

Looking up at mold spots on your ceiling and wondering if you can just wipe them away? You can, but only if you do it right. Most DIY ceiling mold cleaning fails because people skip safety gear, use the wrong solution, or stop before the surface is actually dry. This guide walks you through the complete process, from identifying whether you’re dealing with surface mold or deep contamination, to choosing the right cleaning solution and protecting yourself from spores that fall directly onto your face while you scrub overhead.
Health Risks and Warning Signs of Ceiling Mold

Most people who run into small amounts of ceiling mold will deal with mild symptoms. Runny nose, coughing, sneezing. These reactions are common and typically not serious if you’re otherwise healthy. Walk into a room and immediately start sniffling or coughing? That’s often your body reacting to airborne spores.
People with allergies, asthma, or weakened immune systems face higher risks. For these groups, ceiling mold can trigger genuine breathing difficulty, prolonged coughing fits, and worsening of existing respiratory conditions.
Stachybotrys exposure comes with more specific warning signs. Watch for chest tightness, wheezing that wasn’t there before, or dyspnea (shortness of breath that feels different from just being winded). These symptoms indicate your lungs are reacting to what you’re breathing in that space.
Contact your healthcare provider if respiratory symptoms persist after leaving the moldy environment, if you notice blood when coughing, or if breathing difficulty interferes with daily activities. Don’t wait if you have asthma and your usual medications aren’t controlling symptoms like they normally do.
Identifying Ceiling Mold Types and Severity

Ceiling mold typically appears as black, brown, or green spots or patches. You’ll most commonly find it in damp areas like bathrooms and kitchens, where moisture collects regularly. The texture can range from flat and powdery to raised and fuzzy, depending on the species and how long it’s been growing. Mold usually starts small, maybe just a few dots clustered together, then spreads outward as it feeds and reproduces.
Before you start cleaning, test the depth. Grab a wide spackling knife and pick a spot in the affected area. Gently scrape away the paint layers one at a time, watching what shows up underneath. If mold color keeps appearing through layer after layer with no end in sight, it’s feeding on the drywall itself. That means complete drywall replacement, not just cleaning. If the lower paint layers look clean and the mold only shows on the surface, you caught it early enough to clean without replacing material.
Ghosting looks similar to mold but follows specific patterns that match your attic framing. If the dark marks line up with where ceiling joists run (usually in straight, evenly spaced lines), you’re probably looking at dirt or soot buildup, not fungal growth. Ghosting happens when temperature differences cause dust to settle along framing members. It needs cleaning, but it’s not a moisture problem and won’t keep spreading like actual mold will.
When Professional Mold Remediation Is Necessary

The standard cutoff is 10 square feet. If mold covers an area larger than that, call a professional remediation company instead of handling it yourself. That’s roughly a 3 foot by 3 foot section, about the size of a small bathroom ceiling or a large closet ceiling.
Small mold patches are manageable DIY projects. Large areas mean higher spore counts during cleaning, more extensive material damage, and bigger chances of spreading contamination. The cost of professional remediation becomes worth it when you factor in the equipment they bring, the containment they set up, and the liability they take on.
7 situations requiring professional remediation:
- Mold coverage exceeding 10 square feet
- Mold penetration through entire drywall thickness
- Mold growth inside HVAC systems or ductwork
- Structural damage to ceiling joists or framing
- Sewage related water damage causing mold
- Recurring mold despite repeated cleaning attempts
- Presence of Stachybotrys (black mold) in large quantities
Professional mold remediation includes proper containment with plastic barriers and negative air pressure, HEPA filtration during all work, complete removal of affected materials (not just cleaning), treatment of framing and structural elements, and final testing to verify the space is clean. The process typically starts with a moisture assessment using specialized meters, followed by a containment setup that prevents spores from spreading to other rooms. Professionals will remove and bag contaminated materials, treat remaining surfaces with antimicrobial solutions, and run air scrubbers throughout the job. Expect the work to take anywhere from one day for a single room job to several days for larger areas or whole house problems.
Essential Safety Gear and Cleaning Supplies

Gather everything you need before you climb that ladder. Stopping halfway through a mold cleaning job to run to the store means leaving spores disturbed and airborne while you’re gone. Get it all together first, lay it out, then start the work.
Safety equipment isn’t optional when you’re cleaning mold from overhead. Spores fall down, cleaning solutions drip down, and everything ends up in your face if you’re not protected. Skimp on safety gear and you’ll regret it within the first five minutes of scrubbing.
Safety Equipment:
- Rubber or nitrile gloves
- Safety goggles or protective eyewear
- N95 or N100 respirator mask
- Long sleeves and pants
- Hair covering
- Shoe covers or dedicated work shoes
Cleaning Supplies:
- Spray bottle
- Soft bristled scrub brush
- Microfiber cloths or sponges
- Step ladder
- Drop cloths
- Plastic sheeting and duct tape
Step by Step Ceiling Mold Removal Process

Put on all protective equipment before you do anything else. Gloves first, then goggles, then the respirator mask. Get the fit right on that mask so you’re actually filtering what you breathe. If you can smell the cleaning solution through the mask, it’s not sealed properly.
Open every window in the room and turn on any exhaust fans. You want air moving through the space, carrying spores out instead of letting them settle on other surfaces. If the room has a door, keep it closed to contain the work area but crack a window on the opposite side of the house to create cross ventilation.
8 step mold removal process:
- Put on protective gear (gloves, goggles, respirator mask)
- Open windows and doors for ventilation
- Lay drop cloths and plastic sheeting below work area
- Prepare cleaning solution in spray bottle
- Spray solution generously on moldy areas
- Let solution sit for 10 to 15 minutes
- Scrub with brush in circular motions, rinsing brush frequently
- Wipe clean with damp cloth and allow to air dry completely
Seal all contaminated materials in heavy plastic bags before you carry them through the house. That means the drop cloths, used rags, sponges, and even the disposable gloves you wore. Tie the bags closed, then put those bags inside a second bag. Take them straight outside to the trash. Wash your hands thoroughly after handling any bagged materials, even if you had gloves on. Clean your scrub brush and spray bottle with hot soapy water if you plan to reuse them, or toss them if the contamination was heavy.
Best Cleaning Solutions for Ceiling Mold

Different cleaning solutions work differently on mold. Some kill it on contact. Some penetrate deeper into porous materials. Some leave residue that helps prevent regrowth. Pick the right solution for your ceiling type and the severity of the mold you’re dealing with.
White Vinegar Solution
Use white vinegar straight from the bottle. Don’t dilute it. The acidity kills mold and penetrates into porous surfaces like drywall, which means it reaches mold growing inside the material, not just on the surface. Pour it directly into a spray bottle. The smell is strong but fades as it dries. Vinegar won’t bleach paint or damage most ceiling finishes, which makes it the safest first choice for testing how your ceiling responds to cleaning.
Bleach Solution
Mix 1 cup of bleach with 1 gallon of warm water. This ratio kills surface mold fast and visibly lightens stains. Bleach excels at removing what you can see, but it doesn’t penetrate porous materials effectively. It kills surface growth and sanitizes, but if mold has roots deeper in the drywall, bleach won’t reach them. Never mix bleach with vinegar, ammonia, or anything except water. The chemical reactions create toxic gases that can cause serious respiratory harm.
Hydrogen Peroxide Treatment
Use 3% hydrogen peroxide undiluted, straight from the bottle into your spray bottle. It works as both antifungal and antibacterial treatment. Hydrogen peroxide penetrates better than bleach and doesn’t produce harsh fumes. Test it on a small hidden spot first, because it can lighten paint or discolor certain ceiling textures. Let it sit on the mold for at least 10 minutes before scrubbing.
Borax Mixture
Mix 1 cup of borax with 1 gallon of water. Borax kills mold without producing dangerous fumes during application or afterward. It’s safer to breathe while you work and leaves behind a residue that inhibits future mold growth. For a stronger mixture, combine 2 tablespoons of borax with one quarter cup of vinegar and 2 cups of hot water. This combination gives you borax’s residual protection plus vinegar’s penetration.
| Solution | Mixing Ratio | Best For | Key Benefit |
|---|---|---|---|
| White Vinegar | Undiluted | Porous surfaces, deep penetration | Kills mold inside drywall |
| Bleach | 1 cup per 1 gallon water | Surface mold, visible stains | Fast visible results, strong sanitizer |
| Hydrogen Peroxide | 3% undiluted | Painted ceilings, mild to moderate mold | No harsh fumes, antifungal properties |
| Borax | 1 cup per 1 gallon water | General cleaning, prevention | No dangerous fumes, leaves protective residue |
| Tea Tree Oil | 1 teaspoon per 1 cup water | Small areas, natural preference | Natural antifungal, long lasting effect |
Root Causes and Moisture Source Identification

Fix the moisture source before you clean the mold, or at least immediately after. Cleaning mold without stopping the water is like mopping the floor while the sink is still overflowing. The mold will just come back, usually within weeks, and you’ll be right back on that ladder scrubbing the same spot again.
10 common moisture sources:
- Roof leaks from damaged shingles or flashing
- Plumbing leaks from pipes above ceiling
- Bathroom steam and humidity from showers
- Kitchen moisture from cooking activities
- Condensation from temperature differences
- Ice dam formation in cold climates
- HVAC condensation line problems
- Poor attic ventilation trapping moisture
- Inadequate attic insulation causing condensation
- Vapor barrier problems in ceiling assembly
Look at the timing and pattern of the mold growth to narrow down the cause. Mold that appears after heavy rain points to a roof leak or ice dam problem. Mold that worsens during winter heating season suggests condensation from temperature differences or insulation problems. Bathroom ceiling mold that clusters near the shower indicates steam and humidity issues. Kitchen ceiling mold near the stove signals inadequate exhaust ventilation when cooking. Water stains shaped like rings usually mean active leaks. Widespread light discoloration suggests condensation. If you’re dealing with mold in the same spot over and over despite repeated cleaning, Understanding Water Damage Categories can help you determine the severity and source of the moisture issue.
For stubborn recurring cases, work systematically through possibilities. Check the attic during or right after rain to catch active roof leaks. Run the shower with the bathroom door closed and watch where steam condenses on the ceiling. Turn off all water in the house and check the meter to detect hidden plumbing leaks. Run your hand along visible pipes in the attic or above the ceiling to feel for dampness. If you can’t find the source after checking the obvious spots, call a building diagnostics specialist who can use thermal imaging cameras and moisture meters to map exactly where water is entering or condensing.
Cleaning Different Ceiling Surface Types

Always test your cleaning solution on a small, less visible area first. Pick a corner or an edge that furniture would block if something goes wrong. Spray a small amount, let it sit for the full contact time, then scrub gently and check for paint damage, discoloration, or texture breakdown. Wait 24 hours to see if delayed reactions show up.
Painted Drywall Ceilings
Painted drywall needs a gentler approach than you might expect. Too much scrubbing pressure will damage the paint and rough up the surface, leaving it looking worse than when you started. Vinegar works better than bleach for painted drywall because it penetrates without degrading paint as aggressively. Spray the solution, let it sit the full 10 to 15 minutes, then use light pressure with a soft brush. If the mold doesn’t come off easily with light scrubbing, saturate it again and wait longer rather than scrubbing harder.
Textured and Popcorn Ceilings
Textured ceilings trap mold in all those tiny crevices where a brush can’t reach. Scrubbing doesn’t work well because you’ll just flatten or remove the texture instead of removing the mold. Use a spray and blot technique instead. Saturate the moldy area thoroughly, wait the full contact time, then blot with a clean cloth or sponge. Don’t rub. Press the cloth against the surface and lift, then move to a clean section of cloth and repeat. If mold has penetrated deep into popcorn texture, you’re usually looking at removal and replacement rather than cleaning.
Wood Ceilings
Wood ceiling mold requires surface preparation before sealing. Sand the affected area with fine grit sandpaper to remove the top layer of wood along with the mold. Clean thoroughly after sanding, then apply a wood specific antimicrobial treatment or a specialized sealing paint designed for mold remediation on wood. Some products combine mold killing chemicals with sealers that encapsulate any remaining spores. If the wood shows soft spots, warping, or mold that keeps reappearing through the grain even after sanding, replacement is the only reliable fix.
After cleaning any ceiling type, apply a mold resistant primer before repainting. These primers contain antimicrobial additives that actively prevent mold spores from establishing new growth. On especially porous surfaces like bare drywall or plaster, a borate based sealer adds an extra layer of protection by creating a surface mold can’t easily colonize.
Preventing Future Ceiling Mold and Long Term Maintenance

Prevention costs less and takes less time than repeatedly cleaning the same mold growth. Most ceiling mold prevention comes down to controlling moisture levels and catching small problems before they turn into large ones.
Humidity control prevents the conditions mold needs to grow. Keep indoor humidity below 60% year round, ideally between 30% and 50%. You can check levels with an inexpensive hygrometer from any hardware store. If readings consistently run high, you need more ventilation, better air circulation, or a dehumidifier.
8 prevention strategies:
-
Run exhaust fan during and 20 to 30 minutes after showers to remove humid air completely before it condenses on cool ceilings.
-
Keep indoor humidity below 60% using dehumidifiers in basements, bathrooms, or other moisture prone areas. Empty collection tanks daily or run the drain line to a floor drain if your unit has that option.
-
Improve attic ventilation to reduce condensation by installing soffit vents along the eaves and ridge vents at the peak so hot, moist air can escape instead of condensing on ceiling surfaces.
-
Open windows regularly for air circulation, especially in rooms without exhaust fans. Even five minutes of fresh air exchange helps remove moisture buildup.
-
Fix leaks promptly when discovered. A small drip today becomes ceiling damage and mold growth in a week. Check under sinks, around toilets, and in attics twice yearly.
-
Upgrade insulation to prevent temperature differentials between attic air and ceiling drywall. Cold surfaces attract condensation. Proper insulation keeps ceiling temperatures closer to room temperature.
-
Clean and maintain exhaust fans and dehumidifiers every three months. Dust and debris reduce airflow efficiency, and ironically, dirty dehumidifiers can grow mold inside the unit.
-
Avoid indoor clothes drying in humidity prone rooms. Wet laundry releases huge amounts of moisture into room air. Use outdoor lines or a vented dryer instead.
Early detection means catching mold when it’s still small. Monthly quick checks take less than five minutes. Walk through each room, look up at ceilings, and specifically check areas where mold commonly starts. Seasonal thorough inspections mean using a flashlight and actually looking at ceiling corners, around fixtures, and anywhere water pipes run overhead. Preventing Water Damage in Your Bathroom provides detailed strategies for controlling moisture in the room most likely to develop ceiling mold. Finding a few small spots early beats discovering extensive growth that requires professional remediation.
8 ceiling inspection checkpoints:
- Small discolored spots or dots appearing unexpectedly
- Musty odors when entering room
- Paint bubbling or peeling in localized areas
- Water staining or yellowish discoloration
- Ceiling texture changes or soft spots
- Increased condensation patterns on ceiling
- Visible moisture beading during temperature changes
- Darkening along ceiling edges or corners
Schedule inspections after winter when ice dams and condensation cause the most moisture problems, and during summer’s high humidity months when bathroom and kitchen moisture accumulates fastest. Keep a simple log noting the date, areas checked, and any spots that need watching. If the same area shows up repeatedly in your notes even without visible mold yet, that’s your warning to investigate the moisture source now before growth starts.
Bathroom and Kitchen Ceiling Mold Challenges
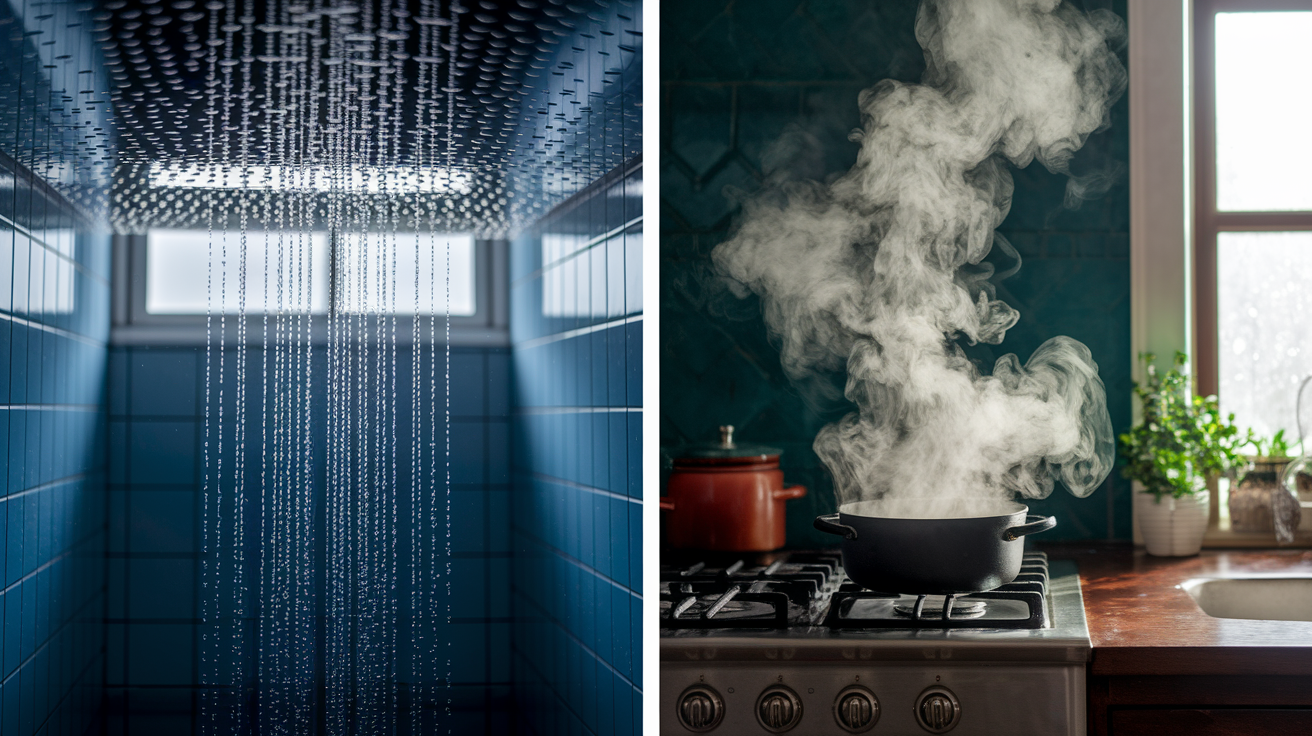
Bathrooms and kitchens top the list for ceiling mold because they generate heat and moisture several times daily. Hot air rises, hits the cooler ceiling surface, and leaves moisture behind as it cools. That cycle repeats every time someone showers or cooks pasta, creating constant conditions mold thrives in.
Bathroom ceilings face steam from hot showers in enclosed spaces. Small bathrooms with poor ventilation trap that moisture for hours after someone showers. The ceiling stays damp, never fully drying before the next shower adds more moisture. Combine that with warm temperatures and limited natural light in most bathrooms, and you’ve created ideal mold conditions. Many bathrooms lack windows entirely, which means no natural ventilation and no sunlight to naturally inhibit mold growth.
Kitchen ceilings deal with cooking steam, especially from boiling water or frying. The moisture isn’t as intense as a shower, but it happens daily and often for longer periods. Kitchens usually have better ventilation than bathrooms because of range hoods, but many homeowners don’t run the hood long enough or at high enough fan speeds to actually remove the moisture before it reaches the ceiling. Dishwasher steam adds another moisture source, particularly during the drying cycle when hot, humid air vents into the kitchen.
Run the bathroom exhaust fan for 20 to 30 minutes after every shower, not just during it. Set a timer if you need to. Open windows for 10 minutes after cooking, even in winter. Upgrade to a higher CFM exhaust fan if your current one can’t keep up with moisture production. Install vapor barriers during any ceiling renovation in these high moisture rooms. If you’re dealing with a windowless bathroom, add a timer switch to the exhaust fan so it runs automatically for 30 minutes after someone turns off the light. Small changes to ventilation habits prevent most bathroom and kitchen ceiling mold before it starts.
Repainting and Sealing After Mold Removal
Let the ceiling dry completely before you seal anything. “Completely” means at least 24 hours in a well ventilated room, and up to 72 hours if you cleaned an area larger than a few square feet or if the room doesn’t get good air circulation. Run box fans pointed at the ceiling. Bring in a dehumidifier if you’re not sure the ceiling is dry. Moisture trapped under new paint creates the perfect environment for mold to regrow inside the sealed space.
6 step repainting process:
-
Allow ceiling to air dry completely (24 to 72 hours with fans and dehumidifiers running continuously to remove all moisture).
-
Inspect for remaining stains or discoloration by looking at the area from different angles under good light to catch any spots you missed.
-
Apply borate based solution or antimicrobial spray to the entire cleaned area, extending six inches beyond where mold was visible to catch hidden spores.
-
Prime with mold resistant primer sealer specifically labeled for moisture prone areas, applying one coat over all cleaned sections.
-
Allow primer to fully cure per manufacturer instructions (usually 24 to 48 hours) before applying any topcoat paint over it.
-
Apply two coats of waterproof or mold resistant paint, letting the first coat dry completely before applying the second for maximum protection.
Specialized mold resistant paints contain antimicrobial additives that actively inhibit mold growth on the painted surface. Waterproof or moisture resistant paints create a barrier that prevents water vapor from penetrating into the drywall below, stopping the moisture mold needs to grow. These paints cost more than standard ceiling paint, but they’re worth the extra expense in bathrooms, kitchens, basements, or any room that’s already had a mold problem. Regular ceiling paint will work short term, but it won’t provide the same long term protection against mold regrowth.
Dealing with Stubborn Mold Stains and Discoloration
Sometimes the mold is dead and gone, but the stain remains. Mold pigmentation can penetrate into paint and even into the top layers of drywall, leaving visible discoloration even after you’ve killed the fungus and scrubbed the surface clean. Dead mold isn’t a health risk like active growth, but the stain bothers people and makes the ceiling look dirty.
The staining happens because mold produces pigments as it grows. Those pigments soak into porous materials like paint and drywall paper facing. Bleach lightens stains by breaking down pigments chemically, but it doesn’t always remove them completely, especially on textured or porous surfaces that trap pigments deep in the material.
5 stain removal techniques:
-
Multiple applications of hydrogen peroxide for bleaching effect (spray, wait 15 minutes, scrub gently, repeat until stain lightens or stops improving)
-
Gentle scrubbing in circular motions with increasing pressure (start soft, gradually apply more force if stain persists without paint damage)
-
Oxygen based bleach alternatives for sensitive surfaces that can’t handle chlorine bleach without discoloring or degrading
-
Stain blocking primer before repainting (covers stains that won’t come out, prevents bleed through into finish paint)
-
Professional stain treatment products designed for mold discoloration (enzyme based cleaners that break down organic staining)
Some stains won’t come out no matter what you try. Heavy mold growth that sat on the ceiling for months or years can permanently discolor paint and drywall. At that point, your options are repainting with stain blocking primer and finish coats, or replacing the damaged ceiling section. Set realistic expectations. If three rounds of treatment haven’t lightened the stain, it’s probably not going to budge. Cover it with paint or cut it out.
Testing Ceiling Materials for Hidden Mold Depth
Testing depth separates a simple cleaning job from a drywall replacement project. Surface mold you can clean. Mold feeding through the entire thickness of drywall means the material is compromised and needs to be cut out and replaced.
5 steps for testing mold depth:
-
Select least visible test spot in affected area, preferably near an edge or corner where any damage won’t be as noticeable if you scrape deeper than planned.
-
Use spackling knife to gently scrape away paint layers, working slowly to see each layer separately without gouging through everything at once.
-
Observe color of underlying material at each layer, looking specifically for black, brown, or green discoloration that indicates mold growth in that layer.
-
Continue scraping if mold color persists through layers, going deeper until you reach either clean material or the back paper facing of the drywall.
-
Document depth findings with photos for records, especially if you’re dealing with insurance claims or rental properties where you need to show due diligence.
If mold only appears on the surface paint layers and the drywall paper below looks clean, you’re good to clean and repaint. The mold stayed shallow and didn’t compromise the structural material. If you keep scraping and the black or green color never stops, you’re looking at mold that has penetrated the entire gypsum core and is feeding on the drywall itself. That material is structurally weakened and will continue supporting mold growth even after you clean the surface. Cut it out.
Partial replacement works when mold growth is contained to one section of ceiling. Cut out the moldy drywall in a clean rectangle, removing at least six inches beyond visible mold in all directions to ensure you get all contaminated material. Replace just that section, tape and mud the seams, then prime and paint to match. Full ceiling replacement makes sense when mold is scattered across the entire ceiling or when testing shows multiple areas with deep penetration. At that point, the cost difference between multiple small repairs and one complete replacement job is small, and the complete replacement gives you a clean start.
Final Words
Mold on your ceiling won’t fix itself, but now you know how to clean mold off ceiling safely and find the source causing it.
Get your protective gear on, pick your cleaning solution, and work through the steps methodically. If you scrape down and the mold keeps going, or you’re looking at more than 10 square feet, call a pro.
Once it’s clean and dry, seal it right and fix whatever brought the moisture in the first place. That’s what keeps it from coming back.
FAQ
What is the best thing to clean mold off the ceiling?
The best thing to clean mold off the ceiling is undiluted white vinegar in a spray bottle because it penetrates drywall to kill mold inside porous surfaces. For surface mold only, a bleach solution (1 cup bleach per gallon of warm water) works well. Always wear protective gear and test your cleaning solution on a small area first.
Is bleach or vinegar better for mold?
Vinegar is better for mold on porous ceiling surfaces like drywall because it penetrates deep to kill mold growth inside the material. Bleach removes surface mold effectively but doesn’t kill mold that has penetrated into drywall or other porous materials. Use vinegar for long-term mold elimination and bleach for surface cleaning on non-porous materials.
How do you get rid of mold on a ceiling permanently?
You get rid of mold on a ceiling permanently by fixing the moisture source causing the growth, then cleaning the mold with proper solutions and protective gear. After cleaning, allow the ceiling to dry completely (24 to 72 hours), then apply mold-resistant primer and waterproof paint to prevent regrowth.
Is ceiling mold toxic?
Ceiling mold is toxic depending on the type and amount present. Most common ceiling molds cause mild symptoms like runny nose, coughing, or sneezing in healthy people. Stachybotrys (black mold) can cause serious symptoms including chest tightness, wheezing, and breathing difficulty, especially in people with allergies, asthma, or compromised immune systems.
What are the warning signs that ceiling mold needs professional removal?
Ceiling mold needs professional removal when coverage exceeds 10 square feet, mold has penetrated through entire drywall thickness, or mold appears inside HVAC systems. Other warning signs include structural damage to ceiling joists, sewage-related water damage, recurring mold despite cleaning, or large quantities of Stachybotrys (black mold).
How long should cleaning solution sit on ceiling mold?
Cleaning solution should sit on ceiling mold for 10 to 15 minutes to properly penetrate and kill the spores. Apply the solution generously until mold is saturated, wait the full time period, then scrub with a soft-bristled brush in circular motions while rinsing the brush frequently.
Can you paint over ceiling mold without removing it first?
You cannot paint over ceiling mold without removing it first because the mold will grow through the new paint. Always clean and kill the mold completely, allow the ceiling to dry thoroughly (24 to 72 hours), then apply mold-resistant primer before repainting with waterproof or mold-resistant paint.
How do you know if mold has penetrated deep into drywall?
You know if mold has penetrated deep into drywall by testing with a wide spackling knife to scrape away paint layers. If mold color continues appearing through multiple layers with no end, the mold is feeding on the drywall and complete replacement is necessary. Surface-only mold requires cleaning only.
What humidity level prevents ceiling mold growth?
Humidity levels below 60 percent prevent ceiling mold growth in most indoor spaces. Use dehumidifiers in high-humidity areas or windowless bathrooms, run exhaust fans during and 20 to 30 minutes after showers, and open windows regularly for air circulation to maintain proper humidity levels.
How do you stop bathroom ceiling mold from coming back?
You stop bathroom ceiling mold from coming back by running the exhaust fan during showers and for 20 to 30 minutes after, opening windows for ventilation, and fixing any roof or plumbing leaks immediately. Improve attic insulation to prevent condensation from temperature differences and keep indoor humidity below 60 percent.
What protective gear do you need for cleaning ceiling mold?
Protective gear needed for cleaning ceiling mold includes rubber or nitrile gloves, safety goggles or protective eyewear, and an N95 or N100 respirator mask. Also wear long sleeves, pants, hair covering, and shoe covers because cleaning overhead creates risk of mold spores and cleaning solution dripping onto you.
When should you replace ceiling drywall instead of cleaning mold?
You should replace ceiling drywall instead of cleaning mold when scraping reveals mold has penetrated through the entire thickness, coverage exceeds manageable cleaning areas, or structural damage exists to ceiling joists. Replace sections when mold keeps returning despite proper cleaning and moisture control efforts.
