

Most people cut wet drywall too low and end up doing the job twice. The visible waterline is never the top of your problem. Drywall wicks moisture upward through capillary action, sometimes a full foot beyond what you can see or feel from the outside. Cut too conservatively and you’re sealing trapped moisture behind new materials, which creates hidden mold in weeks. This guide walks you through industry-standard cut heights, how to assess real moisture spread, and when contamination levels force you to remove more than you thought.
Standard Cut Height Recommendations for Water-Damaged Drywall
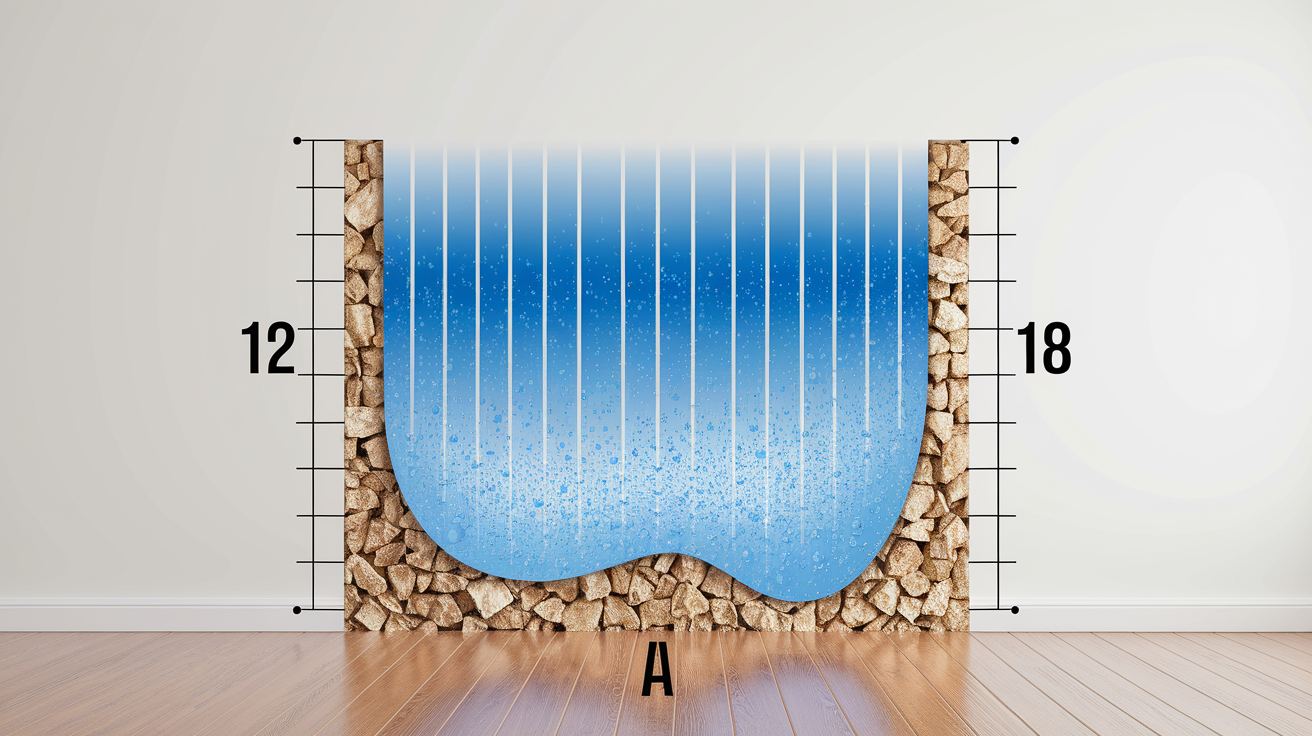
The industry standard is cutting 12 to 24 inches above the visible waterline or wherever moisture topped out. This baseline comes from IICRC standards and accounts for how water naturally wicks upward in residential drywall. If your waterline sits at 18 inches, you’re looking at a cut somewhere between 30 and 42 inches from the floor.
Water doesn’t stop where you can see it. Drywall is porous and pulls moisture upward through capillary action, way beyond the visible damage zone. Drywall can soak up standing water as high as 12 inches in just one hour. What looks like six inches of damage at the bottom might actually mean two feet of compromised material once you account for wicking. The gypsum core and paper facing both draw water vertically, and that’s where mold gets started.
For floods that reach several feet high, you’re cutting 2 to 4 feet above the floor, or potentially removing everything up to the ceiling.
Final cut height depends on how long water sat against the wall. If water’s been there for several days, even a few inches of standing water can wick far enough to justify a 2 or 4 foot cut. Absorption rates increase with time. Materials that stay wet for 48 hours or longer have usually pulled moisture well beyond what you can see or feel from the outside.
Step-by-Step Process for Cutting and Removing Damaged Drywall

Systematic removal prevents tearing out more than necessary and keeps the workspace manageable. Work methodically and you’ll avoid costly mistakes like cutting into studs or leaving contaminated material behind.
You’ll need a utility knife (a few dollars at any hardware store), a drywall saw, a chalk line, and a measuring tape. These basic tools handle the entire job.
-
Pull off baseboards and trim along the affected walls. Water usually pools behind baseboards, and you need to see what’s happening at the bottom plate before you start cutting.
-
Measure your cut height from the floor up, not from the waterline, using a measuring tape. Mark it at several points along the wall. Snap a chalk line through those marks to create a straight horizontal reference.
-
Score the drywall along the chalk line with a utility knife, cutting through about half to three quarters of the drywall thickness. Press firmly and make multiple passes if needed. This prevents tearing and gives you a clean edge.
-
Use a drywall saw to complete the cut all the way through, following the scored line. The saw handles the remaining thickness and cuts through both layers of paper and the gypsum core.
-
Pull away the cut drywall sections. Water damaged drywall often breaks apart easily. Remove all pieces, even small fragments stuck to studs.
-
Inspect the studs and any insulation inside the wall cavity. Check for moisture, soft spots, or visible mold. Remove any wet or damaged insulation immediately.
-
Bag all removed drywall and insulation in heavy duty trash bags. Contaminated materials need to go straight into disposal bags to prevent spreading mold spores.
-
Clear debris from the floor and workspace, then open up the wall cavity to airflow. The space needs to breathe before drying equipment goes in.
Moisture Management: Detection, Assessment, and Drying

Moisture meters are the most reliable way to assess saturation before cutting. Non-penetrating meters scan the surface and give you a reading without leaving holes. Penetrating meters use pins that go into the material and measure moisture deeper in the wall. Both types work. If you don’t have a meter, remove the baseboards and use a screwdriver to poke the drywall near the floor. Soft, crumbly material means water has soaked in.
For interior walls, you’ll need to check moisture inside the cavity. Make a small inspection hole about six inches up from the floor using a utility knife or drywall saw, then shine a flashlight inside. Look at the studs and insulation. If you see dampness, dark staining, or wet insulation, moisture has traveled farther than the surface damage suggests. A penetrating moisture meter can also go through that inspection hole to test studs directly.
The true extent of moisture migration often surprises people. Visible damage on drywall might cover two feet of wall, but the studs and insulation can be wet four feet up. Water moves through wall cavities along framing and insulation, spreading horizontally and vertically beyond what you see from the outside. Check above and to the sides of obvious damage.
You’ve got 48 hours to dry everything out before mold becomes a serious problem. That window is critical. Wall cavities typically take a few days to one week to fully dry using industrial grade dehumidifiers and air movers. Expect the shorter end of that range if you act fast and the longer end if materials were soaked for days before you started drying.
Place dehumidifiers in the center of the affected area and aim air movers directly into the open wall cavities. Fans should run continuously, and dehumidifiers need to be emptied regularly. Check studs, insulation, subflooring, and any other building materials with a moisture meter every 12 to 24 hours. Materials are dry enough for reconstruction when moisture levels match the surrounding unaffected areas. For wood framing, that’s typically below 15% moisture content.
| Material | Acceptable Moisture Level | Typical Drying Time |
|---|---|---|
| Wood Framing | Below 15% | 3-7 days |
| Insulation | Fully dry (replace if wet) | N/A (remove and replace) |
| Concrete | Below 4% (surface) | 7-14 days |
| Subflooring | Below 12% | 3-7 days |
Water Contamination Categories That Affect Cutting Decisions

Water damage isn’t all the same. The IICRC defines three water categories based on contamination level, and those categories change how aggressively you need to remove materials.
Category 2 water (gray water from washing machines, dishwashers, or toilet overflows without feces) and Category 3 water (black water from sewage backups, flooding from rivers or streams, or toilet backflows containing feces) typically require more aggressive removal than Category 1 clean water. Gray water contains detergents, chemicals, or biological contaminants that make drywall unsalvageable even with minor contact. Black water is a serious health hazard and usually requires removing all contacted materials regardless of how high the water reached.
For Category 2 and 3 contamination, you’re often cutting higher than the standard 12 to 24 inches. Sometimes removing entire wall sections up to the ceiling. Contaminated water leaves behind bacteria, pathogens, and chemicals that you can’t safely clean out of porous materials like drywall. Even if the material looks dry and intact, contamination remains. Health risks from prolonged exposure to mold and bacteria in Category 2 or 3 scenarios outweigh any cost savings from trying to salvage materials.
Category 1 (Clean Water): Comes from supply lines, faucets, or rainwater that hasn’t contacted contaminants. Drywall may be salvageable if dried within 48 hours and cut 12 to 24 inches above the waterline. Still requires thorough drying and inspection.
Category 2 (Gray Water): Contains chemical or biological contaminants. Includes washing machine overflows, dishwasher leaks, and clean toilet overflows. Remove all contacted drywall and cut at least 24 inches above the waterline. Sanitization required.
Category 3 (Black Water): Sewage, floodwater from outside, or any water that has sat stagnant for days. Highly contaminated. Remove all contacted materials, often cutting to the ceiling. Professional remediation strongly recommended.
Mold Risks, Prevention, and Remediation During Wet Drywall Removal

Mold spores start reproducing within 24 to 48 hours in wet conditions. Drywall is a cellulose material, which means it’s food for mold. Once moisture gets in and stays, colonization happens fast.
Behind drywall is one of the most common places mold grows after water damage. No air circulation, no UV light, and constant moisture create perfect conditions. The space between drywall and studs traps humidity, and wet insulation holds moisture against framing for days or weeks. That hidden environment is where large mold colonies form before you ever see surface signs.
If you notice soft spots or bulging drywall, don’t cut into it without containment. Disturbing an active mold colony sends invisible spores everywhere. Into HVAC systems, adjacent rooms, throughout your home. Once airborne, spores settle on furniture, clothing, and other surfaces, spreading contamination far beyond the original damage area. Use plastic sheeting to seal off doorways and vents before opening any wall that shows signs of mold.
Improper removal multiplies the problem.
After removing drywall, inspect the wall cavity thoroughly for visible mold on studs, insulation, or the back side of remaining drywall. Look for black, green, or white fuzzy growth and musty odors. Small areas of surface mold on framing (less than 10 square feet) can often be cleaned with a stiff brush and antimicrobial solution, but you need to address the moisture source first or it comes right back. Let studs dry completely, then apply an antimicrobial treatment if any staining or odor remains. Larger mold colonies, especially anything involving insulation or widespread stud contamination, require professional IICRC certified remediation. DIY mold removal works for minor surface growth caught early. Extensive colonization, anything involving HVAC systems, or situations where you’re unsure of the contamination level should go to professionals who have containment equipment and proper disposal procedures. For more guidance on stopping mold before it starts, see Mold Prevention After Water Damage.
Tools and Safety Equipment for Cutting Wet Drywall

A utility knife runs a few dollars and handles the scoring cuts. You’ll also need a drywall saw (around $10 to $15), a chalk line ($5 to $10), and a measuring tape. Total tool cost for a basic wet drywall removal job is under $30 if you’re starting from nothing.
Protective equipment isn’t optional when you’re handling water damaged materials. Wet drywall can contain mold spores, bacteria from contaminated water, and sharp edges from broken gypsum. Gloves protect your hands from cuts and contamination. Safety glasses keep debris out of your eyes during cutting and removal. Reinforced footwear (boots with puncture resistant soles) prevents injuries from nails, screws, or sharp materials on the floor. A respirator rated for mold and dust (N95 minimum, preferably N100 or P100) filters out spores and particles you can’t see. Headgear protects against bumps in tight spaces. Heavy duty disposal bags (contractor grade trash bags) contain contaminated drywall and prevent spores from spreading during transport.
Safety Glasses: Protect eyes from drywall dust, mold spores, and debris during cutting.
Waterproof Gloves: Prevent contamination and protect hands from sharp edges and splinters.
Reinforced Footwear: Steel toe or puncture resistant boots guard against nails, screws, and debris on the floor.
Respirator (N95 or Higher): Filters mold spores, dust, and airborne contaminants during removal.
Headgear: Hard hat or bump cap for low ceilings and tight spaces.
Heavy Duty Disposal Bags: Contractor grade trash bags to contain and transport contaminated materials without tearing.
Inspecting Wall Cavities After Drywall Removal

Check wooden studs carefully for moisture, dark staining, soft spots, or any signs of rot. Use a moisture meter on each stud, especially near the bottom plate where water pools. Press a screwdriver into the wood. Healthy framing is firm. Soft or spongy wood means rot has started, and that framing needs professional evaluation before you close anything back up.
Wet insulation has lost its R value and becomes a liability. Fiberglass and cellulose insulation both absorb water and hold it against framing. Even if insulation looks partially dry, replace it. Insulation is one of the cheapest materials in a wall, and trying to save it isn’t worth the risk of trapping moisture or mold spores. Pull it all out, bag it, and plan to install fresh insulation after everything dries.
Inspect the bottom plate, the horizontal framing member that sits on the subfloor. This piece often takes the most water and can rot or develop mold faster than vertical studs. Check for soft spots, discoloration, and moisture with a meter. If the bottom plate is compromised, it usually needs to be replaced, which means a more involved repair.
Look at electrical outlets, switches, and any wiring visible in the cavity. Water and electricity are a dangerous combination. If outlets were submerged or you see corrosion on wires, shut off power to that circuit at the breaker and call a licensed electrician. Don’t attempt to dry out or reuse wet electrical components.
Repairing and Finishing After Cutting Out Wet Drywall

Before you hang new drywall, confirm with a moisture meter that studs, subflooring, and any remaining materials are completely dry and that no mold or odors remain in the cavity.
-
Measure and cut replacement drywall to fit the opening. Use a utility knife to score and snap sheets to size, matching the thickness of the existing drywall (usually ½ inch for walls, ⅝ inch for ceilings).
-
Secure new drywall panels to the studs using drywall screws spaced about 12 inches apart. Screws should sit just below the surface without breaking the paper facing.
-
Apply paper or fiberglass mesh tape over the seams where new drywall meets old. Press tape firmly into place.
-
Spread joint compound (mud) over the taped seams using a taping knife. Feather the edges outward to blend with the surrounding wall. Allow the first coat to dry completely (usually 24 hours).
-
Apply a second coat of joint compound, spreading it wider than the first coat to create a smooth transition. Let it dry, then apply a third coat if needed to eliminate ridges or imperfections.
-
Sand the dried joint compound smooth using fine grit sandpaper (120 to 150 grit). Wear a dust mask. The goal is a surface that blends with the existing wall.
-
Prime the repaired area with a stain blocking primer, then paint or apply texture to match the rest of the wall. If the original wall has texture, practice matching it on a scrap piece before finishing the repair.
Cost Considerations and Timeline for Wet Drywall Removal

DIY wet drywall removal typically costs $50 to $200 for a small to moderate job, covering tools (utility knife, drywall saw, chalk line), safety equipment (respirator, gloves, glasses), disposal bags, and equipment rental if you need a dehumidifier or air mover. Add $100 to $300 for replacement drywall, joint compound, tape, primer, and paint. Disposal fees at a landfill or dumpster rental can add another $50 to $200 depending on the volume of material.
Professional contractors charge $1,000 to $4,000 or more for the same job, depending on the extent of damage, contamination category, and regional labor rates. Professionals make sense when you’re dealing with Category 2 or 3 water, widespread mold, structural concerns, or time constraints. They bring industrial drying equipment, mold remediation expertise, and insurance coverage for the work. DIY works well for small, clean water leaks caught early, where you’re confident in your ability to manage drying and repairs.
Insurance claims require thorough documentation from the start. Take photos and videos of the water damage before you remove anything, then document each stage of removal and drying. Keep receipts for all materials, equipment rentals, and disposal fees. Proper documentation improves claim outcomes and speeds up reimbursement. Some insurance policies require professional assessment or remediation for coverage, so check your policy before starting DIY work.
| Project Phase | DIY Timeline | Professional Timeline |
|---|---|---|
| Assessment | 1-2 hours | 1-3 hours |
| Removal | 4-8 hours | 2-4 hours |
| Drying | 3-7 days | 2-5 days |
| Repair | 1-2 days | 1 day |
| Finishing | 2-3 days (drying time) | 1-2 days |
When to Call a Professional for Wet Drywall Removal

DIY removal works for small, straightforward water damage from clean sources, but improper technique creates bigger problems. Incomplete drying traps moisture, inadequate containment spreads mold spores, and structural mistakes can compromise framing. If you’re uncertain about the extent of damage or the contamination level, the cost of getting it wrong exceeds the cost of hiring someone who knows what they’re doing.
IICRC certified professionals bring specialized equipment, mold remediation training, and experience with complex water damage scenarios. Certification means they’ve been trained in industry standards for water damage restoration and mold remediation. That training includes containment procedures, proper drying techniques, and safety protocols that prevent cross contamination and structural damage.
Category 2 or 3 Water: Gray water and black water contain contaminants that require professional handling, specialized cleaning agents, and proper disposal procedures.
Extensive Mold Presence: Visible mold covering more than 10 square feet, strong musty odors, or mold growth inside HVAC systems requires professional containment and remediation.
Structural Concerns: Sagging ceilings, compromised floor joists, damaged bottom plates, or any uncertainty about framing integrity needs a professional assessment before removal begins.
Load Bearing Walls: Removing drywall from load bearing walls risks exposing or damaging critical structural elements. Professionals know how to work around framing without compromising the structure.
Electrical Hazards: Water near outlets, submerged electrical panels, or visible corrosion on wiring requires an electrician and potentially a restoration professional to coordinate safe removal.
Insurance Requirements: Some policies require professional assessment or remediation for claims to be valid. Check your policy before starting DIY work.
Time Constraints: If you’re racing the 48 hour mold window and don’t have the time, tools, or help to complete drying quickly, professionals move faster with industrial equipment and crews.
Preventing Future Water Damage to Drywall
The best time to prevent water damage is before it happens. Once drywall absorbs water (up to 12 inches high in just one hour) you’re looking at removal, drying, and repairs. Addressing water sources and controlling humidity stops problems before they start.
Humidity control and proper ventilation reduce condensation and moisture buildup in basements, bathrooms, and other moisture prone areas. Dehumidifiers, exhaust fans, and adequate air circulation keep humidity levels below 60%, which slows mold growth and reduces the chance of drywall absorbing ambient moisture over time.
After repairing water damage, consider preventive upgrades that reduce future risk. Smart leak detectors near water heaters, washing machines, and under sinks alert you to leaks before they cause significant damage. Waterproof drywall (green board or purple board) in bathrooms and basements resists moisture better than standard drywall. Proper grading around your foundation and functional gutters keep water away from the house. For long term moisture control in basements, see Basement Waterproofing Basics.
Regular Plumbing Inspections: Check supply lines, drain connections, water heater, and appliance hoses annually for wear, corrosion, or leaks.
Roof Maintenance: Inspect shingles, flashing, and gutters twice a year. Clear debris and repair damage before leaks develop.
Proper Grading: Ensure soil slopes away from the foundation to direct water away from the house during rain or snow melt.
Sump Pump Maintenance: Test your sump pump every few months, clean the pit, and consider a battery backup system for power outages.
Dehumidifier Use: Run dehumidifiers in basements and crawl spaces to keep humidity below 60% and reduce condensation.
Smart Leak Detectors: Install water sensors near water heaters, washing machines, dishwashers, and under sinks to catch leaks early.
Final Words
Knowing how far up to cut wet drywall comes down to the 12 to 24 inch standard, but that’s just your starting point.
Water wicks up fast, contamination level matters, and hidden moisture behind the surface changes everything.
Cut high enough the first time, verify dryness with a meter before closing anything back up, and don’t skip the mold check once studs are exposed.
If you’re dealing with sewage backup or visible growth, call a pro. But for most clean water situations, you can handle this with the right sequence and patience.
Dry it right, replace it clean, and you won’t be tearing into the same wall again next year.
FAQ
How high should you cut wet drywall?
You should cut wet drywall 12 to 24 inches above the visible waterline or highest point of moisture. This standard industry recommendation accounts for upward wicking through porous drywall, which can absorb water 12 inches high in just one hour.
How quickly does mold grow on wet drywall?
Mold grows on wet drywall within 24 to 48 hours after water exposure. Drywall’s cellulose composition serves as a food source for mold spores, and trapped moisture behind walls creates ideal conditions due to lack of air circulation and UV light.
How do you cut wet drywall safely?
You cut wet drywall by first removing baseboards, marking a horizontal cut line with chalk, scoring the drywall with a utility knife through half to three-quarters thickness, then completing the cut with a drywall saw. Always wear protective equipment including gloves, glasses, and a respirator when handling contaminated materials.
Is drywall ruined if it gets wet?
Drywall is ruined if it gets wet and cannot dry completely within 48 hours or shows signs of contamination, warping, or saturation. Even a few inches of water contact requires removal and replacement, as drywall’s porous nature traps moisture that leads to mold growth and structural weakness.
What factors determine how high to cut water-damaged drywall?
The height to cut water-damaged drywall is determined by the severity of flooding, time exposed to water, water contamination category, and capillary action effects. Severe flooding several feet high may require cutting 2 to 4 feet above the floor or removing all drywall to the ceiling.
What tools do you need to cut wet drywall?
You need a utility knife, drywall saw, chalk line, and measuring tape to cut wet drywall. A basic utility knife costs only a few dollars at hardware stores and scores the drywall, while the saw completes cuts and removes sections around studs.
How long does it take for wall cavities to dry after removing wet drywall?
Wall cavities take anywhere from a few days to one week to fully dry using industrial-grade dehumidifiers and air movers. Complete drying of all materials including subflooring and wooden panels should occur in less than 48 hours to prevent mold growth.
When should you call a professional for wet drywall removal?
You should call a professional for wet drywall removal when dealing with Category 2 or 3 contaminated water, extensive mold presence, structural concerns, load-bearing walls, or electrical hazards. IICRC-certified professionals prevent improper removal that can spread mold spores throughout your entire home.
What should you inspect after removing wet drywall?
After removing wet drywall, you should inspect wooden studs for moisture and rot, check insulation for saturation, examine the bottom plate and framing for water damage, and verify electrical outlets and wiring are safe. Wet insulation must be removed and replaced as it loses R-value and becomes a liability.
Does water category affect how much drywall to remove?
Water category affects how much drywall to remove, with Category 3 contaminated water (sewage backup or floodwater) typically requiring more aggressive removal than Category 1 clean water. Category 2 and 3 water may require cutting higher or removing entire wall sections due to health hazards.
How do you prevent mold when cutting out wet drywall?
You prevent mold when cutting out wet drywall by removing damaged sections within 24 to 48 hours, containing the work area with plastic sheeting, and never opening walls with soft spots that could release active mold spores. Use dehumidifiers and fans to dry wall cavities completely before installing replacement drywall.
What moisture level is safe before replacing drywall?
Wood framing is safe before replacing drywall when moisture meters show readings at or below acceptable levels for the specific material. Use penetrating moisture meters to verify studs, subflooring, and structural elements have reached safe moisture content after the drying period.
