

You just found mold on your wall and Googled “hydrogen peroxide.” Here’s the truth: it works, but only if you actually use it correctly. Most people spray it, wipe it immediately, and wonder why the mold comes back in two weeks. Hydrogen peroxide kills mold through a chemical reaction that needs time, the right concentration, and proper contact with the surface. This guide walks you through the safe, effective method that actually stops growth and removes visible mold from walls under 10 square feet.
Using Hydrogen Peroxide Effectively: Quick-Start Essentials

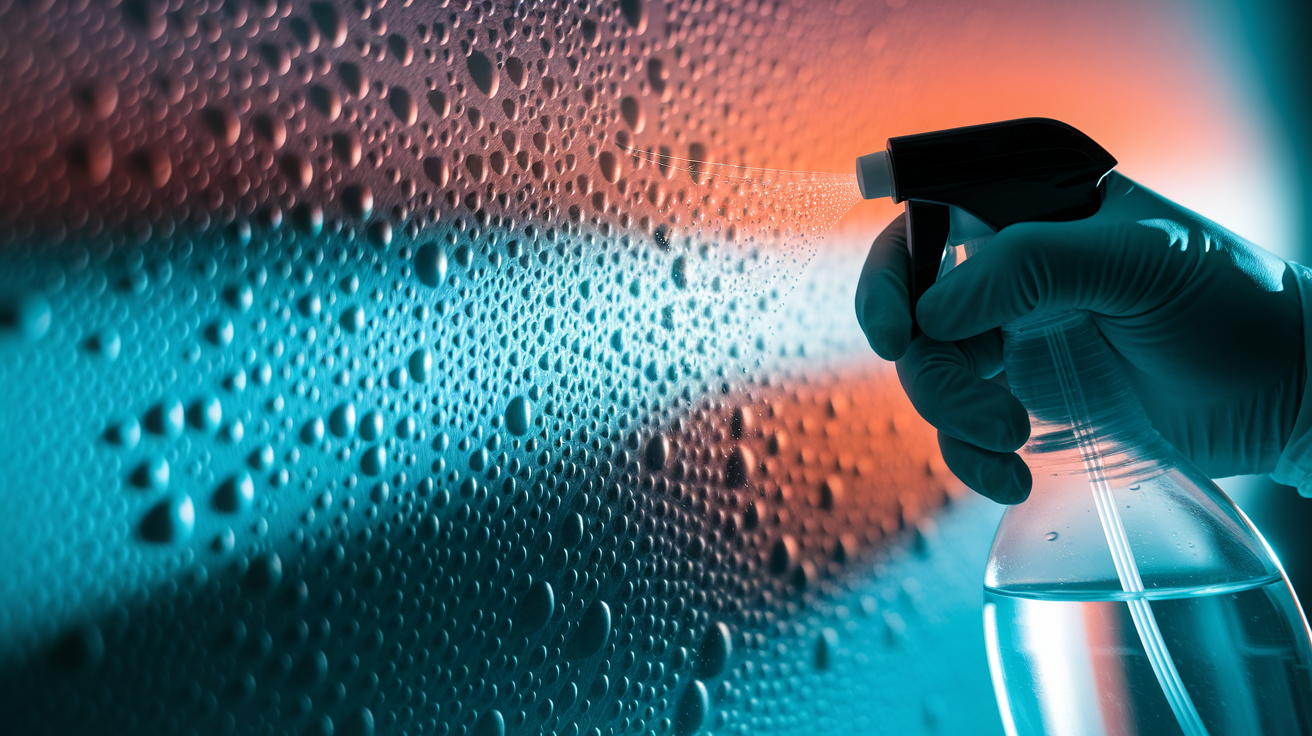
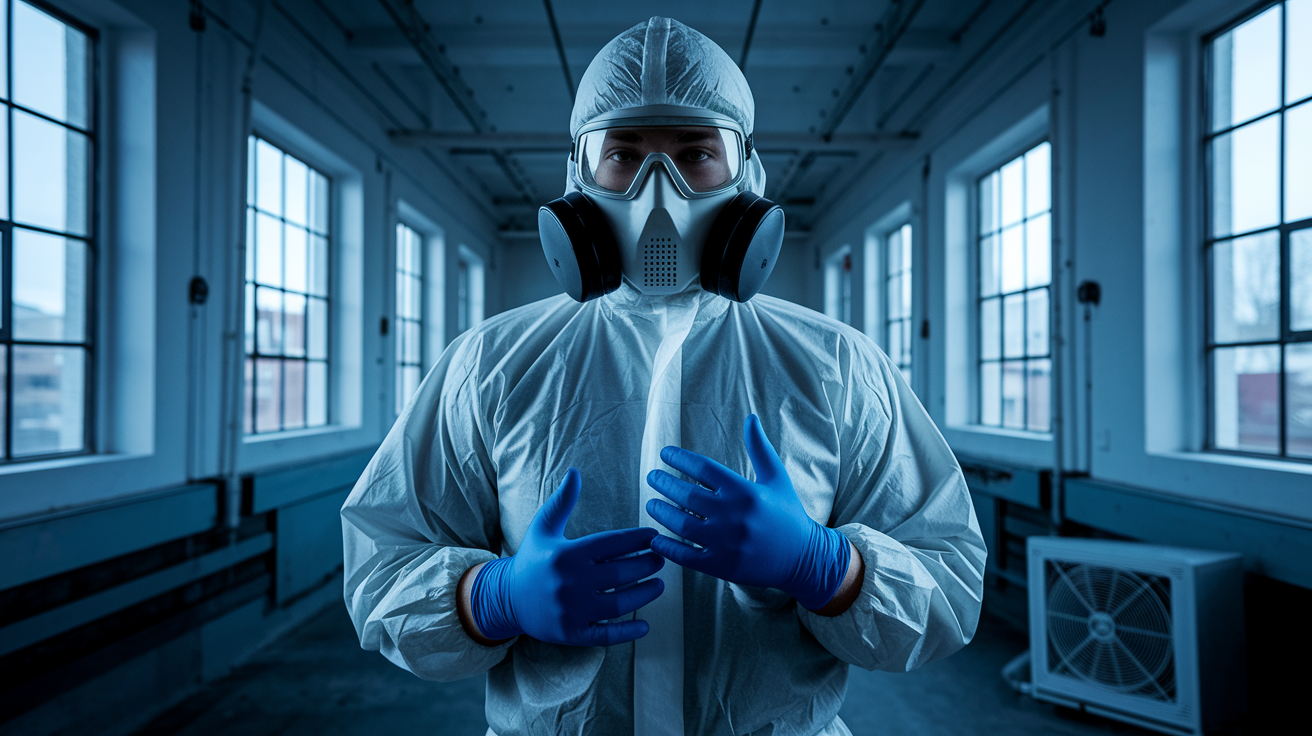
You’ll need 3% hydrogen peroxide (probably already under your sink), a spray bottle, an N95 mask, safety goggles, and rubber gloves. If you’re treating bare drywall or unpainted wood, spray the hydrogen peroxide straight from the bottle until everything’s soaked. On painted walls or non-porous surfaces, mix equal parts hydrogen peroxide and water. Spray it on, wait at least 15 minutes, then wipe or gently scrub with a soft brush. Don’t start without your mask, goggles, and gloves.
Here’s what actually happens when hydrogen peroxide hits mold. It generates hydroxyl free radicals that attack the proteins, DNA, and cell components inside the mold organism. A 2011 study found a 9-fold decrease in mold content and a 13-fold decrease in bacteria and fungi colony-forming units after treating contaminated areas with nebulized hydrogen peroxide. Then in 2013, the Journal of Occupational and Environmental Hygiene published research showing that hydrogen peroxide successfully stops both growth and spore germination of six common household fungi. Real science.
This works best on small areas (under 10 square feet, like a patch about 3 feet by 3 feet or smaller), on surfaces you can see and reach, and when you catch it early. If the mold covers more than 10 square feet, keeps coming back after you’ve treated it and fixed moisture problems, or you find it growing inside walls, stop. Call a professional. Same goes if you’re seeing structural damage like soft drywall or warped framing.
Step-by-Step Application Method for Hydrogen Peroxide on Walls
Before you spray anything, get rid of loose debris and dust with a dry cloth or vacuum with a HEPA filter. You want the hydrogen peroxide reaching mold, not sitting on top of dirt.
Spot test somewhere inconspicuous first. Spray a little on a hidden section and wait 10 minutes to check for discoloration or damage. Hydrogen peroxide bleaches things.
Pour 3% hydrogen peroxide into a clean spray bottle. Don’t dilute it if you’re treating bare drywall, unpainted wood, or other porous surfaces. For painted walls or non-porous surfaces, mix equal parts hydrogen peroxide and water.
Spray the affected area until it’s thoroughly wet. Not damp. Wet.
Go about 6 inches beyond the visible mold in all directions. Mold spores spread farther than you can see.
Let it sit for at least 15 minutes. This contact time matters. Hydrogen peroxide needs time to generate those hydroxyl radicals and get into porous materials.
Scrub gently with a soft brush or cloth using small circular motions. Don’t go hard on drywall or you’ll wreck the surface.
Wipe everything clean with a damp cloth to get rid of dead mold and loosened material.
Dry the wall completely with a clean towel and set up a box fan or open windows for air circulation. Proper drying is part of comprehensive water damage restoration and keeps new mold from growing.
If stubborn spots don’t come clean after the first try, you can repeat after 24 hours. Make sure the wall’s completely dry before you go again. If mold’s still there after two treatments, it’s probably deeper than surface level or you haven’t addressed the moisture source.
Put all contaminated cleaning materials in sealed plastic bags and take them outside right away. Don’t leave moldy rags or brushes sitting around. Wash your gloves with soap and water before you take them off, then wash your hands.
How Long Hydrogen Peroxide Takes to Kill Mold on Walls

Hydrogen peroxide kills surface mold within minutes of contact, but killing mold isn’t the same as removing it completely and stopping spores from spreading. The dead mold still needs to come off the surface.
That 15-minute minimum contact time isn’t negotiable. Wiping too early cuts effectiveness because hydrogen peroxide needs time to generate hydroxyl radicals and get into porous surfaces like drywall and wood. Rush this step and you’re basically wiping away surface mold while leaving embedded spores alive. For heavily soiled areas or thick growth, you might need to spray more solution during the wait time to keep everything saturated. Hydrogen peroxide dries out, especially in warm rooms or with air moving.
Here’s what timing looks like for complete treatment. Initial treatment needs at least 15 minutes of contact time. Deeply embedded mold benefits from 20 to 30 minutes on the first application. You need to wait 24 hours before a second treatment, and the wall must dry completely between treatments. Total project timeline runs 2 to 3 days including drying and possible reapplication.
Success means no visible mold, no musty or earthy smell, and a surface that’s dry and clean when you touch it. Check behind and around the treatment area for hidden growth. If mold shows up again within a few days or weeks, either the moisture source hasn’t been fixed or the infestation goes deeper than surface level. Retreat if it’s still small, or call a professional if it keeps expanding or coming back.
Correct Concentration and Dilution Ratios for Wall Mold Treatment

Concentration matters because too little won’t kill mold effectively, and anything above 3% needs special handling and can damage materials or cause chemical burns. The EPA recommends hydrogen peroxide for disinfecting porous materials, but how you apply it depends on what you’re treating.
Use undiluted 3% hydrogen peroxide on porous surfaces. Bare drywall, unpainted wood, concrete, unfinished materials that absorb moisture. Use a 50/50 dilution (equal parts 3% hydrogen peroxide and water) on non-porous surfaces like painted walls, tiles, finished wood, plastic, metal. Higher concentrations (6% to 10%) exist but need professional training and equipment, plus they seriously increase bleaching and surface damage risks. Store hydrogen peroxide in its original brown bottle in a cool, dark place to keep it potent. Light and heat break it down into water and oxygen.
To figure out your wall surface type, look at what’s showing. If you see paint, drywall texture, or a finished coating, start with diluted solution. If you’re down to bare drywall paper, raw wood, or concrete, use it undiluted. When in doubt, start diluted and move to undiluted only if the first treatment doesn’t work. Spot test first no matter which you choose.
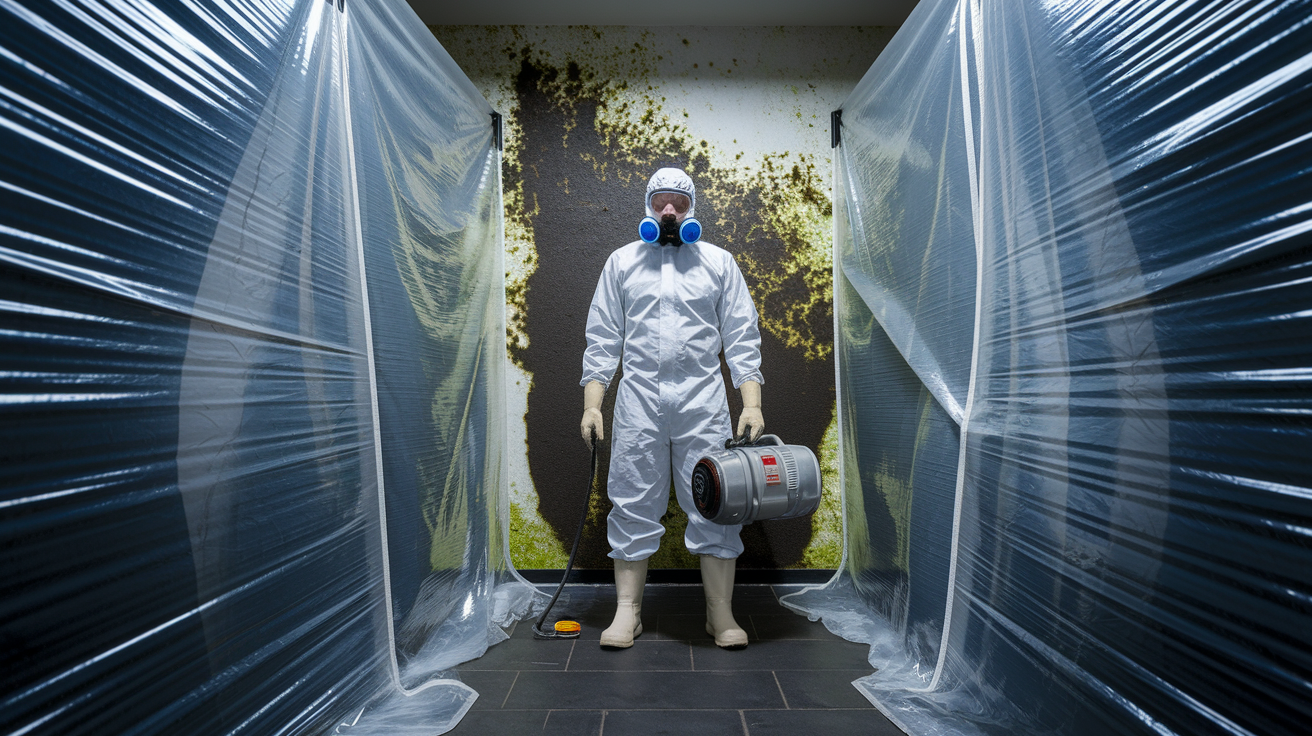
Safety and Equipment Requirements for Mold Removal
Mold spores go airborne when you spray and scrub, which means you’re breathing them while also working with a chemical that irritates skin and mucous membranes. This dual hazard makes protection critical, not optional.
You need an N95 or P100 respirator mask. Not a cloth mask, not a dust mask. Mold spores are small enough to pass through those. Safety goggles or a full face shield come next. Mold spores and hydrogen peroxide mist both irritate eyes. Rubber or nitrile gloves extending to mid-forearm. Household-grade 3% hydrogen peroxide causes mild skin irritation with prolonged contact. Long sleeves and pants made of material you can wash in hot water immediately after. Ventilation setup with open windows and a box fan blowing outward to push contaminated air outside.
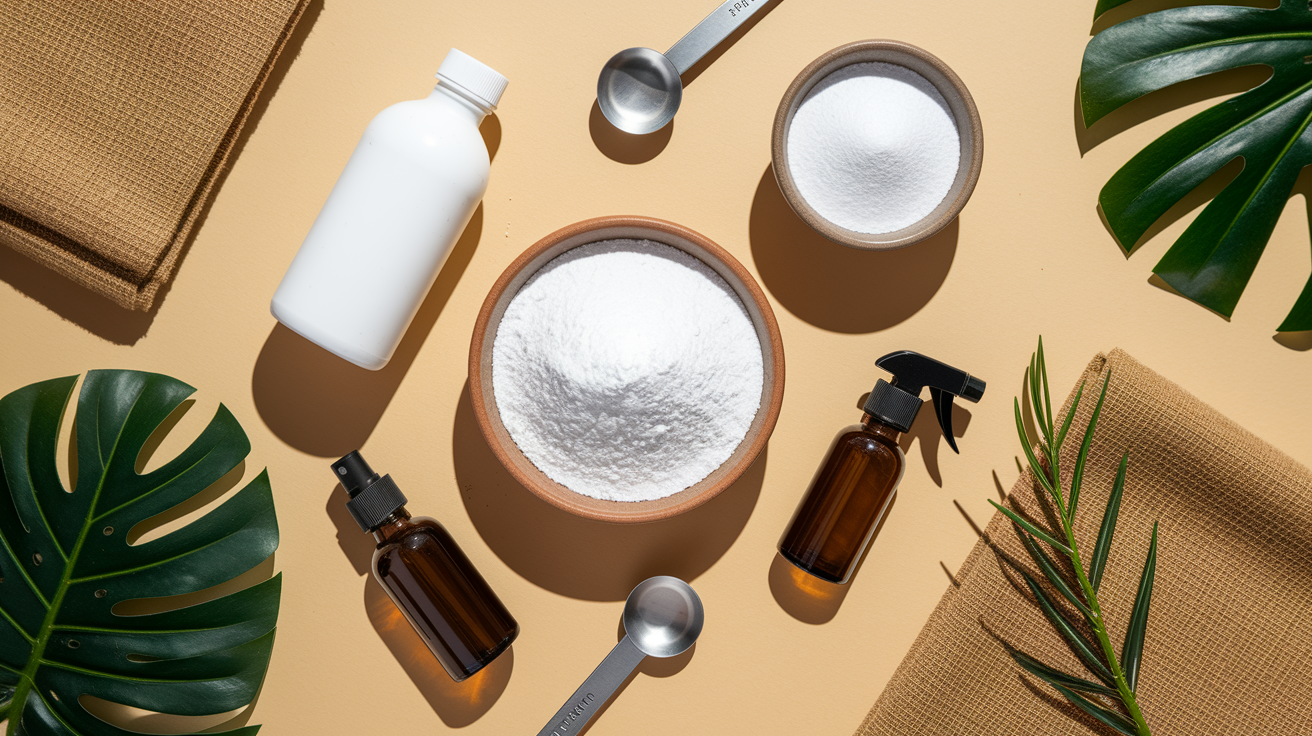
For cleaning and support, grab 3% hydrogen peroxide (one 16-ounce bottle treats roughly 10 to 15 square feet), clean spray bottles (one for undiluted, one for diluted if you’re treating multiple surface types), soft brushes or old toothbrushes for scrubbing, microfiber cloths or old towels for wiping (disposable is better), a box fan or ventilation fan to move air, a dehumidifier if you have one (helps dry walls faster and reduces humidity that encourages new growth), and heavy-duty trash bags for disposing of contaminated materials.
Never mix hydrogen peroxide with vinegar, bleach, or ammonia. Combining hydrogen peroxide and vinegar creates peracetic acid, which irritates eyes, skin, and the respiratory tract. Mixing with bleach or ammonia creates toxic gases. If you accidentally mix chemicals and start experiencing burning eyes, difficulty breathing, chest tightness, or severe coughing, leave immediately and get fresh air.
Some people shouldn’t attempt DIY mold removal no matter the area size. Pregnant women, young children, elderly individuals, anyone with asthma or chronic respiratory conditions, anyone with weakened immune systems (from illness, medication, or chemotherapy), and anyone with known mold allergies. If that’s you, leave the space and have someone else handle it or hire professionals.
DIY costs roughly $20 to $50 for supplies. Professional mold remediation starts around $500 for small jobs and can hit $6000 or more for extensive infestations, but includes proper containment, air scrubbing, and guaranteed removal.
Different Wall Types and Hydrogen Peroxide Compatibility
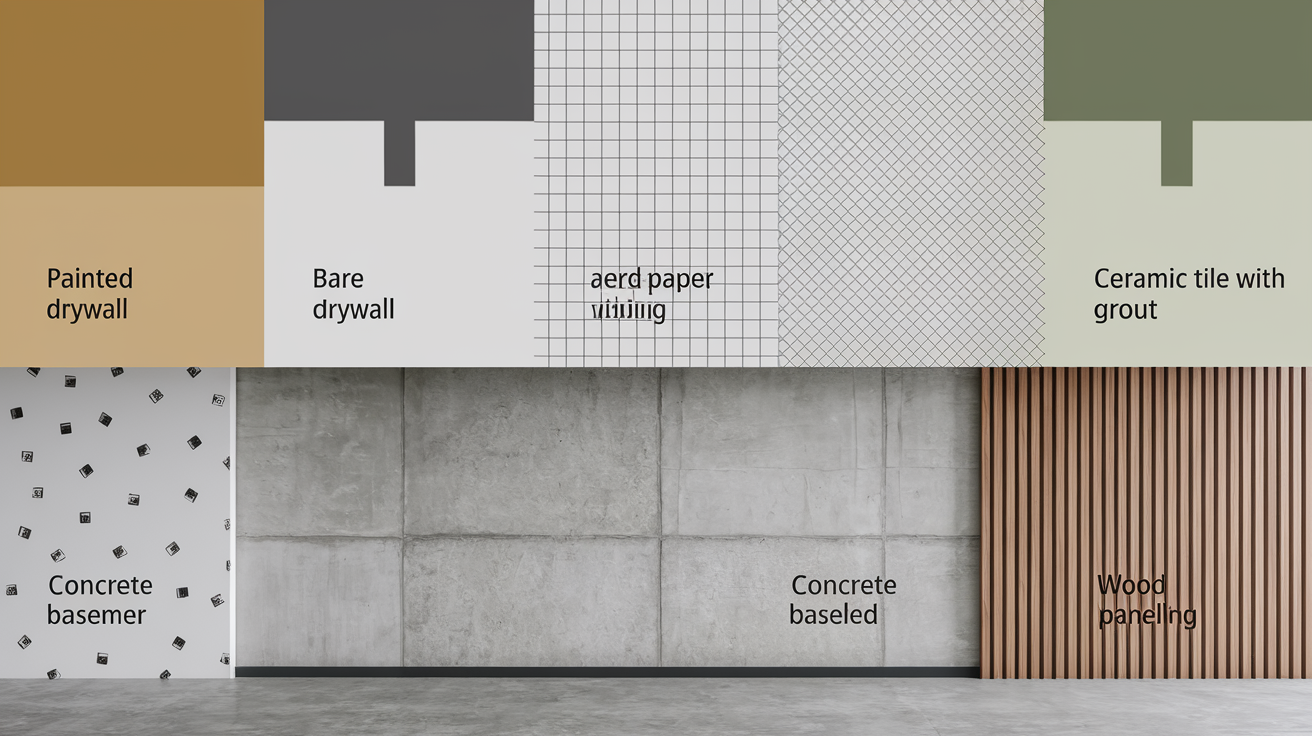
Surface type determines both how effective hydrogen peroxide will be and whether it’ll damage your wall finish. Porous surfaces absorb the solution and let it reach embedded mold, but they also show discoloration more easily. Non-porous surfaces resist absorption, so mold sits on top but also means less penetration when you treat it.
| Wall Surface Type | Hydrogen Peroxide Compatibility | Application Notes | Discoloration Risk |
|---|---|---|---|
| Painted drywall | Good with diluted solution | Use 50/50 mix, test color-fastness first, may lighten dark or bold paint colors | Medium |
| Unpainted drywall | Excellent with undiluted solution | Use full-strength 3%, saturate thoroughly, may see white residue as mold dies | Low |
| Tile and grout | Excellent with undiluted solution | Safe on ceramic tile, grout absorbs solution well, may lighten grout color slightly | Low to Medium |
| Wallpaper | Poor compatibility | Hydrogen peroxide can cause paper to peel or colors to run, consider removal instead | High |
| Concrete/cement (basement walls) | Excellent with undiluted solution | Highly porous, use full-strength, may need longer dwell time (20 to 30 minutes) | Very Low |
| Wood paneling | Good with diluted or undiluted depending on finish | Use diluted on finished wood, undiluted on raw wood, test stained wood carefully | Medium to High |
Bathroom walls need special attention because constant moisture from showers and baths creates ongoing mold risk even after treatment. After using hydrogen peroxide to kill existing mold, run the exhaust fan during and for 30 minutes after every shower, and wipe down walls weekly to prevent new growth. Basement walls often show mold because of groundwater seepage, poor ventilation, and high humidity. Treating basement wall mold with hydrogen peroxide addresses the symptom but won’t stop it from coming back unless you also handle the underlying moisture problem through better drainage, waterproofing, or dehumidification. See basement waterproofing guide for long-term moisture control.
If you’re treating colored or textured walls and spot testing shows lightening or discoloration, you’ve got three options. Accept the bleaching effect and plan to repaint after treatment, switch to a non-bleaching alternative like vinegar (which works on about 80% of mold species), or call a professional who has access to methods that don’t affect color. If bleaching happens during treatment, stop right away and wipe the area with plain water to dilute the hydrogen peroxide.
Identifying Mold and Root Causes on Walls

The 24 to 48 hour window after water exposure is when prevention is easiest. Dry everything thoroughly in that timeframe and you’ll likely avoid mold growth entirely. Once mold appears, hydrogen peroxide treats the visible problem but doesn’t stop new growth if moisture keeps coming.
Dark spots or patches in black, green, white, or orange tell you mold’s present. Color depends on the species. Fuzzy, powdery, or slimy texture on the wall surface is another sign. A musty or earthy smell often shows up first, before you see anything. Peeling or bubbling paint that wasn’t there before means trouble. Warping or soft spots in drywall when you press on it. Water stains or discoloration around the moldy area. Condensation or dampness on the wall that doesn’t dry. Increased allergy symptoms like sneezing, coughing, itchy eyes when you’re in specific rooms.
To tell mold from dirt, stains, or surface mildew, put a drop of household bleach on the spot. Mold lightens within a minute or two. Dirt doesn’t change. Take photos of the mold before you start treatment. Document the location, size, and any nearby water damage or moisture issues. These photos help if you need to call professionals later or if you’re dealing with insurance or rental property issues.
Roof leaks are a common moisture source. Check the attic and ceiling areas above the mold. Plumbing leaks behind walls (listen for running water, look for water meter movement when nothing’s on). Basement seepage or groundwater coming through the foundation. Poor ventilation in bathrooms and kitchens, like no exhaust fan or a fan that doesn’t vent outside. HVAC condensation issues from a leaking drain pan or clogged condensate line. Window condensation and seal failures where water runs down and soaks into the wall. Previous flooding or water damage that wasn’t dried properly.
Do a quick moisture investigation before you treat the mold. Look for water stains on the wall and ceiling above and below the moldy area. Feel the wall for dampness by pressing firmly with your palm. Wet drywall feels cool and slightly soft. If you have a moisture meter or hygrometer, check humidity levels. Indoor humidity should stay below 50%. Above 60% creates ideal conditions for mold.
Skip finding the root cause and the mold’s coming back. You can kill every spore on that wall today, but if water keeps getting in or humidity stays high, new mold appears within weeks. Fix the leak, improve the ventilation, or address the drainage problem first, or at least at the same time you’re treating the mold.
Preventing Mold Growth After Hydrogen Peroxide Treatment
Prevention costs less than repeated cleaning and protects your home’s structure and your family’s health. Once you’ve removed existing mold, your focus shifts to keeping conditions bad for new growth.
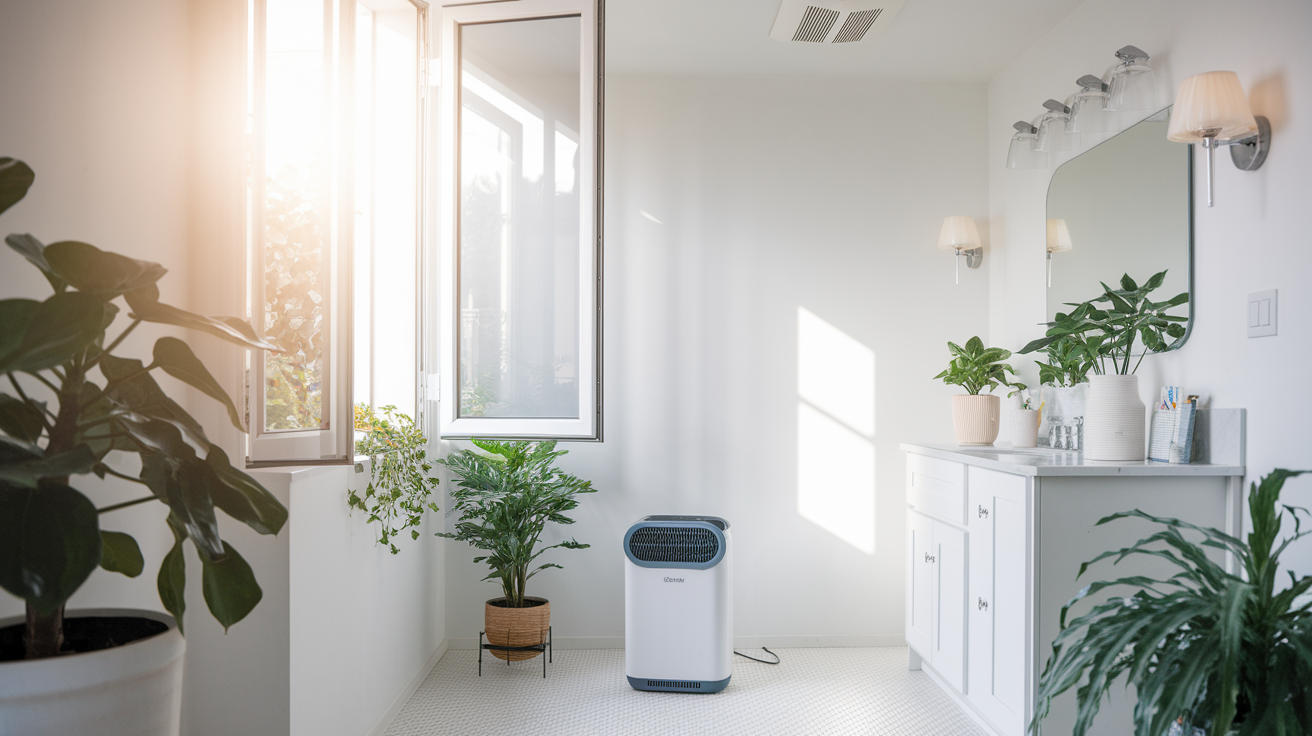
Keep indoor humidity between 30% and 50% using dehumidifiers in basements, bathrooms, and other moisture-prone areas. Empty and clean dehumidifiers regularly.
Make sure bathroom and kitchen exhaust fans vent outside (not into the attic) and run them during and for 30 minutes after showers and cooking.
Fix all leaks within 24 to 48 hours of finding them. Plumbing leaks, roof leaks, even small drips you think don’t matter. They matter.
Improve air circulation in closets and behind furniture by leaving closet doors open sometimes and pulling large furniture a few inches away from exterior walls.
Clean gutters twice yearly and make sure downspouts direct water at least 6 feet away from your foundation. Poor drainage puts water against basement walls.
Use mold-resistant paint or add antimicrobial products to regular paint in high-risk areas like basements, bathrooms, and laundry rooms.
Inspect problem areas monthly for early signs of mold or moisture. Catch it when it’s a small spot instead of waiting until it covers a full wall.
Address condensation on windows by improving insulation, using storm windows, or increasing ventilation in the room. Condensation means humidity’s too high or the surface is too cold.
Seasonal stuff matters. Humid summer months increase mold risk, especially in basements and poorly ventilated spaces. Run dehumidifiers more often and check moisture levels weekly during summer. Winter brings condensation when warm indoor air hits cold windows and walls. Increase ventilation and consider adding insulation to exterior walls that show condensation or frost.
Document your prevention improvements with photos, receipts, and notes about when work was done. This documentation helps with insurance claims if water damage happens again, and adds value if you sell the property by showing proactive moisture management.
When Hydrogen Peroxide Won’t Work and Professional Help Is Needed
DIY mold removal has real limitations, and pushing past them risks your health and can make the problem worse by spreading spores throughout your home without proper containment.
Mold covering more than 10 square feet needs professionals. That’s the EPA’s threshold for when DIY becomes unsafe. Mold inside HVAC systems or ductwork spreads spores throughout the house every time the system runs if you treat it yourself. Suspected toxic black mold (Stachybotrys chartarum), which appears dark black and slimy and often grows on materials that stay wet, needs professionals. Mold behind walls or in structural cavities you can’t access without cutting into materials. Mold returning repeatedly despite treatment and moisture control indicates a hidden water source or deeper infestation. Occupants experiencing persistent health symptoms like respiratory distress, chronic coughing, or severe allergic reactions. Mold following sewage backup or contaminated water (Category 3 water damage) requires professional handling.
Professionals offer stuff DIY methods can’t match. They set up containment barriers with plastic sheeting and negative air pressure to prevent spore spread. They remove contaminated materials properly instead of trying to clean them. They use commercial-grade air scrubbers with HEPA filters to clean airborne spores. They have moisture meters and thermal imaging cameras to find hidden water sources inside walls and under floors. They document everything for insurance and provide guarantees.
DIY costs $20 to $50 for hydrogen peroxide, spray bottles, protective gear, and cleaning supplies. Professional mold remediation starts around $500 for small, straightforward jobs (single wall area under 10 square feet in an accessible location). Costs rise to $1500 to $3000 for moderate jobs (bathroom or small basement area), and $4000 to $6000 or more for extensive infestations affecting multiple rooms or hidden areas. See when to call water damage professionals for more guidance on making this decision.
When you’re vetting remediation contractors, check for proper licensing and insurance, ask for references from recent mold jobs, get a detailed scope of work in writing before any work starts, and make sure they’ll address the moisture source and not just remove the mold. A good contractor explains what they’ll do, how they’ll protect your home during the work, and what you should expect for results.
Alternative Mold Removal Methods and When to Use Them
Hydrogen peroxide isn’t the only household solution for mold, and knowing alternatives helps you choose the best approach for your situation based on availability, cost, surface type, and personal preferences.
| Method | Effectiveness | Best Used On | Limitations |
|---|---|---|---|
| White vinegar (undiluted) | Kills 80% of mold species | Non-porous surfaces, tiles, glass, finished wood | Strong odor, less effective on porous surfaces, doesn’t kill all species |
| Baking soda paste | Mild cleaning, pH adjustment | Scrubbing abrasive, odor absorption, combination with other methods | Not a strong killer on its own, works best as follow-up scrub |
| Borax solution (1 cup per gallon water) | Good inhibitor and cleaner | Walls, floors, wood surfaces where you want residual protection | Must mix properly, not for consumption, rinse not required but leaves white residue |
| Tea tree oil (2 tsp per 2 cups water) | Natural antifungal, good long-term | Small areas, prevention, natural preference | Expensive, strong scent, slower acting than hydrogen peroxide |
| Bleach (1 cup per gallon water) | Strong surface killer | Non-porous surfaces only, tiles, tubs | Toxic fumes, doesn’t penetrate porous materials, damages many surfaces, dangerous if mixed |
Combination approaches can improve results if used correctly. Hydrogen peroxide followed by a baking soda scrub works well because the hydrogen peroxide kills the mold and the baking soda provides gentle abrasion to remove the dead material. Mix a paste of baking soda and water, apply it after the hydrogen peroxide dwell time, scrub gently, then rinse. Never combine hydrogen peroxide with vinegar. That creates peracetic acid, which irritates eyes, skin, and the respiratory tract and can cause serious burns at high concentrations.
Never use ammonia on mold. It doesn’t kill mold effectively, and if you mix ammonia with bleach (or use them in the same space without thorough rinsing between), you create toxic chloramine gas that causes serious respiratory damage.
Choose hydrogen peroxide over alternatives when you’re treating porous surfaces like drywall or unsealed wood, when you want to avoid harsh chemical fumes (especially important in poorly ventilated spaces), when you’re concerned about bleaching or damaging colored materials (hydrogen peroxide is milder than bleach), or when you prefer a more natural approach than chemical cleaners. White vinegar works better on non-porous surfaces and when you’re treating areas where food is prepared, since vinegar residue is food-safe. Borax provides longer-lasting protection when you’re treating areas prone to recurring mold. Tea tree oil makes sense for very small areas or as a prevention spray, but costs too much for large-scale treatment.
Final Words
Hydrogen peroxide for mold on walls works when you use it right: 3% undiluted on drywall, 15 minutes minimum dwell time, proper safety gear, and complete drying after treatment.
The real work starts after you spray. Fix the leak, control humidity, improve ventilation, and check problem spots monthly.
If mold covers more than 10 square feet, keeps coming back, or you’re finding it behind walls, stop and call a licensed remediation pro.
Small spots caught early respond well to DIY treatment. Larger infestations or hidden moisture problems need professional equipment and expertise you can’t replicate with a spray bottle.
FAQ
Does vinegar or peroxide kill mold better?
Hydrogen peroxide kills mold better than vinegar on most wall surfaces because it works on a broader range of mold species and penetrates porous materials like drywall more effectively, while vinegar kills approximately 80% of mold species and works best on non-porous surfaces.
How long does it take for hydrogen peroxide to kill mold?
Hydrogen peroxide takes a minimum of 15 minutes to kill mold on walls after you spray it on the affected area. For heavily embedded mold in porous surfaces, extending contact time to 20-30 minutes improves effectiveness before wiping or scrubbing.
What kills black mold on walls?
Black mold on walls is killed by undiluted 3% hydrogen peroxide applied directly to the surface and left for 15 minutes minimum. If black mold covers more than 10 square feet or returns after treatment, call a professional remediation company instead of treating it yourself.
What kills mold permanently?
Mold is killed permanently by treating the surface with hydrogen peroxide or another antimicrobial solution and fixing the underlying moisture problem that caused it. Without addressing leaks, humidity issues, or ventilation problems, mold will return no matter what cleaning method you use.
Can I use hydrogen peroxide on painted walls?
Hydrogen peroxide can be used on painted walls but requires spot testing first in an inconspicuous area because it acts as a bleaching agent. Use a 50/50 dilution of 3% hydrogen peroxide and water on painted surfaces to reduce discoloration risk.
What concentration of hydrogen peroxide kills mold?
The concentration of hydrogen peroxide that kills mold is standard household-grade 3%, used undiluted on porous surfaces like drywall or diluted 50/50 with water on painted or non-porous surfaces. Higher concentrations require professional handling and are unnecessary for typical household mold.
What safety equipment do I need for mold removal?
Safety equipment needed for mold removal includes an N95 or P100 respirator mask, safety goggles or face shield, rubber gloves extending to mid-forearm, and long sleeves with pants. Open windows and run fans for ventilation since mold spores become airborne during scrubbing.
Should I throw away moldy drywall or clean it?
You should throw away moldy drywall if mold growth is extensive, deeply embedded, or if the drywall stayed wet for more than 48 hours. Surface mold on small areas can be treated with hydrogen peroxide, but cut out and replace any section showing structural damage or warping.
How do I prevent mold from coming back after cleaning?
Mold is prevented from coming back by maintaining indoor humidity between 30-50%, fixing all leaks within 24-48 hours, running exhaust fans during and after showers, and improving air circulation in problem areas. Monthly inspections of previously affected spots catch early recurrence.
When should I call a professional for mold removal?
You should call a professional for mold removal when affected areas exceed 10 square feet, mold returns repeatedly despite treatment, mold is inside HVAC systems or wall cavities, or when household members experience persistent respiratory symptoms. Sewage-related mold always requires professional remediation.
Can I mix hydrogen peroxide with other cleaners for mold?
You cannot mix hydrogen peroxide with vinegar because it creates peracetic acid that irritates eyes, skin, and airways. Never combine hydrogen peroxide with bleach or ammonia either, as these mixtures create dangerous fumes and toxic compounds.
How do I know if mold treatment worked?
Mold treatment worked when no visible mold remains, the musty odor disappears, the surface feels completely dry, and no new growth appears within 48-72 hours. If mold returns within a week, you missed the moisture source and need to investigate further before retreating.
