
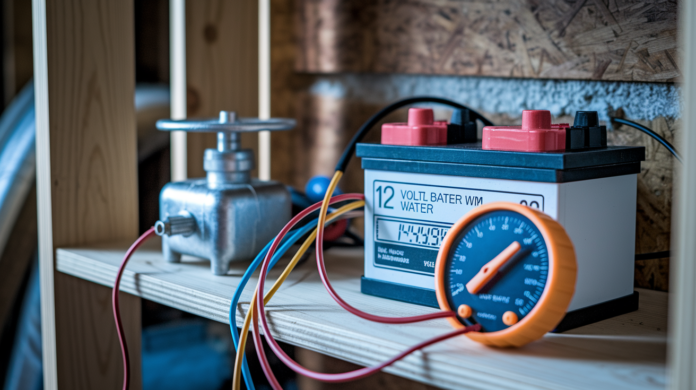
Most sump pump battery backups won’t run as long as you think they will. That 84 amp hour battery the installer promised would give you “all night” protection? You might only get 60 to 90 minutes of actual runtime once losses, real pump loads, and battery aging cut into the math. The difference between what the spec sheet says and what you’ll get during the next storm matters a lot when your basement is at risk. This guide breaks down actual runtime numbers, what kills batteries faster than it should, and how to squeeze more protection out of the backup system you already have.
Battery Backup Runtime and Practical Calculations
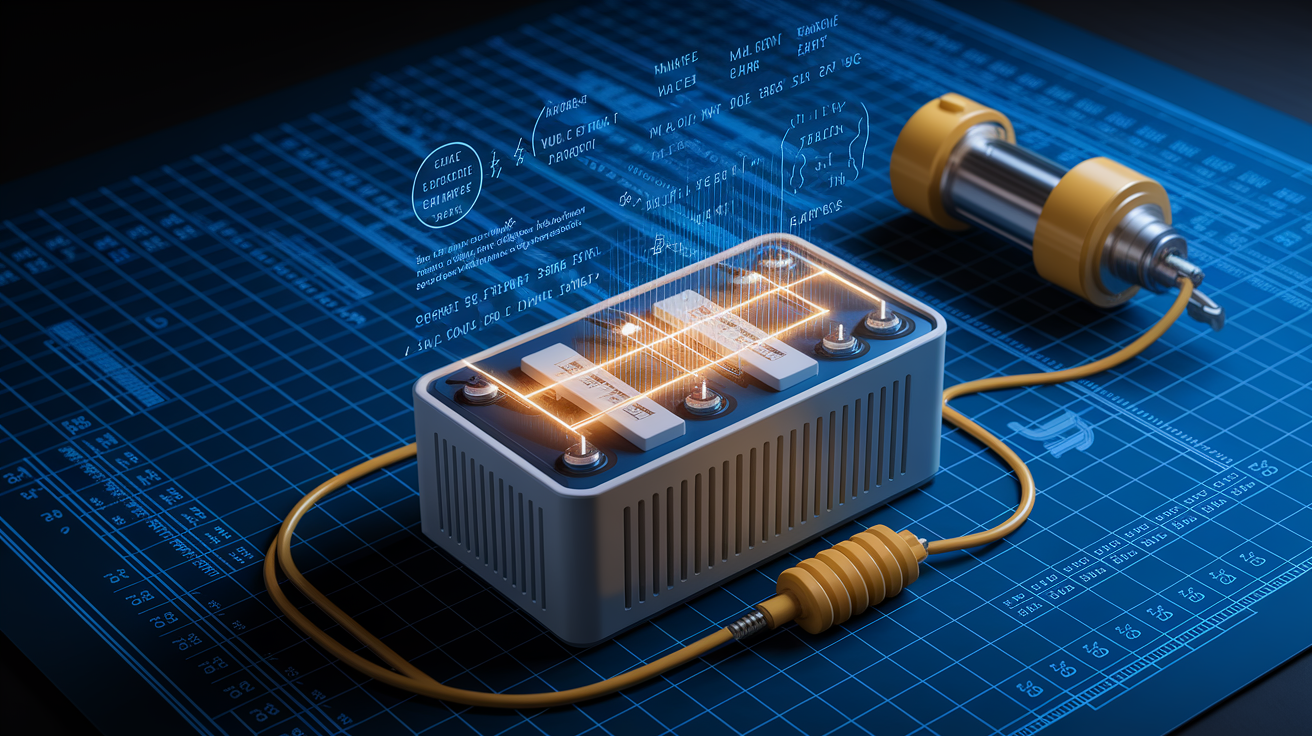
The basic formula goes like this: amp hours (Ah) × voltage (V) ÷ watts = hours you’ll get. So an 84 Ah battery running at 12 volts gives you 1,008 watt hours total (84 × 12 = 1,008). Your pump pulls 600 watts? Divide 1,008 by 600 and you get 1.68 hours theoretically.
Real life doesn’t work that way. You’ll see 50 to 70% of those numbers because of losses in wiring, connections, the pump motor fighting friction. Deep cycle batteries can’t drain all the way down without damage, so practical runtime stops around 10.5 volts instead of hitting true zero. That same 84 Ah battery? Expect 1.0 to 1.2 hours of actual use, not the 1.68 hours the math promised. A battery that should run your 600 watt pump for nearly two hours might only give you 60 to 75 minutes when you actually need it.
How the pump runs makes a huge difference. Continuous pumping happens when groundwater keeps pouring in faster than the pump can keep up during heavy storms. The motor just runs and runs until the battery dies. Intermittent pumping is when the pump cycles on and off as the pit fills and empties, with breaks between runs. A fully charged battery might last 4 to 8 hours running continuously but stretch to 1 to 3 days when it’s cycling on and off. The difference comes from cooling periods between cycles and less total motor runtime spread across multiple days.
North Dakota State University actually tested this stuff in lab conditions. Their tests showed 40 Ah batteries lasting under 4 hours of continuous pumping before voltage dropped too low. Those same pumps hooked to 84 Ah batteries ran about 7 hours before hitting the same voltage threshold. These tests controlled things like pump size, water temperature, discharge height, giving you reliable benchmarks instead of guesswork.
Here’s what you can expect for continuous pumping:
- 40 Ah batteries: 2.5 to 4 hours with quarter horsepower pumps, less with bigger motors
- 55 Ah batteries: 3.5 to 5 hours depending on pump efficiency and how high it’s lifting
- 75 Ah batteries: 5 to 6.5 hours with most home backup pump setups
- 84 Ah batteries: 6 to 7 hours based on university testing with standard residential pumps
- 100+ Ah systems: 8 to 10 hours or more, typically used where water tables run high or outages last forever
Pump horsepower directly controls how fast the battery drains. Quarter horsepower pumps typically pull 400 to 600 watts, while one third horsepower models draw 700 to 900 watts when running. That 200 to 400 watt difference translates to 30 to 50% longer battery life when you pick the smaller motor. If your water doesn’t come in fast enough to need the higher pumping capacity, the quarter horsepower pump gives you more backup time without sacrificing flood protection.
Deep Cycle Battery Types for Backup Sump Systems
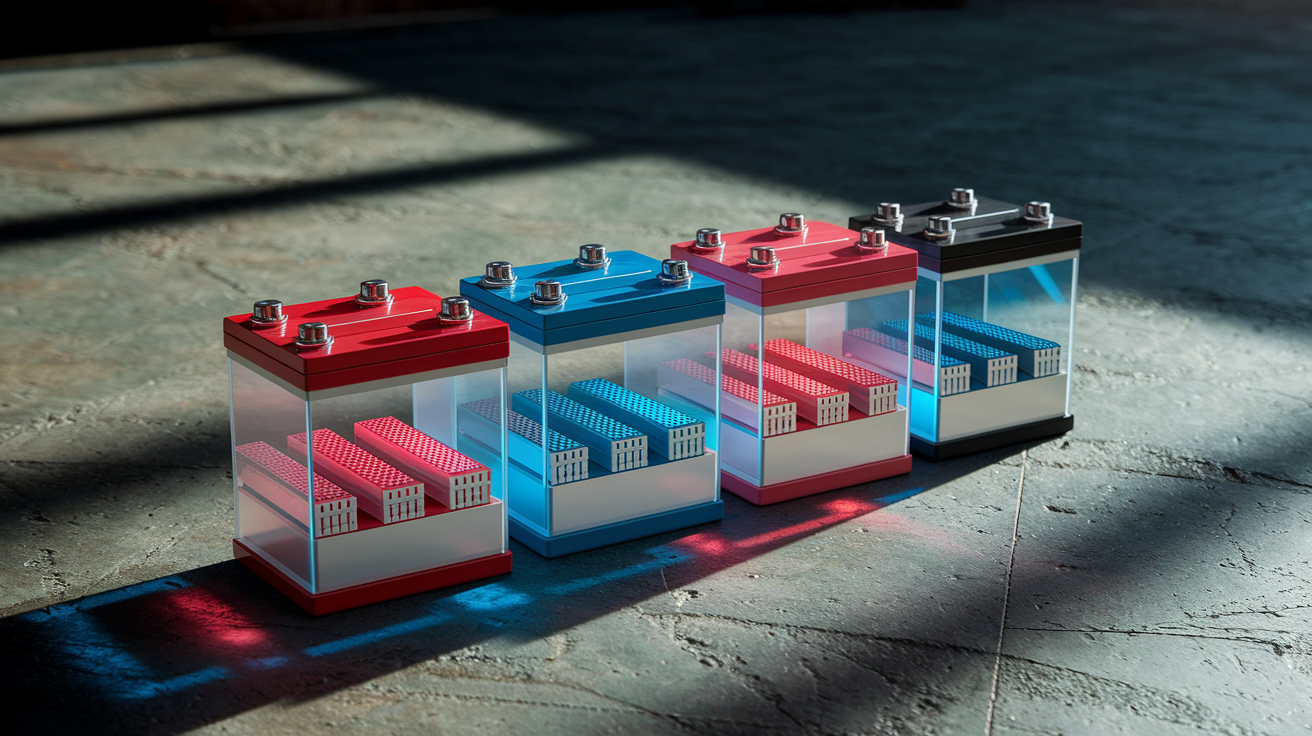
Deep cycle batteries handle the sustained discharge patterns that sump pump backup systems demand. Automotive starter batteries deliver high current for short engine cranking bursts but fail quickly when drained slowly over hours. Deep cycle construction uses thicker lead plates and different internal chemistry designed for repeated discharge and recharge cycles without permanent damage.
Sealed Lead Acid (SLA) Batteries
Sealed Lead Acid batteries require zero maintenance and come ready to install. The sealed construction prevents electrolyte leakage and eliminates water level checks that older battery designs require. SLA batteries typically last 3 to 5 years in sump pump applications, handling several hundred charge discharge cycles before capacity drops below useful levels. They cost less than AGM alternatives but also deliver shorter overall service life and slower recharge rates.
AGM (Absorbent Glass Mat) Batteries
AGM technology suspends electrolyte in fiberglass mat separators between lead plates instead of free flowing liquid. This construction resists vibration damage better than flooded designs and recharges 20 to 30% faster after discharge. AGM batteries handle deeper discharge cycles without damage, often providing 500 to 800 full cycles compared to 300 to 400 for standard SLA batteries. The higher initial cost ($50 to 100 more than equivalent SLA capacity) pays back through longer service life and better performance during frequent cycling.
Marine Deep Cycle Batteries
Marine batteries withstand harsh moisture conditions and temperature swings that basement installations create. Heavy duty terminals resist corrosion from humidity, and reinforced cases handle occasional bumps during maintenance work. These batteries install immediately without initial charging or activation procedures. Marine construction typically adds 10 to 20% to cost compared to standard deep cycle batteries but provides extra durability in damp basement environments where moisture exposure happens despite best efforts.
Flooded Lead Acid Batteries
Traditional flooded batteries cost 30 to 40% less than sealed alternatives at the same capacity rating. The lower price comes with maintenance requirements: checking water levels every 3 to 6 months and adding distilled water when plates become exposed. Flooded batteries also need ventilation since charging produces hydrogen gas. Despite the extra work, they deliver reliable performance and make economic sense when budget constraints matter more than convenience.
| Battery Type | Maintenance Required | Typical Lifespan | Best For |
|---|---|---|---|
| Sealed Lead Acid (SLA) | None | 3-5 years | Standard installations, set-and-forget convenience |
| AGM (Absorbent Glass Mat) | None | 4-7 years | Frequent cycling, faster recharge needs, premium performance |
| Marine Deep Cycle | None (sealed) or quarterly checks (flooded) | 4-6 years | High-humidity basements, moisture exposure risk |
| Flooded Lead Acid | Check water levels every 3-6 months | 3-5 years | Budget-conscious installations, DIY maintenance comfort |
Battery Degradation Factors and Environmental Conditions

Batteries need replacement every 3 to 5 years no matter how well the system seems to work. Internal chemistry degrades even when batteries sit unused between storms. A battery that delivered 7 hours when new might only give you 2 to 3 hours after three years. Lead plates inside wet cell batteries corrode gradually, building up sulfate deposits that reduce the surface area available for chemical reactions. This sulfation happens during normal operation and speeds up when batteries sit partially discharged for long stretches between uses.
Temperature extremes accelerate internal degradation and reduce available capacity during actual use. High heat above 80°F causes electrolyte fluid to evaporate in flooded batteries and speeds up internal chemical reactions that wear out plates faster. Basement temperatures climbing into the 85 to 95°F range during summer can cut battery lifespan by a full year. Cold weather below 32°F doesn’t damage batteries permanently but temporarily reduces capacity by 20 to 50%. A battery that normally provides 6 hours of backup might only deliver 3 to 4 hours during a January power outage when basement temperatures drop into the 40s.
Moisture exposure creates resistance problems that waste battery power before it reaches the pump motor. Condensation forming on terminals and cable connections allows corrosion to build up, creating a layer of oxidized metal that electricity must push through. Even minor corrosion can reduce power delivery by 10 to 15%. Proper ventilation prevents this by controlling humidity around the battery enclosure and getting rid of hydrogen gas released during charging. Sealed battery boxes trap heat and moisture, creating exactly the conditions that speed up failure. A simple open shelf or ventilated battery tray prevents these problems.
Things that speed up battery aging:
- Sulfation buildup: White crystalline deposits form on plates when batteries sit partially discharged, permanently reducing capacity
- Charge cycle count: Each discharge recharge cycle wears plates slightly. 300 to 500 cycles represent typical deep cycle battery lifespan
- Depth of discharge patterns: Draining batteries to 20% capacity repeatedly causes more wear than stopping at 50%
- Calendar age: Three to five years of service life applies even with minimal use due to internal chemical degradation
- Corrosion of internal components: Lead plates and connectors deteriorate from normal electrochemical reactions over time
- Voltage readings below 12.1V: Indicates weakened cells that can’t hold full charge and risk failure during next storm
- Heat accumulation: Poor ventilation allows temperatures inside battery boxes to climb 10 to 20°F above ambient basement temperature
Optimal battery placement elevates the unit 4 to 6 inches off concrete floors on a wood platform, plastic tray, or metal shelf. Direct contact with concrete doesn’t drain batteries like old myths claim, but elevation prevents water from reaching terminals during minor leaks or condensation accumulation. Position batteries in temperature stable areas away from furnaces, water heaters, and areas where sun exposure through basement windows creates hot spots. Keep them accessible for monthly testing and maintenance but protected from direct water exposure if pipes burst or the main sump system fails catastrophically.
Battery replacement is preventive maintenance rather than emergency repair. Waiting until a battery fails completely means discovering the problem during an actual power outage when your basement is flooding. Schedule replacement at the three year mark for standard SLA batteries or four years for AGM units, before performance drops become critical. The $150 to 250 battery replacement cost is minor compared to water damage from a failed backup system.
Water Inflow Rate and Storm Duration Impact

Water inflow rate determines whether batteries last hours or days during the same power outage. Slow groundwater seepage filling a sump pit over 2 to 3 hours allows long rest periods between pump cycles, preserving battery charge for extended protection. The pump might run 2 to 3 minutes every few hours, cycling maybe 15 to 20 times over two days while barely touching battery capacity. Heavy rainfall during severe storms fills pits in 15 to 30 minutes, forcing pumps to cycle continuously or run non stop if inflow exceeds pump capacity. The same battery that could protect your basement for three days during slow seepage might exhaust in 5 to 7 hours under storm conditions.
Battery power declines progressively during extended pumping sessions. Voltage drops from 12.6V when fully charged down to 11.5V after several hours of cycling. As voltage decreases, the pump motor struggles to lift water effectively, running longer to clear the same volume. Eventually voltage drops below 10.5V where the pump can’t generate enough pressure to push water up the discharge pipe, and the pit begins filling faster than the weakened motor can remove it. At this point the pump becomes overwhelmed by water inflow regardless of how hard it tries to run.
The duty cycle determines actual runtime more than theoretical battery capacity. Duty cycle measures the percentage of time a pump runs versus rests. A pump running 10 minutes out of every hour operates at roughly 17% duty cycle, potentially extending battery life to multiple days. The same pump running 45 minutes per hour operates at 75% duty cycle, pushing the battery hard and limiting protection to maybe 6 to 8 hours. Light seepage scenarios where pits refill slowly create 5 to 10% duty cycles, allowing 1 to 3 days of intermittent protection. Storm conditions requiring 40 to 50 minutes of pumping per hour create 65 to 85% duty cycles that limit runtime to 5 to 8 hours of continuous operation.
Matching battery capacity to typical storm duration makes practical sense. If your area regularly gets 12 to 18 hour power outages during severe weather, a standard 75 to 84 Ah battery provides marginal protection. Consider upgrading to dual battery configuration or 100+ Ah capacity for adequate coverage. Areas with brief 2 to 4 hour outages don’t need premium battery systems. Check local weather patterns and soil drainage characteristics to determine realistic requirements rather than overbuying protection you’ll never use.
Charging System Efficiency and Battery Readiness

Automatic charging systems maintain batteries at full capacity between power outages by applying float charge voltage. Float charging holds batteries at 13.2 to 13.8 volts, slightly above resting voltage but below the 14.4 to 14.8V bulk charging range that pushes current hard during recharge. This keeps batteries topped off without overcharging that boils away electrolyte and damages plates. Simple plug in chargers maintain this float voltage constantly whenever house power is available, ensuring batteries stand ready for the next outage.
Smart chargers use three stage charging to maximize battery health and longevity. The bulk stage pushes maximum current into depleted batteries until voltage reaches approximately 14.4V, rapidly restoring 80 to 90% of capacity. The absorption stage holds voltage steady at 14.4 to 14.8V while current gradually decreases, filling the remaining capacity without overheating the battery. Finally, the float stage drops voltage to 13.2 to 13.8V for long term maintenance without overcharge stress. This staged approach prevents the plate damage and electrolyte loss that simple trickle chargers cause when they push constant current into already full batteries. Smart chargers add $30 to 50 to system cost but can extend battery life by a full year.
Signs your charging system isn’t maintaining battery readiness:
- Charger indicator lights staying off: No charging current reaching battery despite power connection
- Lights flashing erratically: Internal charger fault or poor connection preventing proper charging
- Batteries not reaching full voltage: Reading below 12.6V after 24 hours on charger indicates charging system failure
- Warm batteries during charging: Excessive heat during float charging suggests overcharge condition damaging internal plates
- Corroded terminals after cleaning: Rapid corrosion return indicates overcharging producing excessive hydrogen gas
Typical recharge time runs 12 to 24 hours after significant discharge. A battery drained to 50% capacity needs 8 to 12 hours to reach 90% charge and another 4 to 6 hours for the absorption stage to complete the final 10%. Batteries drained to 20% capacity might need the full 24 hours before they’re truly ready for another outage. Homeowners sometimes test their backup system, see it working, then experience a real power outage six hours later before the battery fully recharged. Always allow a complete day of charging after any test that runs the pump for more than a few minutes.
Monitoring Battery Health and Replacement Indicators

Monthly functional testing confirms the entire system works before you need it during an actual emergency. Pour 5 to 8 gallons of water into the sump pit until the float switch activates and the backup pump engages. Time how long the pump runs and watch how effectively it clears the water. A healthy system should activate within 1 to 2 seconds of the float trigger and clear the test water in 30 to 60 seconds depending on pump size and vertical lift. This simple test catches problems like corroded connections, weak batteries, failed float switches, or clogged discharge pipes before they become flooding emergencies. Monthly testing also exercises the battery, preventing the sulfation buildup that happens when batteries sit unused for months between cycles. When basement flooding occurs, having a properly functioning backup system makes the difference between manageable cleanup and extensive damage requiring professional restoration.
Voltage testing with a basic multimeter provides objective battery health data beyond just “it works” confirmation. Touch the multimeter’s red probe to the positive terminal and black probe to negative, reading the display with no load on the battery. Fully charged deep cycle batteries should show 12.6 to 12.8 volts when resting. Readings between 12.3 to 12.5V indicate 75% charge, adequate for moderate protection but suggesting the charging system isn’t fully maintaining the battery. Voltage below 12.1V signals aging batteries with reduced capacity at high risk of premature failure during storms. Batteries reading 11.8V or lower have essentially no useful capacity left and need immediate replacement regardless of age. Test voltage at least quarterly and always before storm season starts.
Annual load testing measures actual capacity under realistic pump operating conditions rather than just static voltage. Professional load testers apply current draw equivalent to your pump’s wattage for several minutes while monitoring voltage drop. A healthy battery maintains voltage above 10.5V under load for the duration of the test. Batteries that drop below 10V quickly or can’t sustain load for the test duration have lost significant capacity even if resting voltage looks acceptable. Battery retailers and auto parts stores often provide free load testing, or purchase a basic carbon pile load tester for $40 to 80 to test at home.
Immediate failure indicators demand replacement before the next weather event. Alarm systems sounding despite house power being available signal battery or charging system failure. Continuous beeping that doesn’t reset after pressing the alarm button indicates the control board detected critically low battery voltage. Failed manual water tests where the pump struggles to activate, runs weakly, or won’t start at all mean the battery can’t deliver enough current to run the motor. These aren’t “check it later” situations since the next power outage might happen tonight.
Performance degradation shows up gradually through testing patterns. A backup system that used to run 6 hours on the same battery now runs only 2 hours during identical test conditions. The pump cycles more frequently without effectively clearing water, taking two or three cycles to empty the pit instead of one. Voltage readings consistently below 12.1V even after full charging cycles indicate cells that can’t accept or hold full charge anymore. These signs mean replacement soon, within weeks not months, before complete failure leaves you unprotected.
Physical deterioration accelerates near end of life. Excessive corrosion around terminals that returns within days of cleaning suggests the battery is off gassing excessively from internal breakdown. Battery cases bulging outward or developing cracks near the top indicate internal pressure from failing cells. Sulfur smell during charging means plates are breaking down and the battery is beyond recovery. Any of these physical signs means immediate replacement regardless of voltage readings or apparent function.
Keep a simple testing log noting date, voltage readings, and observed runtime during monthly tests. This baseline data reveals degradation trends that single tests miss. Voltage dropping from 12.7V in January to 12.3V by July shows decline that predicts failure by October. Runtime decreasing from 7 hours when new to 5 hours after two years suggests you’ll hit inadequate protection around the three year mark. These patterns let you plan replacement during spring when prices are often lower, rather than scrambling during autumn storm season when demand pushes prices up.
Replace batteries on the 3 to 5 year timeline regardless of apparent condition. Internal degradation occurs continuously even with perfect maintenance and light use. The difference between a four year old battery that tests okay and a new battery shows up during extended outages when you need every available hour of runtime. That aged battery might test fine during your monthly 2 minute checks but fail three hours into a real 8 hour outage. The $150 to 250 replacement cost every few years is preventive insurance against flooding damage costing thousands. For more guidance on protecting your basement from water damage, see the comprehensive steps in our article on what to do after flooding at https://floodrecoverydiy.com/what-to-do-after-flooding/.
Extending Runtime Through Dual Battery Configuration
Three primary strategies extend backup duration beyond standard single battery limitations: upgrading to larger capacity batteries, adding second batteries in parallel configuration, and selecting more efficient quarter horsepower pumps. Each approach adds cost but provides measurably longer protection. Upgrading from a 55 Ah to 84 Ah battery adds $80 to 120 and extends runtime by 50 to 70%. Adding a second 75 Ah battery in parallel doubles capacity for $150 to 200 plus cables and connectors. Switching from one third to quarter horsepower pumps reduces current draw by 25 to 35%, effectively extending runtime without battery changes.
Dual battery systems make practical sense in several specific situations. Areas experiencing multi day power outages during hurricanes or ice storms need 24 to 48 hours of backup rather than the 6 to 8 hours single batteries provide. High water tables that cause sump pits to refill every 20 to 30 minutes require frequent cycling that exhausts single batteries in half the normal time. Finished basements with bedrooms, home offices, or expensive entertainment systems justify premium backup protection since flooding damage easily exceeds $10,000 to 20,000. Homes where the main floor sits below grade and total flooding would affect living space rather than just storage areas warrant extended backup duration.
Parallel battery connections require matching battery specifications and age for safe, effective operation. Never connect batteries of different amp hour ratings (mixing 55 Ah with 84 Ah batteries, for example) since the larger battery attempts to charge the smaller one during operation, causing overheating and potential failure. Never combine old and new batteries since the aged unit drags down the performance of the fresh one while accepting uneven charging that accelerates failure. Always use identical battery types (both AGM, both SLA, never one of each) since different chemistries have different charging requirements. When installing dual batteries, either buy both new at the same time or plan to replace both when one reaches end of life.
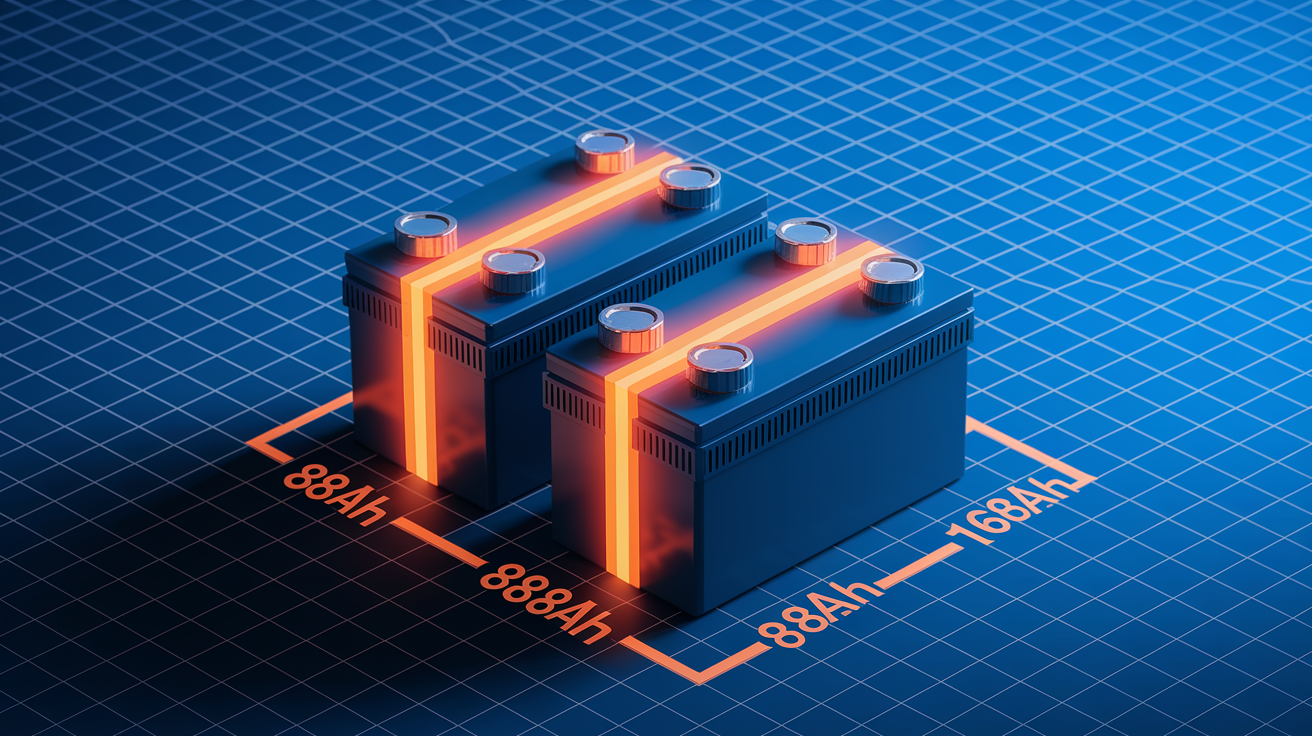
Parallel wiring connects the positive terminal of the first battery to the positive terminal of the second using heavy gauge cable (4 to 6 AWG for residential systems), then connects both negative terminals the same way. The pump’s positive cable attaches to one battery’s positive post, and the negative cable attaches to one battery’s negative post, with the parallel wiring effectively creating a single larger battery. This configuration maintains 12V system voltage while doubling amp hour capacity. An 84 Ah battery paired in parallel with another 84 Ah battery creates a 168 Ah system at 12 volts, not a 24 volt system. This effectively doubles runtime without requiring pump or charger modifications in most residential backup systems, providing 10 to 16 hours continuous runtime or several days of intermittent protection.
Physical installation requires elevated mounting platforms that keep both batteries off concrete and allow air circulation between units. Space batteries 2 to 4 inches apart to prevent heat buildup between cases during charging and operation. Both units need accessible locations for monthly testing and terminal maintenance. Standard battery boxes designed for single batteries don’t accommodate dual configurations, so expect to build simple plywood platforms or purchase ventilated battery trays sized for multiple units. Total installation space requirement runs about 24 to 30 inches wide by 12 to 14 inches deep for side by side mounting of two standard deep cycle batteries.
Efficiency improvements extend runtime without adding batteries or upgrade costs:
- Select quarter horsepower pumps: Draw 400 to 600 watts instead of 700 to 900 watts from one third HP motors, reducing battery drain by 25 to 35%
- Minimize vertical lift distance: Each additional foot of lift adds resistance. Keep discharge pipes as short as practical to reduce pump work
- Use proper diameter discharge pipes: 1½ inch minimum diameter reduces friction compared to 1¼ inch pipes, letting pumps move water with less effort
- Install quality check valves: Prevent backflow that causes pumps to re cycle immediately, eliminating wasted battery power pumping the same water repeatedly
- Set float switches properly: Position switches to allow longer run cycles rather than frequent short bursts that stress motors and waste power on startup current
When drying your basement after any flooding event, proper battery placement and moisture control become critical for maintaining backup system reliability. Follow the moisture management strategies outlined in our guide on how to dry basement after flood at https://floodrecoverydiy.com/how-to-dry-basement-after-flood/ to protect your backup power equipment.
Maintenance Practices That Maximize Battery Life

Terminal maintenance prevents the power delivery losses that corroded connections create. Inspect terminals every 3 to 4 months for white, green, or blue powder buildup around posts and cable connections. This corrosion forms from chemical reactions between lead terminals, copper cables, and moisture in basement air. Mix 2 tablespoons of baking soda into 1 cup of warm water, then use an old toothbrush to scrub terminals until the fizzing stops and metal surfaces look clean. Rinse with plain water, dry completely with a rag, then apply a thin layer of petroleum jelly or specialized terminal protector spray to posts and cable connectors. This coating prevents moisture contact that starts new corrosion. Tighten terminal bolts after cleaning since corrosion often hides loose connections that reduce power transfer.
Keep the battery and surrounding 2 foot area clean and dry to prevent moisture related corrosion that spreads beyond just the terminals. Wipe dust and dirt off the battery case monthly since grime holds moisture against plastic surfaces and creates paths for minor current leakage between posts. Check the floor or platform under the battery for water accumulation from condensation or minor basement dampness. Even batteries marketed as “sealed” can release small amounts of hydrogen gas through pressure vents, and this gas can carry tiny amounts of acid mist that settles on nearby surfaces and promotes rust on metal shelves or corrosion on nearby electrical components.
Quarterly maintenance tasks that preserve battery capacity and catch developing problems:
- Check electrolyte levels (flooded batteries only): Remove caps and look inside cells. Plates should stay submerged under liquid with ½ inch coverage above top of plates
- Verify secure terminal connections: Hand tighten bolts firmly. Loose connections create resistance that wastes battery power as heat rather than running the pump
- Test voltage under no load conditions: Should read 12.6 to 12.8V when fully charged. Readings below 12.4V indicate problems with battery or charging system
- Confirm charger indicator lights function: Green light, solid light, or other indicators should show normal charging status. Dark or flashing lights signal charger failure
- Inspect for case cracks or bulging: Plastic cases that bow outward or develop stress cracks near terminals indicate internal pressure from failing cells requiring immediate replacement
- Ensure adequate ventilation: Check that battery boxes have openings for air circulation. Feel case temperature during charging (warm but not hot to touch is normal)
Detailed maintenance records establish performance baselines that reveal when gradual degradation crosses into replacement territory. Note the date, voltage reading, any water added to flooded batteries, terminal condition, and general observations in a simple notebook or phone note kept near the sump pit. Record monthly test results including how long the pump ran and whether it cleared water effectively. After several months you’ll notice patterns like voltage consistently reading 12.7V in months 1 to 6, then dropping to 12.5V in months 7 to 12, then 12.3V by month 18. This steady decline predicts when the battery crosses below 12.1V where failure risk increases significantly. Without records, that slow degradation looks like random variation rather than a clear trend pointing toward replacement timing.
Battery Backup Cost and Replacement Considerations

Battery replacement costs vary significantly based on capacity requirements and technology choices. Basic 40 to 55 Ah sealed lead acid batteries run $80 to 150 depending on brand and retailer. These smaller batteries suit homes with infrequent power outages or minimal water inflow where 3 to 4 hours of backup provides adequate protection. Mid range 75 to 84 Ah batteries cost $150 to 250 and deliver the 6 to 7 hours of runtime that handles most residential storm situations. Premium 100+ Ah batteries or AGM technology units reach $250 to 400 but provide extended runtime for high risk installations or dual battery budget compared to two smaller units.
Pump specifications drive battery capacity requirements and total system cost. More powerful one third horsepower pumps drawing 700 to 900 watts need larger batteries to maintain adequate runtime compared to quarter horsepower units drawing 400 to 600 watts. A 55 Ah battery paired with a quarter HP pump might provide 5 to 6 hours of protection, but the same battery struggles to run a one third HP pump for even 3 hours. This means more powerful pump systems require $200 to 300 batteries just to match the protection that moderate pumps achieve with $120 to 150 batteries. Check your pump’s wattage rating before buying replacement batteries to ensure capacity matches actual power demands.
DIY battery replacement is straightforward and saves $75 to 150 in service call charges. Turn off power to the charging system, disconnect the negative cable first (always negative before positive to prevent shorts), then disconnect positive. Remove the old battery, clean the cable terminals and battery tray, position the new battery, connect positive cable first (always positive before negative), then connect negative. Restore power to the charging system and verify the charger indicator shows charging status. The entire job takes 15 to 20 minutes with basic tools. Full system installations including pump, battery, charging unit, and piping modifications benefit from professional installation since improper discharge pipe sizing or incorrect check valve placement creates ongoing performance problems that cost more to fix later than hiring a plumber initially.
Warranty coverage provides some financial protection against early battery failure. Most deep cycle batteries include 1 to 3 year warranties covering manufacturing defects. Free replacement applies during the first year for batteries failing from internal defects rather than misuse. Prorated replacement (partial credit toward new battery based on remaining warranty period) typically covers years 2 to 3. Manufacturers may require maintenance documentation showing regular voltage checks and proper charging to honor warranty claims on batteries failing before the rated service life. Keep purchase receipts and basic maintenance records in case early replacement becomes necessary.
Backup System Integration with Primary Pumps
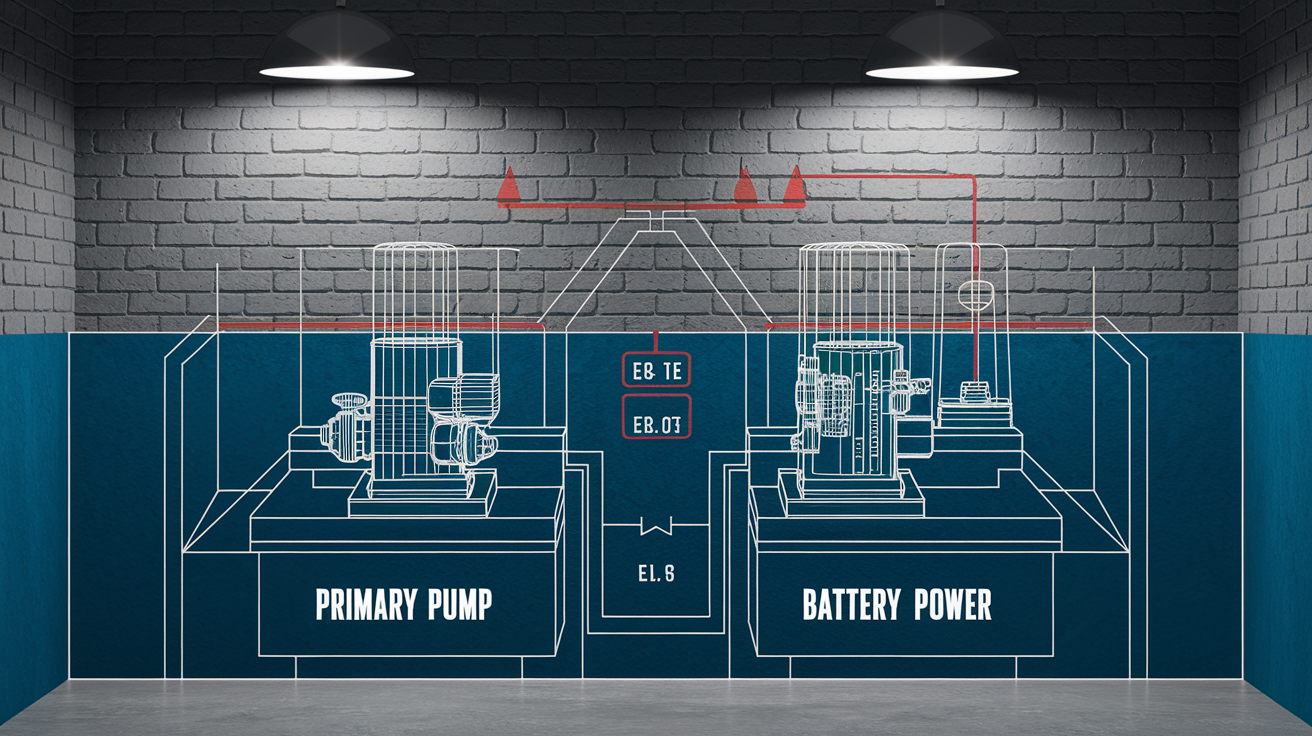
Typical basement sump configurations use hardwired AC powered primary pumps handling daily water removal while battery backup systems sit idle until power failures or primary pump malfunctions. The primary pump connects directly to household electrical circuits (or dedicated generator circuits), running on standard 120V power whenever available. This arrangement lets the main pump handle normal groundwater inflow using unlimited household power. The battery backup activates only during emergencies, preserving battery charge for the situations when it actually matters rather than draining capacity during routine operation.
Automatic switching systems detect power loss and activate battery backup within seconds of the main pump stopping. Float switches set at different heights create the switching logic. The primary pump’s float activates first at the normal water level, handling typical conditions. The backup pump’s float sits 3 to 6 inches higher, only triggering if the primary pump fails or power cuts off and water rises beyond normal operating levels. This height difference prevents both pumps from running simultaneously under normal conditions. When power fails, water continues rising past the primary pump shutoff level until it reaches the backup float and activates the battery powered pump. The entire switch happens in 15 to 30 seconds, fast enough to prevent flooding in pits that refill quickly.
Combination units house primary and backup pumps in a single integrated casing but operate independently on separate power sources. The primary pump section connects to AC house power, while the backup section runs on battery. Both pumps share the same intake screen and discharge outlet, reducing the space requirement compared to installing two separate pump units side by side in the pit. Combination systems prevent the maintenance concern of backup pumps sitting completely unused for months or years between power outages. Since both pumps occupy the same housing and discharge system, monthly testing of the backup section becomes simpler without needing to add extra water to reach a separate float switch height. This integrated design costs $100 to 200 more than separate pumps but simplifies installation in smaller sump pits.
Battery backup systems retrofit alongside existing primary pumps without replacing functional equipment. Homeowners with working AC powered pumps don’t need to tear out and replace the entire system to add battery protection. The backup pump installs next to the existing unit in the same pit, its float switch set higher than the primary, and its discharge connects into the existing outlet pipe through a simple tee fitting. This retrofit friendly design means adding backup protection costs $300 to 500 for the pump, battery, and installation compared to $800 to 1,200 for complete dual pump system replacement. The existing primary pump continues handling 95% of the pumping work under normal conditions while the backup stands ready for emergencies.
Comparing AC/DC and DC Only Battery Backup Systems
AC/DC combination systems run on household current when power is available and automatically switch to battery power during outages. These pumps contain internal inverters that convert 12V or 24V DC battery power into 120V AC current to run standard AC motors. The advantage is flexibility since the pump can handle normal conditions using unlimited house power without sitting idle between outages. The disadvantage is efficiency loss through the DC to AC conversion process. Inverters waste 10 to 20% of battery power as heat during the conversion, reducing actual runtime compared to the battery’s theoretical capacity.
DC only systems run exclusively on battery power through motors specifically designed for 12V or 24V operation. These pumps typically install as pure backup units behind a separate AC powered primary pump, sitting idle during normal conditions and activating only when the float switch detects water reaching emergency levels during power failures. DC motors eliminate inverter losses, delivering 10 to 20% longer runtime per amp hour compared to AC/DC systems. A 75 Ah battery running a DC only pump might provide 6 to 7 hours of operation, while the same battery powering an AC/DC pump through an inverter delivers closer to 5 to 6 hours due to conversion losses.
The runtime difference matters during extended outages. An extra hour of backup protection might mean the difference between making it through a storm safely and experiencing flooding during the final hour before power restoration. DC only systems maximize available battery capacity by eliminating the inverter middleman between battery and motor. However, this requires accepting that the pump serves purely as backup rather than helping with normal daily water removal.
System voltage requirements must match battery specifications to prevent equipment damage. Most residential backup pumps operate on 12V DC power, requiring standard 12V deep cycle batteries. Some commercial or high capacity systems use 24V motors requiring two 12V batteries wired in series (positive to negative) to create 24V total. Installing 12V batteries in a 24V system leaves the pump underpowered and unable to lift water effectively. Installing 24V power into a 12V pump destroys the motor within seconds. Always verify voltage requirements before purchasing replacement batteries, since mixing voltages isn’t obvious from external appearance but causes immediate and expensive failure.
When to Upgrade Your Backup Battery Capacity
Several situations signal that current battery capacity provides insufficient protection and upgrading makes practical sense. If power outages regularly last longer than your battery’s runtime, you’re gambling every storm. A home with a 55 Ah battery providing 4 to 5 hours of backup located in an area where typical storm outages last 8 to 12 hours needs capacity upgrades to match actual local conditions. High water tables that cause sump pits to refill in 20 to 30 minutes during heavy rain create frequent cycling that exhausts batteries in half their normal runtime through constant motor operation.
Finished basements shift the cost benefit analysis toward premium backup protection. An unfinished basement containing basic storage might suffer $1,000 to 2,000 in damage from flooding that ruins boxes of
Final Words
Knowing how long sump pump battery backup last gives you realistic protection windows and helps prevent costly flooding surprises.
Your runtime depends on battery capacity, pump efficiency, and how often water forces the pump to cycle.
Test monthly, monitor voltage, and replace batteries every 3-5 years before they fail during the storm you actually need them for.
Match your battery size to local outage patterns and water table conditions.
A properly maintained backup system buys you hours to days of protection when the power drops and the rain keeps coming.
FAQ
How long will a sump pump run on a battery backup?
A sump pump will run on a battery backup for 4-8 hours during continuous operation or 1-3 days during intermittent cycling, depending on battery capacity and water inflow rate. An 84 Ah battery provides around 7 hours of continuous pumping, while a 40 Ah battery lasts less than 4 hours under the same conditions.
Is a sump pump battery backup worth it?
A sump pump battery backup is worth it if you experience power outages during storms, have a finished basement, or live in areas with high water tables. Battery backup systems prevent thousands in flood damage by providing 4-8 hours of continuous protection or several days of intermittent pumping when your primary AC-powered pump fails.
Is it normal for a sump pump to go off every 10 minutes?
A sump pump going off every 10 minutes can be normal during heavy rainfall or in homes with high water tables causing constant seepage. This intermittent cycling extends battery backup runtime significantly compared to continuous operation, potentially providing 1-3 days of protection instead of just 4-8 hours.
How often should I replace my sump pump battery backup?
You should replace your sump pump battery backup every 3-5 years regardless of apparent condition or usage frequency. Aged batteries lose charge capacity progressively, running only 2-3 hours instead of the original 7 hours when new, even with proper maintenance and testing throughout their service life.
What type of battery is best for sump pump backup systems?
AGM (Absorbent Glass Mat) batteries are best for sump pump backup systems because they offer faster recharge capability, longer cycle life, and superior vibration resistance compared to standard sealed lead acid batteries. Marine deep-cycle batteries also work well due to their moisture resistance and durability in harsh basement conditions.
How do I know when my sump pump battery is failing?
Your sump pump battery is failing when voltage readings drop below 12.1 volts, runtime decreases significantly during tests, or the alarm sounds continuously despite power being available. Physical signs include excessive terminal corrosion, battery case bulging, warm batteries during charging, and a sulfur smell during the charging cycle.
Can I use two batteries to extend sump pump backup runtime?
You can use two batteries in parallel configuration to extend sump pump backup runtime by connecting positive to positive and negative to negative terminals. This setup doubles your amp-hour capacity, providing 10-16 hours of continuous runtime or several days of intermittent protection without requiring pump modifications.
How do I test my sump pump battery backup monthly?
Test your sump pump battery backup monthly by pouring water into the pit until the float activates, then timing how long the pump runs and confirming proper water clearance. Record the test date, voltage readings, and runtime to identify performance degradation patterns before complete failure occurs during an actual outage.
What factors reduce sump pump battery runtime?
Factors that reduce sump pump battery runtime include high water inflow rates requiring continuous pumping, cold temperatures reducing capacity by 20-50%, poor ventilation causing heat buildup, aged batteries beyond 3 years, and one-third horsepower pumps drawing 700-900 watts instead of quarter horsepower pumps using 400-600 watts.
Where should I install my sump pump backup battery?
Install your sump pump backup battery on an elevated shelf or platform off the concrete floor in a well-ventilated, dry basement area away from direct water exposure. Good ventilation dissipates charging gases and controls battery temperature, while elevation prevents moisture damage and terminal corrosion that reduces power delivery.
How long does it take to recharge a sump pump battery?
A sump pump battery takes 12-24 hours to reach full capacity after discharge when using the automatic charging system. Smart chargers use staged charging with bulk, absorption, and float phases to prevent overcharge damage, while simple trickle chargers may overcharge batteries and reduce their overall lifespan.
What causes sump pump batteries to fail prematurely?
Sump pump batteries fail prematurely due to extreme temperatures evaporating fluid or reducing charge capacity, moisture exposure causing terminal corrosion, poor ventilation allowing heat accumulation, sulfation buildup from incomplete charging cycles, and deep discharge patterns that stress internal lead plates beyond their designed capacity.