

Most homeowners reach for whatever cleaner is under the sink when they spot mold on their walls, but the wrong product wastes time, damages surfaces, and leaves mold roots alive to grow back in days. The cleaner that works depends on what your wall is made of and how deep the mold has spread. This guide breaks down which products actually kill mold on different surfaces, what safety gear you need before you start scrubbing, and when to stop and call a professional instead of making the problem worse.
Top Mold Cleaners: Product Recommendations and Comparison

| Product/Solution | Active Ingredient | Price Range | Effectiveness Rating | Best Surface Type | Application Method |
|---|---|---|---|---|---|
| Ecolab Mold and Mildew Stain Remover | Sodium hypochlorite blend | Under $5 | High (9/10) | Tile, grout, non-porous surfaces | Spray, wait 30 min, scrub, rinse |
| RMR-86 Instant Mold Stain Remover | Sodium hypochlorite concentrate | $10-$15 | Very High (9.5/10) | All non-porous surfaces | Spray, wait 15 seconds, wipe clean |
| Concrobium Mold Control | Trisodium phosphate | $12-$18 | High (8.5/10) | All surfaces, safe for colored materials | Spray, let dry, scrub if needed |
| CLR Mold & Mildew Clear | Bleach-free formula | $8-$12 | Medium-High (8/10) | Colored grout, painted walls | Spray, wait 5 min, wipe clean |
| 1:1 Vinegar-Water Spray | Acetic acid (5%) | $2-$4 | Medium (7/10) | Painted walls, wallpaper, porous surfaces | Spray twice, wait 30 min each, scrub, rinse |
| 3% Hydrogen Peroxide Spray | Hydrogen peroxide | $3-$5 | Medium-High (7.5/10) | All surfaces, safe for colors | Spray, wait 10 min, scrub, wipe |
| Baking Soda Paste (3:1 ratio) | Sodium bicarbonate | $1-$2 | Medium (6.5/10) | Textured surfaces, grout | Apply paste, scrub, let sit, rinse |
| Borax Mixture | Sodium borate | $4-$6 | High (8/10) | Painted walls, general use | Spray liberally, scrub, spray again, wait 10 min |
| Straight Bleach Solution (1:10 dilution) | Sodium hypochlorite (6%) | $2-$4 | Very High (9/10) | Non-porous surfaces only | Spray, wait 30 min, scrub, rinse thoroughly |
Bleach Safety Precautions
Bleach kills mold fast on non-porous stuff like tile, glass, and sealed concrete. But it creates nasty fumes that need open windows and serious airflow while you’re working. Never mix bleach with ammonia, vinegar, or other cleaners. That combo creates chlorine gas, which can mess up your lungs permanently.
Bleach fades colored grout and fabrics for good, there’s no fixing it after. It needs at least 30 minutes sitting on the mold to actually kill it, not just lighten the stains. Always dilute it right, one part bleach to ten parts water for regular cleaning. Wear rubber gloves and eye protection every time.
Choosing between store-bought products and DIY options depends on how much mold you’re dealing with, what kind of wall surface you have, and what you want to spend. Commercial cleaners like RMR-86 work faster and need way less scrubbing, which helps when you’re tackling a large bathroom or basement. DIY solutions like vinegar and hydrogen peroxide cost less and handle small spots on painted walls or grout lines just fine. They take longer though. Porous surfaces like drywall and concrete respond better to stuff that penetrates deep, like borax mixtures or hydrogen peroxide. Non-porous tile and glass clean up fastest with bleach-based formulas. If you’re working on colored materials or don’t want harsh fumes in your house, stick with vinegar, hydrogen peroxide, or a bleach-free product like Concrobium.
Safety Precautions and Protective Equipment for Mold Cleaning
Mold spores go airborne the second you start scrubbing. Breathing them causes respiratory problems, allergic reactions, and headaches. Even small cleaning jobs kick up thousands of spores into the air around you. Skipping protective gear turns a simple cleaning task into a health risk, especially if you already deal with asthma, allergies, or a weakened immune system.
Black mold releases mycotoxins that cause worse problems than regular household mold. Symptoms include persistent coughing, throat irritation, skin rashes, and in bad cases, neurological issues. You can’t tell by looking whether mold is toxic, so treat every job like it could be.
-
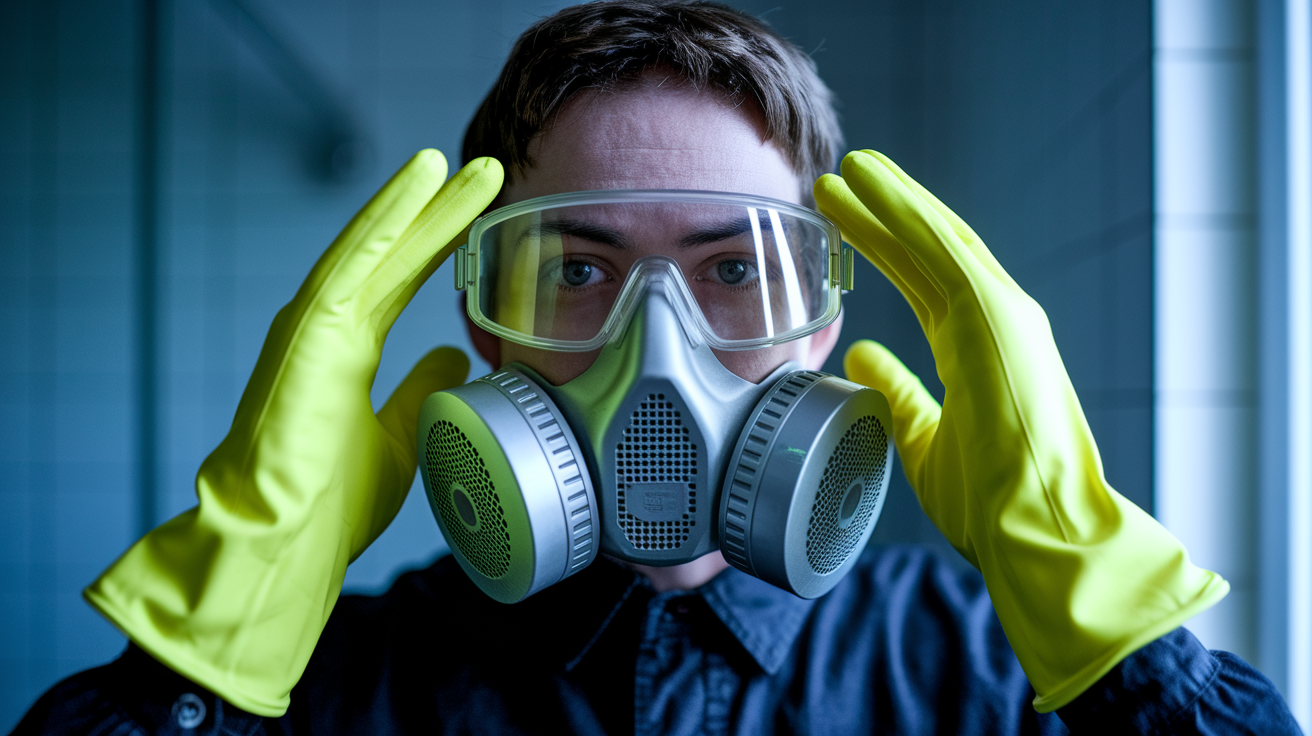
Respirator mask – Use an N-95 or P-100 respirator for any mold patch bigger than a few square feet. Dust masks and cloth face coverings don’t filter mold spores. The respirator needs to seal tight against your face. If you have a beard, it won’t seal right.
-
Eye protection – Wear sealed safety goggles, not regular glasses. Mold spores irritate eyes on contact, and cleaning sprays can splash back into your face while you’re scrubbing.
-
Rubber gloves – Use heavy-duty rubber cleaning gloves that cover your wrists. Thin latex or nitrile gloves tear too easily when you’re scrubbing rough surfaces like concrete.
-
Long sleeves and pants – Cover your skin completely. Mold spores stick to bare skin and clothing, so wear old clothes you can wash in hot water right after or throw away if the job’s big.
-
Ventilation setup – Set a box fan in a window pointing outward before you start. This pushes spore-filled air outside instead of circulating it through your home. Keep the fan running the entire time you work.
Stop and call a professional if mold covers more than 10 square feet of wall space. That’s roughly a 3-by-3-foot area. Also get help if you find mold inside air ducts, behind walls where you can see bulging or water damage, or if it keeps coming back after you’ve cleaned it twice. Black mold that looks dark greenish-black and slimy needs professional equipment and containment procedures. If anyone in your house has serious respiratory problems or immune system issues, don’t risk DIY cleaning on anything larger than a dinner plate.
Wall Surface Types and Cleaner Compatibility

Different wall materials absorb moisture and hold mold differently. Porous surfaces like drywall and concrete let mold roots grow deep into the material. Non-porous surfaces like tile and glass keep mold on the surface where it’s easier to kill and remove. The cleaner that works great on bathroom tile might damage painted drywall or stain concrete, so matching the product to your wall type prevents extra repair work.
Painted and Wallpapered Walls
Painted walls need gentler treatment because harsh chemicals and aggressive scrubbing damage paint and expose the drywall underneath. Bleach can discolor paint and create streaky patches that look worse than the mold stains. Stick with vinegar solutions or the borax mixture that won’t strip paint off.
Mix 2 tablespoons borax with 1/4 cup white vinegar and 2 cups hot water in a spray bottle. Spray it heavily on the moldy area, scrub gently with a soft-bristled brush or sponge, then wipe clean. Spray the same spot again and let it sit for 10 minutes before wiping it dry. This formula kills mold without eating through paint.
For wallpapered walls, test any cleaner on a hidden spot first, behind furniture or in a closet. Too much liquid soaks through wallpaper and loosens the adhesive. Use light misting instead of heavy spraying, and wipe gently instead of scrubbing hard.
Concrete and Masonry Walls
Concrete and brick are porous, which means mold grows into the material instead of sitting on top. You need aggressive scrubbing with a stiff-bristled brush to pull mold out of the tiny holes and pits in the surface. Bleach works well on concrete because the surface can handle harsh chemicals without damage.
Work in small sections, about 2 feet by 2 feet at a time. Spray your cleaner, wait the full contact time, then scrub with firm pressure in circular motions. Concrete in basements stays damp longer than walls upstairs, so check for water coming through the foundation or pooling near the wall base. Cleaning surface mold doesn’t help much if water keeps seeping in and feeding new growth. Understanding Basement Water Damage helps identify whether you have a foundation leak or drainage problem that needs fixing before mold removal makes sense.
After cleaning and drying concrete completely, apply a concrete sealer or mold inhibitor to fill the pores and prevent mold from growing back into the surface.
Tile and Grout Surfaces
Grout is the weak spot on tile walls. The tile itself is non-porous and easy to clean, but grout is rough and porous, so mold grows into it like it does with concrete. Bleach works on white grout but causes permanent fading on colored grout. You can’t reverse that damage.
For colored grout, use hydrogen peroxide or a bleach-free commercial cleaner. Spray it directly on the grout lines, let it sit for the recommended time, then scrub with a grout brush that has stiff, narrow bristles that get down into the grout lines. An old toothbrush works for small areas.
Check the caulk around tub edges and shower corners. If mold’s growing in the caulk instead of just on the surface, the caulk needs to come out and get replaced. You can’t clean mold out of deteriorating caulk.
Bathroom Wall Surfaces
Bathroom walls face constant moisture from showers and baths, plus poor air circulation when exhaust fans aren’t running. Mold grows in the same spots every time: where tile meets caulk, in grout lines near the showerhead, on painted walls above the shower surround, and behind towel bars where condensation collects.
Clean bathroom walls more often than walls in other rooms. Every two weeks if you see early signs of mold. Use your exhaust fan during every shower and leave it running for 15 minutes after you finish. Wipe down tile and walls after showers to remove standing water before it soaks in.
Basement and Below-Grade Walls
Basement walls stay cooler than walls above ground, which makes them collect condensation when humid air hits the cold surface. Poor ventilation means that moisture sits on the walls instead of drying out. Concrete foundation walls are thick and porous. Perfect conditions for deep mold growth.
Run a dehumidifier in the basement year-round if humidity goes above 50 percent. Place it in the center of the space, away from walls, so it pulls moisture from the entire room. Check for water coming through foundation cracks or floor-wall joints, especially after heavy rain. If the wall feels damp or shows white mineral deposits (efflorescence), water’s moving through the concrete from outside.
Before you start any cleaning, test your chosen product on a small hidden area and wait 24 hours. Check for discoloration, paint damage, or surface etching. If the test spot looks fine, proceed with the rest of the wall.
Step-by-Step Application Process for Mold Removal
Rushing through mold cleaning or skipping wait times means mold comes back in a few weeks. The cleaning solution needs time to penetrate the surface and kill mold roots, not just remove the visible discoloration. Proper technique makes the difference between actually killing mold and just spreading it around.
-
Put on protective gear first – Respirator mask, goggles, rubber gloves, and long sleeves go on before you open the cleaning product. Set up your box fan in the window pointing outward and turn it on.
-
Remove loose items and cover what stays – Take down pictures, move furniture away from the wall, and cover floor surfaces with plastic sheeting or old towels. Mold spores and cleaning drips end up everywhere during scrubbing.
-
Lightly mist the moldy area with water – Use a spray bottle filled with plain water to dampen the mold before you apply cleaner. This keeps spores from going airborne when you start scrubbing. Don’t soak the wall, just a light misting.
-
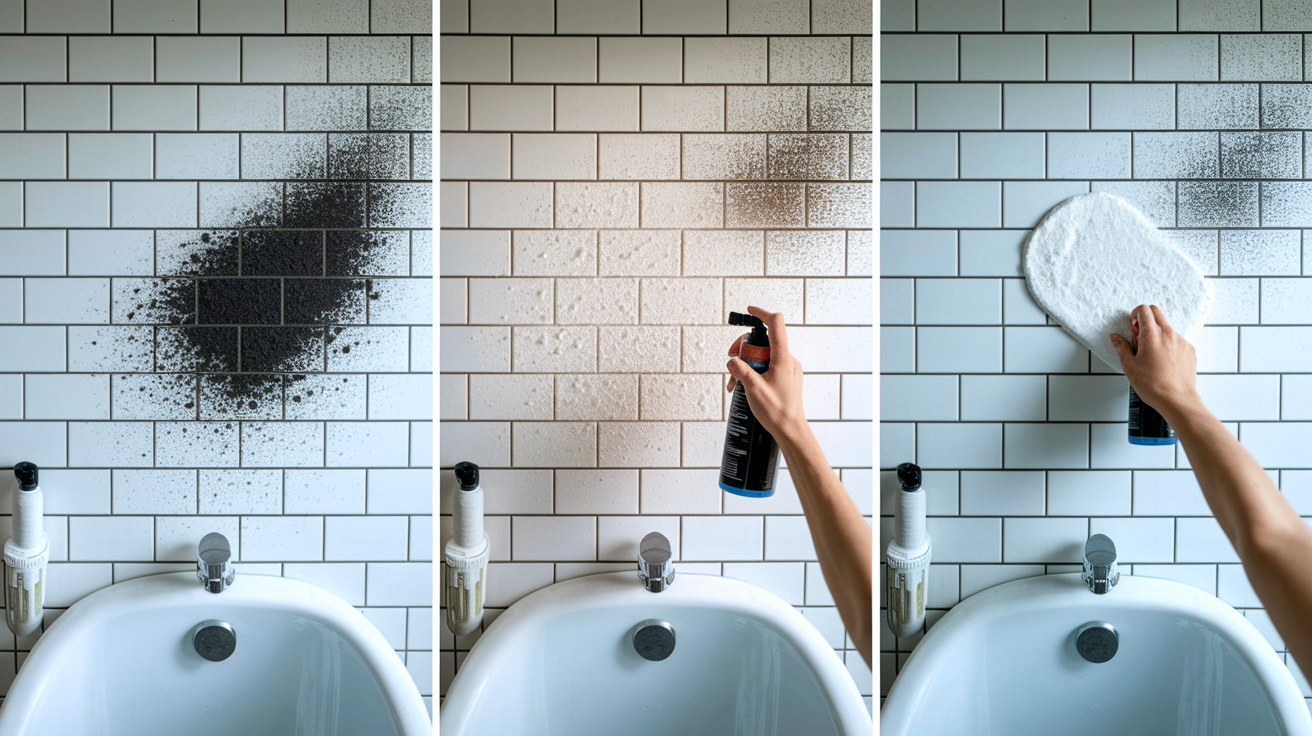
Apply your cleaning solution thoroughly – Spray or brush the cleaner directly onto all visible mold, plus a few inches beyond the edges where mold might be starting. Make sure the entire affected area’s wet with cleaner, not just damp. For large areas, work in sections so the cleaner doesn’t dry out before you finish.
-
Wait the full contact time – Bleach needs at least 30 minutes to kill mold. Vinegar requires two applications of 30 minutes each, so 60 minutes total. Hydrogen peroxide needs 10 minutes. Set a timer. Walking away and letting the cleaner do its job is the most important part of the process.
-
Scrub with appropriate pressure and tools – Use a stiff-bristled brush for concrete and grout. Use a softer brush or sponge for painted walls. Scrub in circular motions, working from the outside edges of the mold patch toward the center. Apply firm, steady pressure but don’t scrub so hard you damage the wall surface.
-
Rinse thoroughly with clean water – Wipe the wall with a clean, damp cloth or sponge to remove all cleaning solution residue. Change your rinse water frequently. Leaving cleaner on the wall can damage paint or leave streaks. For concrete, you can rinse with a spray bottle or damp cloth.
-
Dry the wall completely – Point a box fan or floor fan directly at the cleaned wall. Run a dehumidifier in the room. Open windows if weather permits. The wall needs to dry completely within 24 hours. Touch the wall to check. It should feel completely dry, not cool or slightly damp.
For stubborn mold that doesn’t come completely clean after the first treatment, repeat the entire process after the wall dries. If mold remains after two complete treatments with proper contact times and scrubbing, the mold’s grown too deep into the material. At that point, the affected drywall or wallpaper needs removal and replacement, not just surface cleaning. Concrete that won’t come clean may need a concrete grinder or professional equipment to remove the contaminated surface layer.
Identifying Mold Types and Severity on Walls

Knowing what kind of mold you have helps you choose the right cleaner and decide whether DIY cleaning is safe. Different mold species look and behave differently, and some require professional handling instead of basic household cleaners and elbow grease.
Household mold appears in black, green, blue, red, white, or gray patches. Texture varies from fuzzy like peach skin to slimy and wet to powdery like dust. Common types include Alternaria (dark spots with a fuzzy texture), Aspergillus (gray or green powdery appearance), Mucor (white or gray with thick, fast-spreading patches), and Serpula (yellow or brown with a stringy texture). Most of these respond to standard cleaning methods with bleach, vinegar, or commercial removers.
Black mold (Stachybotrys chartarum) shows up as dark greenish-black patches that look slimy or wet. It grows on materials that stay wet for extended periods, like drywall after a pipe leak or concrete walls in chronically damp basements. Black mold poses serious health risks to people with weakened immune systems, chronic respiratory conditions, or mold allergies. It releases mycotoxins that cause worse symptoms than regular household mold. Persistent coughing, wheezing, skin irritation, and chronic fatigue. If you find black mold that looks wet and slimy rather than dry and powdery, treat it cautiously and consider professional testing.
Several factors indicate mold severity has moved beyond safe DIY cleaning:
Size exceeds 10 square feet – If the mold patch measures larger than a 3-by-3-foot square, you’re dealing with an infestation that needs professional containment and removal procedures.
Visible structural damage – Walls that feel soft, bulge outward, or show crumbling material indicate the mold’s compromised the structural integrity behind the surface.
Repeated growth in the same location – Mold that comes back within weeks after thorough cleaning means moisture’s continuously feeding it from inside the wall or from a hidden leak.
Mold behind walls – If you see water stains, smell musty odors, or notice wall damage but can’t see surface mold, it’s growing inside the wall cavity where DIY cleaning can’t reach it.
Mildew and mold get confused because they look similar, but mildew’s easier to clean. Mildew appears as flat, powdery gray or white patches on surfaces. It stays on the surface and wipes off with basic bathroom cleaners. Mold grows roots into materials, appears raised or fuzzy, and comes in darker colors. If it wipes off easily with a wet cloth and regular cleaner, it’s probably mildew, not mold.
Preventing Mold Reoccurrence on Cleaned Walls

Killing existing mold accomplishes nothing if moisture keeps feeding new growth in the same spot. Prevention focuses on controlling the conditions mold needs to grow: moisture, poor air circulation, and organic material to feed on.
Permanent mold prevention requires fixing the underlying moisture problem. Cleaning surface mold without stopping water intrusion or high humidity means you’ll be cleaning the same wall again in a month. Check for leaks first, then address ventilation and humidity control.
-
Apply mold inhibitor or sealer to cleaned surfaces – After concrete walls dry completely, brush or spray on a concrete sealer or specific mold inhibitor product. This fills the pores in concrete and masonry, making it harder for mold to attach and grow. Reapply every 2-3 years.
-
Use mold-resistant paint with mildewcide – Paint bathrooms, basements, and other moisture-prone areas with paint that contains mildewcide. This works especially well in bathrooms where shower moisture regularly hits painted walls and in shaded exterior walls that stay damp. Regular paint provides no mold protection.
-
Fix plumbing leaks immediately – Check under sinks, around toilets, behind washing machines, and anywhere pipes run through walls. A small drip that seems insignificant keeps building moisture inside walls where you can’t see it until mold appears. Fix leaks the same day you notice them.
-
Maintain humidity between 30-50 percent – Buy a hygrometer to monitor humidity levels. Run dehumidifiers when humidity climbs above 50 percent. This matters especially in basements, laundry rooms, and bathrooms. Empty dehumidifier tanks daily or run a drainage hose to a floor drain.
-
Use exhaust fans during and after moisture-generating activities – Turn on bathroom exhaust fans before you start showering and leave them running for 15 minutes after you finish. Do the same in kitchens when cooking generates steam. These fans remove moisture before it condenses on walls and ceilings.
-
Ensure proper attic and crawlspace ventilation – Moisture rises from lower floors and collects in attics and crawlspaces. Install or improve ventilation in these spaces so moisture escapes outside instead of condensing on wood and insulation. Check that soffit vents aren’t blocked by insulation.
-
Run dehumidifiers in basements and moisture-prone areas – Basements naturally have higher humidity because they’re underground and stay cooler. A dehumidifier that runs continuously during humid months prevents moisture buildup on walls and floors. Size the dehumidifier correctly for your square footage.
-
Route water away from your foundation – Make sure gutters are clean and downspouts extend at least 6 feet from the house. Grade soil so it slopes away from the foundation. Water pooling near the foundation seeps through concrete and creates moisture problems inside basement walls.
-
Inspect plumbing fixtures, roofs, and windows monthly – Walk around your house once a month checking for water stains, damp spots, or musty smells. Catching small leaks early prevents major mold problems later. Preventing Water Damage in Your Home covers leak detection and maintenance routines that stop water problems before mold starts.
-
Improve air circulation with fans – Still air in closets, corners, and behind furniture allows moisture to settle on walls. Run ceiling fans or place small box fans in problem areas to keep air moving. This matters especially in rooms that don’t get much natural airflow.
| Prevention Method | Frequency | Difficulty Level | Estimated Cost Range |
|---|---|---|---|
| Mold-resistant paint application | Every 5-7 years | Medium (DIY-friendly) | $30-$60 per gallon |
| Dehumidifier operation | Daily during humid months | Easy | $150-$300 unit, $10-$30/month electricity |
| Exhaust fan usage | During and after showers/cooking | Easy | No cost (existing) or $50-$200 installation |
| Leak inspections | Monthly | Easy | No cost for self-inspection |
| Humidity monitoring with hygrometer | Check weekly | Easy | $10-$30 for device |
| Ventilation improvements | One-time or as needed | Medium to Hard | $50-$500 depending on scope |
Check moisture-prone areas regularly even after prevention measures are in place. Look behind bathroom vanities, under sinks, in basement corners, and around windows every few weeks. Catching mold when it’s a small spot the size of a quarter takes five minutes to clean. Ignoring it until it spreads across several square feet means hours of work or professional help.
After you finish cleaning mold from concrete, brick, or block walls, apply a penetrating concrete sealer within a week. The sealer soaks into the porous surface and creates a barrier that repels water and prevents mold from taking hold again. Choose a breathable sealer that allows moisture vapor to escape, not a surface coating that traps moisture underneath. For painted walls, apply mildew-resistant paint or add a mildewcide additive to regular paint before repainting cleaned areas. This creates long-term protection rather than just covering up the problem temporarily.
Professional Mold Remediation: When to Call Experts
DIY mold cleaning works for small surface mold on accessible walls. But some situations require equipment, containment procedures, and expertise that go beyond household cleaners and scrub brushes. Trying to handle a large infestation yourself risks spreading mold throughout your home and exposing your family to health hazards.
Professional mold remediation makes sense when the scale or complexity of the problem exceeds what basic cleaning can accomplish. Pros bring commercial-grade HEPA filtration equipment, proper containment barriers to prevent cross-contamination, industrial dehumidifiers, and moisture meters to verify complete drying. They also carry liability insurance, which matters if the mold problem’s tied to a structural issue or insurance claim.
Call a licensed mold remediation company if any of these situations apply:
Mold covers more than 10 square feet – This is the EPA guideline for DIY safety limits. Beyond this size, proper containment and air filtration equipment becomes necessary to prevent spreading spores throughout your home during cleaning.
Mold is growing inside HVAC ducts or systems – Mold in air ducts spreads spores every time the system runs. Cleaning requires special equipment to access ductwork and prevent contaminating the entire ventilation system.
Structural damage or hidden mold behind walls – If drywall feels soft, walls bulge, or you smell mold but can’t see it, the problem’s inside wall cavities. This requires removing and replacing contaminated materials, not just surface cleaning.
Mold keeps coming back after multiple cleanings – Recurring mold in the same location means either the moisture source wasn’t identified or the mold’s penetrated deep into building materials. Pros have moisture meters and thermal imaging to find hidden water sources.
Anyone in the household has immune system problems or severe respiratory conditions – Mold exposure during cleaning poses serious health risks to people with compromised immune systems, asthma, COPD, or chronic allergies. Professional containment protects vulnerable occupants.
Black mold (Stachybotrys chartarum) is present – Dark greenish-black mold that appears slimy requires professional testing to confirm the species and professional removal because of mycotoxin risks.
Mold resulted from sewage backup or contaminated water – Sewage contains bacteria and pathogens in addition to mold. This requires professional biohazard cleaning, not standard mold removal methods.
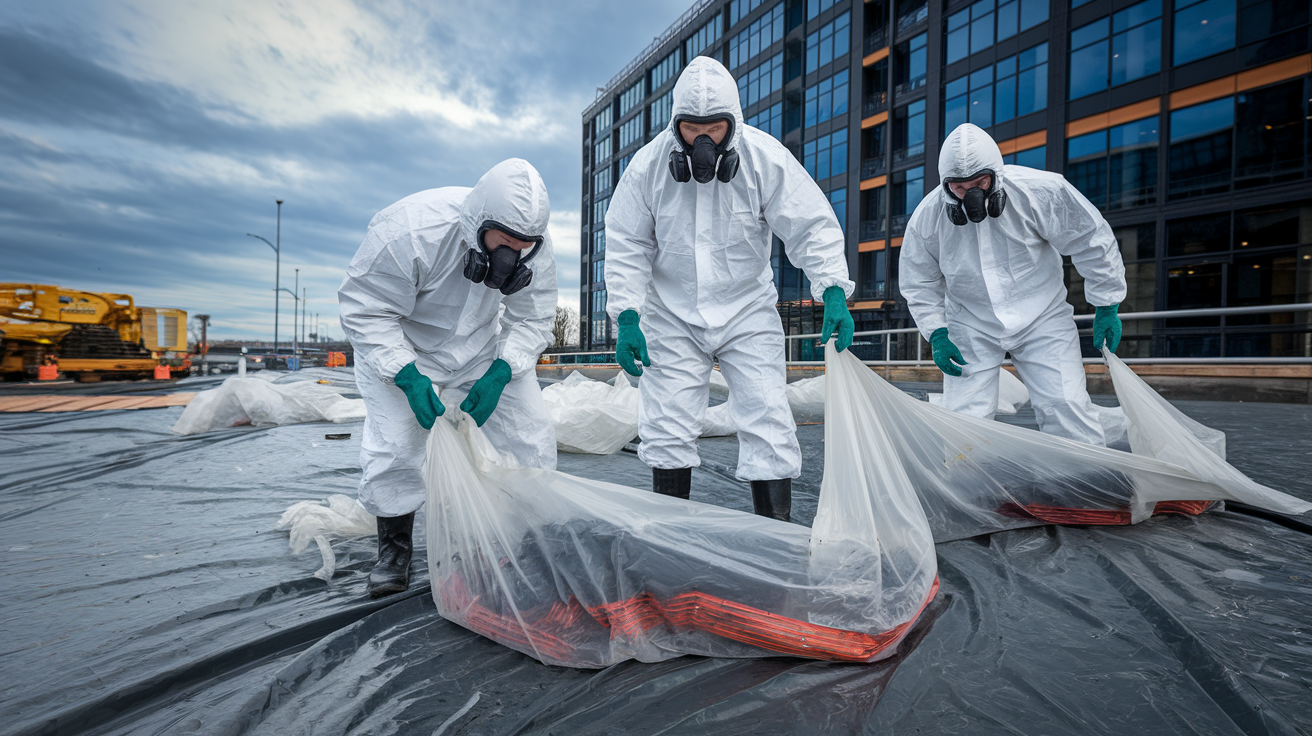
Professional remediators set up containment barriers using heavy plastic sheeting to seal off the work area from the rest of the house. They use negative air machines with HEPA filters that continuously pull air from the contained area and exhaust it outside, preventing spores from spreading to clean areas. This equipment costs thousands of dollars and requires training to use effectively.
Contaminated materials like drywall, insulation, and carpeting get removed and sealed in 6-mil plastic before disposal. Professionals bag everything in heavy-duty contractor bags, often double-bagging to prevent tears during transport. They use HEPA-filtered vacuums rated for mold spores, not shop vacs that blow particles back into the air. After removal, they treat remaining surfaces with antimicrobial solutions and verify complete drying using moisture meters before allowing reconstruction.
Professional mold remediation costs vary widely based on the size of the affected area and extent of damage. Small jobs in a single room might run $500 to $1,500. Large infestations requiring wall removal, duct cleaning, or structural drying can cost $3,000 to $10,000 or more. Many homeowners insurance policies cover mold remediation if it resulted from a sudden covered event like a burst pipe, but they typically exclude mold from long-term moisture problems or maintenance issues. Check your policy and document everything with photos before cleanup starts.
Common Mold Cleaning Mistakes and How to Avoid Them

Small errors during mold cleaning reduce effectiveness, spread spores to new areas, or create safety hazards. Knowing what not to do matters as much as following the correct steps, especially when you’re working with chemicals or disturbing established mold growth.
Mistakes that turn a manageable cleaning job into a bigger problem:
Mixing bleach with other cleaners – Combining bleach with ammonia, vinegar, or acidic cleaners produces toxic chlorine gas. This isn’t a minor irritant. It burns lungs and can cause respiratory failure. Use one product at a time, rinse the surface completely before switching products, and never mix chemicals in the same bucket or spray bottle.
Not allowing enough contact time before scrubbing – Spraying cleaner and immediately wiping it off removes surface discoloration but doesn’t kill mold roots. Bleach needs 30 minutes, vinegar needs 60 minutes total with two applications. Set a timer and walk away.
Dry scrubbing without dampening the area first – Scrubbing dry mold launches thousands of spores into the air where they float for hours and land on clean surfaces throughout the room. Always mist the moldy area with plain water before applying cleaner and before scrubbing.
Working without adequate ventilation – Cleaning mold in a closed room with no air movement concentrates spores and chemical fumes. Open windows and run a fan pointed outward before you start. Don’t just crack a window. Create actual airflow.
Not addressing the moisture source feeding the mold – Cleaning mold while a pipe leak continues or humidity stays high means the mold grows back immediately. Find and fix the water problem first, or you’re wasting time and money on repeated cleanings.
Painting over mold without removing it – Paint doesn’t kill mold. It temporarily hides the discoloration until mold grows through the new paint layer. Mold also prevents paint from adhering properly, so it peels off within weeks.
Stopping the cleaning process before walls are completely dry – Damp walls that feel slightly cool to the touch still contain enough moisture for mold to regrow. Use fans and dehumidifiers until the wall feels room temperature and completely dry.
Reusing sponges, brushes, and cleaning cloths without proper decontamination – Cleaning tools become contaminated with mold spores during scrubbing. Reusing them spreads spores to new areas. Either dispose of cleaning materials after a mold job or soak them in bleach solution for at least 10 minutes before washing.
Use a garden sprayer or spray bottle to lightly mist moldy areas with plain water before you start scrubbing. The water weighs down spores so they don’t go airborne as easily. This technique, called “misting for containment,” keeps the immediate work area from filling with floating spores. Mist again during scrubbing if the area starts to dry out.
Box fans used during mold cleanup become permanently contaminated with spores that settle on the motor housing and blades. Cleaning these spores off is nearly impossible because they get into the internal motor components. Plan to throw the fan away after the job finishes. Place it in a window pointing outward to exhaust contaminated air, tape cardboard or plastic around the edges to create a seal, and run it on high during the entire cleaning process. When you finish, turn it off, seal it in plastic, and put it in the trash.
Root causes matter more than surface appearance. If mold keeps appearing in the same spot, you’re treating symptoms without fixing the problem. Common hidden issues include condensation from missing insulation, tiny roof leaks that only appear during wind-driven rain, plumbing condensation on cold pipes, or foundation cracks that let groundwater through. Cleaning surface mold repeatedly without identifying why moisture keeps appearing in that location wastes effort and money.
Cost Comparison and Product Availability for Mold Cleaners

Budget matters when you’re deciding between commercial products and homemade solutions. The cheapest option that actually kills mold saves money over products that just remove stains without eliminating the problem.
| Product Type | Price Range | Where to Buy | Coverage Area |
|---|---|---|---|
| Ecolab Mold and Mildew Stain Remover | Under $5 | Walmart, grocery stores, online | 50-75 sq ft per bottle |
| RMR-86, Concrobium, CLR brands | $10-$18 | Home Depot, Lowe’s, Amazon | 100-200 sq ft per bottle |
| Household bleach (diluted 1:10) | $2-$4 | Any grocery or hardware store | 300+ sq ft per gallon diluted |
| White vinegar (5% acidity) | $2-$4 per gallon | Grocery stores, warehouse stores | 200+ sq ft per gallon |
Final Words
Picking the best cleaner for mold on walls comes down to what you’re dealing with and where it’s growing. Non-porous surfaces like tile respond well to bleach or commercial sprays. Painted drywall usually does better with vinegar or borax mixtures that won’t cause fading or damage.
Whatever product you choose, give it enough contact time, scrub thoroughly, and dry everything completely before calling it done. And if the mold keeps coming back or covers more than 10 square feet, stop and bring in a pro.
Fix the moisture source, keep humidity in check, and you’ll stay ahead of the next round.
FAQ
What kills mold permanently on walls?
A: Killing mold permanently on walls requires removing the mold, eliminating the moisture source, and applying mold-resistant sealants or paint. White vinegar, hydrogen peroxide, bleach on non-porous surfaces, and commercial mold removers effectively kill existing mold, but mold will return if you don’t fix leaks, control humidity, and improve ventilation in the affected area.
How do you clean black mold on walls?
A: To clean black mold on walls, wear N-95 respirator, goggles, and rubber gloves, then spray the area with undiluted white vinegar or 3% hydrogen peroxide and let it sit for 60 minutes. Scrub with a stiff brush, rinse with clean water, and dry completely with fans or a dehumidifier. For infestations larger than 10 square feet or health concerns, call a professional mold remediation service instead of attempting DIY cleaning.
Is bleach or vinegar better to kill black mold?
A: Vinegar is better than bleach for killing black mold on most wall surfaces because it penetrates porous materials like drywall and concrete without producing harmful fumes or causing discoloration. Bleach kills mold quickly on non-porous surfaces like tile but doesn’t penetrate porous materials, requires 30-minute contact time, produces dangerous fumes, and can fade colored grout or painted surfaces.
How do you get mold off of a painted wall?
A: To get mold off a painted wall, mix 2 tablespoons borax with 1/4 cup white vinegar and 2 cups hot water, spray the solution on the moldy area, and let it sit for 30 minutes. Gently scrub with a soft brush or sponge, rinse with clean water on a damp cloth, and dry thoroughly with fans. Avoid bleach solutions on painted walls as they can cause discoloration and damage the paint finish.
What is the most effective commercial mold cleaner for walls?
A: The most effective commercial mold cleaners for walls include RMR-86 for fast mold stain removal, Concrobium for residual protection on porous surfaces, and Ecolab Mold and Mildew Stain Remover for budget-friendly bathroom cleaning under $5. Choose based on your wall surface type, with hydrogen peroxide or vinegar-based products working best on painted walls and aggressive bleach-based cleaners suited for tile and non-porous bathroom surfaces.
How long should mold cleaner sit on walls before scrubbing?
A: Mold cleaner should sit on walls for at least 30 minutes for bleach solutions and 60 minutes total for vinegar treatments, which require two 30-minute applications. Hydrogen peroxide needs 10-15 minutes of contact time, while commercial products have specific dwell times listed on labels. Proper contact time allows the cleaning solution to penetrate and kill mold spores before you scrub the surface.
What protective equipment do you need for cleaning mold on walls?
A: For cleaning mold on walls, you need an N-95 or P-100 respirator mask, safety goggles without ventilation holes, rubber gloves that extend past your wrists, and old clothing you can discard afterward. Set a box fan in a window to blow contaminated air outside, open doors and windows for cross-ventilation, and seal off doorways to other rooms with plastic sheeting to prevent spore spread.
Can you use bleach on all types of wall surfaces?
A: You cannot use bleach on all wall surfaces because it damages painted walls, causes fading on colored grout, and doesn’t penetrate porous materials like drywall or concrete effectively. Use bleach only on non-porous surfaces like ceramic tile, glass, or sealed concrete, and always dilute properly with water. For painted walls, drywall, and wallpapered surfaces, choose vinegar, hydrogen peroxide, or borax-based solutions instead.
How do you prevent mold from returning after cleaning walls?
A: To prevent mold from returning after cleaning walls, fix all water leaks immediately, maintain indoor humidity between 30-50 percent using a dehumidifier, and run exhaust fans during and after showers or cooking. Apply mold-resistant paint or sealant to cleaned surfaces, improve air circulation with fans, route water away from your foundation, and inspect plumbing fixtures, roofs, and windows monthly for new leaks or moisture problems.
When should you call a professional for mold on walls instead of cleaning it yourself?
A: You should call a professional for mold on walls when the affected area exceeds 10 square feet, mold appears inside HVAC ducts or behind walls, or you’ve cleaned the same spot multiple times and mold keeps returning. Also call a pro for black mold presence, anyone in your home with respiratory conditions or weakened immune systems, sewage-related water damage, or visible structural damage like warping or sagging walls.
What is the difference between mold and mildew on walls?
A: Mold and mildew on walls differ in appearance and severity, with mildew appearing as flat, powdery gray or white patches that wipe away easily, while mold grows in raised, fuzzy or slimy patches in black, green, blue, or red colors. Mildew stays on surfaces and responds to simple cleaning, but mold penetrates porous materials like drywall and requires more aggressive removal methods and moisture control to prevent return.
How do you dry walls completely after mold cleaning?
A: To dry walls completely after mold cleaning, position box fans or oscillating fans directly at the cleaned surface and run a dehumidifier in the room for 24-48 hours minimum. Open windows for cross-ventilation if outdoor humidity is low, and use a moisture meter to confirm the wall registers below 16 percent moisture content before sealing or painting. Never close up or paint damp walls because trapped moisture causes mold to return inside the wall cavity.
What household items can you use to clean mold off walls?
A: Household items you can use to clean mold off walls include undiluted white vinegar, 3% hydrogen peroxide, a paste of baking soda and water in a 3:1 ratio, or a solution of 2 tablespoons borax, 1/4 cup white vinegar, and 2 cups hot water. These DIY options cost less than commercial cleaners, work on most wall surfaces including painted walls, and don’t produce harsh fumes like bleach-based products.
How do you clean mold from concrete basement walls?
A: To clean mold from concrete basement walls, use a stiff-bristled brush with diluted bleach solution or hydrogen peroxide and work in small sections with firm scrubbing pressure to penetrate the porous surface. After scrubbing, rinse with clean water, dry thoroughly with fans and a dehumidifier, then apply a concrete sealer or mold inhibitor to prevent future growth. Fix foundation leaks, improve ventilation, and control basement humidity below 50 percent to stop mold from returning.
Should you mix bleach and vinegar to clean mold?
A: You should never mix bleach and vinegar to clean mold because combining them creates toxic chlorine gas that causes respiratory damage, eye irritation, and serious health emergencies. Use either bleach or vinegar separately, never together or in sequence on the same surface without thorough rinsing between applications. Choose vinegar for porous surfaces like drywall and painted walls, or bleach only for non-porous surfaces like tile with proper ventilation.
What causes mold to grow on bathroom walls?
A: Mold grows on bathroom walls due to high humidity from showering and bathing, poor ventilation, water leaks from plumbing or roof damage, and inadequate airflow in isolated corners. Common bathroom mold locations include tile grout, caulk around tubs and sinks, painted or wallpapered walls, and ceiling corners where moisture condenses. Running exhaust fans during and for 30 minutes after showers, fixing leaks immediately, and maintaining humidity below 50 percent prevents bathroom mold growth.
How much does professional mold remediation cost compared to DIY cleaning?
A: Professional mold remediation costs $500-$6,000 depending on the affected area size and severity, while DIY cleaning costs $5-$50 for cleaning supplies and protective equipment for small areas under 10 square feet. Commercial mold removers range from $5-$30 per bottle, household cleaners like vinegar cost under $5, and N-95 respirators run $15-$40 for multi-packs. DIY methods work for surface mold on accessible walls, but hidden mold, large infestations, or structural damage require professional equipment and expertise.
What is the best cleaner for mold on painted walls?
A: The best cleaner for mold on painted walls is a borax solution made with 2 tablespoons borax, 1/4 cup white vinegar, and 2 cups hot water, or undiluted white vinegar sprayed directly on the mold. These gentle options kill mold without damaging paint, causing discoloration, or producing harsh fumes. Avoid bleach on painted walls because it strips color, damages the finish, and doesn’t penetrate paint to reach mold underneath.
How do you know if mold on walls is toxic black mold?
A: Toxic black mold appears as dark greenish-black or charcoal-colored patches with a slimy or wet texture, often growing in circular patterns on drywall, wood, or ceiling tiles in areas with chronic moisture problems. Black mold releases a strong musty odor and typically appears after water damage, roof leaks, or plumbing failures. If you suspect black mold, don’t disturb it yourself because it releases harmful mycotoxins when scraped or scrubbed—call a professional for testing and safe removal.
