

You just found mold on your wall. You scrubbed it clean and it’s gone. So can you paint over it now and move on? Not safely. Painting over a spot that had mold only works if you’ve removed every trace of growth, eliminated the moisture that caused it, verified actual dryness with a meter, and treated the surface before primer goes on. Skip any of those steps and you’re just hiding a problem that’s still growing underneath your fresh coat.
Painting Over Mold After Cleaning: When It’s Safe and What Must Happen First
Yes, you can paint over areas that had mold. But there’s a process you can’t skip. You need complete mold removal (not just wiping the surface), elimination of whatever moisture caused it, verified dryness using actual measurement tools, and antimicrobial treatment before primer goes on. Miss any of these and you’re just covering up the problem temporarily.
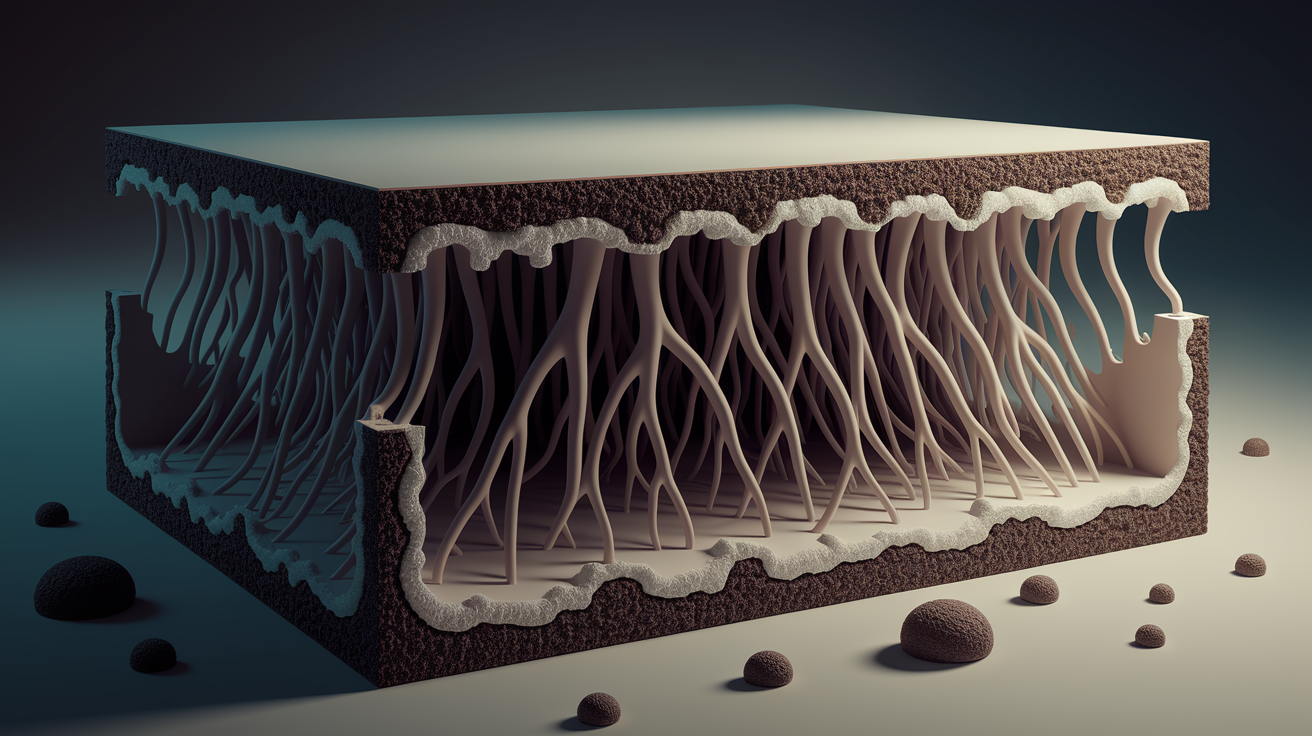
Here’s why the process matters. Mold sends root structures called hyphae deep into porous stuff like drywall and wood. These networks spread beneath what you can see, where a quick spray and wipe won’t touch them. Paint only covers the top layer. The EPA confirms that mold must be removed from surfaces before you paint or seal, because paint applied over active mold will fail. You’re not covering a stain. You’re trying to seal a living organism that feeds on moisture and keeps growing underneath your fresh coat.
Active leaks, condensation, poor ventilation, or high humidity created the mold initially. If you don’t identify and completely fix these moisture sources, you’re setting up the exact same conditions. A leaking supply line behind a wall, condensation from an unvented bathroom, or basement humidity above 60% will bring mold right back no matter how good your paint is. Fix the water problem first or you’ll be repainting the same spot in six months.
After moisture sources are gone and mold is removed, surfaces must be completely dry before primer touches them. That means 48 to 72 hours minimum with fans running and windows open. Touch the surface. It should feel room temperature, not cool or damp. Working on drywall that got soaked? You might need a full week of drying time. Moisture trapped under paint creates exactly what mold needs to come back stronger.
Paint applied over bad remediation will bubble, peel, and crack within weeks to months. You’ll see the paint lift at the edges first, then watch discoloration bleed through as mold continues underneath. The health risks don’t stop because you can’t see it anymore. You end up tearing out the new paint, removing more material than you would’ve initially, and starting over with proper remediation at way higher cost.
Health Risks of Painting Over Insufficiently Treated Mold

The CDC links mold exposure to upper respiratory symptoms, increased asthma attacks, and allergic reactions including sneezing, runny nose, and skin irritation. People with compromised immune systems face serious infection risks. Painting over mold doesn’t eliminate these hazards. The organism stays alive under the paint film, doing exactly what it did before you covered it.
Mold continues releasing airborne spores and potential mycotoxins into your living space even when you can’t see it. Paint isn’t an airtight seal. Spores find their way through tiny cracks, around edges, and through the paint itself as it breaks down. You’re breathing the same contaminated air, just without the visual reminder.
Children, elderly family members, and anyone with existing respiratory conditions face heightened risks. If someone in your household has asthma, expect more frequent attacks. If anyone develops unexplained coughing, wheezing, or skin rashes that improve when they leave the house, you’re looking at a mold problem that needs proper remediation.
Identifying and Fixing Moisture Sources Before Any Remediation
Active moisture sources will bring mold back regardless of how thoroughly you clean or how good your paint is. You can scrub every visible spore off the wall, apply the best antimicrobial primer available, and use premium mold resistant paint. If water is still getting into that spot, mold will return. Moisture elimination is the foundation, and it’s the step most DIY efforts skip because it’s less visible than the stain on the wall.
Fix water leaks within 24 to 48 hours to prevent mold from establishing in the first place. Keep indoor humidity between 30% and 50%. Run exhaust fans in bathrooms during showers and for 20 minutes after. Make sure your kitchen range hood vents outside, not into the attic. These aren’t optional. They’re the baseline conditions that determine whether mold can grow in your home.
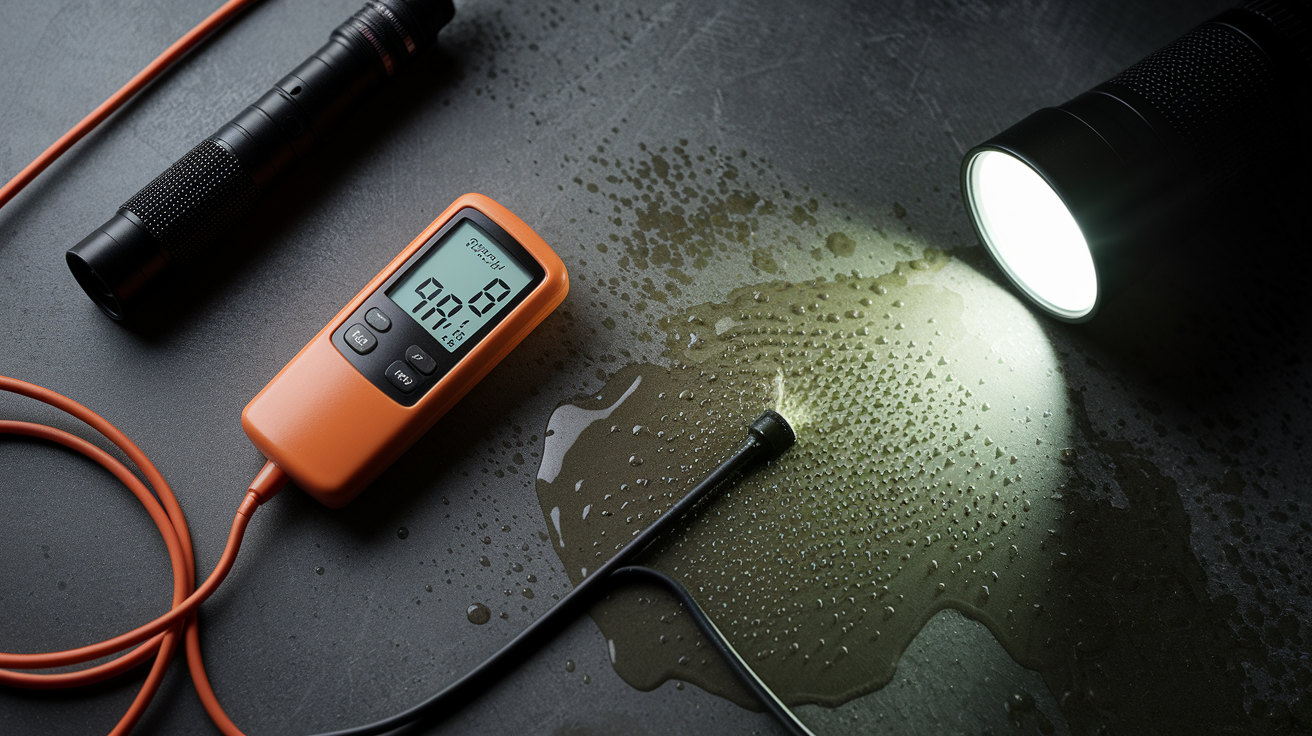
Before you proceed to any cleaning or painting, verify that moisture issues are actually resolved. Use a moisture meter to check readings in the affected area. Wood should measure below 16%. Drywall should be below 1%. Touch the surface at different times of day to check for condensation patterns. Look for water stains that might indicate an active leak you haven’t found yet. If you see any sign of ongoing moisture, stop and find the source.
Common moisture sources requiring identification and repair:
• Leaking supply or drain pipes hidden behind walls, under sinks, or in crawl spaces
• Roof penetrations and flashing failures around chimneys, vents, and skylights
• Window and door seal failures that let rain penetrate during storms
• Condensation from temperature differentials where warm humid air meets cold surfaces
• Inadequate bathroom or kitchen ventilation that traps humidity after showers and cooking
• Basement seepage or foundation cracks that let groundwater enter
• Elevated ambient humidity above 50% from insufficient whole house ventilation
No cleaning should begin until moisture sources are completely eliminated and the area has been verified dry for at least 48 hours. You’re not ready to start removing mold until you’ve removed what caused it.
Proper Mold Removal Steps Before Painting Is Safe

You need to understand the difference between surface cleanable mold and deep penetration that requires material replacement. Mold on non porous surfaces like metal, glass, or sealed tile can be scrubbed off. Mold on porous materials like drywall and wood sends those hyphae networks deep into the material, where cleaning solutions can’t reach. If you see mold covering more than the surface layer of drywall, you’re cutting it out, not cleaning it.
Put on an N95 respirator mask, safety goggles without ventilation holes, and rubber gloves before you touch anything. Mold remediation stirs up concentrated spores that you don’t want in your lungs, eyes, or on your skin.
Steps for proper mold removal on non porous surfaces:
- Assess the extent and depth of mold penetration by checking how far staining goes into the material
- Put on protective equipment including N95 respirator, goggles, and gloves before disturbing any mold
- Apply appropriate cleaning solution such as detergent and water, hydrogen peroxide, or a commercial mold cleaner to the affected area
- Scrub thoroughly with a stiff brush to remove all visible growth and staining until the surface shows no discoloration
- Rinse with clean water and wipe dry, checking carefully that no residual mold or staining remains
- Allow a minimum 48 to 72 hours of drying time with fans running and windows open to pull moisture out of the material
Porous materials like drywall with deep mold penetration must be cut out and replaced, not cleaned. If you see black or green staining that goes into the paper facing of drywall, or if mold covers more than 10 square feet, you’re removing that section completely. Cut at least 12 inches beyond visible mold in all directions to make sure you’re getting the full extent of growth. Those hyphae spread farther than you can see, and surface treatments won’t kill what’s embedded.
Testing Surface Dryness Before Applying Primer and Paint

Painting over damp surfaces traps moisture between the material and the paint film, creating the perfect environment for mold regrowth. You can’t see moisture content with your eyes. The surface might look dry while still holding 5% to 10% moisture content in the substrate, which is more than enough to support mold growth.
Visual inspection gives you preliminary information. The surface should show no water stains, no darkened areas that indicate dampness, and no visible condensation. Touch the wall with your palm. It should feel room temperature. If it feels cool or clammy, moisture is evaporating from the material and the surface isn’t dry yet.
Use a moisture meter for quantitative verification on porous materials. Pin type meters work well for drywall and wood. Press the pins into the surface at several locations across the affected area and at the edges. Wood should read below 16% moisture content. Drywall should be below 1%. Some meters display actual moisture percentages. Others use a scale where readings below 10 indicate dry conditions suitable for painting. Check the manufacturer’s guidance for your specific meter.
Plan for minimum drying periods of 48 to 72 hours after cleaning, with fans running and windows open to move air across the surface. Materials with deep moisture penetration need longer. A basement wall that got soaked from exterior water intrusion might need a full week or more to dry completely, especially if outdoor humidity is high. Don’t rush this step because you’re tired of looking at bare drywall. Moisture trapped under paint guarantees you’ll be back here doing this whole process again in a few months.
Required Safety Equipment and Ventilation During the Process

Mold remediation work exposes you to concentrated spores released when you disturb growth and scrub surfaces. The quantity of spores in the air during active cleaning is significantly higher than normal background levels in the home. You need respiratory protection that filters particles down to 0.3 microns, which is where N95 and higher respirators operate. Dust masks don’t provide adequate protection. Neither do surgical masks.
Ventilation requirements include opening windows in the work area and running exhaust fans to push contaminated air outside. Close doors to other parts of the house to prevent spore spread into bedrooms and living spaces. Tape plastic sheeting over doorways if you’re working on a larger area. Turn off central HVAC systems during remediation so you don’t pull spores into ductwork and distribute them throughout the house.
Required safety items:
• N95 or higher respirator mask that seals around your nose and mouth
• Non vented safety goggles that protect eyes from spore contact and cleaning solution splash
• Rubber or nitrile gloves that extend past your wrists
• Long sleeves and pants to prevent skin contact with mold and cleaning solutions
• Containment measures including plastic sheeting, closed doors, and turned off HVAC to isolate the work area from clean spaces
Selecting and Applying the Right Primer After Mold Removal
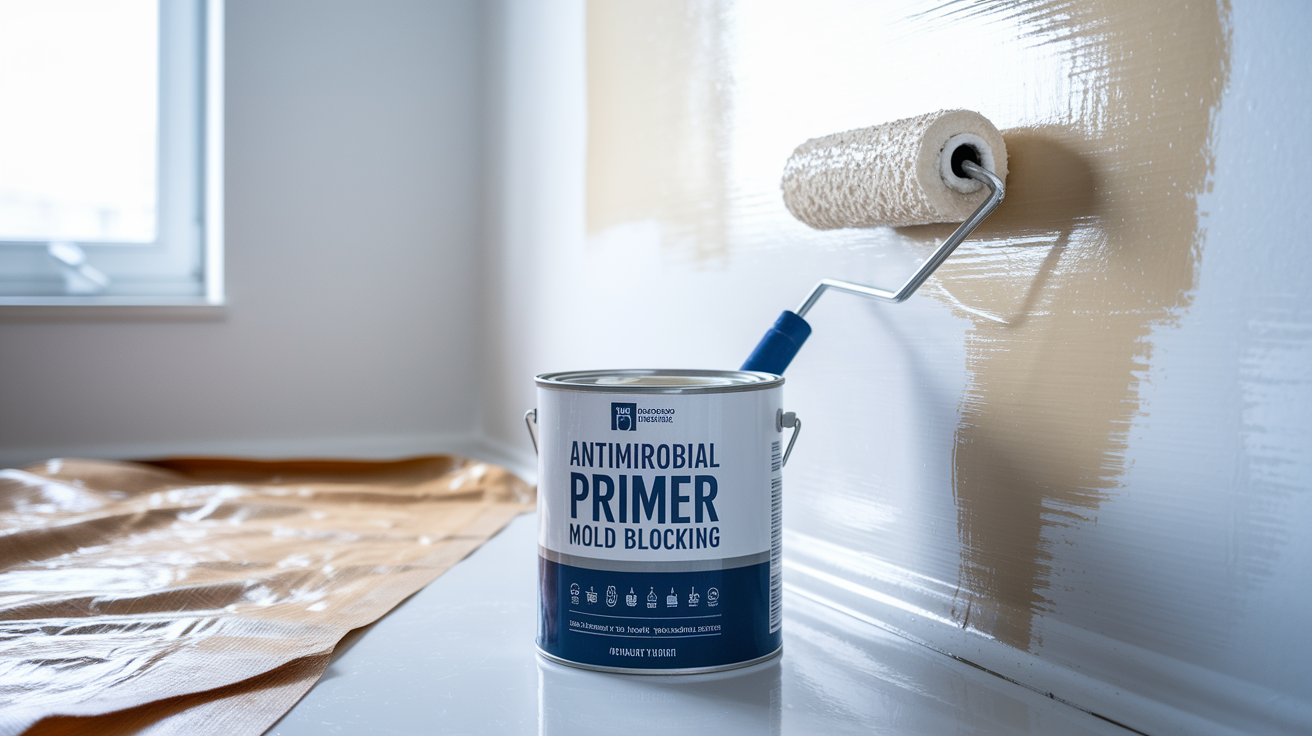
Quality primers serve dual functions after mold remediation. They block stains from bleeding through your topcoat paint, preventing the brown or yellow discoloration that tells everyone there used to be a water problem on this wall. They also contain antimicrobial ingredients that discourage new mold growth on the primer film surface. The primer doesn’t kill existing mold, which is why complete removal must happen first. But it does create an environment on the paint surface that’s less hospitable to new spores trying to establish.
Apply primer only after complete mold removal, moisture source elimination, and verified surface dryness. This timing is critical. Primer applied over damp surfaces traps that moisture. Primer applied over inadequately cleaned surfaces seals in remaining mold and gives you a false sense that the problem is solved. You’re using primer as one component of a complete system, not as a substitute for proper remediation.
Apply primer with a brush, roller, or sprayer according to manufacturer instructions. Coverage matters. Thin or spotty application leaves gaps where moisture can penetrate and where antimicrobial protection doesn’t exist. Most primers require one coat, but heavily stained areas might need two coats for complete stain blocking. Wait for the specified drying time before applying topcoat paint.
| Primer Type | Key Properties | Best Application |
|---|---|---|
| Mold killing primers with biocides | Contains EPA registered antimicrobial ingredients that prevent growth on primer film; may have limited stain blocking capability | Clean surfaces in moisture prone areas where staining is minimal |
| Stain blocking primers | Heavy duty coverage that seals water stains, tannin bleed, and discoloration; may not include antimicrobial properties | Areas with significant water staining where mold has been completely removed and moisture controlled |
| Combination antimicrobial and stain blocking primers | EPA registered mildewcide prevents growth on primer surface while blocking water stains, tannin, and discoloration from bleeding through | Previously moldy areas in bathrooms, kitchens, basements, laundry rooms where both stain coverage and ongoing protection are needed |
Primer application works best as part of a complete prevention strategy that includes ongoing environmental controls. Maintain indoor humidity between 30% and 50% with dehumidifiers in basements and damp areas. Address any new leaks within 24 to 48 hours before water damage establishes conditions for mold growth. Run bathroom exhaust fans during showers and for 20 minutes after to remove humidity. The primer protects the paint surface, but environmental control prevents the underlying conditions that cause mold in the first place.
Choosing Mold Resistant Paint for Long Term Protection
Mold resistant paints contain mildewcides that discourage fungal growth on the paint film surface. These formulations don’t kill mold. They make the surface less hospitable to spores trying to establish and grow. You’re adding a final protective layer that works in combination with moisture control, proper substrate preparation, and quality primer.
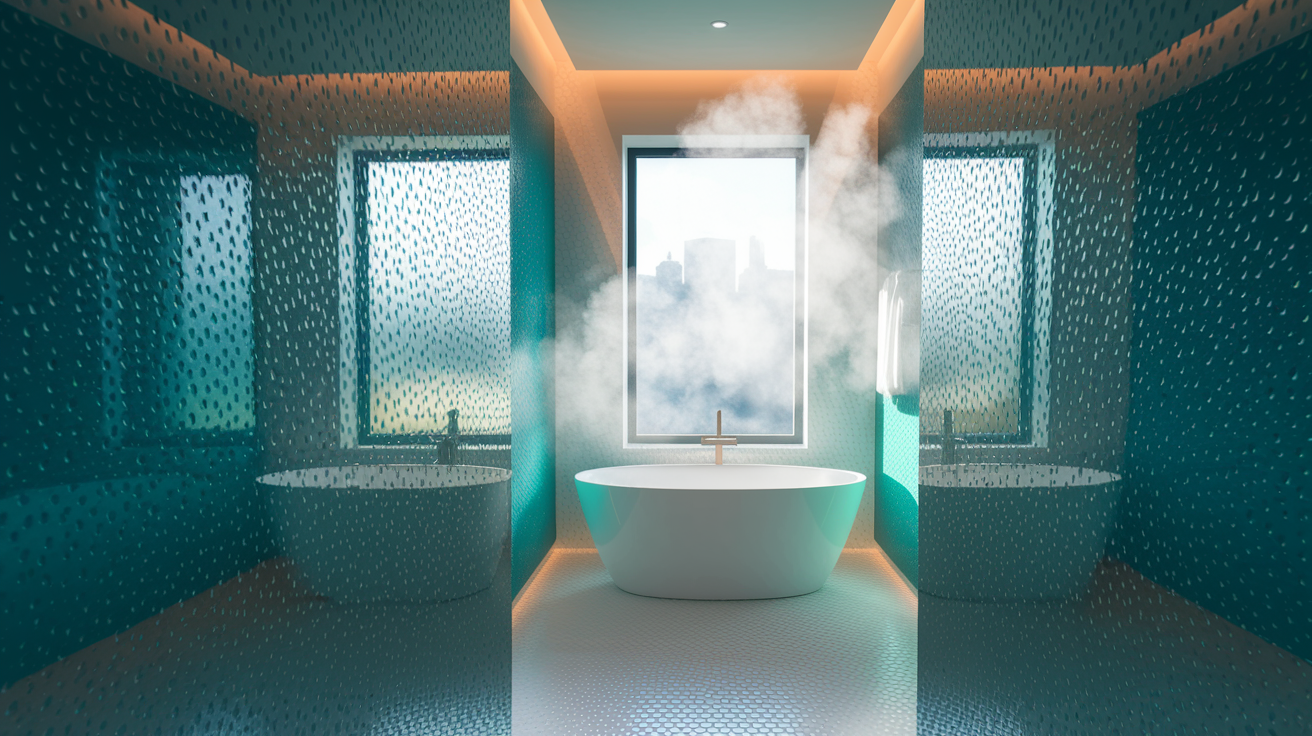
Priority application areas include bathrooms, kitchens, basements, laundry rooms, and any space that experiences elevated humidity or temperature fluctuations that cause condensation. Exterior applications include covered porches, patio kitchens, pool decks, and other areas where moisture exposure is routine but direct water contact is limited. Standard interior paint in these locations will support mold growth when conditions are right. Mold resistant formulations extend the time before growth appears and reduce the severity when it does.
Apply a minimum of two coats for adequate protection. Follow the manufacturer’s specified drying time between coats, typically 2 to 4 hours depending on temperature and humidity. Don’t thin the paint, which reduces the concentration of mildewcide. Plan for a 48 hour curing period before exposing the surface to moisture from showers, cooking steam, or other sources.
Ongoing environmental controls that maximize paint effectiveness:
• Maintain 30% to 50% indoor humidity using dehumidifiers in basements and damp areas, especially during humid summer months
• Use dehumidifiers in basements and crawl spaces year round if moisture levels routinely exceed 50%
• Run exhaust fans during and after moisture generating activities like showering for 20 minutes and cooking for 15 minutes
• Ensure adequate ventilation and air circulation by opening windows periodically and running ceiling fans to prevent stagnant humid air
• Address any new leaks within 24 to 48 hours, before water damage creates conditions for mold establishment
Mold resistant paint is the final layer in a complete system that starts with moisture control, includes proper remediation and substrate preparation, uses quality antimicrobial primer, and depends on ongoing maintenance to keep moisture levels low. The paint isn’t a magic solution that works by itself. It’s the last step that protects all the work you did before it.
Recognizing Signs Your Mold Cleanup Was Insufficient

Incomplete remediation reveals itself through specific indicators that appear within weeks to months after painting. You’re looking for visual changes in the paint surface, odors that weren’t present immediately after the work was completed, and structural changes that suggest ongoing moisture problems.
| Warning Sign | What It Indicates | Timeline |
|---|---|---|
| Paint bubbling or peeling | Mold continuing to grow underneath paint film, releasing gases and moisture that lift paint from substrate | 2 to 8 weeks after painting |
| Discoloration bleed through | Staining from water damage or mold growth penetrating primer and paint layers | 1 to 3 months after painting |
| Musty odor | Active mold growth behind walls or under paint releasing volatile organic compounds | Immediately to several weeks after completion |
| New visible growth | Inadequate cleaning left mold roots in porous materials, or moisture source was not fully eliminated | 3 to 12 weeks after painting in high moisture conditions |
| Recurring moisture or condensation | Underlying water intrusion, leak, or humidity problem was not identified or properly fixed | Ongoing from completion, often seasonal |
Any of these signs requires immediate re-evaluation and likely more aggressive remediation before attempting to repaint. Don’t apply more paint over bubbling or peeling surfaces. Pull back the failed paint to see what’s happening underneath. Check the area with a moisture meter to determine if you’re dealing with active moisture intrusion. Look for water stains that indicate an ongoing leak you missed during the initial assessment. In most cases, you’re removing more material than you did the first time and starting over with proper moisture elimination, complete substrate drying, and verified removal of all mold growth before you touch primer.
When DIY Mold Removal and Painting Becomes Unsafe

DIY mold cleaning is appropriate only for small affected areas less than 10 square feet. This EPA threshold exists because larger mold infestations indicate more serious moisture problems, deeper material penetration, and higher spore concentrations that require professional containment and removal procedures.
Cost context matters when making this decision. Professional remediation for a 10 square foot area typically costs $500 to $1,500 according to the Institute of Inspection, Cleaning and Restoration Certification. Attempting a DIY shortcut that starts at $200 for cleaning supplies and paint can escalate to $1,500 or more when mold returns within months and requires complete re work including paint removal, substrate replacement, proper remediation, new primer, and repainting. You end up paying for the job twice, plus the cost of the failed DIY attempt.
Conditions requiring professional remediation:
- Affected area exceeds 10 square feet in total, whether concentrated in one location or spread across multiple spots
- Mold has contaminated HVAC systems, ductwork, or central air components that distribute spores throughout the house
- Mold appears black or greenish black, which may indicate species producing mycotoxins requiring specialized handling
- You smell mold odor but cannot locate the visible source, indicating hidden growth behind walls, under flooring, or in other concealed spaces
- Mold returns within weeks or months after DIY cleaning and repainting, suggesting deeper penetration or unresolved moisture problems
- Anyone in the household experiences serious health reactions including difficulty breathing, severe allergic responses, or infections
- Mold resulted from sewage backup or contaminated water sources requiring specialized cleaning and disinfection protocols
Larger mold infestations requiring removal of building materials, HVAC cleaning, or treatment of multiple rooms cost $3,000 to $6,000 or more to remediate. These numbers reflect professional grade containment, proper disposal of contaminated materials, antimicrobial treatments, and verification testing to confirm complete removal. The scope of work includes identifying and fixing all moisture sources, something that DIY efforts often miss.
Professional remediation is a one time investment that prevents recurring costs from repeatedly painting over inadequately treated surfaces. Every failed DIY attempt adds to the total cost through paint removal, additional substrate damage from continuing mold growth, and eventual professional remediation that should have happened first. When you add up materials, time, and the cost of doing it again when it fails, professional remediation for situations beyond the 10 square foot threshold makes financial sense before you factor in the health risks of ongoing exposure to active mold growth.
Final Words
You can paint over mold after cleaning, but only when you’ve done the complete job. That means fixing the leak, removing all the mold (or cutting out the drywall if it went deep), drying everything for 48-72 hours, and applying the right primer.
Skip any of those steps and you’re just buying time before the paint bubbles and you’re back at square one.
If the area is bigger than 10 square feet, or if mold keeps coming back, call a pro. The upfront cost beats doing it twice.
FAQ
How do you get rid of mold before painting?
You get rid of mold before painting by first fixing the moisture source, then removing all visible mold with detergent and water or hydrogen peroxide, allowing surfaces to dry completely for 48-72 hours, and applying antimicrobial primer before any paint goes on.
What happens if you just paint over mold?
Paint applied over mold will bubble, crack, and peel within weeks to months as the living organism continues growing underneath the paint film, while also continuing to release spores and potential mycotoxins into your home’s air.
What kills 100% of black mold?
Complete mold elimination requires removing the affected porous material like drywall rather than relying on cleaning solutions alone, because mold hyphae penetrate deep into materials where surface treatments cannot reach, making material replacement the only guaranteed approach.
Can I put Kilz over mold?
You cannot put Kilz or any primer over existing mold. The surface must be completely mold-free and dry before applying Kilz Mold & Mildew Primer, which then prevents new growth on the primer film but does not kill mold already present.
How long must surfaces dry after mold removal before painting?
Surfaces must dry for a minimum of 48-72 hours with active air circulation after mold removal, with moisture meter readings below 16% for wood and below 1% for drywall confirming adequate dryness before primer application.
What protective equipment is required for DIY mold removal?
DIY mold removal requires an N-95 or higher respirator mask, non-vented safety goggles, rubber or nitrile gloves, long sleeves and pants, and containment measures to prevent spore spread to unaffected areas.
When should you call a professional instead of removing mold yourself?
You should call a professional when the affected area exceeds 10 square feet, mold appears in HVAC systems, mold returns after DIY cleaning, serious health reactions occur, or the source was sewage or contaminated water.
What humidity level prevents mold growth after painting?
Indoor humidity maintained between 30-50% prevents mold growth after painting, combined with running exhaust fans during moisture-generating activities and addressing any new leaks within 24-48 hours of discovery.
How can you tell if mold removal was incomplete before painting?
Incomplete mold removal reveals itself through paint bubbling or peeling, discoloration bleeding through the paint, persistent musty odor, new visible growth appearing, or recurring moisture patterns within weeks to months after painting.
What is the difference between mold-killing primer and mold-resistant paint?
Mold-killing primer contains EPA-certified antimicrobial ingredients that discourage growth on the primer film surface and blocks stains, while mold-resistant paint adds a topcoat layer with mildewcides for ongoing protection in moisture-prone areas like bathrooms and basements.
How much does professional mold remediation cost compared to DIY painting?
Professional mold remediation for a 10-square-foot area costs $500-$1,500, while attempting a $200 DIY paint coverup can escalate to $1,500+ when mold returns and requires proper remediation, paint removal, substrate repair, and complete repainting.
What moisture sources must be fixed before painting over cleaned mold areas?
Common moisture sources requiring repair include leaking supply or drain pipes, roof and window seal failures, condensation from temperature differentials, inadequate bathroom and kitchen ventilation, basement seepage, foundation cracks, and ambient humidity above 50%.
