

Most people try to save carpet padding after a flood, but that’s almost always the wrong call. Padding soaks up water like a sponge and holds it against your subfloor, creating the perfect conditions for mold growth and bacterial contamination that you can’t see or smell until it’s too late. The decision to replace or salvage depends on two critical factors: what kind of water touched the padding and how long it stayed wet. Get either one wrong and you’re sealing health hazards under your carpet that’ll cost far more to fix later.
Carpet Padding Replacement After Flood: The Essential Answer
You have to replace carpet padding after a flood if the water came from sewage, natural flooding, or any contaminated source. The decision comes down to what kind of water touched the padding and how long it stayed wet.
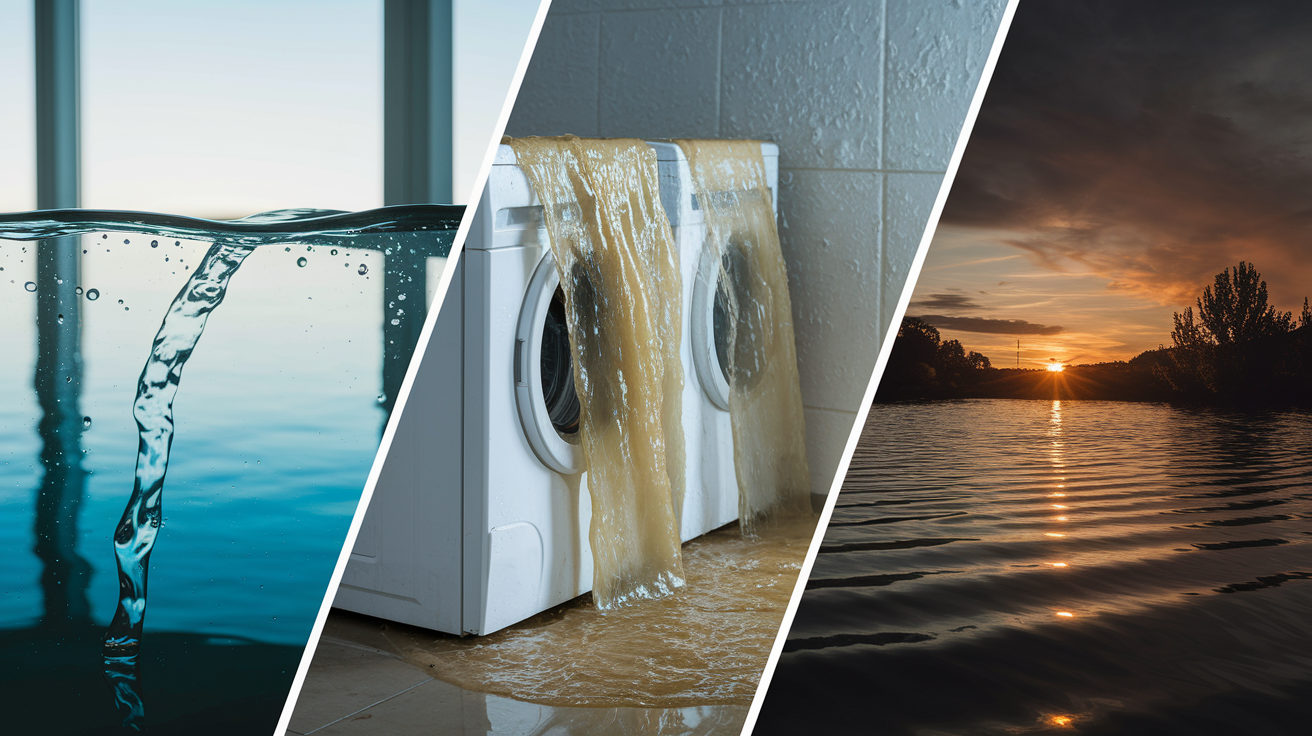
Water damage gets sorted into three categories. Category 1 is clean water from supply lines, like a burst pipe or broken water heater connection. If you act within 24 hours, pull the carpet, extract the water, and set up proper drying equipment, you might salvage the padding. But you need immediate action and the right tools. Category 2 is gray water from appliances like washing machines, dishwashers, or sump pump backups. This water carries bacteria, detergents, and other contaminants. Gray water damage usually means replacement because the padding absorbs chemicals and microorganisms that create health risks even after drying. Category 3 is black water from sewage backup, toilet overflow, natural floods, or any standing water that’s been sitting outside. Black water always requires immediate padding replacement. No exceptions. The contamination level makes salvage unsafe no matter how quickly you respond.
Even clean Category 1 water becomes contaminated after sitting for 48 hours. Bacteria multiply rapidly in wet padding. What starts as clean supply line water turns into a breeding ground for microorganisms within two days. If the padding’s been wet for more than 48 hours, replacement is the safer choice regardless of the original water source. Time matters as much as contamination type.
Here’s the decision rule: contaminated water or sewage means you replace the padding immediately. Clean water that’s been sitting for more than 48 hours means you replace it. Clean water caught within 24 hours with proper extraction and drying equipment might be salvageable, but only if you can verify complete drying with a moisture meter and the padding shows no signs of breakdown or odor. Safety protocols vary by category. Category 1 requires standard protective gloves and dust mask. Category 2 requires enhanced protection including N95 respirator, gloves, and eye protection plus disinfection of all surfaces. Category 3 requires full protective equipment and professional handling due to serious health hazards.
Why Wet Carpet Padding Creates Health and Safety Risks

Carpet padding acts like a sponge. Whether it’s foam, rubber, or fiber construction, padding absorbs moisture and holds it against the subfloor. A typical foam pad can absorb several times its weight in water, and that trapped moisture creates the perfect environment for biological growth and material breakdown.
Mold and mildew start growing within 24 to 48 hours in damp conditions. You won’t see it right away because it starts underneath the carpet, hidden inside the padding layers. Mold spores spread through your HVAC system and contaminate the air throughout your home. People with allergies or respiratory conditions notice symptoms first, but prolonged exposure affects anyone. Bacterial contamination adds another layer of risk, especially with gray or black water exposure. Bacteria multiply rapidly in warm, wet padding and release odors as they break down organic material. These aren’t just unpleasant smells. They indicate active biological contamination that can cause infections and illness. Allergens accumulate as mold colonies grow and bacteria spread, triggering reactions even in people who don’t typically have allergies.
Wet padding doesn’t just create health risks. It breaks down structurally. Foam padding loses its cellular structure when saturated, crumbling into pieces or compressing into a hard, flat mat. Rubber padding can delaminate, with the layers separating and creating uneven spots under your carpet. Fiber padding holds moisture the longest and develops the worst odors because it traps organic material and provides ideal conditions for decomposition. Stubborn odors from contaminated water, pet accidents, or sewage penetrate beyond the carpet fibers and become permanently embedded in the padding structure. Even if the carpet surface looks clean and dry, the padding underneath can harbor smells that resurface every time humidity rises or the carpet gets walked on.
5 specific health risks from wet carpet padding:
- Mold spore inhalation leading to respiratory irritation, coughing, wheezing, and aggravated asthma symptoms
- Bacterial infections from skin contact or inhalation of contaminated dust particles, especially with weakened immune systems
- Allergic reactions including sneezing, itchy eyes, skin rashes, and sinus congestion triggered by elevated allergen levels
- Respiratory distress from volatile organic compounds released by decomposing materials and active mold growth
- Chronic indoor air quality degradation affecting sleep quality, concentration, and overall health for all household members
Signs Your Flooded Carpet Padding Is Unsalvageable

Pull back the carpet and look at the padding directly. Surface inspection tells you almost nothing. You need to see what’s happening underneath where moisture’s been trapped against the padding and subfloor.
Visible indicators show up first. Look for discoloration, especially brown or black staining that indicates contaminated water or advanced decomposition. Mold appears as fuzzy spots in white, green, gray, or black. Check the edges where the padding meets walls and the center of wet areas. Delamination happens when padding layers separate, creating a spongy or lumpy texture. Hold a section and look at the cut edge. If you see layers pulling apart or a foam pad breaking into chunks, the structure has failed. Water staining patterns tell you what kind of water caused the damage. Clean water leaves lighter marks. Gray or black water leaves dark staining with visible residue.
Feel the padding. Press on it with your hand. Healthy padding bounces back. Damaged padding stays compressed or crumbles under pressure. Persistent dampness three or four days after flooding means the padding isn’t drying properly, even with fans and dehumidifiers running. That trapped moisture has already started biological growth. Odor is the most reliable indicator. A musty smell means mold. A sour smell indicates bacterial growth. A sewage smell means contaminated water exposure. These odors don’t go away with air fresheners or surface cleaning. They come from inside the padding structure.
6 definitive signs that require padding replacement:
- Persistent musty or sour odor that remains after 72 hours of drying, indicating active mold or bacterial growth embedded in padding structure
- Visible mold growth appearing as fuzzy spots in any color, especially concentrated at edges or in damp areas that stayed wet longest
- Black or brown water staining throughout padding indicating contaminated water exposure or advanced decomposition from prolonged saturation
- Crumbling or delaminated structure where padding breaks apart when handled or layers visibly separate, showing material breakdown
- Saturated padding that remains damp beyond 48 hours despite active drying efforts with fans, dehumidifiers, and good ventilation
- Any sewage or contaminated water exposure regardless of drying timeline or visual condition due to serious health hazards
Moisture Testing and Drying Methods for Flood Damaged Padding

A moisture meter tells you what’s actually happening inside the padding. Visual inspection and touch aren’t reliable. A section might feel dry on the surface but still hold moisture in the core or against the subfloor. Moisture meters measure the exact moisture content as a percentage. Padding needs to reach 10 to 12 percent moisture or below before you can safely reinstall carpet. Anything higher and you’re sealing in moisture that’ll cause mold growth and odor problems.
The DIY drying approach works for small areas affected by clean water if you catch it within hours. Pull the carpet back and prop it up with fans or sawhorses to expose both sides of the padding. Position box fans to blow across the padding surface, not just at it. Air needs to move across the wet material to pull moisture out. Run a dehumidifier in the room with doors and windows closed. The dehumidifier pulls moisture from the air, which lets the padding release more water. Check the padding twice a day. Flip sections if possible to expose the bottom side. This process takes three to five days minimum under ideal conditions with moderate humidity and good air circulation. Don’t rush it. Reinstalling carpet over damp padding guarantees mold problems within weeks.
Professional extraction equipment changes the timeline and success rate. Truck mounted water extractors pull water directly from padding using vacuum pressure. Industrial air movers push 3,000 cubic feet per minute or more, creating airflow that DIY fans can’t match. Commercial dehumidifiers handle larger volumes of moisture and work faster than residential units. Restoration companies also use moisture meters to test padding and subfloor in multiple locations, documenting the drying progress for insurance purposes. Professional drying still takes two to four days, but the success rate is higher because the equipment is more powerful and technicians know how to position it for maximum effect.
| Drying Method | Equipment Needed | Timeframe | Success Rate |
|---|---|---|---|
| DIY air drying | Box fans (3-4), residential dehumidifier, moisture meter | 3-5 days minimum | 30-40% (clean water only, immediate action) |
| Professional extraction + drying | Truck mounted extractor, industrial air movers (6+), commercial dehumidifier | 2-4 days | 60-70% (clean water, quick response) |
| Heat drying systems | Professional heating mats, air movers, commercial dehumidifiers, monitoring equipment | 1-3 days | 50-60% (specialized applications) |
| Replacement recommended | New padding, disposal bags, installation tools | Same day | 100% (guaranteed dry, fresh start) |
Step by Step Carpet Padding Removal After Flooding

Put on safety gear before you touch contaminated padding. Wear disposable gloves, an N95 respirator mask (not just a dust mask), eye protection, and knee pads if you’ll be working on the floor for extended periods. If the water came from sewage or a natural flood, upgrade to waterproof gloves and consider full coveralls. Work in a well ventilated area with windows open and fans running to exhaust contaminated air outside. Plan to dispose of the old padding immediately. Don’t leave it sitting in your garage or yard.
8 steps to remove flooded carpet padding:
-
Pull the carpet back from the tack strips starting at one corner. Grab the carpet firmly and pull up and back. The tack strips have angled nails that grip the carpet backing. Pull at a low angle to release the carpet without tearing it. Work your way along the wall, releasing 3 to 4 feet at a time.
-
Roll the carpet toward the center of the room to expose the padding underneath. For larger rooms, roll the carpet in sections rather than trying to move the entire piece at once. This keeps wet carpet manageable and prevents back strain.
-
Cut the padding into manageable sections approximately 3 to 4 feet wide using a utility knife. Wet padding is heavy. A full room’s worth of saturated padding can weigh several hundred pounds. Smaller sections roll up easier and fit into contractor bags for disposal.
-
Remove all staples and adhesive residue from the subfloor. Padding is typically stapled around the perimeter and sometimes in the center of large rooms. Use pliers or a staple puller to remove every staple. Scrape away old adhesive with a floor scraper. These create bumps under new padding.
-
Inspect the subfloor carefully for signs of moisture damage, warping, soft spots, or dark staining. Press on the subfloor in multiple locations. It should feel solid and dry. Soft spots indicate water damage that needs repair before new padding goes down.
-
Allow the subfloor to dry completely before installing new padding. This might take several additional days. Test with a moisture meter. Wood subfloors should read below 12 percent moisture. Concrete should be below 4 percent. Don’t skip this step.
-
Dispose of old padding in sealed contractor bags or plastic sheeting. Contaminated padding should go directly into sealed bags to prevent spore release and odor. Most waste management services accept bagged carpet padding, but check local regulations for water damaged or contaminated materials.
-
Clean and disinfect the subfloor surface before installing new padding. Use a solution appropriate for your subfloor type. Wood subfloors can be cleaned with a mild bleach solution (1 cup bleach per gallon of water), applied lightly and allowed to dry. Concrete can handle stronger cleaning solutions. This step prevents contamination transfer to your new padding.
Subfloor inspection after padding removal sometimes reveals damage you didn’t expect. Look for warping in wood subfloors, especially near the wet areas. Warped sections might need replacement or sanding to create a level surface. Check for soft spots by walking across the subfloor and feeling for areas that flex or give under your weight. These indicate structural damage from prolonged moisture exposure. Persistent moisture in the subfloor even days after removing wet padding means you have a bigger problem. The subfloor itself may need drying time with industrial equipment, or in severe cases, sections may need replacement. Don’t install new padding over a subfloor that hasn’t fully dried. You’ll trap moisture between the new padding and the floor, creating the same mold and odor problems you just removed.
Professional Restoration Versus DIY Replacement: Decision Factors and Cost Comparison
Whether to handle this yourself or call a restoration company depends on five factors: what kind of water caused the damage, how much area got wet, how fast you responded, whether insurance is involved, and whether you found structural problems. Get these factors clear before you commit to a plan.
DIY makes sense in specific situations. If clean water from a supply line affected a small area (under 100 square feet), you caught it within hours, and you have time to manage the drying and replacement process yourself, you can handle this. A typical bedroom (150 square feet) requires about $75 to $125 in new padding material at $0.50 to $0.80 per square foot for basic foam padding, or $150 to $300 if you choose better quality rubber or fiber padding at $1.00 to $2.00 per square foot. Add another $50 to $150 if you need to rent a commercial dehumidifier, buy a moisture meter, or purchase disposal supplies and cleaning solutions. Total DIY cost for an average bedroom ranges from $75 to $300 depending on padding quality and what equipment you already own. The tradeoff is time. Expect to spend 6 to 12 hours over several days handling removal, drying, disposal, subfloor prep, and installation.
Professional help becomes necessary when contamination level is Category 2 or 3, the affected area is large (over 150 square feet), more than 48 hours passed before you started mitigation, you found structural damage during inspection, or you need to file an insurance claim. Restoration companies employ IICRC certified technicians who understand contamination protocols and proper drying procedures. They arrive with truck mounted extraction equipment, industrial air movers, commercial dehumidifiers, and moisture testing equipment. Professional padding replacement costs $1.50 to $4.00 per square foot including labor, disposal, and materials. Emergency water extraction adds $500 to $3,000 depending on severity and response time. A professional restoration project for an average bedroom typically ranges from $225 to $600. For larger areas like a finished basement or multiple rooms, costs scale up to $1,500 to $5,000 or more depending on the extent of damage.
Insurance coverage varies based on what caused the flood. Sudden events like a burst pipe or water heater failure are usually covered under standard homeowner’s policies. Gradual seepage, poor maintenance, or natural flooding typically isn’t covered unless you have separate flood insurance. Insurance companies require immediate mitigation to prevent claim denial. Document everything with photos showing the water source, affected areas, and damage extent before you start removal. Save receipts for all materials and services. Professional restoration companies handle insurance documentation as part of their service, which can be valuable if your claim is complex or if the adjuster disputes the scope of damage. Depreciation affects older carpet and padding. Insurance might only cover actual cash value (depreciated worth) rather than full replacement cost, which means you pay the difference. Professional documentation showing the contamination level and explaining why replacement was necessary rather than just preferred helps support your claim and can result in better settlement offers.
| Situation Factor | DIY Appropriate | Call Professional | Cost Impact |
|---|---|---|---|
| Water contamination level | Category 1 (clean water) only | Category 2 (gray water) or Category 3 (black water/sewage) | DIY $75-$300 | Pro $500-$3,000+ |
| Affected area size | Small rooms under 100 sq ft | Large areas over 150 sq ft, multiple rooms, finished basements | DIY $0.50-$2/sq ft materials | Pro $1.50-$4/sq ft installed |
| Time since flooding | Immediate action within 24 hours | Over 48 hours since initial water exposure | Delayed response increases total cost 50-100% |
| Insurance claim involvement | No insurance claim, paying out of pocket | Filing insurance claim requiring professional documentation and mitigation records | Professional documentation may increase settlement 20-40% |
| Structural damage presence | No subfloor damage, padding only affected | Subfloor warping, soft spots, extensive moisture penetration, visible mold on framing | Subfloor repair adds $3-$8/sq ft, replacement $8-$15/sq ft |
Choosing Replacement Padding After Water Damage

Replacing flood damaged padding gives you a chance to upgrade. If your old padding was basic builder grade foam that compressed easily and didn’t offer much protection, this is the time to install something better that’ll last longer and perform better if another water incident happens.
Three main padding types handle moisture differently. Foam padding in the 6 to 8 pound density range costs $0.50 to $1.00 per square foot and provides good cushioning for light to moderate traffic. But foam absorbs water readily and compresses over time, especially in damp basements. Foam is the most affordable option but also the most vulnerable to water damage. Rubber padding in the 8 to 10 pound density range costs $1.50 to $2.50 per square foot and offers better water resistance because of its dense structure. Rubber doesn’t absorb water the way foam does. It dries faster and resists breakdown from moisture exposure. Rubber padding lasts longer and provides better support under heavy traffic. The higher cost pays off in durability. Fiber padding made from recycled materials costs $1.00 to $1.50 per square foot and offers good support with excellent sound absorption. Fiber padding does absorb moisture, but many fiber pads include antimicrobial treatments that inhibit mold growth, making them a middle option between foam and rubber for moisture prone areas.
Density matters more than thickness for long term performance. Higher density padding resists compression better, provides more support, and lasts longer. A 6 pound foam pad in a high traffic hallway will compress into a flat mat within three to five years. A 10 pound rubber pad in the same location maintains its structure for 10 to 15 years. Thickness typically ranges from 3/8 inch to 1/2 inch. Thicker isn’t always better. Too much padding makes carpet feel unstable and can cause wrinkles. Match thickness to room use. Bedrooms and living rooms work well with 1/2 inch padding for maximum comfort. Hallways and high traffic areas do better with 3/8 inch dense padding that won’t compress as quickly. Carpet manufacturers often specify maximum padding thickness in their warranties. Exceeding it can void coverage.
Cost to value calculation changes when you factor in flood risk. If you’re in a basement, near a bathroom, or in an area with recurring moisture issues, spending an extra $1 per square foot for rubber or treated fiber padding prevents a complete replacement the next time water shows up. That $150 difference on a 150 square foot room saves you $300 to $600 in future restoration costs. But if this was a one time event from a burst pipe in a second floor bedroom with no history of moisture problems, standard foam padding is fine. Match the padding quality to the actual risk level in that specific location.
Preventing Future Carpet Padding Flood Damage

Prevention costs less than repeated replacement. If this flood came from a preventable source, fix the root cause before installing new padding. If it came from an external source or building characteristic you can’t change, upgrade your materials and emergency response plan.
Moisture resistant padding technologies give you better protection in vulnerable areas. Closed cell foam construction prevents water from penetrating into the padding structure. Water stays on the surface where it can be extracted rather than soaking deep into the material. Synthetic materials like dense rubber or closed cell polyethylene don’t absorb water the way traditional foam does. They dry faster and resist biological growth. Antimicrobial treatments embedded in the padding material inhibit mold and bacteria growth even if the padding does get damp. Quick dry construction uses open channels or textured surfaces that allow air circulation under the carpet and speed drying time. Moisture barrier backing on the bottom of padding adds a waterproof layer between padding and subfloor, protecting the subfloor from minor water incidents. These technologies cost more upfront (typically $2 to $4 per square foot installed) but make sense in basements, laundry rooms, bathrooms with carpet, and any area with previous water damage history. For flood prone areas, moisture resistant padding can be the difference between drying out after a leak and facing another complete replacement.
Home improvements reduce flood risk at the source. Sump pumps in basements handle groundwater and prevent seepage during heavy rain. Test your sump pump quarterly by pouring water into the pit and verifying it activates and drains properly. Replace the pump every 7 to 10 years before it fails. Proper grading around your foundation moves water away from the house rather than letting it pool against basement walls. The ground should slope at least 6 inches over 10 feet of distance. Add soil if needed. Gutters and downspouts matter more than most people realize. Clogged gutters overflow and dump water right against your foundation. Clean gutters twice a year and extend downspouts at least 6 feet from the house. Water leak detection sensors cost $20 to $50 each and sound an alarm when they detect moisture. Place them near water heaters, washing machines, dishwashers, refrigerator water lines, and under bathroom sinks. The alert gives you time to shut off water and minimize damage.
Emergency preparedness means knowing what to do in the first 10 minutes. Can you find your main water shutoff valve right now? If not, find it today and label it clearly. Know which circuit breaker controls outlets in the flooded room so you can cut power safely. Keep a wet dry vacuum in an accessible location, not buried in a storage room. Maintain a contact list with phone numbers for a restoration company, a plumber, and your insurance agent. These contacts in your phone during an emergency save time when every minute counts. If you’re in a flood prone area, consider a battery backup sump pump system. Regular sump pumps fail when power goes out during storms. Battery backup systems keep working and can prevent thousands in damage.
6 preventive measures to protect carpet padding from flood damage:
- Install water leak detection sensors near all appliances with water connections (water heater, washing machine, dishwasher, refrigerator ice maker) and under bathroom sinks to receive immediate alerts when leaks start
- Upgrade to moisture resistant or waterproof padding in vulnerable areas including basements, laundry rooms, bathrooms with carpet, and rooms with previous water damage history
- Maintain and test sump pump quarterly by pouring water into the pit to verify operation, and replace the entire pump every 7 to 10 years before failure occurs
- Improve drainage around your home foundation by ensuring ground slopes away at least 6 inches over 10 feet distance and extending downspouts at least 6 feet from the house
- Create an emergency response plan with clearly labeled main water shutoff valve location, circuit breaker map for each room, and contact list for restoration company, plumber, and insurance agent
- Schedule annual appliance hose inspections and replace washing machine hoses, dishwasher connections, and water heater supply lines every 5 years before they fail
Final Words
So, do you have to replace carpet padding after flood? If you’re dealing with contaminated water or padding that’s been wet beyond 48 hours, yes. If clean supply water hit the padding and you acted fast, proper extraction and drying might save it.
The key is knowing your water category, moving quickly, and checking moisture levels with real tools. Skip those steps, and you’re looking at mold, odors, and subfloor damage down the line.
Most of the time, replacement is the safer call. Padding is cheap compared to what happens when you trap moisture under carpet.
When in doubt, pull it. Dry out the subfloor. Start fresh with better padding, and you’ll have peace of mind every time it rains.
FAQ
Does carpet padding need to be replaced after a flood?
Carpet padding needs to be replaced after a flood in most situations, with replacement necessity determined by water contamination category and exposure time. Category 3 (black water from sewage or natural floods) always requires immediate replacement. Category 2 (gray water from appliances) typically requires replacement due to bacteria. Category 1 (clean supply line water) may allow salvage only if action begins within 24 hours, proper extraction occurs, and complete drying happens within 48 hours with moisture meter confirmation.
How quickly can mold grow under wet carpet?
Mold can grow under wet carpet within 24 to 48 hours when moisture, warmth, and organic material are present. Saturated carpet padding creates ideal mold conditions because foam, rubber, and fiber materials absorb water like a sponge and stay damp longer than carpet surface fibers. Contaminated water accelerates mold growth compared to clean water, and mold spores begin colonizing even faster in warm environments with poor air circulation.
How much does it cost to replace padding under carpet?
Replacing padding under carpet costs $0.50 to $2.00 per square foot for DIY material costs, or $1.50 to $4.00 per square foot for professional installation including labor and disposal. A typical 150-square-foot bedroom ranges from $75 to $300 for DIY replacement or $225 to $600 with professional installation. Emergency water extraction and professional restoration add $500 to $3,000 depending on damage extent and contamination level.
Does carpet need to be replaced after a flood?
Carpet needs to be replaced after a flood when exposed to sewage or contaminated water, when mold growth appears, or when saturation exceeds 48 hours without proper drying. Clean water floods caught within 24 hours may allow carpet salvage if professional extraction occurs immediately and complete drying happens within 48 hours. Padding underneath typically requires replacement even when carpet can be saved because padding retains moisture longer and harbors bacteria.
What are the health risks of wet carpet padding?
The health risks of wet carpet padding include mold spore inhalation causing respiratory problems, bacterial infections from contaminated water exposure, allergic reactions to mildew and allergens, respiratory distress in those with asthma or sensitivities, and chronic indoor air quality degradation affecting entire households. Wet padding distributes spores through HVAC systems and creates persistent musty odors indicating ongoing microbial growth beneath carpet surfaces.
How long does carpet padding take to dry after flooding?
Carpet padding takes 3 to 5 days minimum to dry completely after flooding under ideal conditions with professional equipment including industrial dehumidifiers and high-CFM air movers. DIY drying with household fans and dehumidifiers typically requires 5 to 7 days or longer depending on padding thickness, humidity levels, and air circulation. Moisture meter readings should confirm padding moisture content below 10 to 12 percent before reinstalling carpet.
What type of carpet padding is best after water damage?
The best carpet padding after water damage is moisture-resistant or waterproof padding with closed-cell construction that prevents water absorption, particularly for basements, laundry rooms, and flood-prone areas. Rubber padding (8 to 10 pound density) offers more water resistance and durability than foam padding. Synthetic materials with antimicrobial treatments and moisture barrier backing provide long-term protection against future flooding and inhibit mold growth better than standard foam or fiber padding.
When should you call a professional for flooded carpet padding?
You should call a professional for flooded carpet padding when gray water or black water contamination occurs, when affected area exceeds 100 square feet, when response is delayed beyond 48 hours after flooding, when structural damage or subfloor concerns exist, or when insurance claim documentation is needed. Certified restoration technicians have industrial extraction equipment, commercial dehumidifiers, and moisture testing tools that DIY methods cannot match for thorough drying and contamination remediation.
How do you know if carpet padding is unsalvageable?
Carpet padding is unsalvageable when persistent musty odor remains after 72 hours of drying, visible mold growth appears on padding surfaces, black or brown water staining from contaminated sources is present, padding structure crumbles or delaminates when touched, saturation remains beyond 48 hours despite drying efforts, or any sewage or contaminated water exposure occurred. Lifting carpet corners allows direct padding inspection for these definitive replacement signs.
Can you prevent carpet padding damage from future floods?
You can prevent carpet padding damage from future floods by installing water leak detection sensors near appliances and water heaters, upgrading to moisture-resistant padding in vulnerable areas like basements and laundry rooms, maintaining sump pumps with quarterly testing, improving drainage around home foundation with proper grading, creating emergency response plans with shutoff valve locations documented, and scheduling annual appliance hose inspections. Moisture-resistant padding with antimicrobial treatments provides practical long-term protection in flood-prone locations.
