

You’ve heard it a thousand times: bleach kills mold. But here’s the problem. On drywall, bleach only cleans what you can see while the water in the bleach solution actually feeds the mold roots hiding inside the porous material. Within days, the same spot grows back, often worse than before. This isn’t just ineffective, it’s creating a bigger health risk while you think you’ve solved the problem. Here’s what actually works and when you need to cut out the drywall instead.
Bleach Effectiveness and Drywall’s Porous Problem
Bleach kills surface mold, but it doesn’t actually eliminate mold on drywall. The reason? Drywall’s porous nature.
Hard surfaces like glass, bathroom tiles, metal fixtures, concrete floors, and steel work great with bleach. The chlorine stays right where you spray it, makes contact with the mold, and destroys it. These smooth surfaces don’t soak up the solution, so the active ingredient has time to do its thing. Your kitchen counter or shower door? Sure, bleach handles that.
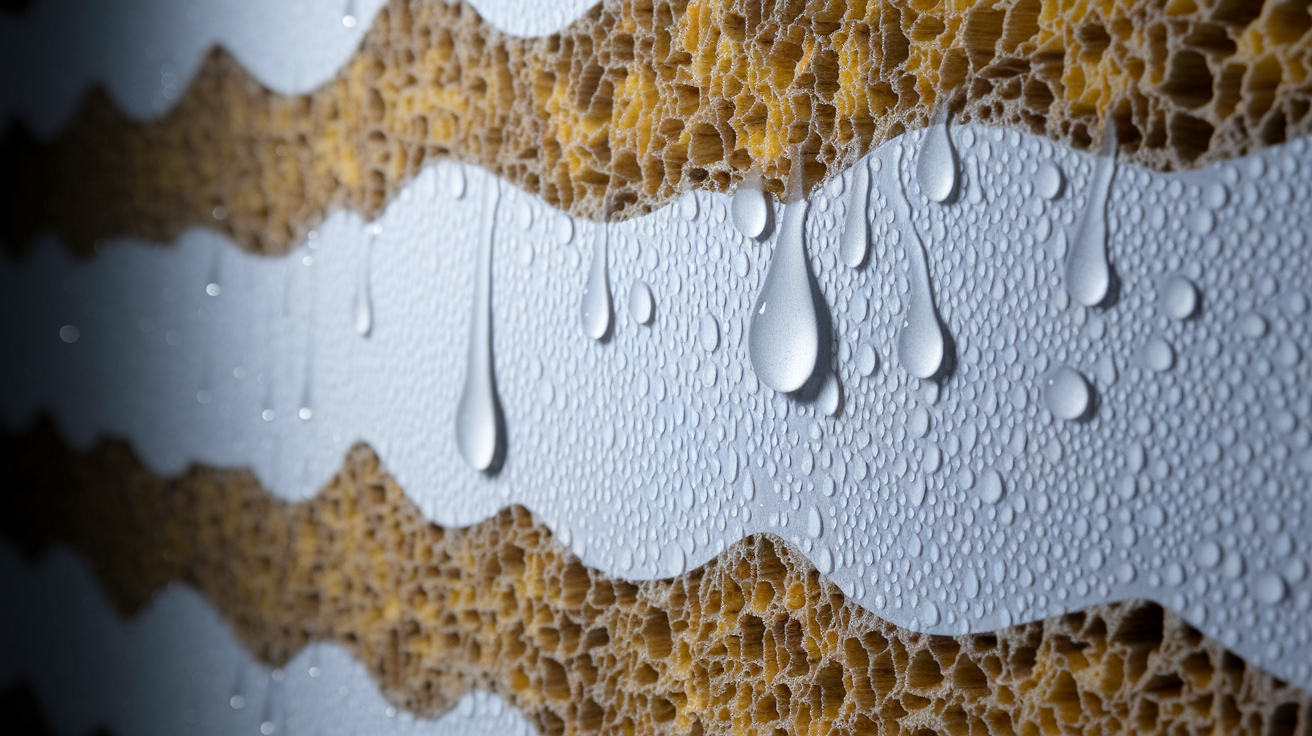
Drywall’s a different story. It’s made of a gypsum core sandwiched between two layers of thick paper backing. That paper facing soaks up liquid like crazy, and the gypsum itself is pretty porous too. When water hits drywall, it gets absorbed. And when mold grows on drywall, it doesn’t just hang out on the surface.
Mold sends root structures called hyphae deep into the paper and the gypsum underneath. These roots dig into the material, looking for moisture and food. The paper backing gives them both, which makes it perfect mold food. By the time you spot visible mold on your wall, the organism’s already built an extensive root system inside.
Here’s the problem with bleach on porous stuff. Household bleach is about 95% water and only 5% sodium hypochlorite (that’s the active ingredient). When you spray bleach solution onto drywall, the chlorine mostly stays on the surface while the water gets sucked into the porous material. The chlorine kills what you can see, making the wall look clean. But the water travels inward, right where those mold roots are living, and actually feeds subsurface growth.
You get cosmetic cleaning with zero real fix. Within a couple days, the mold grows back from those intact roots underneath. Often in the same spot or spreading outward. You’ve made it look clean while the actual problem keeps thriving inside your wall.
Health and Safety Risks of Using Bleach on Mold
Major health and safety organizations tell you not to use bleach for mold removal.
OSHA says bleach shouldn’t be used in routine mold work. EPA doesn’t recommend it either because of documented health risks. Bleach irritates your eyes on contact and produces harsh fumes that inflame lung tissue. When it contacts drywall, it can release chlorine gas for a week or more after you apply it, creating ongoing exposure in your living space. If you accidentally mix bleach with ammonia cleaners (common in lots of households), it releases highly toxic gas that can seriously harm your breathing. The chlorine vapor gets concentrated in small or poorly ventilated rooms, especially bathrooms and closets where drywall mold commonly shows up.
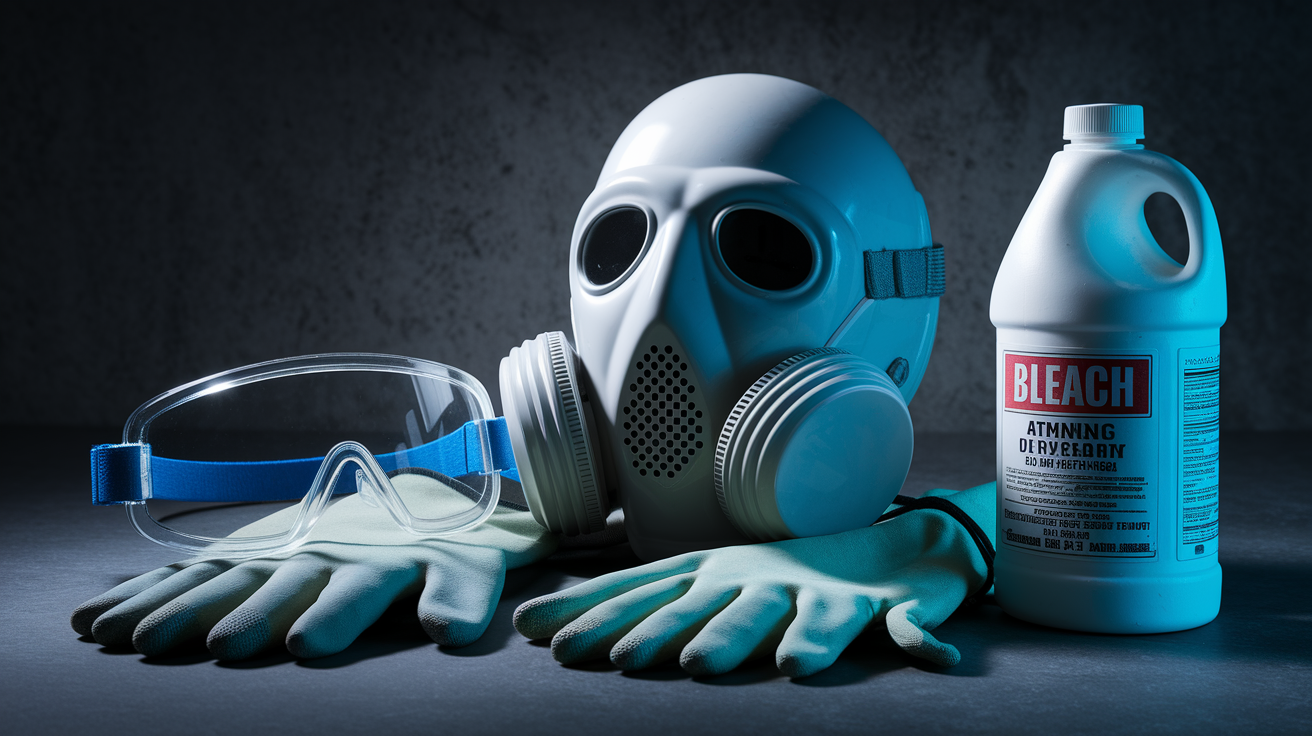
If you’re still going to use bleach despite these warnings, proper protective gear isn’t optional. Wear heavy rubber gloves that cover your forearms. Not thin disposable ones. Use eye goggles that seal around your eyes, not just safety glasses. Put on an N95 respirator or better before you even open the bleach bottle. Open every window and door in the room and run an exhaust fan pointed outward. Keep kids and pets completely out of the area during application and for several hours after. If you start coughing, feeling dizzy, or experiencing burning eyes or throat, leave immediately and get fresh air.
Proper Bleach Application Method for Drywall Surface Mold
This method only addresses minor surface mold. It doesn’t eliminate the root system or solve the underlying problem.
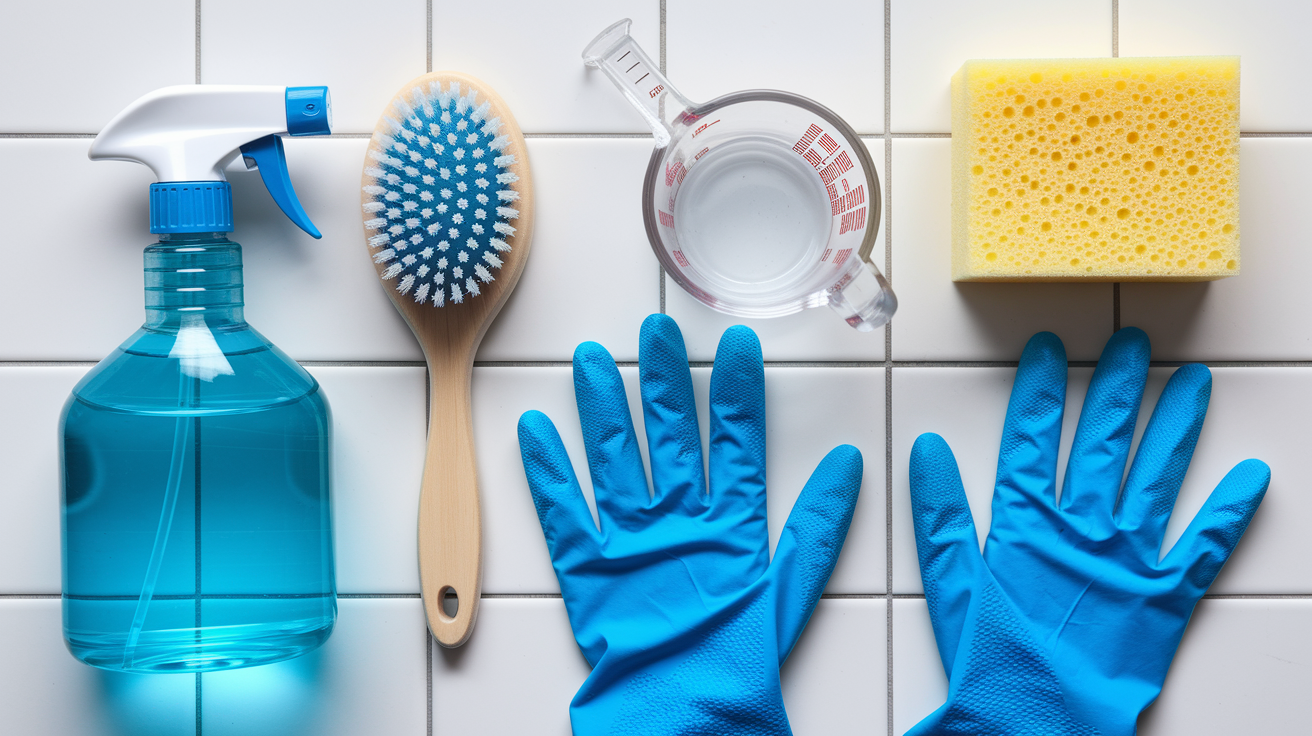
Mix 0.5 cup (4 ounces) of household bleach with 1 quart of cool water in a spray bottle or bucket. Put on rubber gloves, eye goggles, and respiratory protection before you open the bleach. Spray or apply the solution to the moldy surface using a sponge, and gently scrub with a soft brush to work it into the visible mold. Let it sit for at least 30 minutes, potentially several hours for heavy surface growth. Don’t rinse the treated area. Let it air dry completely with windows open and fans running for ventilation.
Some areas need a second or third treatment if discoloration sticks around after the first application dries.
This approach only changes how the wall looks by removing visible surface mold. The roots stay alive beneath the surface. The mold will almost certainly regrow from those roots within days unless you also fix the moisture source feeding it.
More Effective Alternative Cleaners for Mold on Drywall
Several cleaning alternatives work better than bleach for porous drywall surfaces and create fewer health risks.
White Vinegar for Mold Treatment
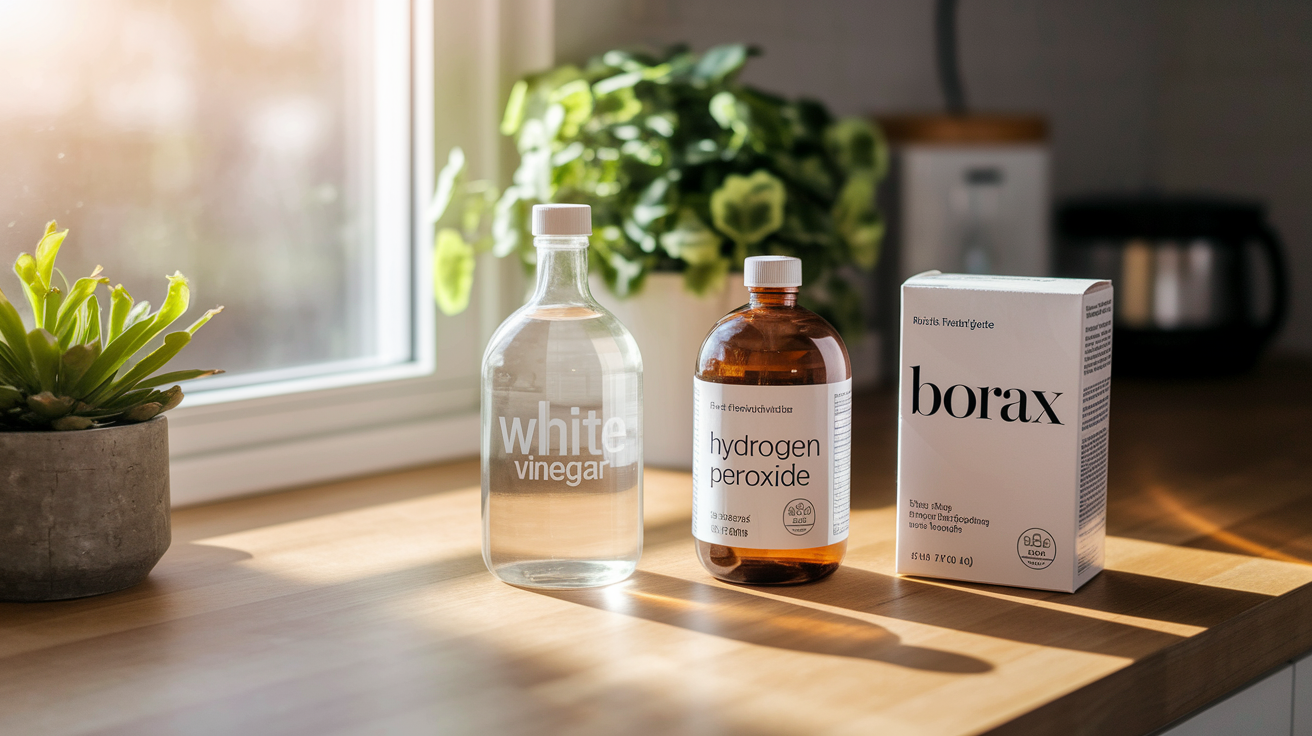
White distilled vinegar kills about 80 to 82 species of household molds without releasing toxic fumes. Pour undiluted white vinegar into a spray bottle and saturate the moldy surface. Let it sit for one hour, then wipe down with a damp cloth. The acidity disrupts mold cell structures. Vinegar needs reapplication every few days for a couple of months to suppress regrowth while you work on the moisture problem. The smell goes away within a few hours. Vinegar won’t scratch or damage drywall, though you should avoid using it on natural stone surfaces elsewhere in your home.
Hydrogen Peroxide as a Bleach Alternative
Standard 3% hydrogen peroxide solution (the brown bottle from any pharmacy) works as well as bleach for killing surface mold without the harsh chlorine fumes. Spray it directly onto the mold and let it sit for at least 10 minutes before scrubbing with a brush. Hydrogen peroxide may fade or lighten white or colored paint, so test it on a hidden section of wall first. The solution loses strength when exposed to light, so keep it in the original brown bottle and use it fairly soon after opening.
Borax Solution for Maximum pH Impact
Borax gives you the most effective pH based mold suppression. Mix 1 cup of borax powder per gallon of warm water, stirring until dissolved. The high pH (around 9.5) makes the surface environment hostile to mold growth. Vacuum any loose mold from the surface first, then apply the borax solution with a scrub brush. Let it penetrate for 10 to 15 minutes, scrub thoroughly, then wipe away excess moisture. You can leave a thin borax residue on the wall as it continues to discourage mold. This works better than baking soda or vinegar because of the higher pH level. When you’re dealing with Water Damage Restoration situations that create ongoing moisture problems, addressing the water source quickly prevents the mold from establishing in the first place.
When Drywall Replacement Is Necessary Instead of Cleaning

Mold penetration beyond the surface layer makes cleaning pointless and requires cutting out the affected material. When mold reaches deep into drywall, you’ll notice the paper backing starts to separate or bubble, discolored areas feel soft when you press on them, and the gypsum becomes crumbly or chalky. The material may show dark staining that goes beyond surface discoloration. In advanced cases, you can actually push your finger into the wall slightly because the structure has weakened.
When mold growth extends to the wooden studs or insulation behind the drywall, cleaning the visible surface does nothing. The mold colony has spread into the wall cavity. You might see mold at the base of the wall, along ceiling joints, or around window frames where water intrusion happens. These locations often mean moisture has traveled behind the drywall and created conditions for extensive hidden growth.
| Condition | Action Required |
|---|---|
| Surface mold covering less than 3 square feet with firm drywall | Clean with vinegar, borax, or hydrogen peroxide; monitor for regrowth |
| Surface mold covering 3 to 10 square feet with firm drywall | Clean with proper containment procedures; consider professional assessment |
| Soft spots, crumbling texture, or mold covering more than 10 square feet | Cut out and replace drywall; call professional remediation |
| Visible mold on wooden studs or insulation behind drywall | Professional remediation required for proper containment and structural treatment |
| Musty smell with no visible mold, or recurring growth in same location | Professional inspection to locate hidden moisture source and extent of penetration |
When cutting out contaminated sections, wear an N95 respirator or better. Cutting releases thousands of spores into the air. Seal off the work area with plastic sheeting and tape, and run an exhaust fan out a window. Cut at least 12 inches beyond visible mold damage to make sure you remove all affected material.
Comprehensive Moisture Control to Prevent Mold Regrowth
Any mold treatment is temporary without addressing the underlying moisture problem that allowed it to grow.
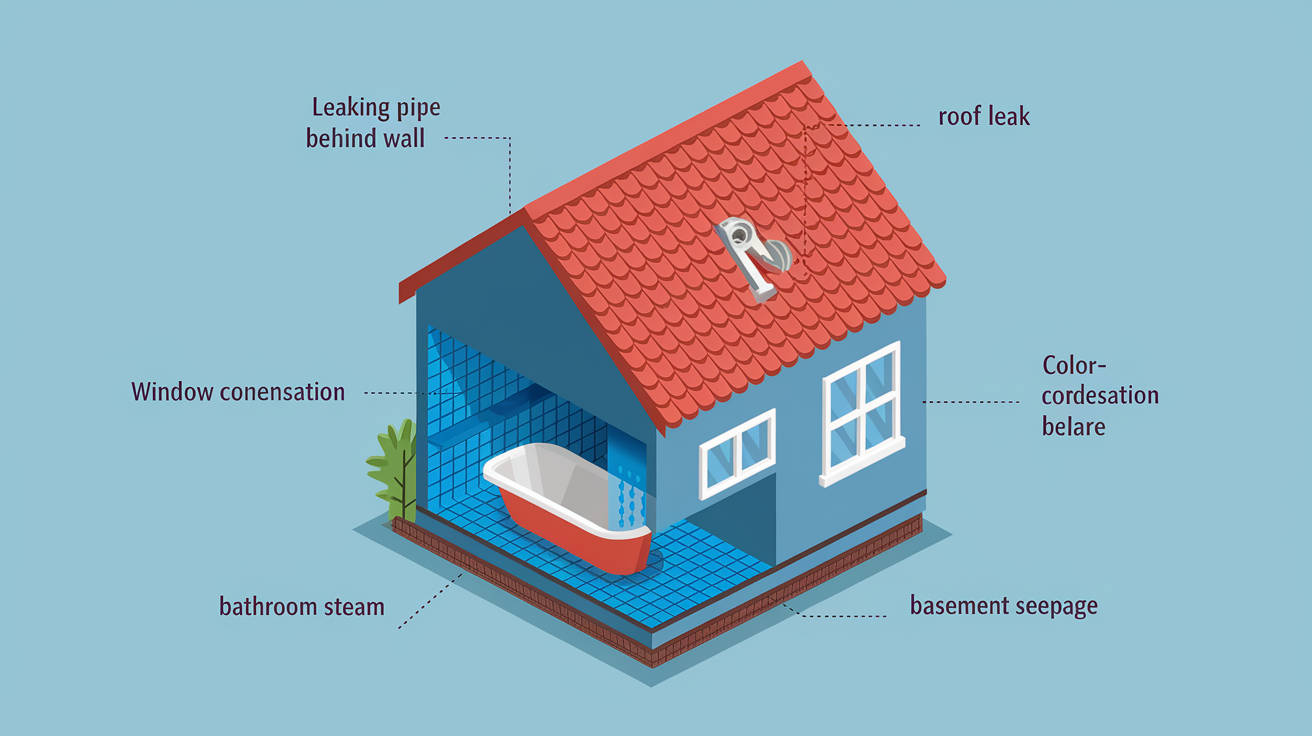
Plumbing leaks behind walls from supply lines or drain pipes. Roof leaks that let rain travel down inside wall cavities. Window condensation that runs down onto the wall and soaks into drywall at the sill. Bathroom humidity from showers and baths without adequate ventilation. Basement seepage or foundation moisture wicking up into wall materials. HVAC condensation dripping onto walls or ceilings from ducts or units. Gutter overflow directing water against exterior walls during storms.
Start with immediate steps while you plan permanent repairs. Wipe down condensation on windows every morning. Run a dehumidifier in the affected room. Fix any dripping faucets or visible plumbing leaks right away. Dry water droplets from walls after showers. Turn on air conditioning during humid weather to pull moisture from indoor air.
For lasting moisture control, keep indoor humidity between 30% and 50%. You can buy a simple hygrometer at any hardware store for under $15 to monitor levels in problem areas. Run a dehumidifier in basements and any room that consistently feels damp. Empty the collection bucket daily or connect a drain hose if the unit allows it. In bathrooms, a dehumidifier helps between showers if the room stays humid despite ventilation efforts.
Proper ventilation moves moisture heavy air out before it can condense on cool surfaces. Run bathroom exhaust fans during showers and for 20 minutes after you finish. Install or upgrade to a more powerful fan if the current one barely moves air. In kitchens, use the range hood fan when cooking anything that produces steam. Check that all exhaust fans actually vent outside, not just into the attic or wall cavity. Open windows on opposite sides of your home to create cross ventilation during dry weather. Never place a running fan directly in front of moldy surfaces as this spreads spores to previously unaffected areas throughout your home. After cleaning mold, expose the treated drywall to sunlight when possible by opening curtains and blinds, as UV light helps kill remaining surface spores. Taking steps to Prevent Water Damage gets rid of the moisture sources that allow mold to establish itself in the first place.
Professional Mold Remediation: When to Call the Experts
Homeowners should only handle mold areas smaller than 3 feet by 3 feet, and the EPA specifically says that contaminated areas larger than 10 square feet require professional restoration companies.
Mold covering more than 10 square feet total, or multiple scattered areas that add up to this size. Visible mold growth on or behind multiple walls, suggesting widespread moisture intrusion. Anyone in the household has respiratory issues, allergies, or compromised immune systems. Mold returns repeatedly in the same location despite cleaning and apparent moisture fixes. HVAC system contamination where mold grows in ductwork or on air handler components. Structural concerns such as soft studs, sagging drywall, or compromised framing members.
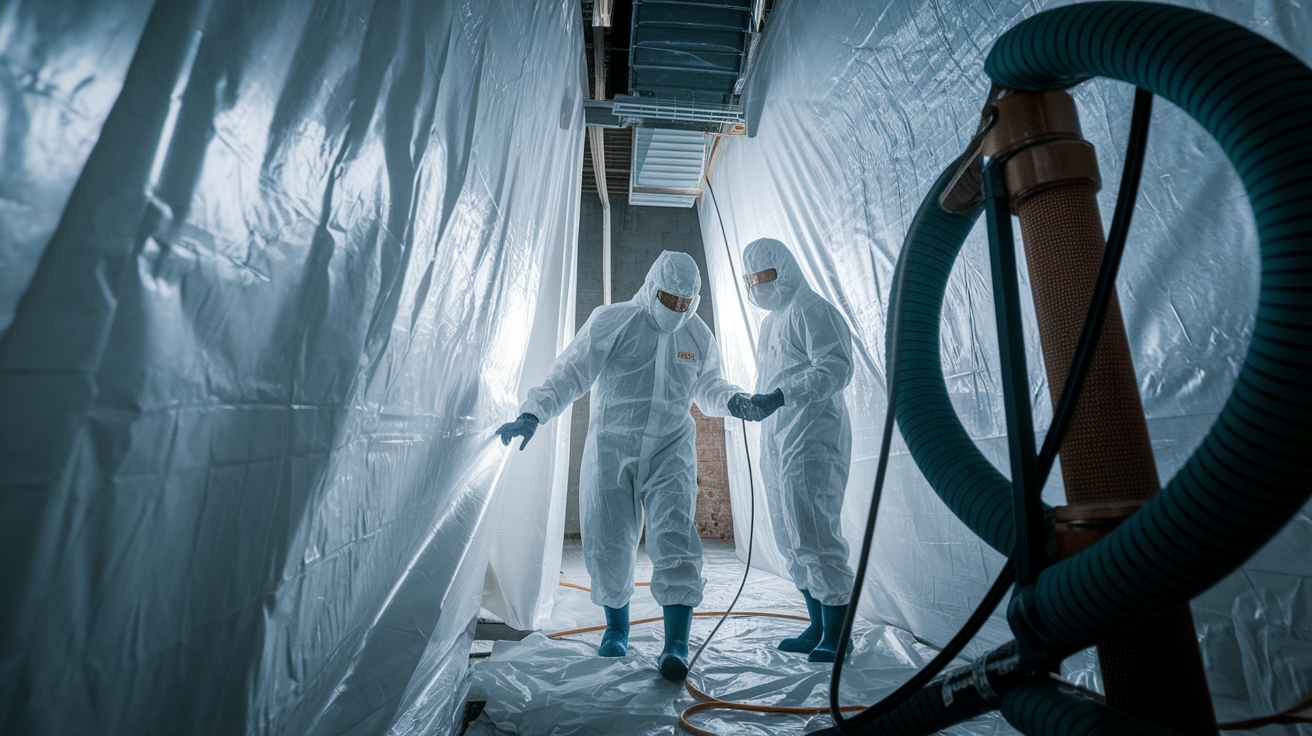
Professional remediation includes air testing technology to identify contaminated areas you can’t see, measure spore concentrations, and determine mold species present. Technicians set up containment barriers with plastic sheeting and negative air pressure to prevent spores from spreading to clean areas during removal. They use commercial grade HEPA filtration equipment to capture airborne spores. After removing contaminated materials, professionals perform verification testing to confirm the space is safe before reconstruction begins. The process includes identifying and documenting moisture sources so repairs can address root causes.
Trying DIY approaches on large mold problems or deep penetration typically makes things worse by disturbing growth and releasing massive spore counts throughout your home. Without proper containment, cleaning one moldy room can contaminate your entire house. Without moisture meters and inspection tools, you might miss hidden growth that continues spreading inside walls. Professional remediation costs money, but it costs less than rebuilding your house after inadequate DIY attempts allow mold to damage extensive areas.
Understanding Black Mold and Toxic Mold Concerns on Drywall

“Black mold” typically refers to Stachybotrys chartarum, a species that produces mycotoxins under certain conditions. Not all black colored mold is Stachybotrys, and not all Stachybotrys growth produces dangerous toxin levels. Many common household molds appear dark green or black, including species of Aspergillus, Cladosporium, and Alternaria. Visual identification tells you nothing reliable about toxicity or health risk.
Common health symptoms from household mold exposure include persistent coughing, wheezing, nasal congestion, throat irritation, eye irritation, skin rashes, and headaches.
Mold causes airway inflammation and infections in sensitive individuals. Prolonged exposure increases the severity of symptoms and the risk of developing chronic respiratory problems. Children, elderly people, and anyone with existing asthma or lung conditions face higher risk from any mold exposure. Untreated mold continues to spread across drywall surfaces and releases more spores as colonies mature, which increases household sickness risk over time.
Professional testing determines actual mold species through laboratory analysis of samples. Testing costs typically range from $200 to $600 depending on the number of samples and analysis depth. Species identification helps assess health risks and guides remediation approaches for different mold types.
Safe DIY Mold Cleaning Procedures and Limitations

Before touching any mold growth, put on an N95 respirator or better to protect your lungs from spores, heavy rubber gloves that cover your forearms, and eye goggles that seal around your face. Open all windows and doors in the work area and set up a fan blowing outward to create ventilation that pushes contaminated air outside rather than into other rooms.
Seal off the work area from the rest of your home by taping plastic sheeting over doorways and vents to contain spores. Use a HEPA filter vacuum to remove any loose, dry mold from the surface before applying wet cleaning solutions, and immediately dispose of the vacuum bag in a sealed plastic bag outside. Apply your chosen cleaning solution (vinegar, hydrogen peroxide, or borax) and let it sit for the recommended contact time without wiping it off early. Scrub the surface with a dedicated brush that you’ll throw away afterward, working from the outer edges toward the center of the mold growth to avoid spreading it. Wipe away loosened mold with disposable cloths or paper towels, immediately sealing them in plastic bags and taking them directly to an outdoor trash bin. After cleaning, run a fan and dehumidifier to thoroughly dry the area, checking with your hand that the surface feels completely dry before closing up the space.
After cleaning, monitor the treated area weekly for at least a month. Take photos immediately after cleaning so you can compare them to the wall’s appearance over time. If you see any new discoloration, smell a musty odor, or notice the same spot looking damp again, the moisture source hasn’t been fixed and the mold will keep returning. Thorough drying after cleaning takes hours, not minutes. Touch the wall several times over several hours to confirm it’s dry all the way through. Damp drywall stays cool to the touch even in a warm room. Wait for it to reach room temperature before considering the job complete.
Final Words
Does bleach kill mold on drywall? It removes surface stains, but it won’t reach the roots in that paper backing and gypsum core.
If you’re dealing with minor spots and want to try surface cleaning, vinegar, hydrogen peroxide, or borax work better than bleach without the health risks. But if the mold is widespread, if the drywall feels soft or crumbly, or if it keeps coming back, cleaning won’t fix it.
The real solution is fixing the moisture problem. Stop the leak, control the humidity, improve the ventilation. Otherwise, you’re just wiping down the same spot every few weeks.
You can handle small areas safely with the right steps. Anything bigger than a 3×3 square or behind the wall, call a pro and move on to the actual fix.
FAQ
Does bleach kill mold on drywall or just hide it?
Bleach kills surface mold on drywall but does not eliminate the root system that penetrates the paper backing and gypsum core. The chlorine stays on the surface while water soaks in, potentially feeding subsurface mold growth. Visible mold removal creates false cleanliness, and regrowth typically appears within days.
Is vinegar or bleach better for mold on drywall?
Vinegar is better for mold on drywall because it penetrates porous surfaces more effectively than bleach and is non-toxic. Vinegar kills approximately 80 percent of household mold species without releasing harmful fumes or feeding subsurface growth with excess moisture like bleach does.
What penetrates drywall to kill mold?
Borax solution penetrates drywall to kill mold most effectively due to its higher pH level compared to other cleaners. Mix one cup of borax per gallon of water for best results. Hydrogen peroxide at three percent concentration also penetrates better than bleach and requires at least 10 minutes of contact time.
How do you permanently get rid of mold on drywall?
You permanently get rid of mold on drywall by identifying and fixing the moisture source first, then either treating surface growth with vinegar or borax if minor, or replacing affected drywall sections if mold has penetrated deeply. Maintain indoor humidity between 30-50 percent to prevent regrowth.
When should you replace drywall instead of cleaning mold?
You should replace drywall instead of cleaning mold when affected areas exceed three feet by three feet, when drywall feels soft or crumbly, or when mold has reached wooden studs or insulation. EPA recommends professional remediation for contaminated areas larger than 10 square feet due to containment and cross-contamination risks.
What health risks does bleach create during mold removal?
Bleach creates health risks during mold removal including respiratory irritation from harsh fumes, eye tissue damage, and chlorine gas emission that can last a week or more on drywall. OSHA and EPA do not recommend bleach for mold remediation due to these hazards and limited effectiveness on porous surfaces.
How long does it take bleach to kill mold on contact?
Bleach takes 30 minutes to several hours to kill mold on contact, and some areas may require multiple cleaning treatments. However, bleach only kills surface mold on drywall while leaving roots intact in the porous material, making it ineffective for true mold elimination on gypsum board.
What moisture sources cause mold to grow on drywall?
Moisture sources that cause mold to grow on drywall include plumbing leaks, roof leaks, condensation from poor ventilation, high indoor humidity, bathroom steam without exhaust fans, basement seepage, and water damage from flooding or burst pipes. Addressing these sources is essential before treating visible mold growth.
When do you need professional mold remediation?
You need professional mold remediation when contaminated areas exceed 10 square feet, when mold appears after flooding, when growth is found inside HVAC systems, when you have health concerns or compromised immunity, or when mold has caused structural damage. Professionals use air testing, containment procedures, and verification testing.
How can you prevent mold regrowth after cleaning drywall?
You prevent mold regrowth after cleaning drywall by fixing all moisture sources, maintaining indoor humidity between 30-50 percent using dehumidifiers, ensuring proper ventilation with exhaust fans, running air conditioning to reduce moisture, and exposing cleaned areas to sunlight when possible. Monitor treated areas for several weeks.
What protective equipment is required for DIY mold removal?
Protective equipment required for DIY mold removal includes breathing protection or respirator, rubber gloves, and eye goggles to prevent exposure to spores and cleaning chemicals. Ensure proper ventilation before starting, and never use fans that blow directly on moldy surfaces because this spreads spores to clean areas.
Can black mold on drywall be identified visually?
Black mold on drywall cannot be reliably identified visually because not all black-colored mold is toxic Stachybotrys chartarum, and many mold species appear similar. Professional testing determines actual mold species. Regardless of type, all mold should be addressed due to respiratory issues, allergic reactions, and health concerns.
