

Standing in front of water damaged drywall with a utility knife in your hand, you’re about to make a decision that could cost you hundreds or even thousands of dollars if you get it wrong. Repair looks cheaper and faster, but replacement might be the only safe option depending on what kind of water hit your walls and how long it’s been sitting there. The difference comes down to five specific factors that tell you whether that drywall can be saved or needs to go in the dumpster, and most homeowners miss at least two of them.
Making the Repair or Replace Decision: Critical Factors to Evaluate

The repair or replace decision for water damaged drywall comes down to five things: what’s in the water, how long it sat there, how much got wet, whether the material is still structurally sound, and if mold started growing. These factors don’t work alone. They combine to tell you if the drywall can be saved or needs to go.
You can save drywall when you respond within 24 to 48 hours, the water is clean (Category 1 from supply lines, pipe bursts, or rain), only small areas got saturated, the structure stayed solid, and you don’t see mold yet. Clean water from a broken supply line that gets dried fast? You can often keep that drywall. Catch it early, dry it right, and the material goes back to normal service.
Replacement isn’t optional when contaminated water got involved. Category 2 gray water from washing machines, dishwashers, or sink drains carries bacteria and chemicals that soak into the porous gypsum core. Category 3 black water from sewage backups, toilet overflows, or outdoor flooding contains pathogens that make drywall permanently unsafe no matter what you try to clean. Moisture that sticks around beyond 48 to 72 hours creates high mold risk even with clean water. Structural damage like sagging sections, crumbling texture, or separation from studs also means replacement. The contamination doesn’t just sit on the surface. It soaks into the gypsum where you can’t reach it.
| Water Category | Source Examples | Salvageable If Dried Within | Typical Action Required |
|---|---|---|---|
| Category 1 (Clean) | Supply lines, pipe bursts, rain | 24-48 hours | Repair with proper drying |
| Category 2 (Gray) | Washing machines, dishwashers, sinks | 24 hours or less | Partial removal or flood cut |
| Category 3 (Black) | Sewage, toilets, outdoor flooding | Never salvageable | Full replacement mandatory |
Professional moisture assessment using meters is the only reliable way to make this call. What you see on the surface doesn’t tell you how far the water traveled inside the wall or how wet the gypsum core actually is.
Visible Signs Indicating Drywall Damage Severity

Visual inspection gives you a starting point for figuring out damage severity, but it never shows the complete picture. What looks minor on the surface often extends deep into the wall cavity and surrounding materials.
Look for these warning signs, from minor to severe:
Light water stains or discoloration (might be repairable if dried quickly). Bubbling or peeling paint. Warping or bowing sections. Soft spots when you press the surface. Sagging sections, especially dangerous on ceilings. Crumbly or deteriorating texture when touched. Musty odors indicating hidden moisture you can’t see. Visible mold growth, which needs immediate professional assessment.
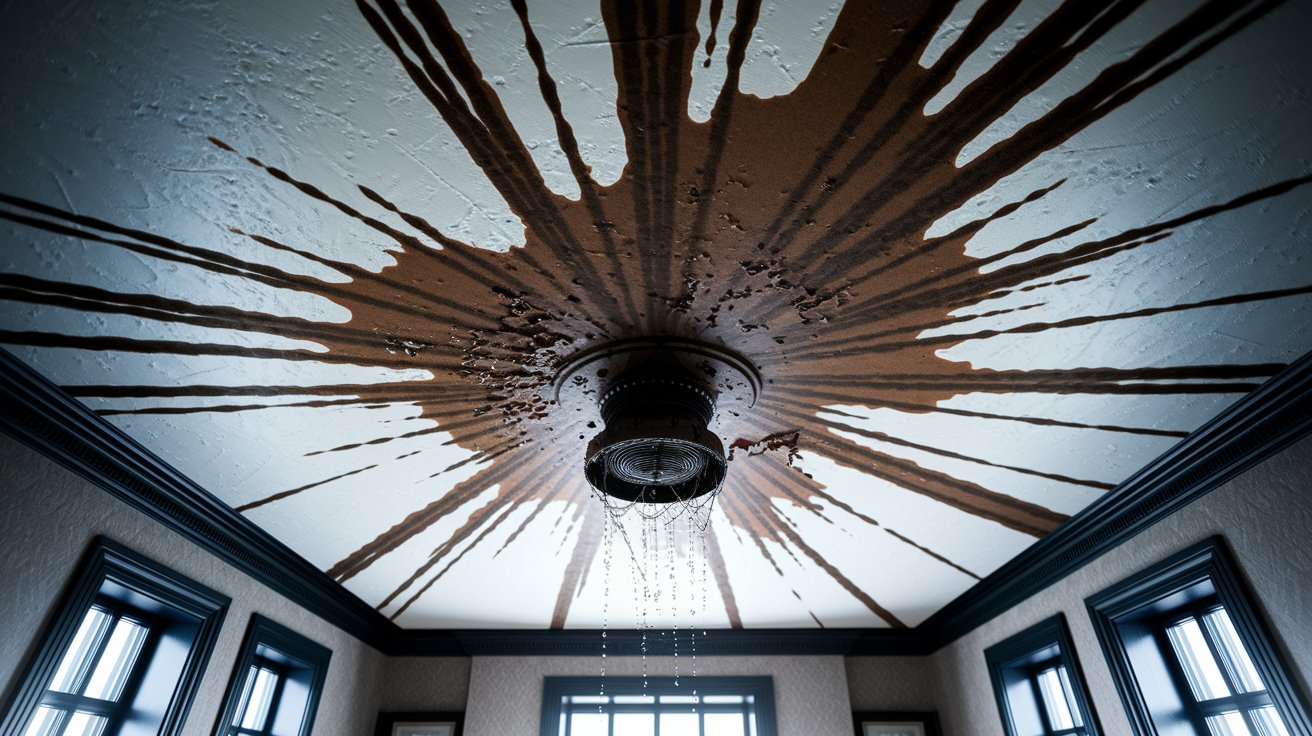
The damage you’re looking at probably extends further than you think. Drywall wicks moisture through capillary action, pulling water 12 to 24 inches above the visible waterline. That brown stain at the baseboard might mean wet drywall two feet up the wall behind the paint. Ceiling damage is particularly deceptive. A water saturated panel can collapse without warning even if it only looks stained. Any sagging or bulging on a ceiling requires immediate professional evaluation before you do anything else.
Professional Moisture Testing and Drying Standards
Touch testing drywall won’t tell you if it’s actually dry enough to save. Proper assessment requires professional equipment designed to measure moisture trapped inside materials you can’t see or feel.
Moisture meters provide pin type or pinless readings that show the actual moisture content of the gypsum core. The safe standard for gypsum drywall is under 1% moisture content. Infrared cameras detect temperature differences that reveal wet areas hidden behind wall surfaces, showing moisture patterns invisible to your eyes. These tools find water in wall cavities, behind baseboards, and in ceiling spaces where damage spreads without any visible evidence on the painted surface.
Professional drying equipment achieves safe moisture levels within 3 to 5 days under proper conditions. Technicians position air movers to create controlled airflow patterns across wet surfaces and through wall cavities. Commercial dehumidifiers pull moisture from the air faster than it can re-absorb into materials. Wall cavity drying systems inject dry air behind drywall through small holes, targeting moisture trapped in the space between the drywall and studs. This controlled process manages humidity levels and air circulation to prevent condensation while speeding up evaporation. Without this equipment, drywall can take weeks to dry, and mold growth becomes likely during that extended timeline.
A dry surface is misleading. The outer paper facing might feel dry while the gypsum core stays saturated, or the drywall might be dry while insulation and framing behind it stay wet and start rotting.
Emergency response speed directly affects whether damage is repairable or needs replacement. Delays beyond 24 to 48 hours often convert what could have been a drying job into a removal project. Regardless of whether you repair or replace, the drying phase takes the longest time. Most professional repair or replacement work finishes in under a day once materials are confirmed dry.
Mold Prevention and Why Contaminated Drywall Requires Replacement

Mold colonization becomes likely when moisture stays in drywall longer than 24 to 48 hours, and growth often starts on the hidden backside before you see anything on the visible surface.
Common mold species that colonize wet wall cavities include Aspergillus and Cladosporium. Both release spores into your indoor air, creating respiratory irritation, allergic reactions, and more serious health effects with prolonged exposure. Air quality degrades as spore counts increase, and the musty odor becomes your first warning that mold is growing somewhere you can’t see yet. The smell alone indicates active growth releasing metabolic gases.
Mold contaminated drywall requires replacement. Never paint over it or try to seal it with primer. Mold continues growing and releasing spores regardless of surface treatments because the contamination penetrates the porous gypsum where surface cleaning can’t reach. Applying primer or paint just hides the problem temporarily while it keeps getting worse behind the fresh finish.
Prevention works better than fixing it later. Respond to water damage within 24 hours before mold can establish colonies. Maintain indoor humidity below 50% using dehumidifiers, especially in basements and crawl spaces. Make sure you’ve got proper ventilation in bathrooms and laundries where moisture piles up regularly. Install moisture resistant or paperless drywall in vulnerable areas during any renovation work. These products resist mold colonization better than standard drywall if water intrusion happens again.
Minor Repair Methods for Salvageable Water Damaged Drywall

Repair is only appropriate after you confirm the drywall is fully dry (moisture content under 1%), structurally sound, and free from contamination. Don’t start cosmetic repairs until moisture testing shows safe levels.
Minor water stains, small cracks, and texture damage can often be repaired without replacing the entire panel. Follow these steps:
- Clean the affected area and verify complete drying with a moisture meter
- Apply stain blocking primer to prevent bleed through. This step is critical for water stains that will otherwise show through every coat of regular paint
- Fill any cracks or small holes with joint compound
- Sand smooth after the compound dries, typically 24 hours
- Match the existing wall texture using spray texture or hand techniques
- Prime and paint with two coats for uniform appearance
Texture matching can be challenging and usually requires practice on scrap material before you work on the visible wall. Get the pattern and depth right before you commit to the repair area. Water stain bleed through is the most common mistake. Homeowners skip the stain blocking primer, then watch brown tannins reappear through fresh paint within days. The stain blocker seals those tannins so they can’t migrate to the surface.
Full Replacement Process for Water Damaged Drywall

Professional replacement follows industry standards set by IICRC S500 guidelines and involves multiple phases including critical inspection of systems hidden behind the damaged drywall.
Preparation starts with containment barriers using plastic sheeting to isolate the work area and control dust spread. Shut off electrical circuits serving the affected area. Water and electricity create serious shock hazards. Remove the damaged sections by cutting at least 12 to 24 inches above the highest point of moisture penetration, accounting for capillary wicking that spreads water far above visible waterlines. Bag contaminated materials immediately and dispose according to local regulations for Category 2 or 3 water waste.
Cavity inspection reveals problems that water damaged drywall was hiding. Examine all wood framing including studs and joists for rot, soft spots, and mold growth that requires treatment or replacement before new drywall goes up. Check electrical wiring and junction boxes for any water contact. Corrosion and short circuit risks create fire hazards that must be addressed by a licensed electrician. Pull wet insulation, which loses R value and harbors mold once saturated. Inspect vapor barriers for tears that compromise moisture control. Verify that the original water source (plumbing, roof leak, foundation seepage) is actually fixed and won’t damage new materials. Check HVAC ductwork for moisture entry points. If water reached the drywall surface, it typically affected these hidden systems too.
Installation involves measuring and cutting new drywall panels to fit the opening, using moisture resistant or paperless drywall in areas prone to future moisture exposure. Secure panels to studs using drywall screws spaced properly. Every 16 inches on vertical seams, every 12 inches on horizontal seams, and 3/8 inch from panel edges. Make sure panels align with existing surfaces without sticking out or sinking in.
Finishing requires taping all seams with mesh or paper drywall tape embedded in joint compound. Apply joint compound in three coats. The first embeds the tape, the second widens the joint, the third feathers edges for an invisible transition. Sand between coats after the compound dries, 24 hours minimum per coat. Match the existing texture using spray equipment or hand tools. Prime all new drywall, then apply two finish coats of paint that match the surrounding wall color.
Flood Cut Technique: Partial Drywall Removal Strategy
Flood cuts offer a strategic middle ground between full wall replacement and attempting to save everything. Partial removal that eliminates contaminated material while preserving sections that weren’t affected.
Standard flood cut height is 12 to 24 inches above the highest visible damage, accounting for capillary wicking that pulls moisture far beyond what you can see at the waterline. The paper facing and gypsum core act like a sponge, drawing water upward through tiny spaces in the material structure. What looks like water damage stopping at 18 inches might actually mean moisture has wicked to 30 inches.
Flood cuts expose the wall cavity for complete inspection and drying access. You can see the condition of studs, check for mold on hidden surfaces, remove wet insulation, and verify electrical components are safe. Wall cavity drying equipment can inject air directly into the space, speeding up moisture removal from framing and preventing rot. The technique preserves upper drywall sections that remained dry, reducing both material costs and labor time compared to removing entire walls floor to ceiling. After the cavity dries completely, you only need to install and finish the lower section.
Cut height must be determined by moisture meter readings that show where moisture penetration actually stops, not by looking at waterlines alone. A professional moisture assessment maps the extent of saturation hidden inside the wall, then marks the cut line above the highest reading.
Water Resistant Drywall Options for Replacement Projects

Replacement projects give you the opportunity to upgrade to moisture resistant products that reduce damage risk if water intrusion happens again in the same location.
| Drywall Type | Core Material | Best Applications | Moisture Resistance |
|---|---|---|---|
| Standard (white board) | Gypsum with paper facing | Dry interior areas | Low |
| Green board | Gypsum with treated paper | Bathrooms, laundries, basements | Moderate |
| Purple board (mold-resistant) | Gypsum with fiberglass facing | High-humidity areas, flood zones | High |
| Paperless | Gypsum with fiberglass mat | Moisture-prone areas, commercial | Highest |
Purple board or paperless drywall makes sense for areas that have experienced water damage before. Basements prone to seepage, bathrooms with recurring humidity issues, or walls along exterior foundations where condensation occurs. Thickness matters for application and code compliance. 1/2 inch is standard for most walls, while 5/8 inch is required for ceilings and fire rated assemblies between garage and living space. Moisture resistant options add 10 to 30% to material costs but improve long term durability, especially in areas where standard drywall previously failed.
Cost Comparison: Drywall Repair vs Replacement After Water Damage

Cost varies significantly based on damage extent, water contamination category, labor market conditions, and whether you hire professionals or handle appropriate work yourself.
Multiple factors affect final pricing. Square footage of affected area, repairs scale with size. Water contamination level, Category 3 black water requires hazmat procedures. Mold remediation requirements add containment and treatment costs. Access difficulty, ceiling work runs 20 to 40% higher than wall repairs. Regional labor rates and contractor availability, emergency rates increase costs.
Typical cost ranges break down by damage severity. Minor cosmetic repairs after confirmed drying run $150 to $400 for patching, priming, and paint matching in small areas. Moderate damage requiring partial wall replacement costs $500 to $1,500 including flood cuts, cavity drying, and finishing. Extensive replacement projects involving multiple rooms or ceiling damage range from $1,500 to $4,000 or more. Add $500 to $3,000 for professional mold remediation if contamination requires containment, HEPA filtration, and antimicrobial treatment.
DIY approaches can cut costs by 60 to 70% by eliminating labor charges, but require skill, proper tools, and time investment. Improper repairs that trap moisture or fail to address mold create recurring problems that multiply long term costs. Small cosmetic projects might suit experienced DIYers, but contaminated water, structural damage, and mold situations require professional assessment and remediation to avoid health risks and code violations.
Ceiling Water Damage: Special Replacement Considerations
Ceiling damage presents greater safety risks and complexity than wall damage due to gravity effects, collapse potential, and difficult overhead access.
Collapse Risk and Safety Protocols
Water saturated ceiling drywall can give way without warning. Look for sagging sections, bulging areas, or heavy water staining that indicates the gypsum has absorbed significant moisture weight. Evacuate the area directly below any damaged ceiling and don’t allow anyone underneath until a professional assesses structural integrity. Standing under a compromised ceiling while you “check it out” puts you directly in the collapse path. The panel can drop suddenly, bringing soaked insulation, fasteners, and sharp drywall edges down on anyone below.
Identifying Water Source Above Ceiling
Locate and stop the water intrusion before you start any ceiling repairs. Common sources include roof leaks from damaged shingles or flashing failures, plumbing pipes running through attic or upper floor spaces, HVAC condensation drain problems, or bathroom fixtures leaking from above. Repairing ceiling drywall without fixing the source means you’re just setting up for the same damage to happen again. New materials will get wet and fail just like the originals did.
Insulation and Electrical Complications
Wet insulation loses thermal performance and provides ideal conditions for mold growth, so it typically requires removal along with the damaged drywall. Electrical wiring running through ceiling cavities creates serious hazards when water makes contact. Check junction boxes, light fixtures, and wire runs for corrosion or water exposure. Inspect ceiling joists and framing for structural damage including soft spots, rot, or mold colonization that can compromise load bearing capacity. Overhead work costs more because everything is harder. Cutting, removing materials, carrying new panels, and finishing all require awkward body positions and physical strain that slow progress compared to wall repairs at comfortable working height.
Professional Assessment vs DIY Evaluation for Water Damaged Drywall
Professionals use specialized equipment to detect problems invisible to homeowner inspection. Moisture meters with pin type or pinless sensors read to 0.1% accuracy, showing exact moisture content deep in materials. Infrared thermal cameras display temperature differences that reveal moisture patterns hidden behind wall surfaces. Wet areas show up as cooler zones on the thermal image. Borescopes inspect inside wall cavities through small holes, showing the condition of framing, insulation, and the backside of drywall without demolition.
Improper assessment leads to decisions that seem fine initially but create hidden moisture problems, mold growth, and structural rot that multiply repair costs later. What feels dry on the surface might be wet in the core or wall cavity. What looks like minor cosmetic damage might be extensive contamination behind the drywall.
| Scenario | DIY Appropriate? | Hire Professional? |
|---|---|---|
| Minor cosmetic damage, clean water, confirmed dry | Yes | Optional |
| Multiple rooms or large areas | No | Yes |
| Ceiling damage or sagging | No | Yes |
| Gray or black water contamination | No | Yes |
| Visible mold or musty odor | No | Yes |
| Insurance claim documentation needed | No | Yes |
Insurance Coverage and Claims for Water Damaged Drywall
Most homeowner insurance policies cover sudden, accidental water damage but exclude gradual damage or problems caused by maintenance neglect.
Covered events typically include burst supply pipes, appliance malfunctions like water heater failures or washing machine hose ruptures, storm damage from wind driven rain through damaged roofs, and sudden roof leaks from storm damage. Excluded events usually include seepage from chronic moisture problems, ongoing leaks that developed slowly over time, flood damage unless you carry separate flood insurance, and damage from maintenance neglect like a roof you should have replaced years ago.
Claim documentation requires photos of damage taken before any cleanup or repairs begin, professional moisture readings showing extent of saturation, written contractor estimates for repair or replacement work, receipts for all materials and labor, and a communication log of every contact with your insurance adjuster. Report damage within your policy timeframe. Most insurers require notification within 24 to 72 hours of discovery. Deductibles affect whether small claims make financial sense. A $1,200 repair with a $1,000 deductible only nets $200 from insurance while potentially raising your premiums.
Use licensed, insured contractors for insurance work. Proper documentation, code compliance, and warranty coverage satisfy insurer requirements and protect you from liability if something goes wrong during repairs.
Preventing Future Water Damage to Drywall
Prevention costs less than repeated repairs, and water damage often happens in the same locations when you don’t address underlying causes.
Effective strategies include cleaning gutters and downspouts quarterly to prevent roof water intrusion from overflow. Inspect roof annually and repair damaged shingles promptly before leaks develop. Insulate pipes in unheated areas to prevent winter freeze bursts. Install water leak detectors near water heaters, washing machines, and under sinks for early warning. Maintain proper grading around your foundation directing water away from the house. Use dehumidifiers in basements to maintain humidity below 50%. Seal foundation cracks and window wells preventing water entry during heavy rain. Replace rubber supply hoses with braided steel hoses on appliances. Rubber fails suddenly, steel hoses are more durable.
Schedule annual professional inspections for moisture prone areas with IICRC certified water damage professionals who can detect problems before they cause visible damage. Antimicrobial treatments are available for wall cavities in previously affected areas, reducing mold colonization risk if moisture intrusion happens again. Upgrade to moisture resistant drywall during any renovation work in bathrooms, basements, and laundry rooms. The modest cost increase provides much better protection.
Tools and Materials Required for DIY Drywall Water Damage Projects
Proper tools and materials are essential for safe, effective repairs. Missing key items leads to substandard results that create recurring problems.
Safety and Containment Equipment
N95 or N100 respirator, protects against mold spores and drywall dust. Safety glasses and work gloves. Plastic sheeting and tape for containment barriers. Box fans and dehumidifier for drying phase. Moisture meter, pin type or pinless for verification. GFCI extension cords for electrical safety in wet areas.
Removal and Preparation Tools
Utility knife with extra blades for scoring and cutting. Drywall saw or reciprocating saw for removal. Pry bar and hammer. Shop vacuum with HEPA filter for dust control. Spray bottles for misting during dusty demolition work.
Repair and Finishing Materials
Replacement drywall, appropriate type and thickness for location. Drywall screws, 1 1/4 inch length for 1/2 inch drywall. Joint compound and stain blocking primer. Mesh or paper drywall tape. Sandpaper or sanding sponges, 120 and 220 grit. Texture spray or texture compound for matching existing finish.
Professional grade moisture meters cost $100 to 300 but are essential for confirming drywall is actually dry enough to close up safely. Touch testing doesn’t work. You need accurate readings.
Common Mistakes When Deciding Between Repair and Replacement
Certain mistakes transform minor water damage into major renovation projects and health hazards that cost far more than proper initial repairs would have.
Seven common mistakes to avoid.
Assuming surface dryness means complete drying. Moisture trapped in the gypsum core or wall cavity continues causing damage and mold growth even when the surface feels dry. You need moisture meter verification showing readings under 1% before closing anything up.
Painting over water stains without stain blocking primer. Tannins from the water damage bleed through standard paint repeatedly, showing brown stains again within days or weeks no matter how many coats you apply.
Attempting to save mold contaminated drywall. Mold penetrates the porous gypsum core where you can’t reach it with surface cleaning. Spores continue releasing into your air regardless of what you do to the visible surface.
Failing to identify and stop the water source before repairs. Recurring intrusion from an unfixed leak ruins new drywall just like it damaged the original materials. Find and fix the source first.
Closing up walls before professional moisture verification. Trapping moisture behind new drywall guarantees mold growth you won’t see until it causes serious problems that require tearing everything out again.
Choosing the cheapest contractor without verifying licensing or insurance. Creates liability issues if someone gets hurt and quality problems when unlicensed workers don’t follow code or proper procedures.
Prioritizing cosmetic appearance over structural integrity. Visible repairs that look fine while hiding ongoing moisture damage and rot affect resale value, safety, and lead to much larger problems later.
Final Words
The choice between drywall replacement vs repair water damage comes down to timing, contamination level, and what moisture readings actually show.
Start with a professional assessment using a moisture meter. Don’t guess based on how things look or feel.
If you caught it early, the water was clean, and everything tests dry, you can often repair. If you’re dealing with contaminated water, visible mold, or structural softness, replacement is the safer path.
Take the time to address hidden damage behind the drywall now. Fixing studs, wiring, and insulation during the repair prevents the next round of problems.
You’ve got a clear roadmap. Follow the sequence, verify dryness before closing anything up, and you’ll end up with walls that last.
FAQ
Should you replace water damaged drywall?
You should replace water-damaged drywall when moisture has been present longer than 48-72 hours, when water came from contaminated sources like sewage or gray water, when visible mold is present, or when drywall shows sagging, crumbling, or structural damage that makes repair unsafe.
Is it cheaper to repair or replace drywall?
Repairing drywall is cheaper when damage is minor and limited to small cosmetic issues like stains or small cracks in dry, structurally sound material. Replacement becomes more cost-effective when damage is extensive across multiple areas or when contamination and mold require removal anyway.
How much does it cost to repair water damage drywall?
Water damage drywall repair costs typically range from $150-$400 for minor cosmetic fixes, $500-$1,500 for moderate damage with partial replacement, and $1,500-$4,000 or more for extensive replacement. Add $500-$3,000 if mold remediation is required.
At what moisture level does drywall need to be replaced?
Drywall needs replacement when moisture content stays above 1% after professional drying attempts, especially beyond 48-72 hours of water exposure. Safe drywall moisture is under 1%, measured with professional moisture meters, not just surface touch-testing which misses trapped interior moisture.
How long does water damaged drywall take to dry?
Water-damaged drywall takes 3-5 days to dry properly with professional equipment like air movers, dehumidifiers, and wall cavity drying systems. Without professional drying equipment, drywall may take weeks to dry, during which time mold growth becomes likely.
Can you repair drywall after a small water leak?
You can repair drywall after a small water leak if clean water was involved, response happened within 24-48 hours, moisture readings confirm complete drying under 1%, no mold is present, and damage is only cosmetic like staining or minor texture issues.
What is a flood cut in drywall repair?
A flood cut is strategic partial drywall removal from floor level to 12-24 inches above the highest moisture reading (not just visible waterline), exposing wall cavities for inspection and drying while preserving upper sections to reduce replacement costs.
Do I need a professional to assess water damaged drywall?
You need a professional to assess water-damaged drywall when damage covers large areas, involves ceilings, comes from contaminated water, shows visible mold or musty odors, or when making insurance claims requiring proper documentation and moisture verification equipment.
What type of drywall should replace water damaged sections?
Water-damaged sections should be replaced with moisture-resistant drywall like purple board or paperless types in previously flooded areas, bathrooms, basements, and high-humidity zones. These products add 10-30% to material costs but significantly improve long-term durability.
Does homeowners insurance cover water damaged drywall replacement?
Homeowners insurance covers water-damaged drywall replacement from sudden, accidental events like burst pipes, appliance malfunctions, and storm damage, but excludes gradual damage, maintenance neglect, seepage, and flooding without separate flood insurance. Proper documentation within 24-72 hours is required.
