

Most people assume their flooded house just needs to dry out for a few days, but that timeline depends on factors many homeowners don’t even check. If you start rebuilding before hidden moisture is actually gone, you’re sealing in conditions that grow mold and rot wood behind your walls. The real answer isn’t a single number, it’s knowing what speeds up or slows down drying in your specific situation and how to verify everything’s actually safe before you close things back up.
Expected Drying Timeline for Flooded Houses
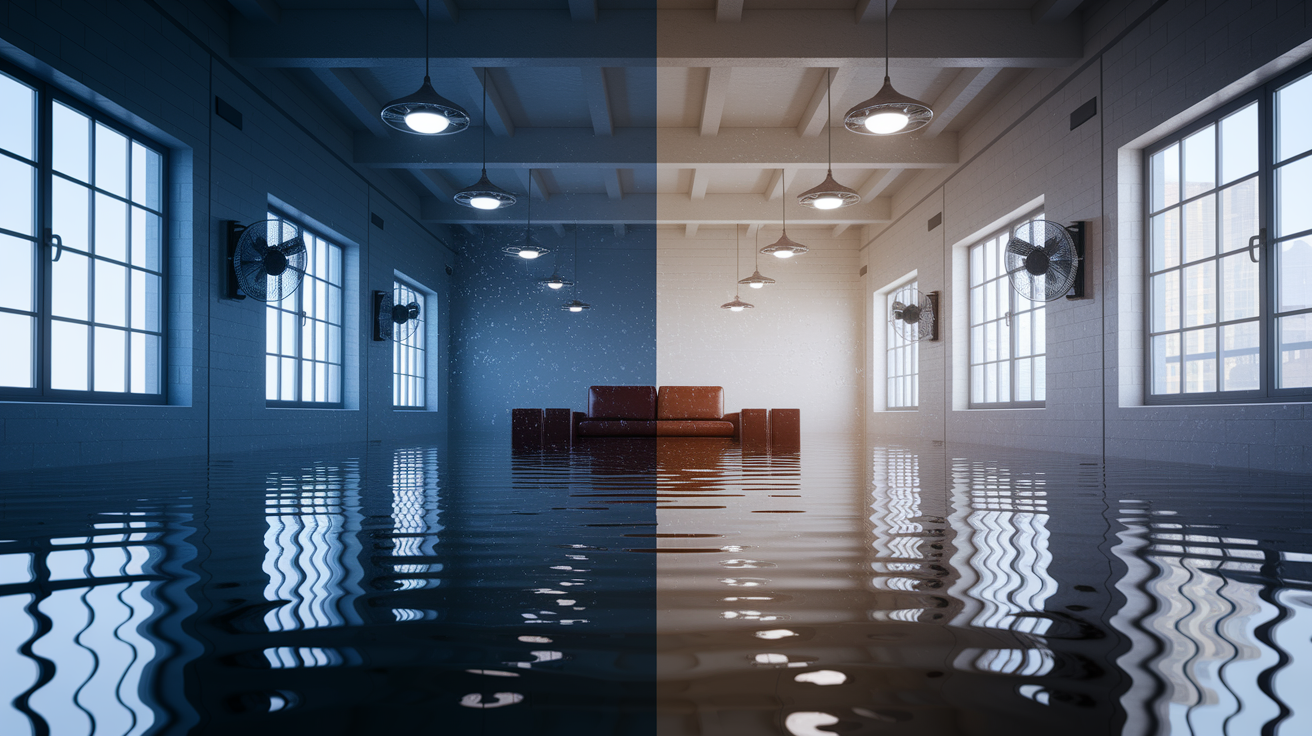
A flooded house usually takes 24 to 72 hours for surfaces to dry, but complete structural drying can stretch into several weeks depending on how bad the flooding is and how fast you respond. The timeline matters because mold can start growing within 24 to 48 hours after water shows up, which makes quick action critical if you want to prevent long term problems.
Here’s how drying timelines break down by flood severity:
Minor surface water (small leaks, overflowing sinks, limited spills): 1 to 2 days with good ventilation, fans, and a consumer grade dehumidifier when water hasn’t gotten into building materials
Moderate flooding (burst pipes, water heater failures, appliance malfunctions): 3 to 5 days when water’s seeped into flooring, baseboards, or lower wall sections but hasn’t saturated structural cavities
Severe flooding (storm surges, sewer backup, extensive intrusion): 7 days to several weeks because of deep saturation in structural materials, contamination requiring decontamination work, and extensive strip out before drying can even start
Initial water extraction: 24 to 48 hours to remove standing water and begin active drying with professional equipment
Final verification and monitoring: About 1 week of daily moisture readings to confirm all building materials have reached safe moisture levels before reconstruction starts
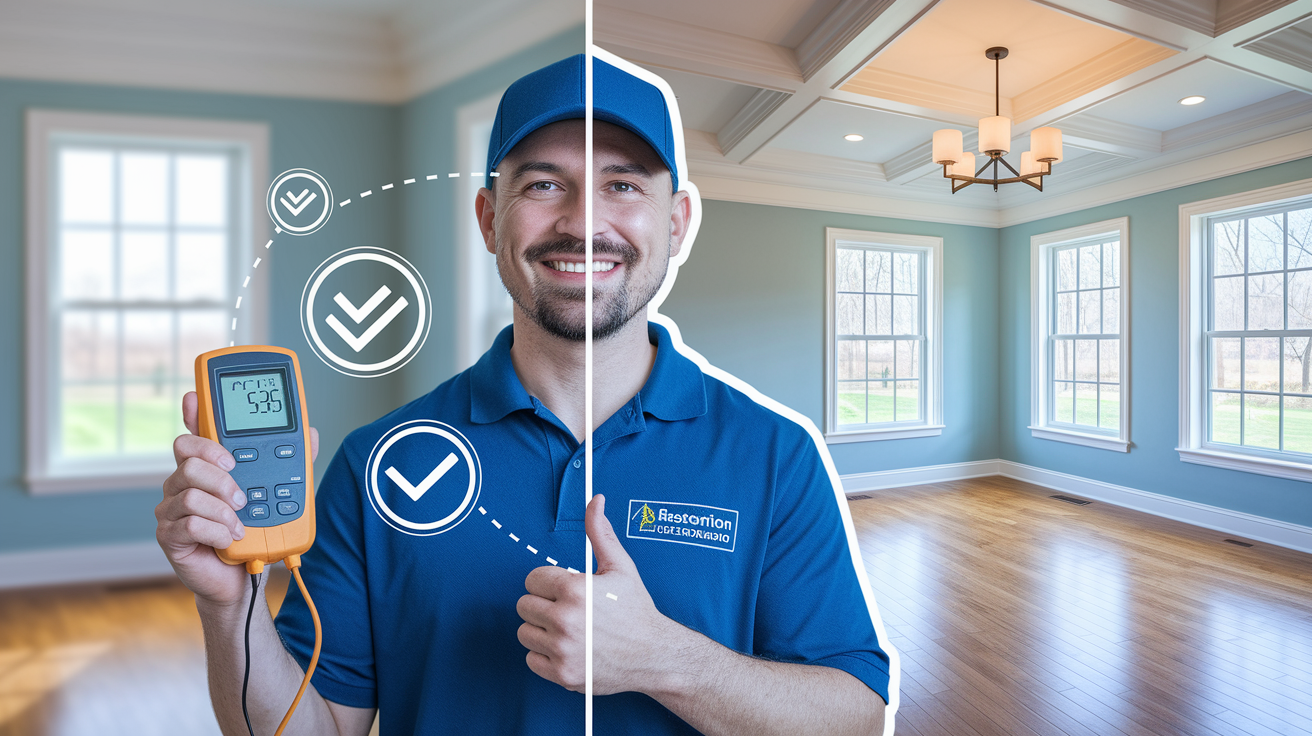
Complete drying verification needs professional monitoring with moisture meters that track progress in hidden spots like wall cavities, under flooring, and within concrete. Certified techs take daily readings and document progress until materials reach equilibrium moisture content, the point where building materials match the normal humidity of their environment. This verification usually spans about 1 week even after visible moisture disappears, because materials that look and feel dry may still hold moisture that causes problems later.
Critical Factors That Affect House Drying Duration

Multiple environmental and structural variables determine whether your house dries in a few days or needs weeks of intensive restoration work. No two floods dry at the same rate because each situation involves a unique combination of conditions that either speed up or slow down moisture removal.
Environmental conditions create the foundation for how quickly evaporation happens. High humidity prevents moisture from evaporating because the surrounding air is already saturated and can’t accept more water vapor. On humid days, water evaporating from your floors and walls simply condenses back onto cool surfaces instead of leaving the space. Temperature plays an equally important role since cooler conditions limit both airflow patterns and the physical rate of evaporation. Cold, damp basements dry much slower than warm, dry upper floors for this reason. Weather during the drying period affects whether you can use ventilation strategies, with rainy or humid outdoor air sometimes making indoor drying harder.
Ventilation and airflow determine whether evaporated moisture leaves your house or just moves to another surface. Stagnant air allows humidity to build up around wet materials, creating a barrier that slows further drying. Strategic air movement with fans or air movers constantly replaces humid air with drier air, maintaining the concentration gradient that drives evaporation. Opening windows helps only when outdoor air is drier than indoor air, otherwise you’re importing humidity that works against your drying efforts.
Flood severity and water volume create the baseline challenge you’re dealing with. A burst supply line releasing 60 gallons in your basement presents a different scope than 6 inches of standing water throughout your first floor. Larger water volumes saturate materials more deeply and affect more building components, extending every phase of the drying process. Older homes need slower, gentler drying methods because rapid moisture removal can cause historic plaster to crack, hardwood floors to cup, or period woodwork to split, adding time to restoration timelines even for moderate flooding.
Structural complexity affects how easily moisture can escape and how thoroughly you can apply drying equipment. Open plan spaces with minimal obstacles dry faster than compartmentalized floor plans with many small rooms. Wall cavities, crawlspaces, and areas behind built in cabinetry trap moisture in spaces where air movement is limited. Multi story homes require equipment on each affected level, while single story homes concentrate drying efforts in one area.
Water Category Classification and Drying Time Impact

Water contamination level significantly determines how long restoration takes because contaminated water requires decontamination work in addition to moisture removal. Clean water from sanitary sources dries quickest since you can begin extraction and drying immediately. Contaminated water categories require stripping out porous materials that can’t be adequately sanitized, then disinfecting remaining surfaces before drying equipment can run safely.
| Water Category | Source Examples | Contamination Level | Impact on Drying Time |
|---|---|---|---|
| Category 1 (Clean Water) | Broken supply lines, overflowing bathtubs, rainwater from clean sources, water heater failures | Sanitary, non toxic, no immediate health risk | Quickest timeline, drying begins immediately after extraction with no decontamination delays |
| Category 2 (Greywater) | Washing machine overflows, dishwasher leaks, toilet overflow with urine only, sump pump failures | Contains chemicals, bacteria, and pollutants that require handling precautions | Extended timeline, requires antimicrobial treatment of salvageable materials and removal of heavily contaminated items before drying |
| Category 3 (Blackwater) | Sewage backups, flooding from rivers or streams, standing water with bacteria growth, toilet overflow with feces | Grossly contaminated with pathogens, toxic substances, and serious health hazards | Longest timeline, requires full decontamination protocols, extensive material removal, professional sanitization before any drying begins |
Category 3 blackwater presents the greatest health hazard and always requires professional restoration with proper protective equipment. Porous materials like drywall, insulation, and carpet exposed to blackwater typically get removed and discarded rather than dried and salvaged, since thorough decontamination is nearly impossible. This removal work adds days to the restoration timeline before drying equipment even starts running. Even after removal, remaining structural materials need disinfection with antimicrobial solutions that require their own drying time.
The contamination category can change over time if you don’t act quickly. Category 1 clean water becomes Category 2 greywater after sitting for 24 to 48 hours as it absorbs contaminants from building materials and begins supporting bacterial growth. This is another reason why rapid response reduces overall drying time, since you’re working with cleaner water that requires less decontamination effort.
Professional Drying Equipment and Methods for Flood Recovery
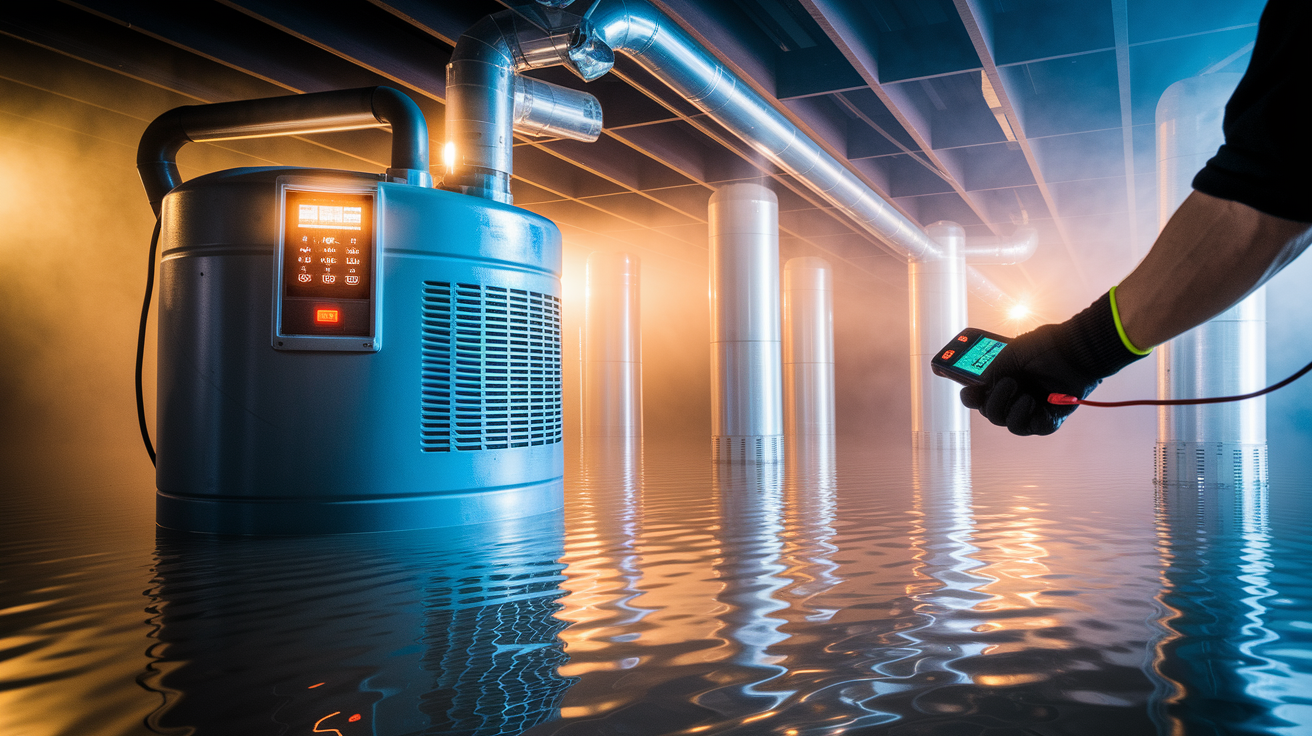
Professional restoration equipment operates at industrial capacity far beyond consumer products, completing in days what household fans and dehumidifiers might require weeks to accomplish. A single commercial air mover moves more air than ten box fans, while an industrial dehumidifier extracts moisture at rates 10 to 20 times faster than the portable unit you can rent at a hardware store.
Optimal professional drying combines multiple equipment types in coordinated protocols that address every phase of moisture removal simultaneously. Extraction equipment runs first, dehumidifiers control airborne moisture levels throughout the space, air movers create circulation patterns that reach all affected surfaces, and monitoring equipment tracks progress in real time. This layered approach speeds drying while preventing the incomplete moisture removal that leads to mold growth.
Water Extraction Equipment
Industrial grade pumps and vacuums remove standing water at rates of 50 to 100 gallons per minute, clearing flooded basements in hours rather than days. Submersible pumps sit directly in standing water and push it outdoors through discharge hoses, handling both clean water and debris laden floodwater. Truck mounted extraction units generate powerful vacuum suction that pulls water from carpets, padding, and porous flooring materials more thoroughly than shop vacuums. These commercial extractors remove 90% or more of water from saturated carpets in a single pass, while residential wet dry vacuums leave materials waterlogged even after repeated attempts.
Industrial Dehumidification Systems
Professional grade dehumidifiers come in two types with different operating principles and applications. Condensation dehumidifiers cool humid air below its dew point, causing moisture to condense into collection tanks or drain lines. They work efficiently in warm conditions (above 65°F) and handle the heavy moisture loads common in the first days after flooding. Adsorption dehumidifiers force air over desiccant materials (substances that naturally absorb moisture from air) and are generally faster at pulling moisture from building materials, though they use more energy and cannot operate above 35°C without damaging the desiccant. Restoration companies often start with condensation units for initial bulk moisture removal, then switch to adsorption dehumidifiers for final drying in stubborn areas like wall cavities.
Air Movement and Pressure Drying
Commercial air movers create focused, high velocity airflow that speeds evaporation across wet surfaces and moves humid air toward dehumidifiers for processing. These aren’t simple fans, they’re engineered blowers that move air in specific patterns (horizontal airflow across floors, vertical patterns up walls, or focused streams into tight spaces). Positive pressure drying systems blow hot, dry air into wall cavities and enclosed spaces, creating the fastest drying for structures with good ventilation or in vacant properties where noise isn’t a concern. Negative pressure drying uses suction to vacuum moisture from cavity spaces while filtering contaminated air through HEPA filters before releasing it, taking longer than positive pressure but creating safer conditions in occupied homes by preventing contaminants from escaping into living areas. Wall cavity drying requires removing small sections of baseboard or drilling discrete holes to insert air tubes, targeting moisture trapped behind walls where passive air circulation never reaches.
Professional monitoring coordinates all this equipment by identifying which areas need more attention and when to adjust drying strategies. Restoration techs reposition air movers every 12 to 24 hours as surface moisture decreases, redirect drying efforts to slower drying materials, and adjust dehumidifier settings based on real time humidity readings.
Measuring Moisture Levels During the House Drying Process
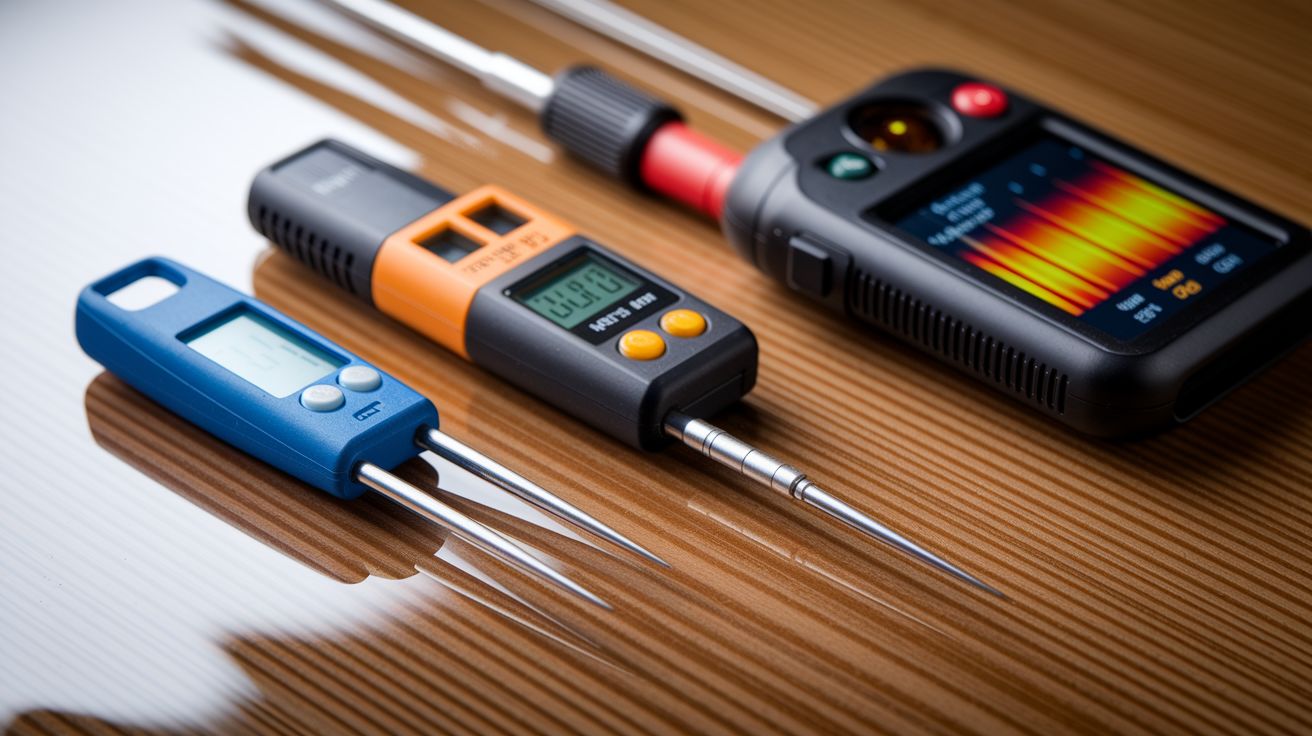
Scientific measurement provides the only reliable way to verify drying progress because building materials often hold significant moisture even when they look and feel dry to the touch. Your hand can’t detect the difference between 12% moisture content (acceptable for wood framing) and 18% moisture content (sufficient to support mold growth). Professional restoration relies on calibrated instruments that detect moisture in specific materials and locations throughout the drying process.
Moisture meters measure water content directly in building materials by sending electrical signals through the material and measuring resistance or capacitance. Pin type meters insert small probes into drywall, wood, or other materials to get readings at specific depths, revealing moisture gradients from surface to core. Non invasive meters scan surfaces without penetration, mapping moisture across large areas quickly to identify problem zones that need closer inspection. Techs take readings in a grid pattern across affected areas, documenting measurements at the same locations daily to track the drying rate. When readings stop decreasing or plateau above acceptable levels, it signals a problem requiring equipment adjustment or material removal.
Hygrometers measure relative humidity and temperature in the air, calculating dew point and grains per pound of air (absolute moisture content). These readings tell restoration professionals whether their dehumidifiers are keeping up with evaporation rates and when to adjust equipment. Thermal imaging cameras reveal temperature differences that indicate moisture location, since evaporation creates cooling that shows up as dark areas in infrared images. Hidden moisture behind non porous surfaces like tile or vinyl flooring shows clearly on thermal images even when moisture meters can’t directly access the wet material. Wall cavities, ceiling spaces, and areas behind cabinetry get scanned regularly to catch moisture migration you can’t see.
Documentation protocols require photographing moisture meter readings and recording measurements in detailed logs that track each location through the entire drying timeline. This creates an evidence trail for insurance claims and provides legal protection if disputes arise about work quality. When moisture readings reach equilibrium moisture content levels appropriate for your climate and building materials, you have objective proof that drying is complete and reconstruction can begin safely.
Building Material Specific Drying Times After Flooding

Different building materials absorb and release moisture at vastly different rates based on their porosity and density. Porous materials like drywall, wood, and insulation absorb water deeply through capillary action and air spaces within their structure, creating large moisture reservoirs that release slowly even under ideal drying conditions. Non porous materials like tile, metal, and plastic resist water absorption but trap moisture underneath their surfaces where it affects subfloor materials and framing.
Typical drying timeframes for common building materials:
Drywall: 3 to 5 days for minor wetting of the bottom 6 to 12 inches, but heavily saturated drywall above 2 feet requires removal rather than drying since gypsum core deteriorates and tape seams fail when thoroughly soaked
Carpet and padding: 2 to 4 days for carpet fibers themselves, but pad underneath often requires 5 to 7 days or complete removal if saturated, since dense foam pad traps water and supports bacterial growth
Hardwood flooring: 5 to 10 days depending on wood species, thickness, and finish, with cupping and warping common if drying happens too quickly, requiring slow controlled drying over weeks in some cases
Concrete floors and foundations: 2 to 4 weeks or longer since concrete is dense and porous, absorbing significant water that releases slowly from interior portions even after surfaces feel dry
Subfloor materials: Plywood subfloor takes 7 to 14 days when saturated, OSB (oriented strand board) often requires 10 to 21 days since strand structure traps moisture, and particle board almost always needs replacement since it swells and loses structural integrity
Wall and ceiling insulation: Fiberglass insulation loses R value when wet and holds moisture for weeks, usually requiring removal, while closed cell foam insulation resists absorption and dries within days
Wood framing and structural lumber: 7 to 14 days for dimensional lumber to return to normal moisture content, longer for engineered lumber products that may delaminate if saturated
Non porous surfaces (ceramic tile, vinyl flooring, laminate): Surface dries within 1 to 2 days but moisture trapped underneath takes as long as the substrate material requires
Hidden moisture trapped beneath non porous surfaces presents special detection challenges since you can’t assess drying visually or by touch. Professional thermal imaging and non invasive moisture meters are essential for verifying that moisture isn’t accumulating under tile, vinyl, or sealed wood floors. Porous materials saturated more than 50% through their thickness often cost more to dry than replace, making removal and replacement the faster and more economical choice in severe flooding.
Mold Growth Timeline and Prevention During House Drying

Mold growth represents the most serious secondary damage risk from flooding and the primary reason why drying speed matters beyond simple convenience. Microscopic mold spores exist everywhere in normal indoor air, but they remain dormant until they land on damp organic materials where they can colonize.
The critical window is 24 to 48 hours from initial water exposure. Within this timeframe, mold spores on wet drywall, wood, insulation, and other organic materials begin germinating and establishing colonies if moisture persists. By 48 to 72 hours, visible mold growth often appears as dark spots or fuzzy patches, and the contamination becomes increasingly difficult to remediate. After a week of moisture exposure, mold colonization becomes so extensive that affected materials usually require removal rather than cleaning. Starting professional drying within the first 24 hours after flooding significantly reduces mold risk by removing moisture before colonization establishes.
Health impacts from mold exposure include respiratory problems, allergic reactions, asthma attacks, and chronic sinus issues for sensitive individuals. Even people without mold allergies experience symptoms when concentrations become high in indoor air. Children, elderly occupants, and anyone with compromised immune systems face greater health risks from mold exposure. Beyond health concerns, active mold growth creates persistent musty odors that permeate furnishings and require expensive remediation.
Structural damage from prolonged moisture extends beyond mold. Water weakens drywall by dissolving gypsum core and adhesive holding paper facing, creating soft spots and eventual failure. Wood framing exposed to moisture for weeks begins rotting as cellulose breaks down, compromising structural support. Wood floor cupping and warping become permanent when moisture content fluctuates repeatedly. Foundation materials experience efflorescence (white mineral deposits) as water draws salts to surfaces, and repeated freeze thaw cycles in damp concrete cause spalling and cracking. These structural impacts compound over time, making damage from a week old flood far more extensive than damage from the same flood addressed immediately.
Antimicrobial treatment becomes necessary with Category 2 and Category 3 water contamination. After removing standing water, techs apply EPA registered antimicrobial solutions to all affected surfaces to kill bacteria and inhibit mold spores before drying begins. Rapid professional drying remains the primary mold prevention strategy because no antimicrobial treatment works permanently on chronically damp materials. Keeping materials dry stops mold more effectively than any chemical treatment.
DIY Versus Professional Flood Drying Approaches
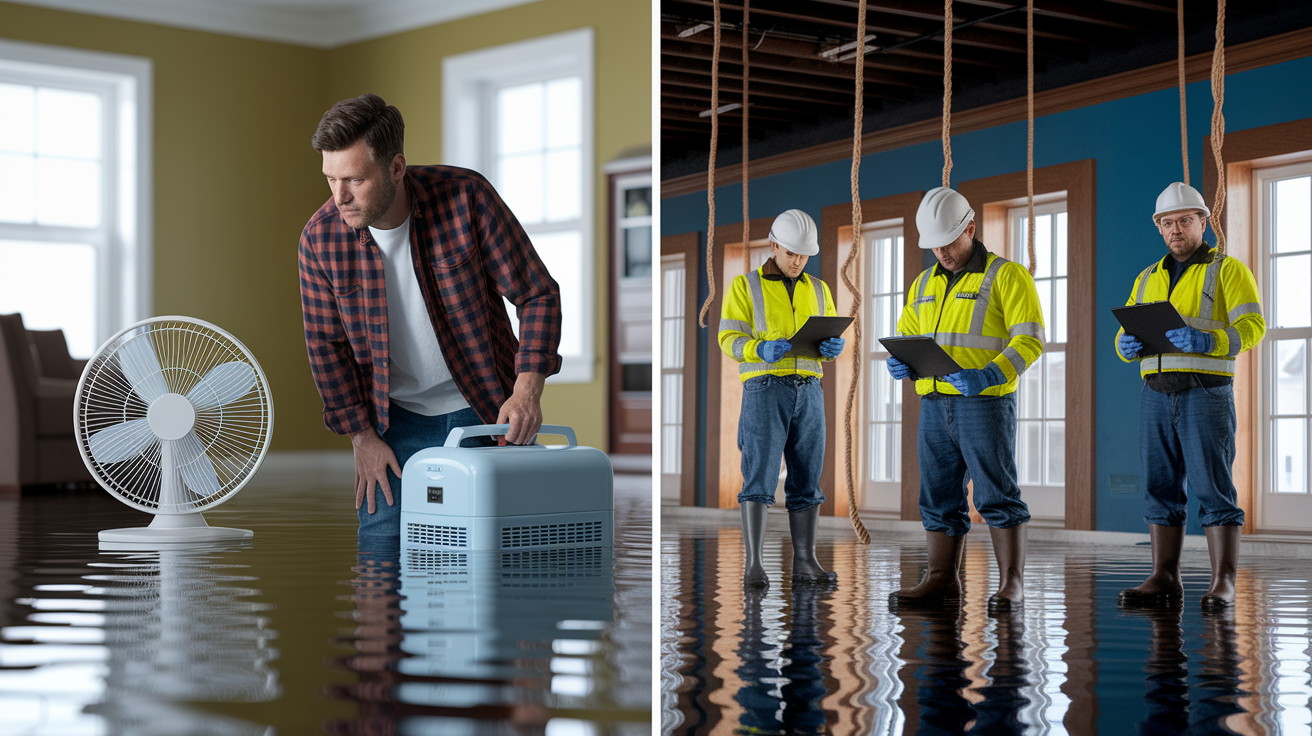
Minor surface water from small spills or localized leaks may be appropriate for DIY drying, while structural water intrusion that has soaked into flooring, walls, or insulation requires professional restoration equipment and expertise. The distinction matters because attempting DIY drying on severe flooding delays proper restoration and increases the likelihood of incomplete drying that leads to mold and structural damage.
Professional restoration equipment and IICRC certified drying methods significantly accelerate drying through higher capacity equipment, proven protocols, and continuous monitoring that adjusts strategies as conditions change. A professional crew extracts water, places drying equipment, and establishes monitoring within hours of your call. They operate 24/7 for emergency response and provide detailed documentation with photographs and moisture readings that support insurance claims. Even for seemingly minor flooding, professional assessment detects hidden moisture in wall cavities and subfloor spaces that DIY inspection misses.
| Situation | DIY Approach | Professional Approach |
|---|---|---|
| Minor surface spills or leaks affecting small area (under 10 sq ft) with no wall or floor penetration | Shop vacuum extraction, household fans for air circulation, consumer dehumidifier, towels for surface water | Generally unnecessary unless moisture meter shows hidden saturation, but provides verification and documentation for insurance |
| Moderate flooding from burst pipe or appliance failure affecting entire room or multiple rooms | Not recommended, household equipment insufficient for volume, high risk of incomplete drying and mold | Industrial extraction, commercial air movers and dehumidifiers, moisture mapping, structural drying with cavity access |
| Severe flooding with standing water, water above baseboards, or saturation through flooring | Do not attempt, immediate professional assessment required to prevent structural damage | Emergency water extraction, full documentation for insurance, antimicrobial treatment, controlled structural drying, completion verification |
| Any contaminated water (Category 2 or 3) from sewage, outdoor flooding, or toilet overflow | Never attempt DIY, serious health hazards require professional decontamination protocols and PPE | Hazmat protocols, contaminated material removal, professional grade antimicrobial treatment, HEPA filtration during drying |
Consider professional assessment even for incidents that seem minor, since water follows hidden paths behind walls, under flooring, and through floor joist spaces. A restoration company inspection costs little compared to discovering mold growth six months later that requires gutting walls. Professionals use moisture meters and thermal imaging to detect saturation you can’t see, providing peace of mind that drying is complete or identifying problems that need attention. Most professional water damage restoration services include free or low cost initial assessment even if you decide to handle drying yourself for minor situations.
Basement and Foundation Drying Challenges After Floods

Basements present unique drying challenges due to below grade location, concrete materials, limited natural ventilation, and tendency to trap moisture that enters through foundation walls, floor cracks, or sewer backups. Severe flooding in basements often requires 7 days or longer for complete drying due to these complicating factors that don’t affect above grade spaces.
Standing water removal in basements requires careful attention to foundation stability and hydrostatic pressure. Pumping out deep standing water too quickly can cause foundation walls to collapse inward or basement floors to heave upward due to pressure differences between saturated soil outside and empty basement inside. Restoration professionals remove water in stages, typically limiting pumping to 2 to 3 feet per day when flooding exceeds 4 feet deep. This gradual approach adds time to the restoration timeline but prevents catastrophic structural damage that would require far more extensive and expensive repairs. Concrete floors and foundation walls require extended drying periods of 2 to 4 weeks or longer since concrete porosity allows significant water absorption that releases slowly from interior sections even after surfaces feel dry.
Wall cavity moisture in finished basements creates particularly stubborn drying challenges since insulation behind drywall traps water in spaces where air circulation is minimal. Fiberglass batt insulation acts like a sponge, holding moisture against wood framing for weeks. Standard air movers and dehumidifiers can’t effectively dry these enclosed spaces because humid air inside wall cavities has nowhere to go. Professional restoration addresses this through negative pressure drying that uses vacuum suction to pull moisture from wall cavities through small access holes while filtering extracted air through HEPA filters. This process requires removing small sections of baseboard or drilling discrete access holes, then sealing foam tubes into the openings that connect to vacuum manifolds. The setup takes time and the drying process runs for days, but it’s the only way to thoroughly dry enclosed wall cavities without removing all the drywall.
Structural integrity concerns require careful monitoring during basement drying, particularly in older homes where foundation waterproofing may be minimal or deteriorated. Moisture trapped in foundation walls can freeze during cold weather, causing spalling and cracking that worsens with each freeze thaw cycle. Basements with existing foundation cracks need professional assessment to determine whether water intrusion has undermined structural support. Rapid drying with excessive heat can cause thermal stress in concrete and masonry, creating new cracks in older foundations that require slower, gentler drying methods even when that extends the timeline. Foundation repairs must happen before reconstruction begins, since building finished walls over compromised foundations creates liability and safety issues.
Signs Your Flooded House Is Completely Dry
Visual dryness alone doesn’t confirm complete moisture removal because building materials can hold significant water content while appearing and feeling dry at surface level. Scientific verification with calibrated instruments provides the only reliable confirmation that it’s safe to begin repairs and close up wall cavities or install new flooring.
Professional verification indicators that drying is complete:
-
Moisture meter readings at or below baseline equilibrium moisture content for each specific material (typically 12 to 15% for wood framing, 0.4 to 0.8% for drywall, under 14% for wood subfloors) matching readings from unaffected areas of the house
-
Relative humidity measurements within normal range for your climate zone (typically 30 to 50% RH) with no localized humidity spikes near previously wet areas indicating ongoing evaporation
-
No visible water stains or discoloration on ceilings, walls, or floors, and no efflorescence (white mineral deposits) appearing on concrete or masonry surfaces
-
Materials feel completely dry to touch with no coolness indicating evaporation, no soft spots in drywall, and no spongy areas in wood flooring or subflooring
-
No musty odors present in affected areas, closets, or enclosed spaces, since persistent dampness creates distinctive smell even when moisture isn’t visible
-
Thermal imaging shows no hidden moisture pockets with temperature variations limited to normal HVAC or sunlight effects rather than evaporative cooling from wet materials
Professional verification before closing walls or installing new materials prevents trapping residual moisture that leads to mold growth, rot, and odor problems discovered months later. Completion certificates issued by certified restoration companies provide documentation for insurance purposes and future home sales, typically after approximately 1 week of daily monitoring confirms moisture levels remain stable. Insurance companies and mortgage lenders often require this documentation before authorizing payment or refinancing on properties that have experienced significant water damage.
Accelerating Drying Time With Homeowner Accessible Methods
Homeowners can take specific actions to speed up drying of minor water incidents using common household equipment and strategic environmental adjustments, though these methods don’t replace professional equipment for structural water damage. Understanding the limitations keeps expectations realistic and prevents costly mistakes from under drying building materials.
Maximizing airflow through strategic positioning creates the foundation for effective DIY drying. Place box fans in doorways to push humid air out of affected rooms while pulling drier air in from other parts of the house. Direct fans across wet surfaces at angles that move air parallel to walls and floors rather than straight into them, since parallel airflow evaporates moisture more efficiently. Create cross ventilation patterns by opening windows on opposite sides of affected rooms when outdoor air is drier than indoor air, but close them during rain or on humid days when you’d import moisture. Ceiling fans set to counterclockwise rotation push air downward, speeding floor drying. Move fans every 6 to 8 hours to target different damp areas as surface moisture decreases.
Temperature elevation accelerates evaporation by increasing the rate at which water molecules leave wet surfaces and enter the air. Raise your thermostat to 75 to 78°F (but not higher since excessive heat can damage materials or create safety issues). Use the HVAC system to circulate heated air through affected rooms if flooding is limited to specific areas. Central air conditioning’s dehumidification effect helps during warm months, though it doesn’t remove moisture as quickly as dedicated dehumidifiers. Never use portable heaters near wet materials or extension cords in damp areas since electrical hazards increase dramatically around moisture.
Consumer grade dehumidifiers provide measurable benefit for minor moisture situations when properly sized and positioned. A portable dehumidifier removes 30 to 50 pints of water per day depending on model and conditions, compared to 150 to 300 pints daily for commercial units. Place the dehumidifier in the center of the affected space with at least 12 inches of clearance on all sides for air circulation. Empty collection tanks frequently or rig continuous drain hoses to avoid automatic shutoff when tanks fill. Run dehumidifiers continuously rather than intermittently for faster results. The critical point is pairing ventilation with dehumidification, since ventilation alone on humid days just moves moisture around without removing it. Humid air will condense back on cool surfaces when air movement stops, defeating your drying efforts.
Avoid over drying building materials too quickly in older homes since rapid moisture loss causes plaster cracking, hardwood floor gapping, and period woodwork splitting. Maintain moderate drying conditions rather than using maximum heat and airflow. Watch for warning signs like new cracks appearing in walls or ceilings. These homeowner methods work adequately for water that affects only surface materials like carpet and the bottom few inches of drywall, but they cannot dry saturated subfloors, wall cavities with insulation, or concrete. Attempting DIY drying for structural water damage simply delays proper restoration while mold colonization begins.
Long Term Monitoring and Repairs After Flood Drying
Initial drying completion marks the beginning of the repair phase rather than the end of the restoration process. Materials that appear dry and pass moisture meter verification can still harbor residual moisture in hard to reach spaces that emerges over the following weeks, making post drying monitoring essential for catching problems before reconstruction proceeds.
The typical post drying monitoring period lasts 1 week with techs returning to take moisture readings at the same locations checked during active drying. Readings should remain stable or continue decreasing toward baseline equilibrium moisture content. Increasing readings indicate moisture migration from undetected reservoirs or new water intrusion requiring investigation. This monitoring catches issues like water traveling horizontally through concrete subfloors, condensation forming inside wall cavities due to inadequate ventilation, or slow leaks that weren’t initially identified as water sources.
Electrical system inspection becomes a non negotiable safety requirement before restoring power to circuits that were submerged or exposed to moisture. Water inside outlet boxes, switch housings, or electrical panel enclosures creates shock and fire hazards even after surfaces dry. Licensed electricians should inspect all affected circuits, test ground fault protection, measure insulation resistance, and verify proper grounding before energizing electrical systems. Many jurisdictions require inspection and approval before utilities reconnect service to flooded properties. Insurance companies document electrical inspection for liability purposes, since improperly restored electrical systems cause fires months after flooding ends.
Repair sequencing follows a specific order that prevents trapping moisture or creating new problems. Structural repairs to framing, subflooring, and foundation issues happen first since these affect building stability. HVAC and plumbing repairs come next to restore mechanical systems before enclosing walls. Insulation installation follows after all moisture concerns are resolved. Drywall, painting, and finish materials are the final steps after confirming all building cavities are completely dry. Rushing to install finish materials before structural drying is complete traps moisture that causes failure of the new materials and creates liability issues with insurance claims.
Documentation throughout monitoring and repair phases protects your interests if disputes arise about work quality or insurance coverage. Photograph all damaged materials before removal, document moisture readings from monitoring visits, keep receipts for all repairs and materials, and maintain communication records with contractors and insurance adjusters. This evidence trail proves due diligence in restoration efforts and provides support if mold or structural issues appear later.
Preventing Future Flood Damage and Reducing Drying Time
Prevention and preparation significantly reduce both the likelihood of flooding and the recovery time when water intrusion occurs. Over 54% of property owners experience water damage at some point, making prevention strategies worthwhile investments that pay back through avoided restoration costs and reduced insurance premiums.
Practical prevention and preparedness measures:
Sump pump installation and maintenance with battery backup systems prevent basement flooding from groundwater, checking operation quarterly and testing backup power annually
Foundation waterproofing and grading improvements that slope ground away from your house at 6 inches per 10 feet prevent surface water from flowing toward foundation walls
Regular plumbing inspections and appliance hose replacement every 5 years before failures occur, installing water leak detectors near water heaters, washing machines, and under sinks
Flood insurance coverage considerations since standard homeowner policies exclude flood damage, purchasing coverage before you need it (30 day waiting period before policies activate)
Emergency contact list for restoration professionals researched and saved before flooding happens, since finding qualified contractors during a crisis leads to poor choices
Water shut off valve location knowledge for every household member including main supply valve and individual fixture shut offs to stop water flow immediately when leaks occur
Pre identified equipment rental locations for pumps, fans, and dehumidifiers if professional restoration isn’t immediately available during widespread flooding events affecting many properties simultaneously
Preparedness planning reduces response time from hours to minutes when flooding begins, directly cutting the total drying duration by starting water removal and air circulation before saturation spreads through building materials. Homeowners who shut off water sources within 10 minutes and begin removing standing water within an hour typically see drying times 30 to 40% shorter than those who wait several hours to begin response. Knowing where your electrical panel is located and which circuits control affected areas lets you safely cut power before entering flooded spaces, preventing electrical hazards that delay professional response.
Regular maintenance catches minor issues before they become major flooding events. Replacing washing machine hoses before they burst, servicing sump pumps before they fail during heavy rain, and clearing gutters before water overflows against foundations prevents many common flooding scenarios entirely. When prevention fails, rapid response and professional restoration minimize both drying time and long term damage to your property.
Final Words
How long does it take for a house to dry out after a flood depends entirely on what you’re dealing with and how fast you respond. Surface water might clear in a day or two. Deep structural saturation can take weeks with professional equipment running around the clock.
Start measuring moisture early, document everything, and don’t guess when it’s actually dry.
The house will tell you when it’s ready for repairs if you’re checking with the right tools. Get it dry, keep mold from starting, and you’ll save yourself from tearing things out twice.
FAQ
How long does it take to dry out after a flood?
A house typically takes 24-72 hours for surface drying and up to several weeks for complete structural drying after a flood. Minor surface water may dry in 1-2 days, moderate flooding in 3-5 days, and severe flooding requires 7+ days with professional equipment and daily moisture monitoring.
How do you dry out a flooded house?
You dry out a flooded house by removing standing water with pumps or vacuums, running industrial dehumidifiers, positioning air movers for maximum airflow, and monitoring moisture levels daily with meters. Professional restoration combines water extraction, dehumidification, and pressure drying methods while tracking progress until materials reach safe moisture content.
How much does drying a flooded house cost?
Drying a flooded house typically costs between a few hundred dollars for minor surface water removal to several thousand dollars for severe flooding requiring professional equipment, decontamination, and extended drying time. Costs depend on water volume, contamination category, affected square footage, and duration of equipment operation.
Can a house be saved after a flood?
A house can be saved after a flood if water is removed quickly, drying begins within 24-48 hours, and contaminated materials are properly handled. Professional restoration following IICRC standards can prevent mold growth, preserve structural integrity, and return the home to safe condition when action is taken immediately.
What factors affect how long house drying takes?
House drying time is affected by flood severity, water contamination category, building materials, humidity levels, temperature, ventilation, and structural complexity. Porous materials like drywall and insulation dry slower than non-porous surfaces, while high humidity and cool temperatures extend timelines by preventing moisture evaporation.
What is the difference between Category 1, 2, and 3 water?
Category 1 water is clean water from supply lines that dries quickest, Category 2 greywater contains contaminants requiring decontamination before completion, and Category 3 blackwater from sewage or flooding presents serious health hazards requiring full professional decontamination that significantly extends restoration timelines.
Why is professional drying equipment faster than DIY methods?
Professional drying equipment is faster than DIY methods because industrial dehumidifiers, high-powered air movers, and pressure drying systems operate at significantly higher capacity. Professionals combine extraction, dehumidification, and air movement in coordinated protocols with scientific monitoring that accelerates drying by days or weeks.
When does mold start growing after a flood?
Mold starts growing within 24-48 hours after flooding if water damage is not addressed. Rapid professional drying within this critical window prevents mold colonization, protects indoor air quality, and avoids respiratory health risks while preserving structural materials from long-term moisture damage.
How do professionals know when a house is completely dry?
Professionals know a house is completely dry when moisture meters show readings at or below equilibrium moisture content, relative humidity falls within normal range, thermal imaging reveals no hidden moisture, and approximately 1 week of daily monitoring confirms stable conditions before issuing completion certificates.
Should you call a professional or dry a flooded house yourself?
You should call a professional for water soaked into floors, walls, or insulation, contaminated water, or flooding beyond minor surface spills. DIY methods with fans and consumer dehumidifiers work only for small, localized clean water incidents, while structural water intrusion requires IICRC-certified equipment and monitoring.
Why do basements take longer to dry after flooding?
Basements take longer to dry after flooding because below-grade locations limit ventilation, concrete absorbs water deeply, wall cavities trap moisture behind finished surfaces, and structural concerns require slower drying methods. Negative pressure drying helps remove moisture from cavity spaces without causing additional damage.
What are signs you can start repairs after flood drying?
You can start repairs after flood drying when moisture meter readings reach baseline levels, relative humidity normalizes, materials feel dry to touch, no musty odors remain, and thermal imaging confirms no hidden moisture pockets after approximately 1 week of professional verification.
