

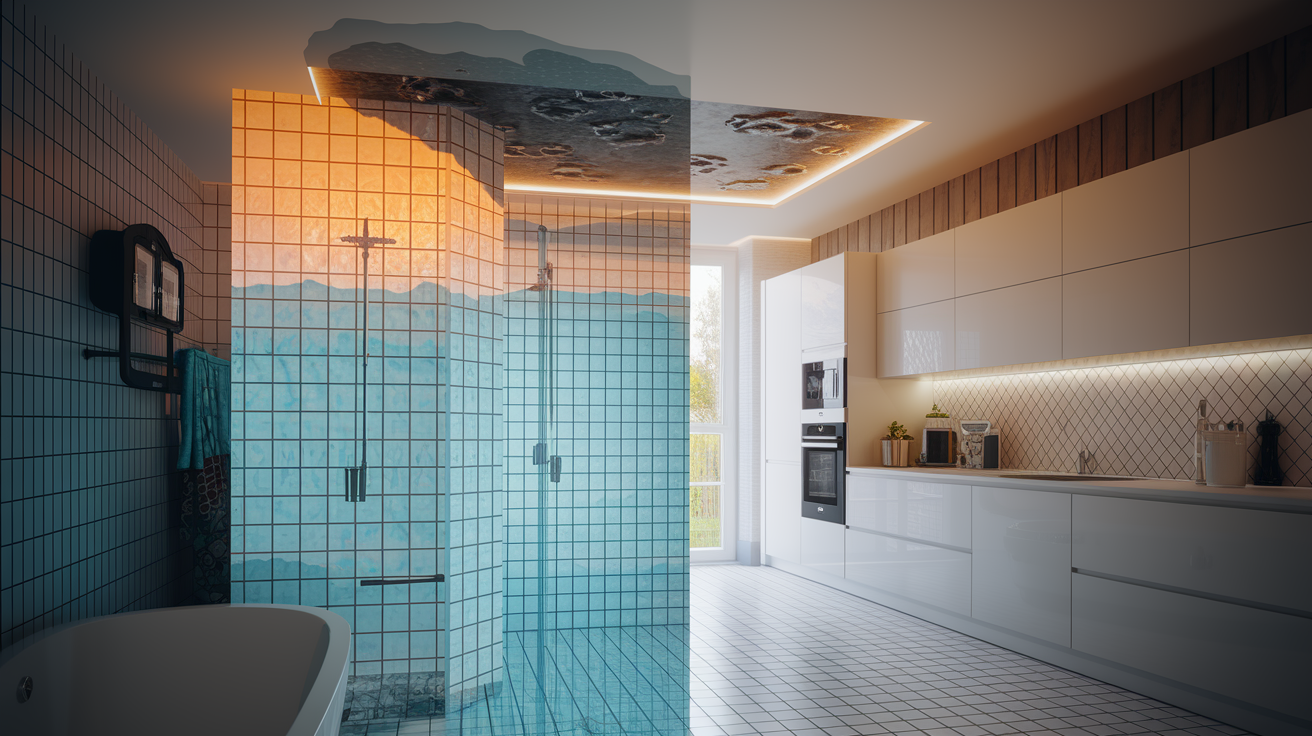
Most homeowners poke wet drywall and think it feels dry in a day or two. But surface dry is not structurally dry, and that difference is where mold starts growing. You’re not just waiting for the paper facing to feel cool to the touch. You’re trying to pull moisture out of the gypsum core, the wall cavity, the insulation, and the framing behind it. This guide breaks down real drying timelines based on damage severity, equipment type, and construction variables so you know when it’s actually safe to close up walls and move forward with repairs.
Drywall Drying Time: What to Expect After Water Damage

Professional drying equipment gets most wet drywall dried out in 24 to 72 hours. DIY household fans and dehumidifiers? You’re looking at 3 to 7 days or more. How long it actually takes depends on how bad the water damage is, what equipment you’re using, and how fast you start the drying process. Small clean water leaks caught within hours can dry in 24 to 48 hours if you’ve got commercial air movers and low grain refrigerant dehumidifiers working. Moderate leaks affecting bigger wall sections take 2 to 4 days with proper equipment. Major flooding events require 3 to 7 days minimum, even with professional grade tools.
Speed matters. Mold can start forming within 24 to 48 hours if wet drywall and framing aren’t properly dried and dehumidified. Complete drying means eliminating moisture from the surface paper facing and the gypsum core, plus any water trapped behind the drywall in wall cavities or insulation. Surface touch tests and visual inspections miss hidden moisture. These timeframes assume you start proper drying techniques immediately after discovering the water damage.
Here’s what you can expect based on damage severity and methods:
- Minor surface dampness with immediate response: 24 to 48 hours with professional equipment, 2 to 3 days with household fans and dehumidifiers
- Small clean water leaks detected within hours: 24 to 48 hours with commercial air movers and dehumidifiers
- Moderate leaks affecting one or two walls: 2 to 4 days with professional equipment, 4 to 7 days with DIY methods
- Major flooding saturating multiple rooms: 3 to 7 days minimum with commercial equipment, 7 to 14 days or longer with household tools
- DIY methods using only household equipment: Always add 2 to 4 days to professional timelines because of lower equipment capacity
Category 1 clean water from supply lines is often salvageable through drying within these timeframes. Category 2 grey water (washing machine discharge, toilet overflow without feces) may require partial demolition and longer drying, especially if materials stayed wet for more than 24 to 48 hours. Category 3 sewage or floodwater always requires removal and replacement of affected drywall, not drying and salvage. Health risks from contamination override any drying timeline.
These are estimates based on optimal conditions. Actual drying time varies significantly based on factors including humidity levels, temperature, ventilation, wall construction, and saturation depth, all covered in the following sections.
Key Variables That Control Drywall Drying Speed

Drying time varies significantly based on several measurable conditions that either speed up moisture removal or slow evaporation to a crawl.
Saturation Depth and Moisture Extent
Surface dampness dries much faster than fully saturated gypsum core. When water contacts drywall, the paper facing absorbs moisture first, then the gypsum core wicks water through capillary action. This wicking spreads moisture beyond the visible wet area. Water often rises several feet above the contact point and spreads sideways to sections that appear completely dry. A small leak at baseboard level can saturate drywall 3 to 4 feet up the wall within hours. Severely soaked drywall that stayed wet for days takes significantly longer to dry completely compared to mild water damage caught early. Measuring only the visible wet area underestimates how far moisture actually penetrated.
Humidity Levels and Relative Humidity
Relative humidity above 60 to 70 percent slows evaporation dramatically. Drywall industry research shows that raising humidity from 50 percent to 90 percent at 55 degrees Fahrenheit can increase drying time by up to 4 times. Air saturated with moisture can’t absorb additional water vapor from wet surfaces, stalling the drying process. Maintaining humidity below 40 percent speeds up drying and prevents mold growth during the recovery period.
Seasonal and climate impacts affect indoor humidity. Spring and summer bring high outdoor humidity, especially after storms. Austin’s high outdoor humidity above 60 to 70 percent relative humidity after storms can slow evaporation. Opening windows may introduce more humid outdoor air rather than help drying. Winter months with lower outdoor humidity allow better natural ventilation. Standard residential HVAC systems can’t provide adequate moisture removal for structural drying because they cycle on and off based on temperature, not humidity control.
Temperature and Ambient Conditions
Warmer air holds more moisture than cold air, which affects the air’s ability to pull water vapor from wet surfaces. Optimal drying occurs between 70 and 90 degrees Fahrenheit. Below 60 degrees, evaporation slows considerably. Above 90 degrees, discomfort and safety concerns arise for anyone working in the space. Heating season provides an advantage because furnaces warm indoor air, increasing its moisture holding capacity. Cooling season creates challenges because air conditioning removes some humidity but prioritizes temperature control over moisture removal. Temperature also affects how water moves within porous materials, with warmer conditions allowing moisture to move more freely through gypsum and wood.
Air Circulation and Ventilation
Stagnant air becomes saturated with moisture quickly, then stops pulling additional water from wet surfaces. Active airflow across wet drywall continuously replaces saturated air with drier air, speeding up evaporation. Cross ventilation strategies use airflow patterns to move moisture away from affected areas. Position fans to create air movement across wall surfaces, not just general room circulation.
Opening windows helps only when outdoor air is drier than indoor air. After rain events or during humid summer conditions, outdoor air at 70 to 80 percent relative humidity actually slows drying by introducing moisture. Check outdoor humidity with a hygrometer before opening windows. When outdoor humidity sits below 50 percent, cross ventilation through open windows and doors speeds up drying. When outdoor humidity exceeds indoor levels, keep windows closed and rely on dehumidifiers to remove moisture.
Water Category and Contamination Level
Category 1 clean water from supply lines (fresh water from broken pipes, supply line failures) allows for aggressive drying and salvage attempts. Category 2 grey water (washing machine discharge, dishwasher leaks, toilet overflows without feces) introduces contaminants that require antimicrobial treatment during drying, and materials may need replacement if they stayed saturated beyond 24 to 48 hours. Category 3 black water (sewage backups, rising floodwater, toilet overflow with feces, standing water with bacterial growth) requires complete removal and replacement of all affected porous materials including drywall. Contamination concerns override drying timelines because health risks from bacteria, viruses, and parasites can’t be eliminated through drying alone.
Drywall Thickness and Construction Materials Impact on Drying

Not all walls dry at the same rate. Material composition and construction methods create significant variations in drying timelines.
Standard half inch drywall dries faster than thicker five eighths inch gypsum board because moisture has less distance to travel from the core to the surface. The paper facing on both sides absorbs water quickly, but the gypsum core holds substantial moisture that must evaporate through the paper. Thicker panels contain more gypsum volume, which means more total water absorption and longer drying times. Fire rated Type X drywall uses denser gypsum with glass fibers, which absorbs water differently than standard panels.
Multiple layers of gypsum board or wallboard over existing surfaces double the drying challenge. Commercial buildings and some residential fire rated walls use double layer installations. Older homes sometimes have new drywall installed over deteriorated plaster rather than removing the old material. Water trapped between layers has minimal air exposure and dries very slowly. Walls damaged on both front and back sides should be opened on both ends for efficient drying, which can still take up to a few weeks. Closed walls without proper access can take months to dry and will likely develop mold growth long before natural evaporation completes.
Insulated walls require removal of both drywall and wet insulation because fiberglass and cellulose act like sponges, holding water and releasing it slowly. Exterior walls with insulation behind sheetrock always require at least a 2 foot flood cut to remove insulation for proper structural dry out. Fiberglass batts compress when wet and lose insulating value permanently. Cellulose insulation made from recycled paper absorbs tremendous amounts of water and takes weeks to dry even with air circulation. Spray foam insulation blocks airflow completely, trapping moisture against wood framing. Attempting to dry insulated walls without removal guarantees mold growth within the wall cavity.
Vapor barriers and foil backed materials trap moisture inside wall cavities. Some insulation products include foil or plastic facing that acts as a moisture barrier. While these materials prevent humidity from entering walls during normal conditions, they also prevent moisture from escaping after water damage. Materials like foil backed fiberglass or Styrofoam may need removal because they hold moisture and slow drying. Even after the drywall surface feels dry, moisture remains trapped behind the vapor barrier for weeks or months.
Water Source Categories and Their Effect on Drying Decisions

The water source determines whether drying is appropriate or replacement is mandatory. Water damage restoration uses a three category classification system based on contamination level and health risk.
| Water Category | Source Examples | Drying Approach | Typical Timeline |
|---|---|---|---|
| Category 1 – Clean Water | Supply line breaks, sink overflows with clean water, refrigerator ice maker leaks, water heater failures | Aggressive drying and salvage with proper equipment and rapid response | 24 to 72 hours with professional equipment, 3 to 7 days DIY |
| Category 2 – Grey Water | Washing machine discharge, dishwasher leaks, toilet overflow without feces, aquarium spills | Antimicrobial treatment during drying, possible partial demolition if soaked beyond 48 hours | 2 to 5 days with treatment, or replacement if contamination is significant |
| Category 3 – Black Water | Sewage backups, rising floodwater, toilet overflow with feces, standing water with bacterial growth | Complete removal and replacement, no salvage attempts | No drying timeline, immediate removal required |
Category 1 clean water from supply lines is often dryable within days if response happens immediately. The water contains no contaminants that create health risks, so aggressive drying makes economic sense. Materials that dry completely within 24 to 48 hours before mold colonization begins can return to service safely. Clean water incidents include burst supply lines, broken ice maker connections, water heater tank failures, and overflowing sinks or tubs filled with fresh water.
Category 2 grey water and Category 3 black water require different approaches that prioritize health and safety over salvage economics. Grey water contains chemical contaminants, microorganisms, or organic matter that creates moderate contamination risk. If grey water saturates drywall for more than 24 to 48 hours, bacterial growth begins and the material degrades beyond reliable salvage. Antimicrobial treatments applied during the drying process eliminate bacteria growth, but porous materials that stayed wet too long need replacement regardless. Category 3 black water carries significant health risks from bacteria, viruses, parasites, and toxic organic matter. Sewage contact requires immediate removal of all porous materials including drywall, insulation, carpeting, and ceiling tiles. No amount of drying or antimicrobial treatment makes sewage contacted drywall safe for reuse.
Comparing DIY and Professional Drying Approaches for Wet Drywall

DIY methods work for minor clean water incidents caught early, affecting small areas, with immediate response. A small supply line drip under a sink or a minor toilet supply line leak that affected one wall section for a few hours fits the DIY profile. Professional services become necessary for moderate to major water events, any contaminated water contact, multi room flooding, ceiling damage, or situations where rapid response didn’t happen within the first few hours.
DIY Drying Equipment and Methods
- Stop the water source first. Turn off the supply valve feeding the leak, shut down the appliance causing discharge, or address the drainage problem before starting any drying work.
- Remove standing water immediately. Use a wet/dry vacuum to extract puddled water from floors and saturated carpet, working from the edges toward the center of the wet area.
- Remove baseboards and trim. Pull baseboards, moldings, and trim to prevent moisture and mold spores from becoming trapped between materials and walls, and to allow air circulation behind these surfaces.
- Position fans for cross ventilation. Place box fans or rental air movers to create airflow across wet wall surfaces, positioning them at angles that move air along the wall rather than just blowing at one spot.
- Run dehumidifiers continuously. Set up at least one dehumidifier per affected room, emptying collection buckets regularly or connecting drain hoses to allow 24 hour operation.
- Monitor humidity levels daily. Use a hygrometer to track indoor relative humidity, targeting levels below 40 percent and adjusting equipment placement if humidity isn’t dropping.
Renting or purchasing fans and dehumidifiers from hardware stores makes sense when personal equipment is insufficient. Residential dehumidifiers typically remove 30 to 50 pints of moisture per day, which works for small areas but struggles with larger water damage. Running multiple dehumidifiers at the same time extracts more moisture and prevents mold growth during drying. For best dehumidifier setup tips, position units in central locations away from walls and furniture so air can circulate freely around the intake and exhaust.
Opening exterior windows and doors improves air flow and speeds up drying only when outdoor humidity sits below indoor levels. After checking outdoor humidity with a hygrometer, open windows if conditions are favorable. Otherwise, keep the space closed and rely on dehumidification.
Realistic DIY timeframe expectations run 3 to 7 days minimum for small to moderate water damage, and 7 to 14 days or longer for extensive saturation. Household equipment simply can’t match the moisture removal capacity of commercial units, so drying takes longer. The first hour after water damage is critical for minimizing repair time and costs, but even with immediate DIY response, expect substantially longer timelines compared to professional services.
Professional Equipment and Accelerated Drying
Commercial grade equipment delivers moisture removal capacity that household units can’t match. Professional air movers measure output in cubic feet per minute (CFM), with ratings from 1,500 to 3,000 CFM per unit. A typical household box fan moves 1,000 to 1,500 CFM at best. The difference means commercial equipment creates powerful airflow that penetrates deeper into wall cavities and speeds up surface evaporation dramatically.
Professionals place air movers every 10 to 14 feet along walls to maximize airflow and speed drying. Strategic placement creates overlapping airflow patterns that eliminate dead zones where moisture lingers. Units angle toward wall surfaces at 45 degrees rather than blowing straight at the wall, which moves air along the surface and creates better evaporation. Commercial air movers provide high CFM airflow while LGR (low grain refrigerant) dehumidifiers remove 100 plus pints per day, compared to home dehumidifiers at 30 to 50 pints per day.
LGR dehumidifiers use refrigerant coils to cool incoming humid air below its dew point, causing moisture to condense and drain away as liquid water. These units operate efficiently even when humidity drops below 40 percent, unlike standard refrigerant dehumidifiers that lose effectiveness in drier conditions. Large scale water damage may require multiple LGR units per floor or per section of the building. Desiccant dehumidifiers provide another option for extremely low humidity targets or cold environments where refrigerant systems struggle.
Professional water extraction equipment removes standing water before drying begins, reducing total moisture load significantly. Truck mounted extraction systems pull water from carpets and subfloors far more effectively than wet/dry vacuums. Removing this standing water immediately drops humidity levels and reduces the total work required from dehumidifiers. Submersible pumps handle deeper standing water in basements or crawl spaces.
The first hour after water damage is critical for minimizing repair time and costs. Professional restoration companies provide 24/7 availability and rapid deployment, often arriving on site within 60 to 90 minutes of the initial call. This rapid response prevents secondary damage from moisture wicking into unaffected areas, reduces mold colonization risk, and dramatically shortens total drying time. Equipment deployment within the first few hours can reduce total drying time from 7 days to 48 hours for the same water event.
Using Moisture Meters to Verify Complete Drywall Drying

Touch and visual inspection miss hidden moisture. Moisture meters are the only reliable way to confirm complete dryness before proceeding with repairs. Surface dryness doesn’t confirm gypsum core or wall cavity is dry. Hidden moisture remains trapped especially with insulation, vapor barriers, or tight construction that blocks evaporation paths. Paint on walls and glossy finishes prevent visual moisture detection. Drywall that feels dry to the touch can still hold 15 to 20 percent moisture content in the core, far above safe levels.
Moisture meters work by measuring electrical resistance (pin type meters) or electromagnetic wave reflection (pinless scan type meters). Pin type meters insert two metal probes into the material, measuring how easily electricity flows between the pins. Wet materials conduct electricity better than dry materials, so higher conductivity indicates higher moisture content. Pinless meters scan surfaces without penetrating, detecting moisture through density changes. Pin type meters provide specific depth readings, while pinless meters cover larger areas quickly for moisture mapping.
Key moisture measurement practices:
- Establish baseline readings from unaffected areas. Measure drywall in rooms unaffected by water damage to determine normal moisture content for your specific building materials and climate, typically 5 to 8 percent for interior drywall.
- Acceptable moisture content levels. Drywall readings above 12 percent indicate wet material requiring further drying. Wood framing should measure 10 to 12 percent moisture content or match unaffected framing elsewhere in the building.
- Multiple measurement locations required. Take readings every 2 to 3 feet along affected walls, at multiple heights from floor to ceiling, and on both sides of walls when accessible to map moisture distribution accurately.
- Document readings over time. Record moisture levels daily during the drying process, tracking how quickly levels drop and identifying areas where moisture stubbornly remains.
Professional moisture meters measure wood framing at typical 10 to 12 percent moisture content and compare drywall readings to unaffected areas. Readings create a moisture map showing where water penetrated and how far it wicked beyond the visible damage. This mapping guides selective demolition decisions, showing exactly where to cut drywall for removal while preserving unaffected sections.
Infrared cameras detect temperature differences indicating moisture because wet materials hold heat differently than dry materials. These cameras create thermal images showing cool spots where evaporation actively occurs, revealing hidden moisture behind walls, under flooring, or in ceiling cavities. Moisture meters and infrared cameras are used by technicians to verify complete dryness before repairs. Professional assessment using both tools provides comprehensive verification that DIY methods with visual inspection alone can’t match.
Signs Your Wet Drywall Needs Replacement Instead of Drying

Some water damage is too severe for drying alone. Health and safety concerns override the economics of salvage when any of these conditions exist:
- Contaminated water contact (Category 2 or 3). Grey water that soaked drywall for more than 24 to 48 hours, or any sewage contact, requires removal because bacteria colonized the porous gypsum and paper facing beyond reliable cleaning.
- Visible mold growth. Surface mold indicates deeper colonization within wall cavities and the gypsum core that can’t be cleaned without removal.
- Sagging or soft spots indicating structural compromise. Drywall that bends under light finger pressure or shows visible sagging has lost structural integrity and won’t recover even after drying.
- Crumbling gypsum. Water saturation breaks down the gypsum core into powder or causes the paper facing to separate from the gypsum, both indicating irreversible damage.
- Saturation lasting beyond 48 hours. Drywall that stayed wet for more than two days, especially without active drying, likely developed mold within the wall cavity even if surface mold isn’t yet visible.
- Long term hidden leaks with cycling wet and dry periods. Slow leaks behind walls that cycled between wet and dry over weeks or months created ideal conditions for mold deep within wall cavities.
- Ceiling bowing showing collapse risk. Any ceiling that shows downward bowing or collects water weight overhead requires immediate removal due to collapse risk.
Drywall replacement is required for sewage contact, mold presence, sagging or crumbling material, Category 2 water soaking for more than 24 to 48 hours, and bowed ceilings showing collapse risk. Safety risks from compromised structural integrity outweigh salvage value. A sagging ceiling section weighing 50 to 100 pounds from absorbed water can collapse without warning. Mold within wall cavities can’t be cleaned effectively without removing all affected materials.
Flood cuts are made 24 inches above the highest visible moisture line to remove wet sections while preserving upper portions. This standard practice ensures complete moisture removal because wicking typically spreads moisture 12 to 18 inches beyond the visible wet line. Cutting 24 inches above provides safety margin. The horizontal cut allows for clean panel replacement and creates a natural break point that conceals the repair seam behind baseboards or at chair rail height. Removing only the bottom 2 to 4 feet of drywall preserves the upper sections, reducing material and labor costs compared to floor to ceiling replacement.
Insulated exterior walls typically require removal even if surface drywall appears salvageable. Exterior walls with insulation behind sheetrock always require at least a 2 foot flood cut to remove insulation for proper structural dry out. Wet insulation acts as a moisture sponge that continuously releases humidity into wall cavities for weeks. This trapped moisture causes wood framing to develop rot and mold regardless of how dry the drywall surface becomes. Cost effectiveness of replacement versus extensive drying attempts favors removal when insulation is involved. For when to replace drywall after water damage, material showing any of these seven warning signs should be removed rather than attempting prolonged drying.
Special Drying Challenges: Ceilings and Hidden Wall Cavities
Ceilings collect pooling water above paper facing and face greater collapse risk due to gravity, often requiring faster intervention than walls. Water leaking from plumbing above, roof leaks, or second floor water damage flows downward and collects against ceiling drywall. The paper facing absorbs water, but gravity pulls the saturated gypsum downward. Ceiling sections can hold 50 to 100 pounds of water weight, stressing fasteners and joints. Sagging indicates imminent collapse risk. Response time for ceiling damage must be faster than for wall damage because structural failure happens within hours rather than days. Any visible bowing requires immediate removal of the affected section.
Walls behind cabinets, tile, or built ins dry more slowly and may require removing toe kicks, drilling access holes, or removing cabinet sections for proper air circulation. Bathroom walls behind tub and shower surrounds, kitchen walls behind base cabinets, and utility room walls behind washer and dryer units all share this challenge. These enclosed spaces block airflow completely. Moisture trapped behind cabinetry has no evaporation path. Removing toe kicks from base cabinets allows air movement into the cavity beneath. Drilling small access holes through cabinet backs or tile surrounds creates paths for air movement and moisture measurement. Some situations require removing entire cabinet sections to access the wall.
Hidden wall cavities that lack air circulation can take weeks to months without intervention. Standard wall construction creates a sealed cavity between studs, closed by drywall on both sides and possibly filled with insulation. Water that enters this cavity through wicking, leaking pipes, or seepage has minimal air exchange with indoor spaces. Walls damaged on both front and back sides should be opened on both ends for efficient drying, which can still take up to a few weeks. Closed walls without proper access can take months to dry and will likely develop mold growth. Creating access requires either removing baseboard and drilling holes near floor level, or cutting inspection openings in the drywall every 8 to 10 feet along the affected wall.
Long term hidden leaks behind bathroom walls, around windows, or under sinks often cycle through wet and dry phases multiple times, creating ideal conditions for mold deep within wall cavities. A dripping supply line behind a bathroom vanity might wet the wall for hours, then stop as usage patterns change, then restart during the next shower. This cycling prevents complete drying while maintaining moisture levels perfect for mold colonization. By the time visible signs appear (musty odor, staining on surfaces, visible mold growth breaking through), extensive hidden damage already exists. These situations almost always require wall opening and material replacement rather than drying attempts.
Mold Prevention During the Drying Process
Mold can begin forming within 24 to 48 hours if wet drywall and framing aren’t properly dried and dehumidified. This 24 to 48 hour critical window determines both the urgency of starting the drying process and the race to complete drying before mold spores colonize wet surfaces. Mold growth can begin within 24 hours of water exposure, creating urgency for quick drying. Every hour of delay reduces the likelihood of successful salvage and increases health risks from mold exposure.
Drywall paper facing provides the food source mold needs to grow. Paper is organic cellulose derived from wood pulp, exactly the material mold colonizes most aggressively. The gypsum core itself is relatively mold resistant, but mold growing on paper facing sends hyphae (root structures) into the gypsum and creates permanent contamination. Once mold establishes within the wall, surface cleaning becomes impossible. Mold requires three conditions at once: moisture above 60 percent relative humidity, food source (organic materials), and temperatures above 40°F. Unfortunately, these conditions describe exactly what wet drywall provides in a climate controlled home.
Using multiple dehumidifiers and air movers at the same time extracts more moisture and prevents mold growth during drying. Comprehensive prevention requires maintaining humidity below 40 percent throughout the affected space, not just near the dehumidifier. Position air movers to create airflow across all wet surfaces. Place dehumidifiers centrally to process air from the entire room. Monitor humidity with hygrometers at multiple locations because humidity varies by several percentage points from one end of a room to the other.
Professionals apply antimicrobial treatments to eliminate bacteria growth during the drying process. These treatments use EPA registered antimicrobial chemicals sprayed on surfaces after water extraction and before active drying begins. The treatment kills bacteria, mold spores, and other microorganisms present in the water or introduced from air during the drying period. Antimicrobial application doesn’t replace proper drying. Materials must still dry completely within 24 to 48 hours to prevent new colonization from airborne spores. For mold prevention after water damage, the combination of immediate water extraction, antimicrobial treatment, aggressive drying equipment, and humidity control below 40 percent provides comprehensive protection during the critical first 48 hours.
Health risks from mold exposure include respiratory problems, allergic reactions, asthma triggers, and immune system responses. People with existing respiratory conditions, allergies, compromised immune systems, or young children face higher risk. Musty odors provide an early warning sign that mold colonization began. The distinctive smell comes from microbial volatile organic compounds (MVOCs) that mold releases during growth. Any musty smell during or after the drying process indicates mold is actively growing somewhere in the affected area, even if visible mold hasn’t yet appeared on surfaces.
When Repairs Can Begin: Timeline for Painting and Finishing Dry Drywall
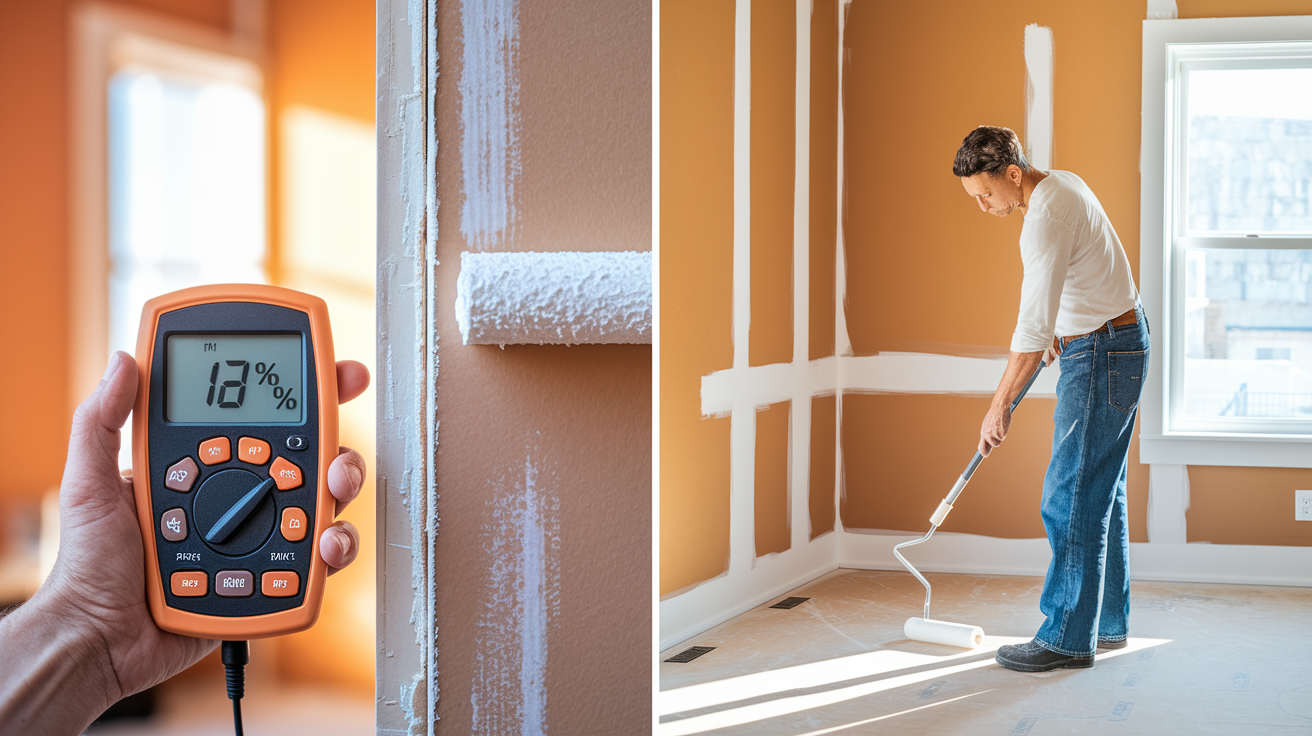
Surface dryness isn’t sufficient to begin repairs. Core moisture must be eliminated completely, verified with moisture meter readings, before sealing the surface with paint or new finishes. Moisture meter readings above 12 percent indicate wet drywall that requires further drying. Even if the surface feels completely dry to the touch, the gypsum core can still hold substantial moisture. Surface dryness doesn’t confirm gypsum core or wall cavity is dry. Hidden moisture remains trapped especially with insulation, vapor barriers, or tight construction.
Moisture meter verification requires readings below 12 percent at multiple locations across the affected area, and readings should match baseline measurements from unaffected areas within 1 to 2 percent. Wait at least 24 hours after final readings confirm dryness before proceeding with repairs. This waiting period ensures readings are stable and no residual moisture continues migrating from wall cavities or adjacent materials. If readings drop from 15 percent to 11 percent over three days, then remain steady at 11 percent for 24 hours, the drywall is ready for repair.
The repair sequence starts with patching any removed sections using new drywall cut to fit openings, then applying joint compound to seams, sanding smooth after drying, and creating a continuous surface ready for finishing. Apply primer specifically designed for previously wet surfaces before painting. These stain blocking primers contain additives that seal surfaces and prevent water stains from bleeding through topcoats. Standard primers don’t provide adequate protection on previously water damaged surfaces. Wait for primer to fully cure according to manufacturer instructions (typically 24 hours) before applying paint.
Painting over damp drywall causes peeling and bubbling within weeks or months as trapped moisture tries to escape through the painted surface. The paint film acts as a vapor barrier that seals moisture inside. As moisture continues migrating outward, it collects beneath the paint film and causes adhesion failure. Bubbles form where moisture vapor pushes the paint away from the drywall surface. The same problem occurs with new flooring installed over subfloors that haven’t dried completely. Walls must be completely dry before starting repairs to avoid future structural problems including paint failure, flooring adhesion issues, and mold growth beneath finished surfaces.
Cost Considerations: DIY Drying Versus Professional Wet Drywall Restoration
Immediate cost differences between DIY equipment rental and professional service fees vary significantly. Renting commercial dehumidifiers costs $50 to $150 per day depending on capacity and rental duration. Air movers rent for $20 to $40 per day each. A moderate drying job might require two dehumidifiers and four air movers for 5 days, totaling $700 to $1,300 in rental costs plus labor. Professional service fees typically range from $1,000 to $5,000 or more depending on extent, including equipment, labor, monitoring, and documentation.
| Approach | Typical Cost | Drying Time | Risk Level |
|---|---|---|---|
| DIY Methods | $300 to $1,300 (equipment rental and purchase) | 3 to 7 days minimum, 7 to 14 days for larger areas | Higher risk of incomplete drying, mold development, structural damage if techniques are incorrect |
| Professional Restoration | $1,000 to $5,000+ depending on damage extent | 24 to 72 hours for most jobs | Lower risk due to expertise, commercial equipment, moisture verification, insurance documentation |
Hidden costs of delayed or inadequate drying dwarf initial savings from DIY approaches when problems develop. Mold remediation costs run $2,000 to $10,000 or more depending on extent and location. Professional mold removal requires containment barriers, HEPA filtration, antimicrobial treatment, and disposal of contaminated materials. Structural repairs from prolonged moisture exposure add thousands more. Wood framing that develops rot requires sistering new lumber alongside damaged members or complete replacement. Subfloor damage from moisture wicking downward through walls requires flooring removal, subfloor replacement, and flooring reinstallation. Health issues from mold exposure create medical costs and quality of life impacts difficult to quantify.
Most homeowner insurance policies cover sudden and accidental water damage from burst pipes, appliance failures, and some storm damage, but flooding requires separate flood insurance. Insurance coverage depends on water source and suddenness. A burst washing machine supply line is covered. A slowly leaking supply line that damaged walls over months typically isn’t. Insurance deductibles typically range from $500 to $2,500, meaning the homeowner pays the first portion of costs.
Insurance companies require documentation of damage extent, drying timelines, and moisture readings to approve claims and verify complete restoration. Professional restoration services provide detailed documentation including initial moisture mapping, daily moisture readings, equipment placement records, and final verification readings. This documentation proves due diligence and complete restoration, protecting against claim denials or future coverage disputes. DIY drying lacks this documentation level, potentially creating claim complications.
Cost effectiveness calculations should weigh immediate service costs against risk of inadequate drying leading to much higher remediation costs later. For small clean water incidents affecting limited areas, DIY approaches with proper equipment can save money while achieving adequate results. For moderate to large incidents, contaminated water, or any situation where rapid drying is critical, professional services provide better value by preventing expensive secondary damage.
Professional Assessment: When to Call Restoration Experts for Wet Drywall
Professional intervention becomes necessary or strongly recommended in several scenarios. Extensive flooding affecting multiple rooms exceeds DIY capacity for equipment and labor. Category 2 or 3 water requires professional handling due to contamination and health risks. Ceiling damage showing any sag indicates collapse risk requiring immediate expert assessment and removal. Moisture affecting electrical systems creates shock and fire hazards requiring professional coordination between restoration and electrical contractors. Visible mold growth indicates colonization already occurred, requiring professional mold remediation protocols, not just drying.
Professional services comprehensive benefits:
- 24/7 emergency response. Immediate deployment within 60 to 90 minutes minimizes damage spread and reduces total drying time by starting intervention during the critical first hour.
- Moisture mapping and documentation. Thermal imaging and moisture meter surveys create detailed maps showing damage extent, tracking drying progress, and verifying complete restoration for insurance coordination.
- Commercial equipment deployment. Industrial air movers and LGR dehumid
Final Words
Wet drywall drying time ranges from 24-72 hours with professional equipment to 3-7 days or more using DIY methods, but rushing repairs before complete drying leads to mold growth and costly mistakes.
Use a moisture meter to verify readings below 12 percent before closing up walls or starting any finish work.
Category 3 sewage water and severely saturated material always require replacement, not drying.
When you catch clean-water leaks early and dry them properly within that critical first 24-48 hours, you’ll save both the drywall and a lot of headaches down the road.
FAQ
Will wet drywall dry out on its own?
Wet drywall will not dry effectively on its own without active intervention. Drywall needs forced air circulation from fans, continuous dehumidification to reduce ambient humidity below 40 percent, and sometimes heat to accelerate evaporation and prevent mold growth within the 24-48 hour window before spores colonize.
How long does it take for drywall to dry from water damage?
Drywall takes 24-72 hours to dry with professional equipment or 3-7 days using DIY methods like household fans and dehumidifiers. Minor surface dampness detected early may dry in 24-48 hours, while severely saturated drywall or major flooding requires longer timeframes with proper equipment running continuously.
How quickly does mold grow on wet drywall?
Mold begins forming on wet drywall within 24-48 hours if moisture and humidity are not controlled immediately. The paper facing on drywall provides food for mold spores, and darkness combined with moisture above 60 percent relative humidity creates ideal colonization conditions, making rapid drying critical.
Can drywall still be used if it gets wet?
Drywall can be salvaged after getting wet only if it involves clean water (Category 1), dries completely within 48 hours, shows no structural sagging or crumbling, and reaches moisture content below 12 percent on a moisture meter before any mold growth appears or contamination occurs.
What factors affect how long wet drywall takes to dry?
The factors affecting wet drywall drying time include saturation depth, relative humidity levels (high humidity above 60-70 percent can quadruple drying time), temperature, air circulation strength, wall construction type with or without insulation, water contamination category, and equipment type (professional versus household).
How do you know when wet drywall is completely dry?
Wet drywall is completely dry when a moisture meter shows readings below 12 percent throughout the affected area, matching baseline readings from unaffected sections. Surface dryness is unreliable because hidden moisture remains trapped in the gypsum core, wall cavities, and behind insulation or vapor barriers.
When does wet drywall need replacement instead of drying?
Wet drywall needs replacement when exposed to sewage or contaminated water (Category 2 or 3), shows visible mold growth, sags or crumbles indicating structural damage, remains saturated beyond 48 hours, or experiences long-term hidden leaks creating cyclical wet-dry conditions inside wall cavities.
What equipment do you need to dry wet drywall?
To dry wet drywall you need air movers or fans for circulation, dehumidifiers removing at least 30-50 pints daily (100+ pints for commercial units), a moisture meter for monitoring progress, and optionally a wet/dry vacuum for standing water removal before starting the active drying process.
How does humidity affect drywall drying time?
Humidity affects drywall drying time significantly because relative humidity above 60-70 percent slows evaporation, with drying time increasing up to four times when humidity rises from 50 percent to 90 percent. Maintaining indoor humidity below 40 percent during drying accelerates moisture removal and prevents mold.
Should you open windows to dry wet drywall?
You should open windows to dry wet drywall only when outdoor humidity is lower than indoor levels. After storms or during humid seasons, opening windows introduces moisture-laden air that slows evaporation, making dehumidifiers and closed ventilation more effective for controlling the indoor drying environment.
How long before you can paint drywall after water damage?
You can paint drywall after water damage only when moisture meter readings confirm levels below 12 percent throughout affected areas and at least 24 hours have passed since final dry readings. Applying moisture-resistant primer before painting prevents future peeling and bubbling from residual dampness.
Do insulated walls take longer to dry than standard walls?
Insulated walls take significantly longer to dry than standard walls because fiberglass and cellulose insulation act like sponges, absorbing water and releasing it slowly into wall cavities. Wet insulation typically requires removal through flood cuts at least 24 inches above moisture lines for proper structural drying.
What is the difference between DIY and professional drywall drying?
The difference between DIY and professional drywall drying is equipment capacity and timeline. Professional restoration uses commercial air movers and LGR dehumidifiers removing 100+ pints daily, completing most jobs in 24-72 hours, while DIY household equipment removes 30-50 pints daily, requiring 3-7 days minimum.
When should you call a professional for wet drywall?
You should call a professional for wet drywall when flooding affects multiple rooms, contaminated water is involved (Category 2 or 3), ceilings show sagging, moisture affects electrical systems, visible mold appears, or saturation exceeds DIY equipment capacity within the critical 24-48 hour response window.
How much does it cost to dry wet drywall professionally?
Professional wet drywall drying costs typically range from $1,000 to $5,000 or more depending on damage extent, square footage affected, water category, and equipment deployment duration. DIY equipment rental costs $50-150 daily but extends timelines, potentially increasing mold remediation costs if drying fails.
