

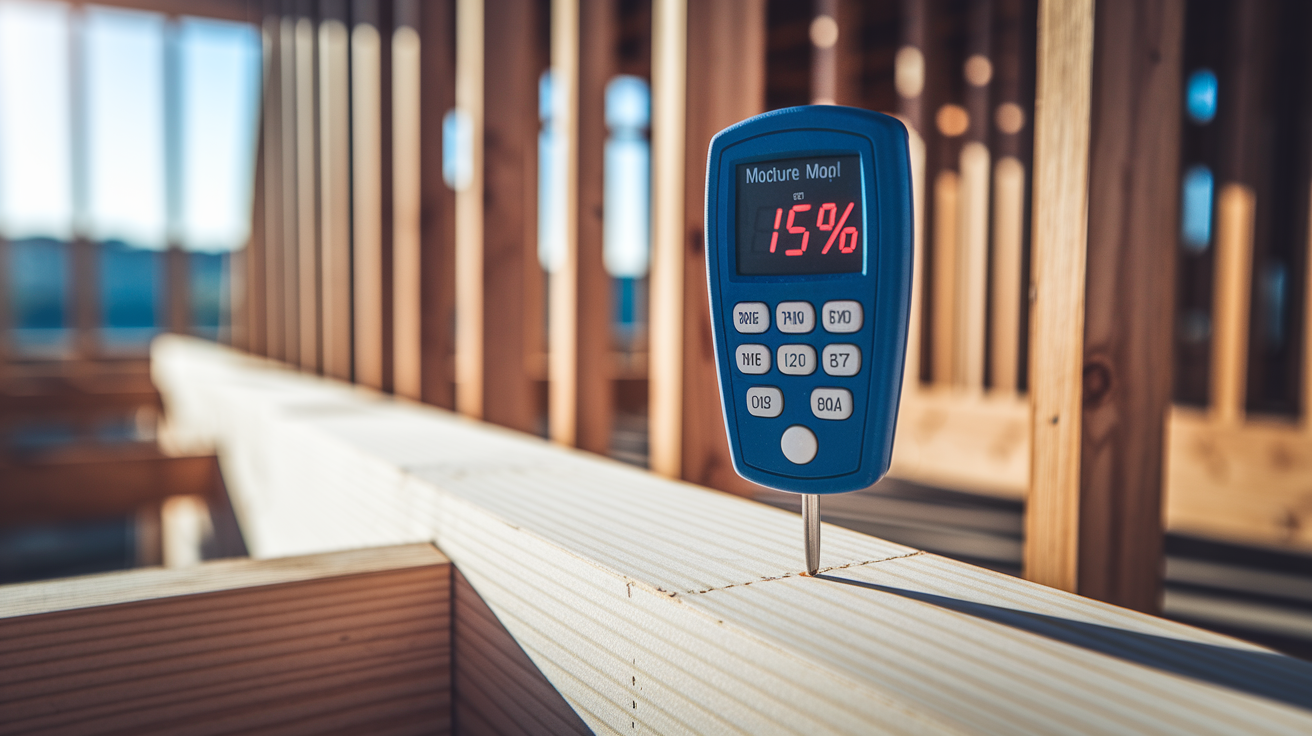
You just closed up wet framing because it looked dry, and six months later you’re pulling drywall to deal with mold. Closing up framing based on a calendar instead of moisture content is one of the most expensive shortcuts in construction. Here’s the truth: your studs need to hit 15% moisture or less before you seal them in, and the only way to know that number is to test them with a moisture meter. This guide walks you through the exact thresholds, testing methods, and drying timelines that prevent callbacks and keep your walls stable.
Safe Moisture Thresholds and Waiting Times for Wet Framing
You can’t just wait two weeks and call it good. Moisture content percentage is what matters, not how many days have passed. Test the wood, confirm the numbers, then move forward.
Your target before hanging drywall or adding insulation is 15% or lower for kiln-dried lumber and 17% or less for pressure-treated or green lumber. Baseplate readings need to hit 15%. Chest-high stud readings should be at 13%. These aren’t suggestions. They’re the line between a stable wall and one that’s going to give you headaches later. Kiln-dried lumber typically shows up at the job site around 12% to 14%, so if your framing got soaked, you’re basically trying to get it back to where it started.
Mold spores wake up and wood rot starts when moisture content goes above 19%. Once the house is lived in and the HVAC has been running for a full year, studs usually settle at 10% to 12%. The gap between your readings before closeup and that final number is what determines whether you’re going to have problems. If your studs are sitting at 18% when you seal them up and they eventually drop to 12%, that’s a 6 point swing. And you’re going to see the results in your finish work.
When studs lose more than 5 percentage points after drywall goes up, shrinkage causes visible problems. Drywall cracks at seams and fasteners. Nail pops show up on walls and ceilings. Trim joints separate. Floors squeak. Those aren’t little cosmetic things you can ignore. They’re expensive callbacks that didn’t have to happen.
Measuring and Monitoring Moisture Content in Framing
Pin-type moisture meters are what you want for framing accuracy. They run around $150 for a decent one. Pinless meters claim they can read moisture to a 3/4 inch depth, which makes them useful for spotting trapped moisture between a slab and sill plate, but for direct stud readings, pins give you better control.
Take readings at the bottom plate every fourth stud, then check all studs at every tenth position. Once at chest height, once near the plate. Plates usually show the highest moisture content because they’re absorbing water from the subfloor, and moisture moves down the vertical studs. King studs take the longest to dry and shrink the most, so if you’re only checking a few spots, make sure those get tested. Bury the pins all the way into the stud. A shallow poke gives you a false low number that doesn’t show what’s happening deeper in the wood.
-
Get a pin-type moisture meter in the $150 range for accurate framing readings, or a pinless meter for detecting trapped moisture at 3/4 inch depth between layers.
-
Test the bottom plate every fourth stud, looking for the highest moisture content where the plate contacts the subfloor.
-
At every tenth stud, take readings at chest height and again near the plate to see how moisture is distributed along the full length of the stud.
-
Push the pins all the way in to make sure you’re reading the core, not just the surface.
-
Check moisture content every three to four days while you’re actively drying. Test more often as readings get close to your target thresholds.
-
Mark each tested stud with the moisture content percentage and date using a permanent marker. Add new readings when they drop by 1 or 2 percentage points. You’ll rarely need more than three markings per stud.
Check every three to four days when you’re running fans or dehumidifiers. As readings get closer to your target, test more often. If you’re using plywood subfloors instead of OSB, check those daily. Plywood dries faster and needs closer monitoring.
Use a permanent marker to write the moisture percentage and date right on each stud you test. When you take another reading a few days later, add the new number if it’s dropped by 1 or 2 points. You won’t need more than three readings marked on any single stud. This gives you a visual log without needing a separate notebook, and it’s right there on the framing if an inspector or builder wants proof the lumber was dry before closeup.
Environmental Factors Affecting Drying Speed

Temperature and humidity determine how fast wet framing dries naturally. Cold and rainy conditions can triple the drying time compared to warm, dry weather. When outdoor humidity climbs above 60%, open windows stop helping. At 100% humidity, no drying happens no matter how much air you move. The moisture in the air can’t absorb more moisture from the wood.
| Temperature Condition | Typical Drying Time (18% to 14%) | Construction Impact |
|---|---|---|
| Above 60°F | 2 to 4 weeks | Natural drying works fine, open windows and air circulation do the job |
| 45°F to 60°F | 4 to 6 weeks | Slower natural drying, fans help if outdoor humidity is low |
| Cold and rainy | 6 to 12 weeks | Natural drying unreliable, need active equipment to stay on schedule |
| Below 32°F | Extremely long | Natural drying doesn’t work, heat and dehumidification required |
When outdoor humidity goes above 60%, close the windows and bring in a dehumidifier. Running fans with a dehumidifier can bring moisture content down in roughly one week if temperatures aren’t too cold. Combined fan and dehumidifier operation gives you controlled drying that doesn’t depend on the weather outside.
| Outdoor Humidity Level | Window Strategy | Drying Approach |
|---|---|---|
| Below 60% | Windows open | Natural ventilation, fans optional but helpful |
| 60% to 80% | Windows closed | Dehumidifier needed, fans for air circulation |
| 80% to 99% | Windows closed | Aggressive dehumidification, continuous operation required |
| 100% | Windows closed | No drying possible until humidity drops, wait or add heat to lower indoor humidity |
Factors That Affect Wet Framing Drying Speed
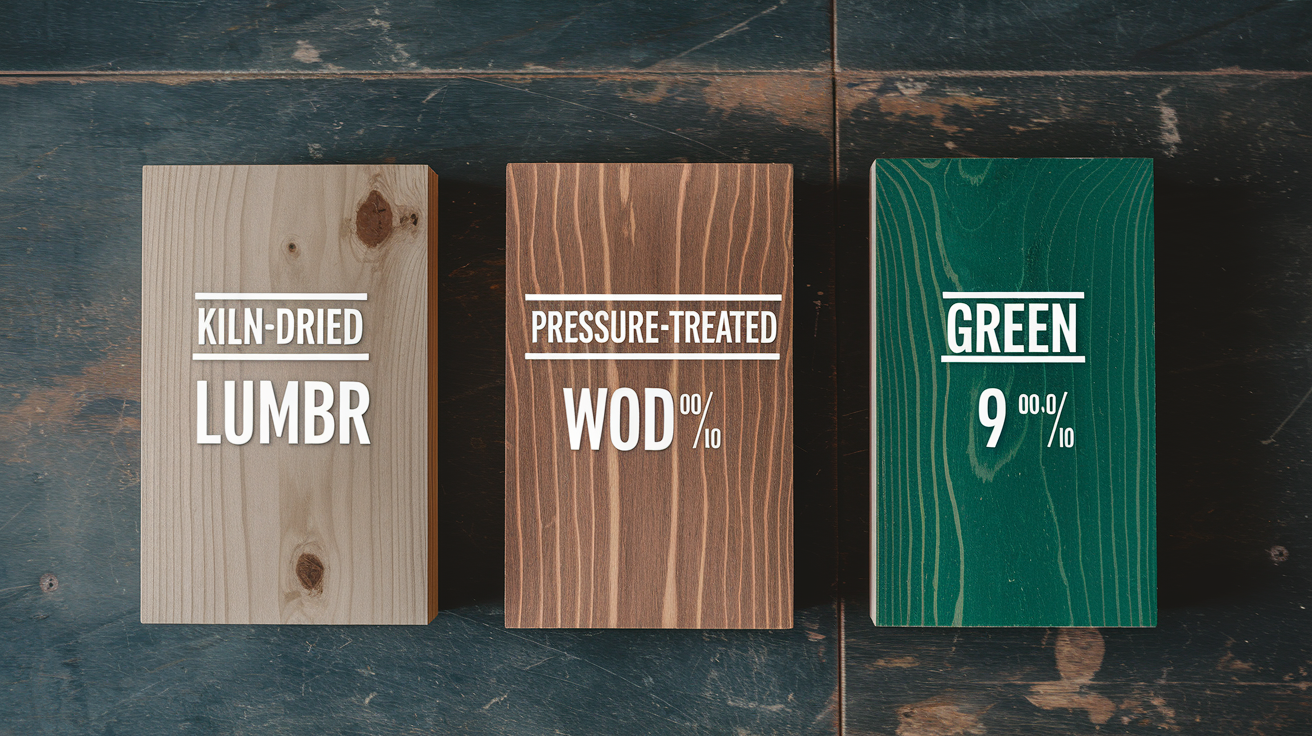
Kiln-dried lumber starts at 12% to 14% moisture content when it shows up at the job site, which means it has less moisture to get rid of compared to pressure-treated or green lumber. Pressure-treated wood and green lumber hold more moisture and take longer to dry, which is why their safe enclosure threshold is set at 17% instead of 15%.
Baseplates dry the slowest because they’re absorbing water from the subfloor, and moisture moves down the vertical studs into the plate. King studs take the longest to dry and shrink the most because of their size and position in the wall. If you’re testing samples to see how overall drying is going, always include baseplates and king studs in your readings.
Air movement makes a difference. Studs in open wall cavities with good airflow dry faster than those tucked into corners or blocked by temporary bracing. Exterior walls with sheathing already installed trap moisture on one side, which slows things down compared to interior partition walls that are open on both faces.
Bigger dimensional lumber like headers, beams, or doubled studs holds more moisture and dries slower than standard single studs. If your framing includes engineered lumber or LVL beams, check the manufacturer’s guidelines. Some engineered products have different moisture thresholds or drying characteristics than solid sawn lumber.
Accelerated Drying Methods and Equipment Specifications

Fans operating 24/7 at daytime temperatures above 45°F reduce moisture content by 0.3 to 1.0 percentage point per day. Running three to four fans can drop moisture content by 5 points in about one week. A 2,500 square foot house needs roughly 10 fans for pre-insulation drying. One solid week of continuous fan operation typically brings moisture from the 18% to 20% range down to 14% or below. The Quest C1000 two-speed fan uses 2.4 to 2.8 amps on low or high to move 2,700 cubic feet per minute, which makes it common for framing drying setups. Dri-Eaz fans, the same kind carpet cleaners use after water damage, can dry subflooring in just a few hours and work well for framing when you position them to move air through wall cavities.
When outdoor humidity climbs above 60%, close the windows and add a dehumidifier. Running fans with a dehumidifier brings moisture content down in roughly one week if it’s not too cold. The Quest PowerDry 4000 dehumidifier has a built-in hygrometer with a range of 30% to 70% relative humidity. Set it to 55% when drying joint compound or paint during finish work, then dial it down to around 45% from the trim stage onward. Combined fan and dehumidifier operation creates predictable drying that doesn’t rely on outdoor weather, which matters when you’re trying to stay on schedule.
Fans: Quest C1000 moves 2,700 CFM using 2.4 to 2.8 amps (low/high). Dri-Eaz industrial fans dry subflooring in hours and work for framing drying. Commercial-grade fans cost around $300 to purchase or $10 per day / $150 per month to rent.
Dehumidifiers: Quest PowerDry 4000 includes built-in hygrometer with 30% to 70% RH range. Set to 55% RH when drying joint compound or paint. Set to 45% RH from trim stage onward.
Heaters: Indirect-fired diesel heaters rated for 90,000 to 100,000 BTU with external fuel tanks run up to three days on one tank. Dragon X2 mobile furnaces (100,000 BTU, trailer-mounted) are professional-grade options for cold-climate drying.
Moisture Meters: Pin-type meters in the $150 range provide accurate framing readings. Pinless meters detect trapped moisture at 3/4 inch depth between layers (useful for sill plates and slabs).
Check moisture content every three to four days during active drying. As readings approach your target, test more frequently so you catch the moment when it’s safe to proceed. Checking too rarely wastes drying time. Checking daily in the middle of the drying process doesn’t tell you much, but once you’re within a point or two of your goal, daily checks keep you from overshooting or missing the window.
Chain or padlock fans to the framing when running continuously for 24/7 operation. Fans left unattended on job sites get stolen. A $10 padlock prevents losing a $300 fan and keeps your drying schedule on track.
Heating Considerations for Drying Wet Framing
Propane heaters add one gallon of moisture to the air for every hour of runtime. They’re working against you. The heat feels like it’s helping, but you’re pumping moisture back into the space at the same time the fans are trying to pull it out.
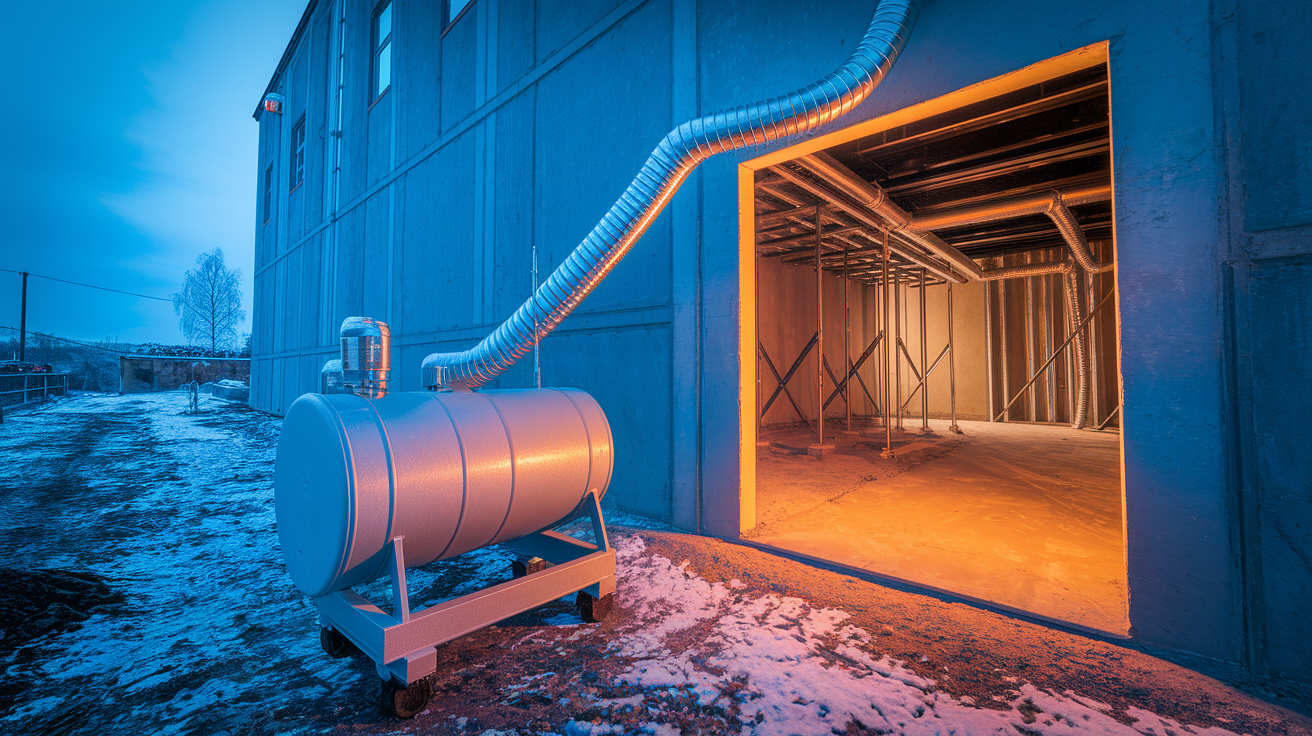
Never use the client’s furnace for temporary heat during construction. It voids the manufacturer’s warranty and damages the ductwork with construction dust, debris, and the high particulate load that comes with drying operations. Proper heating for framing drying requires combustion to happen outside the structure, with only hot, dry air blown into the building. Indirect-fired heaters keep the flame and exhaust outside while delivering heated air through ducting into the space you’re drying.
Diesel-powered indirect-fired heaters rated for 90,000 to 100,000 BTU with external fuel tanks can run up to three days on a single tank. The Dragon X2 mobile furnace is a trailer-mounted, 100,000 BTU unit commonly used by restoration and construction crews for cold-climate drying. These units provide the heat you need without adding moisture or contaminants to the indoor air.
Biological Degradation and Premature Closure Risks
Mold spores activate and wood rot begins when moisture content rises above 19%. That’s the biological threshold where wet framing shifts from a drying problem to a health and structural problem.
Trapped moisture between surfaces like between a slab and sill plate, or behind sheathing that got installed over wet framing, takes two weeks or more to become noticeable. By the time you see discoloration, soft spots, or smell something musty, mold growth may already be established inside the wall cavity. Standing water and soaked framing demand immediate attention. Don’t move to the next construction stage until the lumber has been properly dried and verified with a moisture meter. Structural concerns include compromised fasteners, decay that weakens load-bearing members, and hidden mold growth that affects indoor air quality once the house is lived in.
Visible water staining or dark discoloration on lumber surfaces
Musty odor when entering the framed space, even with good ventilation
Soft spots when you press on studs, plates, or sheathing
High meter readings above target thresholds, even after several days of drying
Condensation forming on wood surfaces, especially in the morning
Framing that feels damp to the touch, even without visible water
When studs lose more than 5 percentage points of moisture content after drywall installation, shrinkage causes visible finish problems. Drywall cracks appear at seams and fasteners. Nail pops show up across walls and ceilings. Trim joints separate as the framing behind them contracts. Floors squeak where subfloor movement loosens fasteners. These problems trace directly back to closing up framing that was still too wet. The 5 point shrinkage rule is the threshold where wood movement starts causing finish failures you can see and hear.
Drywall cracking at seams, corners, and fastener locations
Nail pops appearing throughout walls and ceilings within the first year
Trim separation at joints, especially at inside corners and along baseboards
Floor squeaks from subfloor movement as framing dries and contracts
Hidden mold growth within wall cavities, undetectable until walls are opened or air quality declines
Wood rot and decay compromising structural integrity, fastener hold, and load-bearing capacity
Remediation requires opening walls, removing affected materials, treating or replacing framing, and redoing finishes. The cost is way more than proper initial drying. Waiting an extra week for framing to dry costs you time. Closing up wet framing costs you money, callbacks, and your reputation.
Initial Water Removal Before Framing Dries

Drying can’t start until you achieve “dried-in” status, meaning the roof underlayment is installed and stops the majority of precipitation from getting inside. You can’t dry framing if it’s still getting rained on. Bulk water removal has to happen before you set up fans, dehumidifiers, or any other drying equipment.
-
Get to dried-in status by installing roof underlayment to stop more precipitation from entering the framed structure.
-
Sweep out standing water and puddles with a large push broom, working from the interior toward door openings or temporary drainage points.
-
Drill drainage holes in extremely wet subfloors to let water drain into basement areas or crawl spaces below. Space holes every few feet in areas where water has pooled.
-
Open all windows to get air circulation through the wet framing and let moisture-laden air escape.
-
Take initial moisture meter readings at baseplates and chest-high stud positions to establish baseline numbers and figure out which areas are wettest and will need the longest drying time.
Wall Cavities and Equilibrium Moisture Content
Equilibrium moisture content is the stable moisture level wood reaches when it’s been conditioned by HVAC operation for an extended period. It’s not the moisture content when the lumber arrives at the job site or right after drying. It’s the number the framing settles into once the house is enclosed, insulated, heated, cooled, and lived in.
Once the house is occupied and the HVAC has been running for a full year, studs typically reach equilibrium at 10% to 12%. The gap between your pre-closure readings and that final number determines how much shrinkage the framing will experience after the walls are closed. If you close up walls at 18%, the studs will eventually lose 6 to 8 percentage points as they dry to equilibrium. That’s well beyond the 5 point threshold where shrinkage starts causing visible finish problems.
Closing up framing at too high a moisture content guarantees excessive shrinkage. The 5 point rule connects to equilibrium moisture content this way: if you close up at 15% and the framing drops to 10% at equilibrium, that’s a 5 point swing. Right at the edge of acceptable movement. Close up at 17% or 18%, and the resulting 7 or 8 point drop gives you drywall cracks, nail pops, squeaky floors, and trim joints that separate. Proper pre-closure drying prevents these long-term finish failures by minimizing the gap between your readings at closeup and the equilibrium level the framing will eventually reach.
Drywall and Insulation Installation Timing
Baseplate readings should hit 15%, and chest-high stud readings should be at 13% before you proceed with insulation and drywall installation. For pressure-treated lumber or green lumber, the threshold is 17% or less. These are the numbers that separate safe enclosure from premature closure.
Insulation installation can start once the moisture content thresholds are met, but monitoring should continue even after insulation is in place. Check a few studs at the edges of insulated bays to confirm moisture content isn’t climbing because of trapped humidity or condensation. If readings start moving in the wrong direction, pull the insulation and rethink your drying strategy.
Verify readings across the entire structure before moving forward, not just in a few sample areas. One dry wall doesn’t mean the whole house is ready. Basements, north-facing walls, and areas with less airflow or sun exposure often stay wetter longer. Local building codes may have additional moisture content requirements or documentation standards for pre-drywall inspections. Check with your building department before assuming the standard thresholds are all you need to meet.
Sheathing and Exterior Enclosure Moisture Issues
Plywood dries faster than OSB and requires daily monitoring if you’re using it for subfloors or wall sheathing. OSB holds moisture longer and takes more time to release it, but both materials need verification before you close them up with underlayment, siding, or flooring.
Moisture can get trapped between sheathing and framing, or between sill plates and concrete slabs. This trapped moisture takes two weeks or more to become noticeable because it’s not exposed to airflow or direct meter contact. Pinless moisture meters read to a 3/4 inch depth, which makes them useful for detecting trapped moisture at the slab-to-sill interface or behind sheathing that’s already nailed to studs. If a pinless meter shows elevated readings where you can’t see visible moisture, that’s trapped water working its way out slowly.
House wrap and exterior moisture barriers shouldn’t trap existing moisture inside wall assemblies. If the framing or sheathing is still wet when you install house wrap, you’ve sealed moisture into the wall cavity with no way for it to dry to the exterior. Let the sheathing dry to acceptable levels before adding weather-resistive barriers. In humid or rainy climates, this sometimes means leaving the house wrap off until the sheathing has had time to release moisture, even if it delays siding installation.
Check sheathing moisture content before installing roofing underlayment, siding, or interior finishes that will block drying from one or both sides. The same thresholds apply: 15% or lower for standard materials, 17% or less for pressure-treated or green lumber. Trapped moisture behind sheathing can lead to hidden rot, fastener corrosion, and sheathing delamination that won’t show up until years after construction is complete.
Professional Assessment and Building Code Compliance
Local building codes may specify moisture content thresholds, drying verification methods, or documentation requirements before walls can be closed up. Some jurisdictions require third-party moisture testing or written certification from the builder that framing has been dried to acceptable levels before insulation and drywall installation.
Building inspectors may require documented moisture readings before approving the pre-drywall inspection. Keeping a moisture log with dates, locations, and readings protects you if questions come up later about whether the framing was dry at closeup. Marking readings directly on studs with a permanent marker gives the inspector visible proof that monitoring happened and thresholds were met. Manufacturer warranties often include moisture-related disclaimers. Using the client’s furnace for temporary construction heat voids the warranty and damages the ductwork with dust and debris. Improper drying methods can void warranties on lumber, sheathing, or engineered wood products if moisture-related failures happen later.
Professional assessment is a good idea for extensive water damage, unknown moisture sources, or commercial projects where the stakes and complexity go beyond typical residential construction. A building scientist, restoration specialist, or structural engineer can evaluate trapped moisture, hidden damage, and drying strategies that go beyond basic fan and dehumidifier setups. If you’re dealing with sewage contamination, flooding from an external source, or prolonged water exposure that’s compromised the structural integrity of framing members, bring in a professional before moving forward.
Documented moisture logs protect against future warranty claims, insurance disputes, or buyer complaints about finish problems that trace back to wet framing at closeup. A simple log with stud locations, moisture readings, dates, and drying methods gives you a clear record that proper procedures were followed. If finish cracks or nail pops appear later, your documentation shows the framing was dry when you closed it up, which shifts responsibility away from construction practices and toward normal settling or other factors.
Final Words
Wet framing won’t tell you when it’s ready. Your moisture meter will.
Check baseplates at 15% and chest-high studs at 13% before you insulate or hang drywall. Mark your readings. Check every three to four days when you’re actively drying the space.
If you close it up too early, you’re locking in rot, mold, and years of finish problems you can’t fix without tearing the walls back open.
How long to wait before closing up wet framing depends entirely on moisture content, not calendar days. Get the readings right, and everything else follows.
FAQ
How long does wet framing take to dry?
Wet framing takes 2 to 4 weeks to dry naturally when outdoor temperatures stay above 60°F, dropping from around 18% moisture content to a safe 14% or lower. Cold and rainy weather extends natural drying time to 6 to 12 weeks. Below-freezing temperatures result in extremely slow drying, making natural methods impractical. With active drying using fans and dehumidifiers running continuously (24/7), you can typically reduce moisture content from 18-20% down to 14% or below in approximately one week if temperatures aren’t too cold. Running three to four fans can reduce moisture by 5 percentage points in about one week at daytime temps above 45°F.
What happens if 2×4 gets wet?
A wet 2×4 absorbs moisture that raises its moisture content above the typical 12-14% it arrives with from the kiln. If moisture content rises above 19%, mold spores activate and wood rot begins. The stud needs to dry back down to 15% or lower (13% at chest height) before you close it up with insulation and drywall. King studs and baseplates take longest to dry because moisture gravitates down from vertical studs and baseplates absorb water from subfloors. If you close up a stud that’s too wet and it loses more than 5 percentage points after drywall installation, you’ll get visible finish flaws like drywall cracks, nail pops, squeaky floors, and trim joints separating.
Is it okay if framing gets rained on?
Framing getting rained on is okay if you handle drying properly before closing up the structure. Remove standing water immediately by sweeping puddles out with a large broom and open all windows to maximize air circulation. Begin active drying only after achieving “dried-in” status, meaning roof underlayment is installed and prevents the majority of precipitation from entering the structure. Use a wood moisture meter to verify that moisture content drops to 15% or lower at baseplates and 13% at chest-high studs before proceeding with insulation and drywall. Do not proceed to the next construction stage until properly dried, as trapped moisture can take 2 weeks or more to detect and creates risks for mold growth and structural damage.
How to dry out wet framing?
Drying out wet framing starts with removing standing water using a large broom to sweep out puddles and drilling drainage holes in extremely wet subfloors. Open all windows when outdoor humidity is below 60% to maximize natural air circulation. Run fans continuously (24/7) at daytime temperatures above 45°F to reduce moisture content by 0.3 to 1.0 percentage point per day. A 2,500-square-foot house requires approximately 10 fans for effective pre-insulation drying. Close windows and add a dehumidifier when outside humidity readings exceed 60%, setting it to around 45% relative humidity. Check moisture content every 3 to 4 days using a pin-type moisture meter, burying the pins all the way into the stud for accurate readings. Continue drying until baseplate readings reach 15% and chest-high stud readings reach 13% before installing insulation and drywall.
What moisture level is safe for closing up framing?
The safe moisture level for closing up framing is 15% or lower at baseplates and 13% at chest-high studs for kiln-dried lumber. Pressure-treated and green lumber can be closed up at 17% or less. These targets prevent mold spore activation and wood rot, which begin when moisture content rises above 19%. Once occupied and HVAC has run for a year, studs typically reach equilibrium at 10% to 12% moisture content. Closing up framing above these safe thresholds risks excessive shrinkage, which causes drywall cracks, nail pops, squeaky floors, and trim joint separation when studs lose more than 5 percentage points after drywall installation.
How do you measure moisture in framing lumber?
Measuring moisture in framing lumber requires a wood moisture meter, preferably a pin-type model in the $150 range for accuracy. Bury the meter pins all the way into the stud to ensure accurate readings. Take readings at the bottom plate every fourth stud, and check all studs every 10th position at chest height and near the plate. Mark the moisture content percentage and date with permanent marker on each stud tested. Check moisture content every 3 to 4 days when actively drying, more often when approaching desired levels. Pinless meters are useful for detecting trapped moisture between slab and sill plates at 3/4 inch depth. Plates typically show the highest readings because they absorb water from subfloors and moisture gravitates down vertical studs.
Why does cold weather slow down framing drying?
Cold weather slows down framing drying because temperature is the primary factor determining natural drying speed. Natural drying at temperatures above 60°F takes 2 to 4 weeks, but cold and rainy conditions extend this to 6 to 12 weeks, essentially tripling drying time. Below-freezing temperatures result in extremely slow natural drying that becomes impractical for construction schedules. Even with fans running, temperatures need to stay above 45°F during the day for effective 0.3 to 1.0 percentage point daily moisture reduction. External indirect-fired heaters rated for 90,000 to 100,000 BTU with combustion occurring outside the structure are required for effective cold-climate drying.
Can you use propane heaters to dry wet framing?
You cannot effectively use propane heaters to dry wet framing because they add approximately one gallon of moisture to the air for every hour of runtime, making them counterproductive. Never use the client’s furnace for temporary heat during construction as it voids the manufacturer warranty and damages ductwork. Proper drying requires external heaters that blow hot dry air into the building with combustion occurring outside the structure. Diesel-powered indirect-fired heaters rated for 90,000 BTU with external fuel tanks can run up to 3 days on one tank and provide effective heating without adding moisture.
What equipment do you need to dry framing quickly?
Equipment needed to dry framing quickly includes commercial-grade fans, dehumidifiers, moisture meters, and potentially indirect-fired heaters. A 2,500-square-foot house requires approximately 10 fans running continuously (24/7). Quest C1000 two-speed fans move 2,700 cubic feet per minute using 2.4 to 2.8 amps and cost around $300 to purchase or $10 per day ($150 per month) to rent. Quest PowerDry 4000 dehumidifiers have built-in hygrometers with 30% to 70% relative humidity range. Pin-type moisture meters in the $150 range provide accurate readings when pins are buried all the way into studs. Chain or padlock fans to framing during continuous operation to prevent theft.
What happens if you install drywall on wet framing?
Installing drywall on wet framing traps moisture inside wall cavities, creating conditions for mold growth and wood rot when moisture content stays above 19%. If studs lose more than 5 percentage points after drywall installation, excessive shrinkage causes visible finish flaws including drywall cracks at seams and fasteners, nail pops throughout walls and ceilings, squeaky floors from subfloor movement, and trim joints separating. Hidden mold growth within wall cavities creates health impacts and structural concerns from compromised fasteners and decay. Remediation requires opening walls, removing affected materials, and redoing finishes at far greater cost than proper initial drying before enclosure.
How often should you check moisture readings during drying?
You should check moisture readings every 3 to 4 days when actively drying framing with fans and dehumidifiers. Check more frequently when moisture content approaches your desired target levels of 15% at baseplates and 13% at chest-high studs. If using plywood subfloors instead of OSB products, check daily because plywood dries faster and requires closer monitoring. Take readings at the bottom plate every fourth stud and check all studs every 10th position at chest height. Mark subsequent readings showing moisture content drops of 1 or 2 points with permanent marker, rarely needing more than three total readings per stud.
Does humidity affect framing drying time?
Humidity dramatically affects framing drying time because no drying occurs at 100% humidity regardless of air movement. Close windows and add a dehumidifier when outside humidity readings exceed 60%. At 80% to 99% outdoor humidity, aggressive dehumidification is required for any progress. Running fans with a dehumidifier brings moisture content down in roughly one week if temperatures are not too cold. Set the dehumidifier to 55% relative humidity when drying joint compound or paint, and around 45% from the trim stage onward for house stability. Below 60% outdoor humidity, open windows for natural ventilation.
What are warning signs that framing is still too wet?
Warning signs that framing is still too wet include visible water staining on lumber, musty odor in the structure, dark discoloration on studs and plates, soft spots when you press on wood surfaces, consistently high moisture meter readings above target levels, and condensation forming on surfaces. Standing puddles and soaked conditions demand immediate attention before proceeding to the next construction stage. Hurricane or water intrusion damage may trap moisture between surfaces like sill plates and slabs, requiring 2 weeks or more to detect using pinless meters that read to 3/4 inch depth. Do not install insulation or drywall until baseplate readings reach 15% and chest-high stud readings reach 13%.
Why do baseplates take longer to dry than studs?
Baseplates take longer to dry than studs because they absorb water from subfloors below and moisture gravitates down vertical studs into the bottom plates. Plates typically show the highest moisture content readings during the drying process. Check plywood subfloors daily if using them instead of OSB because trapped moisture between the subfloor and sill plate can take 2 weeks or more to detect. For extremely wet subfloors, drill holes to allow water drainage into basement areas. Pinless moisture meters are useful for detecting this trapped moisture at 3/4 inch depth between surfaces where pin-type meters cannot reach.
What is equilibrium moisture content in framing?
Equilibrium moisture content in framing is the stable moisture level wood reaches when conditioned by HVAC systems, typically 10% to 12% after the system has run for one year in an occupied building. Kiln-dried lumber arrives at job sites with moisture content of 12% to 14%. Closing up framing at too high a moisture content guarantees excessive shrinkage as studs drop to equilibrium levels. If studs lose more than 5 percentage points after drywall installation, shrinkage causes visible finish flaws including drywall cracks, nail pops, squeaky floors, and trim joint separation. Proper pre-closure drying to 15% at baseplates and 13% at chest-high studs prevents these long-term finish failures.
When should you call a professional for wet framing?
You should call a professional for wet framing when you have extensive water damage from hurricanes or major intrusions, unknown moisture sources that keep reappearing, commercial projects with tight schedules, or situations where moisture readings won’t drop despite active drying efforts. Building inspectors may require documented moisture readings before approval to close up walls, and local building codes may specify moisture content thresholds or drying verification methods. Professional assessment protects against manufacturer warranty issues, like using client furnaces for temporary heat which voids warranties and damages ductwork. Documented moisture logs from professionals protect against future warranty or insurance claims and prove proper drying protocols were followed.
