

You can scrub the surface of moldy basement walls all day, but if you don’t fix what’s making them wet, you’re just wasting a Saturday. Mold isn’t the real problem. It’s the symptom. Moisture is what you’re actually fighting. This guide walks you through safe cleaning methods that actually work, the specific solutions that match your wall material, and the honest line between what you can handle yourself and when professional remediation stops being optional. You’ll also learn why half the basement mold cleanup advice online sets you up to either spread spores through your house or end up right back where you started in three weeks.
Required Safety Equipment and Health Risks of Mold Exposure

Mold’s not just gross. It’s a real health problem for everyone in your house, pets included. You’re looking at allergic reactions, breathing issues, headaches that won’t quit, and coughing that sticks around. Black mold (Stachybotrys chartarum) gets particularly nasty when you breathe it in, producing toxins that can make you seriously sick. Even when you can’t see much growth, the spores you kick up during cleaning go airborne and straight into your lungs. This isn’t safety theater. Getting your protection right before you start is what separates a successful cleanup from ending up in urgent care.
Paper masks don’t cut it for mold removal. Spores pass right through. You need a NIOSH approved respirator with P100 or N95 filters that actually catch mold spores. The full setup includes waterproof gear that keeps mold off your skin and out of your eyes. Skip any piece of this equipment and you’re exposing yourself to the same health problems you’re trying to eliminate from your basement.
What you need before touching anything:
- NIOSH approved respirator with P100 or N95 filters (paper masks give you zero protection)
- Protective goggles or safety glasses that seal around your eyes
- Waterproof rubber gloves extending past your wrists
- Tyvek suit or long sleeved protective clothing you can trash afterward
- HEPA vacuum for grabbing loosened spores during cleanup
- Ventilation fans or air circulators to keep fresh air moving
Open every basement window before you start. Set up fans to pull contaminated air outside, not just push it around the room. Chemical cleaners make ventilation even more important to prevent fume buildup in an enclosed space. Keep air moving during the entire cleaning process and for at least two hours after you finish. This constant air exchange removes airborne spores and protects you from breathing concentrated mold particles you stir up while scrubbing.
When to Call Professional Mold Remediation Services

Some mold situations go beyond safe DIY limits. The EPA gives clear guidance that certain conditions need professional remediation, not a spray bottle and effort. Assess your situation honestly before investing time and money in cleaning supplies that won’t actually solve the problem.
Stop and call professionals if you see any of these:
- Mold covering more than 10 square feet (roughly a 3×3 foot area)
- Black mold (Stachybotrys) anywhere in the space
- Mold penetrating through drywall or into insulation
- Structural damage like soft spots, crumbling material, or sagging
- Your breathing problems getting worse during even brief inspection
- Mold returning within weeks of previous cleaning attempts
- You don’t have trained remediation experience or proper containment equipment
Professionals bring capabilities you can’t replicate with hardware store supplies. They identify the specific mold type, determine how deep it penetrated wall materials, set up proper containment to prevent spore spread during removal, and follow disposal procedures for contaminated materials. Testing kits can tell you what you’re dealing with before remediation starts. When mold grows inside unsealed drywall or insulation, professional inspection reveals the full scope of damage that’s invisible from the surface. DIY cleaning on porous materials only temporarily reduces surface growth while the problem keeps spreading inside the wall.
The 10 square foot threshold isn’t random. Larger infestations release overwhelming spore counts during disturbance that exceed what consumer grade respirators can filter. Professional teams use commercial containment systems, air scrubbers, and negative air pressure to prevent cross contamination to clean areas of your home. If your affected area approaches or exceeds this size, the health risks and technical requirements move beyond DIY capabilities.
Complete Mold Removal Process with Effective Cleaning Solutions

Confirm all safety equipment’s properly in place before you pick up a spray bottle. The technique you use and the cleaning solution you choose determine whether mold comes back in three weeks or stays gone. Rushing this process or skipping steps guarantees you’ll be doing it again soon.
Follow these steps in order:
- Gather all protective equipment and cleaning supplies before entering the affected area so you don’t have to break containment mid process
- Establish ventilation with open windows and fans positioned to pull air out of the basement, not circulate it
- Choose and prepare appropriate cleaning solution based on your wall material (see table below for specific formulations)
- Test cleaning solution on small inconspicuous area first and wait 10 minutes to check for surface damage or discoloration
- Apply solution generously to moldy areas using spray bottle until the surface is thoroughly saturated, not just damp
- Allow appropriate dwell time for the solution to penetrate and kill mold (bleach 10 minutes, vinegar 60 minutes, hydrogen peroxide 30 minutes, baking soda paste 15 minutes)
- Scrub affected areas thoroughly with stiff bristled brush using firm pressure and overlapping strokes to break mold’s grip on the surface
- Use minimal water for wiping with damp cloth technique, not soaking, to avoid adding moisture back into the wall
- HEPA vacuum the entire area to capture loosened spores from surfaces and air before they resettle
- Dry the cleaned surface completely with fans pointed directly at the wall and dehumidifier running until humidity drops below 45%
| Solution | Mixing Ratio | Best For | Dwell Time | Safety Notes |
|---|---|---|---|---|
| Bleach Solution | 1 part bleach to 10 parts water | Non-porous surfaces like concrete and painted walls | 10 minutes | Never mix with ammonia (creates toxic chlorine gas); not effective on porous materials |
| White Vinegar | Equal parts water and white vinegar (6% acidity) | General cleaning on most surfaces | 60 minutes | Avoid on wood, marble, granite, or limestone; does not kill 100% of mold species |
| Hydrogen Peroxide | 3% concentration (use straight from bottle) | Concrete and brick walls | 30 minutes | CDC confirms effectiveness against bacteria, viruses, fungi, and mold spores |
| Baking Soda Paste | 1 part baking soda to 2 parts water | Stain removal and odor neutralization | 15 minutes | Safe for all surfaces; works well as follow-up treatment after other solutions |
After your final cleaning pass, inspect the entire area under bright light. Look for any remaining discoloration or texture changes that indicate mold penetration beyond what surface cleaning can address. Bag all used cleaning cloths, disposable protective gear, and contaminated materials in sealed plastic bags for immediate outdoor disposal. Don’t let these items sit in your basement or garage. Keep fans running and dehumidifier operating until the wall feels completely dry to touch and humidity readings stay below 45% for at least 24 hours. Sealing moisture into a wall you think is clean creates perfect conditions for mold to regrow inside the material where you can’t see it.
Cleaning Mold from Different Basement Wall Materials
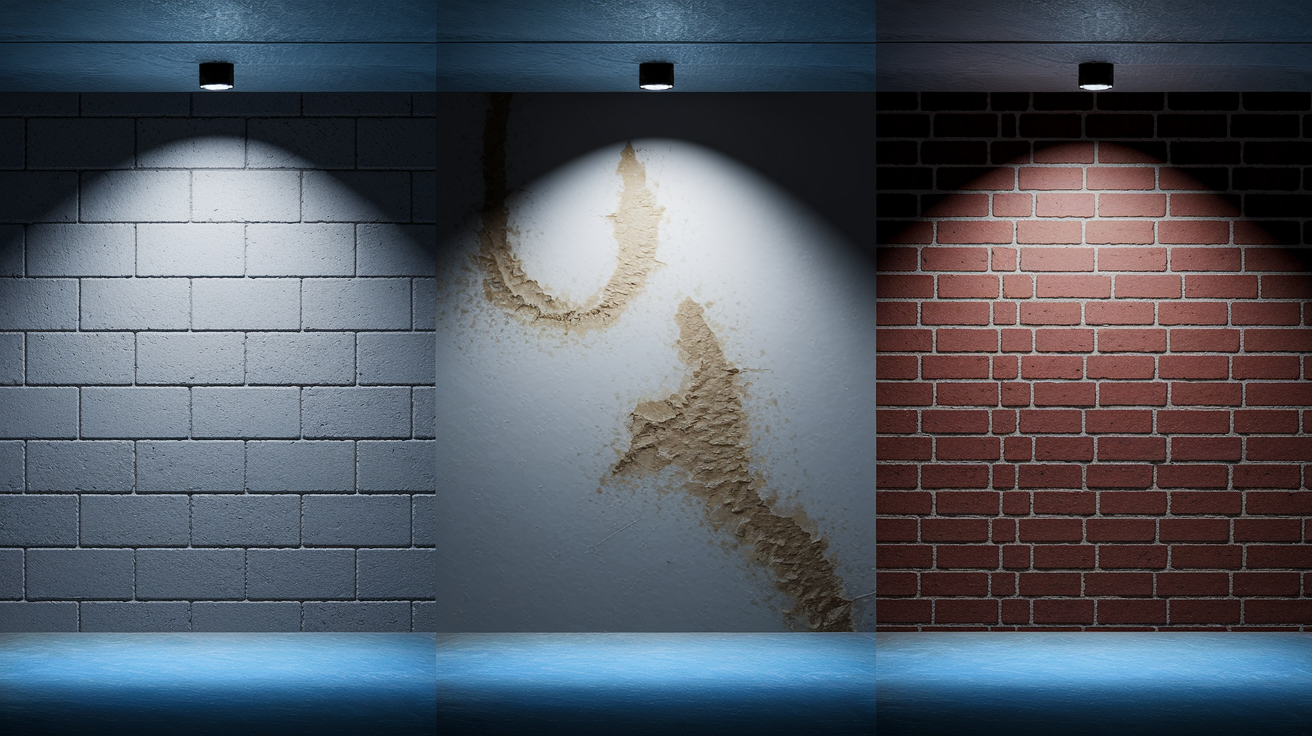
Your wall material determines whether cleaning will actually work or if you’re wasting time on a problem that requires replacement. Porous surfaces absorb mold deep into their structure where scrubbing can’t reach. Non-porous surfaces keep mold on the exterior where cleaning solutions can kill it effectively.
Concrete and Brick Basement Walls
Concrete and brick are the easiest basement wall materials to clean successfully. These non-porous surfaces prevent mold from penetrating beyond the exterior face. Scrub with antimicrobial cleaner purchased from any hardware store until mold completely wipes away with no remaining stain or discoloration. Hydrogen peroxide works especially well on concrete and brick because the 3% concentration penetrates into the slight texture of these materials and kills spores in small surface pits. You’ll see results immediately. If mold doesn’t come off after two scrubbing passes with proper dwell time, it’s etched into the surface from long term growth, but it’s still dead once the hydrogen peroxide sits for 30 minutes.
Painted Basement Walls
The paint type on your walls determines cleaning success before you spray anything. Water resistant wash and wear paint creates a barrier that prevents mold penetration beyond the surface. Standard flat paint absorbs moisture and lets mold grow into the paint layer itself. For painted walls with proper waterproof coating, spray mild mold remover formulated for painted surfaces and let it sit for the recommended time. Scrub gently to avoid damaging the paint. You may need multiple applications if mold’s been present for months. After scrubbing, spray clean water on the area and wipe thoroughly with a clean towel to remove all cleaning solution residue. Any remaining cleaner attracts dirt and can discolor paint over time.
Unsealed Drywall and Porous Materials
Unsealed drywall is porous. Mold doesn’t just grow on the surface. It grows inside the material itself, sending roots through the paper face and into the gypsum core. Surface cleaning only addresses what you can see. Check drywall by cutting small inspection holes near the affected area, pulling back insulation, and using a mirror or phone camera to inspect the back side. If you see mold on the hidden face or the insulation shows any discoloration or musty smell, that section needs complete removal and replacement, not cleaning.
When mold penetrates into drywall or insulation, cleaning the visible surface gives you a temporary cosmetic fix while the problem continues spreading inside the wall cavity. The material stays contaminated and will grow back through to the surface within weeks. This is the most common DIY mistake. People spend hours scrubbing drywall, think they succeeded because the visible mold disappears, then watch it return even darker a month later. Cut out the damaged section, remove contaminated insulation, and install new materials. Attempting to save $40 in drywall by cleaning compromised material costs you multiple cleaning attempts and guarantees the problem spreads to adjacent wall sections.
Identifying the Root Cause of Basement Wall Mold
Don’t clean mold until you diagnose and correct the moisture source. This isn’t optional. Cleaning without fixing what caused the mold guarantees you’ll be cleaning the same wall again in six weeks, except the growth will be worse. Moisture drives mold. Remove the moisture source and mold can’t grow back. Skip this diagnostic step and you’re wasting every minute of cleaning effort because the conditions that created the problem remain unchanged.
Common moisture sources causing basement wall mold:
- Leaky or sweating pipes running along walls or overhead
- Foundation cracks and porous concrete that wicks groundwater through the material
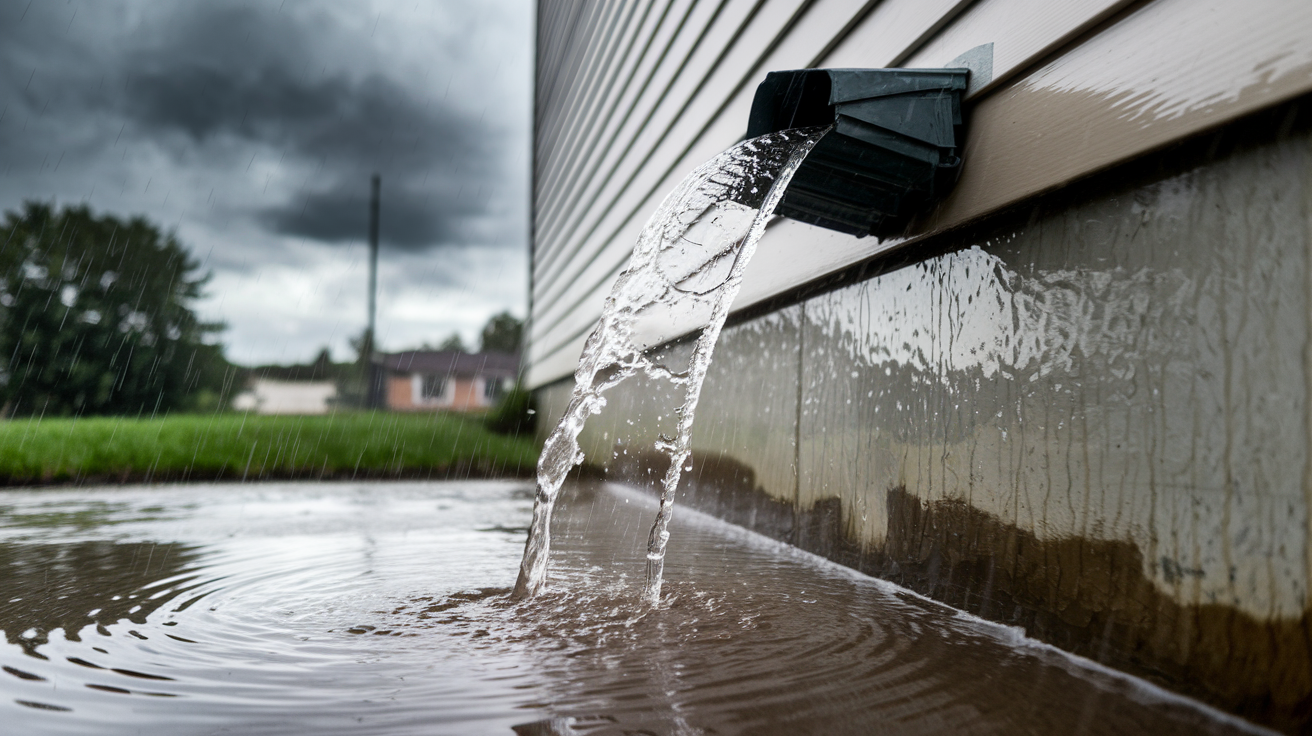
- Poor exterior drainage and downspouts dumping water within 5 feet of the foundation
- Clogged gutters and roof valley overflow at corners that dump concentrated water near the house
- High humidity above 60% and condensation forming on cold surfaces
- Seasonal rain infiltration through foundation during heavy weather
- Water pooling against the foundation after storms
- Inadequate grading slope that directs water toward the house instead of away
Observe your home during active rainfall. This is when you’ll see exactly where water goes. Watch for puddles forming near your foundation within 10 minutes of steady rain starting. Check your basement walls during the storm for dark spots appearing that indicate active water infiltration. Look for displaced wood chips or mulch showing water flow patterns across your landscaping toward the foundation. These visual clues during rain reveal problems that disappear by the time the sun comes out.
Walk your foundation exterior and look for drainage defects. Clogged gutters overflow at seams and corners, dumping hundreds of gallons directly beside your foundation during a single storm. Roof valleys concentrate water flow and when they overflow at corner joints, that volume hits the ground in one spot instead of spreading along the roof edge. Porous concrete foundations act as moisture sponges, pulling groundwater through the material even without visible cracks. These exterior problems cause most basement moisture that leads to wall mold.
Drying and Moisture Control for Basement Walls

Dry the space before you clean. Starting with elevated humidity or damp walls reduces cleaning effectiveness because you’re adding moisture to already wet conditions. Run a dehumidifier with all windows and doors closed until humidity drops to 40% or lower. This baseline drying takes anywhere from 24 hours to several days depending on how wet your basement is. Monitor with a basic humidity meter. Target 40% as your starting point because this level prevents new mold growth while you work.
After cleaning, you’ve just added moisture back into the basement with your cleaning solutions, rinse water, and damp wiping. Dry again immediately. Run fans pointed directly at cleaned walls and keep the dehumidifier operating until humidity returns to the 40 to 45% range. This second drying phase is just as important as pre cleaning drying because sealing moisture from cleaning solutions into a wall creates ideal conditions for mold regrowth inside the material. Wait until walls feel completely dry to touch and humidity readings stay stable below 45% for a full 24 hour period before considering the area ready for any sealing or refinishing work.
Long term humidity maintenance prevents mold from returning after successful cleaning. Balance between ventilation and dehumidification based on outdoor conditions. When outdoor humidity is lower than basement humidity, open windows and use fans to exchange air. When outdoor humidity climbs above 50%, close windows and run the dehumidifier. The goal is maintaining 40 to 45% humidity year round without running dehumidifiers constantly, which gets expensive. Monitor humidity during seasonal rain events because this is when most basements see moisture spikes that trigger new mold growth.
| Humidity Level | Condition | Action Required | Equipment Needed |
|---|---|---|---|
| Below 40% | Optimal for mold prevention | Maintain current ventilation or dehumidifier schedule | Humidity meter for monitoring |
| 40 to 50% | Acceptable range, monitor closely | Increase dehumidifier use if trending upward | Dehumidifier, humidity meter |
| 50 to 60% | Elevated risk, mold growth possible | Run dehumidifier continuously until below 45% | Dehumidifier running full time, check drainage |
| Above 60% | Mold growth actively occurring | Identify moisture source immediately and dry aggressively | Multiple dehumidifiers, fans, possible water extraction equipment |
Prevention Strategies to Stop Basement Wall Mold Recurrence

Prevention costs less and takes less effort than repeated mold cleaning. The strategies you put in place after successful removal determine whether this was a one time cleanup or the first of many identical projects. Prevention directly addresses the root causes you identified during diagnosis. This is ongoing maintenance, not a one time fix you complete and forget.
Put these prevention measures in place to keep mold from returning:
- Redirect downspouts 10 feet or more from foundation using over ground extensions or underground drains to French drains
- Maintain clean gutters year round and repair any overflow points at seams or corners
- Adjust grade slope to direct water away from foundation with minimum 6 inches of drop over first 10 feet
- Install and maintain dehumidifiers with automatic controls targeting 40 to 45% humidity
- Use exhaust fans in laundry rooms and bathrooms that vent outside, not into the basement
- Insulate cold water pipes to prevent condensation forming and dripping onto walls or floors
- Improve air circulation with ventilation systems or additional vents to eliminate stagnant air pockets
- Cut back plantings, bushes, and landscaping within 3 feet of foundation to allow sun and wind to dry the soil
- Elevate all storage items, boxes, and bins at least 2 inches off basement floor using pallets or shelving
- Clean water spills and flooding immediately, within the first 24 hours before mold can establish
- Avoid storing cardboard boxes or paper directly against concrete walls or on concrete floors
- Monitor humidity levels with a simple meter during seasonal rain events to catch moisture spikes early
Create a seasonal inspection schedule. Check your basement quarterly, with extra attention during spring thaw and fall rain seasons when moisture problems intensify. Wait up to one year before refinishing walls or installing permanent improvements. This waiting period confirms your moisture corrections actually worked through a complete seasonal cycle. Rushing to refinish before you’re certain the problem is solved means tearing out new drywall or paint when mold returns. Set up a simple maintenance checklist covering gutter cleaning (twice yearly), downspout inspection (after major storms), humidity monitoring (monthly), and foundation grading check (annually). These small routine tasks catch problems before they become visible mold growth.
Sealing and Protecting Basement Walls After Mold Removal

Mold encapsulation uses specialized sealants applied after thorough cleaning as a last resort for trace amounts remaining on porous surfaces that can’t be practically replaced. These sealants physically trap dead mold and residual spores beneath an impermeable coating. Encapsulation works appropriately on brick or wood surfaces where complete material replacement would be extremely expensive or damage the structure. Never use encapsulation on non-porous surfaces like concrete where it provides no benefit, or on easily replaced materials like drywall where removal and replacement is the correct solution. Encapsulation isn’t a substitute for proper cleaning. It’s a final protective layer after you’ve removed all cleanable mold and verified the surface is completely dry.
Waterproof and mold resistant paints create a protective barrier on basement walls that survived cleaning. Water resistant wash and wear paint types prevent future moisture from penetrating beyond the painted surface, stopping mold before it can establish. Modern basement paints include antimicrobial additives that actively inhibit mold growth even in humid conditions. Application technique matters. Prime bare concrete or previously unpainted surfaces with concrete sealer first, then apply two coats of mold resistant paint, allowing full drying time between coats. Thin coats dry properly and create better protection than single heavy applications that trap moisture beneath the surface.
Wait before sealing or finishing. The recommendation to wait up to one year before replacing basement finishes confirms your moisture corrections actually succeeded through a full seasonal cycle. Rushing to seal or paint within weeks of cleaning risks trapping residual moisture inside the wall assembly. This trapped moisture creates conditions for mold to regrow inside the sealed cavity where you can’t see or access it. Watch the cleaned areas through several rain events. If you see any discoloration return, moisture is still entering the wall and sealing is premature. Signs that indicate readiness for sealing include consistent humidity below 45% for 30 consecutive days, no musty odors after closing the basement for 48 hours, and no new visible growth or discoloration appearing in the cleaned areas.
Final Words
Knowing how to clean mold off basement walls safely starts with the right protective gear and ends with fixing what caused the moisture problem in the first place.
Scrubbing mold away is only half the job. If you skip the diagnosis step or seal up a wall before it’s truly dry, you’re setting yourself up to do this all over again in six months.
Check your humidity levels. Fix that gutter. Move the downspout. Give the walls time to prove they’re staying dry.
When you handle it in the right order with the right precautions, you can clear mold for good and get your basement back.
FAQ
What kills mold on basement walls?
A: The solutions that kill mold on basement walls include a bleach solution (1 part bleach to 10 parts water), white vinegar (equal parts water and vinegar), 3% hydrogen peroxide, or baking soda paste (1 part baking soda to 2 parts water). Apply your chosen solution, allow proper dwell time (bleach 10 minutes, vinegar 60 minutes, hydrogen peroxide 30 minutes, baking soda 15 minutes), then scrub thoroughly with a stiff-bristled brush.
What kills mold permanently?
A: Mold is killed permanently by cleaning with appropriate solutions and then eliminating the moisture source causing the growth. No cleaning solution prevents mold forever if water intrusion, high humidity, or condensation continues. Fix drainage defects, maintain humidity below 45%, repair leaks, and improve ventilation to stop mold from returning after cleaning.
Can mold grow on concrete basement walls?
A: Mold can grow on concrete basement walls when moisture is present, even though concrete is non-porous. Porous concrete foundations act as moisture sponges, allowing water infiltration from exterior drainage defects, and this dampness supports mold growth on the surface. Concrete walls respond well to antimicrobial cleaning and hydrogen peroxide treatment.
Can a moldy basement be saved?
A: A moldy basement can be saved if you identify and correct the moisture source, clean affected surfaces properly, and maintain humidity below 45% long-term. Concrete and brick walls clean successfully with antimicrobial solutions. However, severely moldy drywall or insulation with penetration beneath the surface must be removed and replaced, not just cleaned.
When should I call professionals for basement mold instead of DIY cleaning?
A: You should call professionals for basement mold when it covers more than 10 square feet, black mold (Stachybotrys) is present, mold has penetrated drywall or insulation, structural damage is evident, respiratory symptoms worsen during inspection, mold returns quickly after previous cleaning, or you lack trained remediation experience.
What safety equipment do I need before cleaning basement mold?
A: The required safety equipment before cleaning basement mold includes a NIOSH-approved respirator (not paper masks), protective goggles or eyewear, waterproof rubber gloves, Tyvek suit or protective clothing, HEPA vacuum for cleanup, and ventilation fans. Paper masks do not provide adequate protection from mold spores and health risks.
How do I find the cause of basement wall mold before cleaning?
A: You find the cause of basement wall mold before cleaning by inspecting for leaky pipes, foundation cracks, poor exterior drainage, clogged gutters, high humidity, and water pooling near your foundation. Observe your home during active rainfall to identify water intrusion paths, dark wall spots, and puddles. Mold will return if you clean without fixing the moisture source.
What humidity level prevents mold in basements?
A: The humidity level that prevents mold in basements is 40-45% or lower, maintained using dehumidifiers with closed windows and doors. Target 40% humidity before cleaning mold, then bring levels back to 40-45% after cleaning. Monitor humidity during rain events and alternate between ventilation and dehumidification for long-term control.
How long should I wait before sealing basement walls after mold removal?
A: You should wait up to 1 year before sealing or replacing basement finishes after mold removal to confirm that moisture corrections succeeded. Rushing to seal can trap moisture and cause mold return. Wait until humidity stays consistently at 40-45%, no new growth appears, and the wall stays completely dry through seasonal rain.
Does cleaning mold on drywall work or does it need replacement?
A: Cleaning mold on drywall only works temporarily on surface growth because unsealed drywall is porous and mold grows inside the material. DIY cleaning without professional inspection misses the full scope of damage. Check by cutting inspection holes and using a mirror to inspect the other side. Drywall with mold beneath the surface must be removed and replaced.
How do I clean mold from painted basement walls?
A: You clean mold from painted basement walls by spraying mild mold remover, scrubbing multiple times if needed, then spraying water and wiping with a clean towel to remove residue. Painted walls should have water-resistant wash-and-wear type paint to prevent mold penetration beyond the surface. Test cleaning solution on a small area first.
What can I do to prevent basement mold from coming back?
A: You prevent basement mold from coming back by redirecting downspouts 10+ feet from your foundation, maintaining clean gutters, adjusting grade slope away from the house, using dehumidifiers to maintain 40-45% humidity, running exhaust fans in laundry and bathrooms, insulating cold water pipes, elevating storage off the floor, and cleaning water spills immediately.
