

You’ve probably scrubbed that dark patch in your shower corner three times already, and it keeps coming back because you’re treating the symptom instead of killing the mold. Mold on bathroom walls isn’t just ugly. It releases spores that irritate your lungs and trigger allergies every time you turn on the hot water. The good news is you can clean most bathroom mold yourself if you use the right method, wear proper protection, and dry everything completely afterward.
Effective Mold Removal Method: Step-by-Step Process
Mold removal in your bathroom needs proper safety prep and the right cleaning approach before you touch anything. Start with protection, then tackle the mold with whatever solution fits your situation.
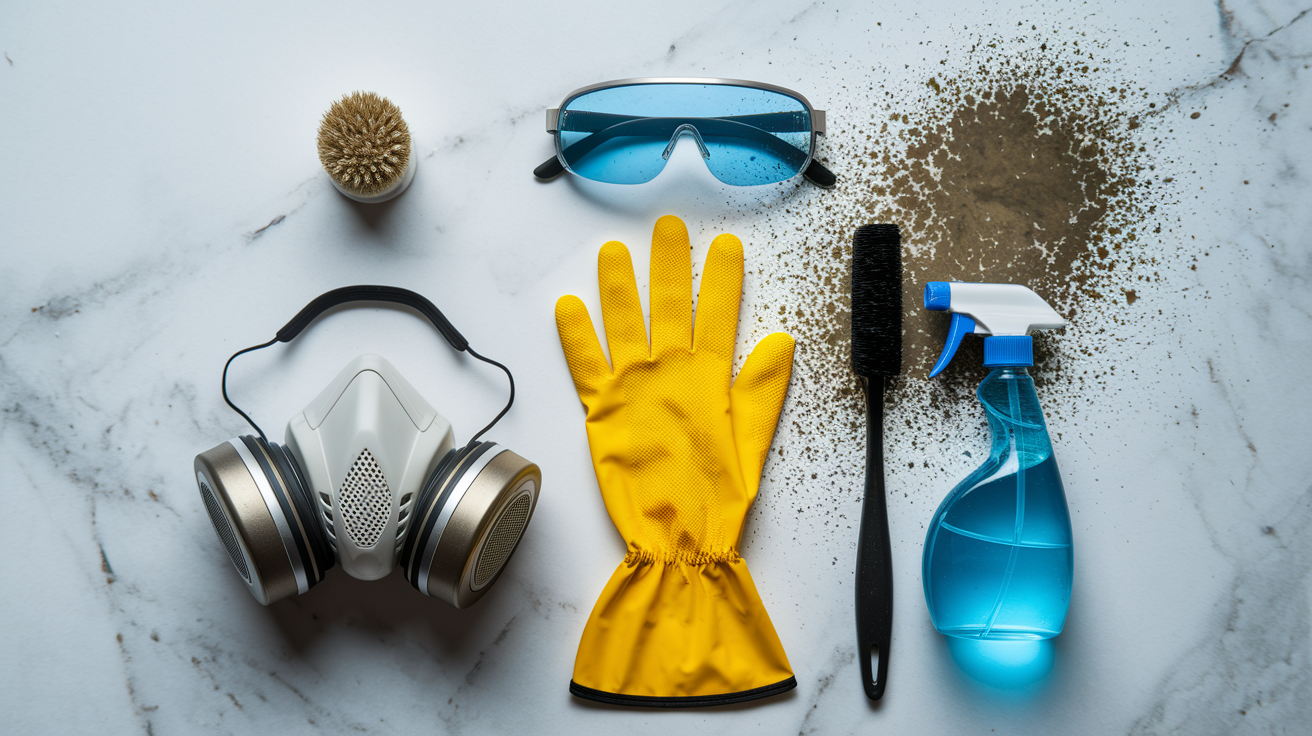
Before you spray or scrub, put on your safety gear. Mold spores go airborne the second you disturb them, and you don’t want to breathe that stuff in:
- N95 or N99 respirator mask (not a dust mask, those don’t filter mold spores)
- Waterproof rubber gloves that go past your wrists
- Safety goggles that seal around your eyes
- Old clothing or protective coveralls you can wash right after
- Proper ventilation by opening windows and doors before you start
Mold releases spores and irritants into the air when disturbed. Even small patches can trigger respiratory problems, eye irritation, allergic reactions. Breathing in mold spores while cleaning puts you at risk for coughing, throat irritation, worsening of asthma symptoms. The protective gear and ventilation aren’t optional. Don’t skip them to save time.
You’ve got three solid cleaning solution options depending on what you’re comfortable using. White vinegar (undiluted or mixed 1:1 with water) is natural, safer around kids and pets, works well for mild to moderate mold. Spray it on and let it sit for 60 minutes before scrubbing. Bleach solution (1 cup bleach to 1 gallon water) acts fast on surfaces like tile and kills mold on contact, but it produces strong fumes that need good ventilation. Never mix it with other cleaners because it creates toxic gas. Hydrogen peroxide (3% concentration straight from the bottle) or baking soda paste (mix baking soda with just enough water to make it spreadable) work gently on painted walls without damaging the finish.
Now follow these steps in order:
- Put on all safety gear and open windows and doors to get cross ventilation going in the bathroom
- Gather your materials: spray bottle, scrub brushes (both soft and stiff), sponges, microfiber cloths, buckets, towels for drying
- Prepare your chosen cleaning solution in the spray bottle or bucket
- Spray solution directly onto all affected areas and let it sit for the right dwell time (10 to 15 minutes for bleach, 60 minutes for vinegar, 15 to 20 minutes for hydrogen peroxide)
- Scrub the surface with the right brush. Soft bristles for painted walls, stiff bristles for tile or concrete. Use firm circular motions
- Rinse thoroughly with a clean damp cloth and dry immediately with towels. Don’t leave surfaces wet
- Inspect closely for remaining mold and repeat the entire process if you still see dark spots or discoloration
Plan on 30 to 60 minutes for small problem areas like around the tub or in a corner. Extensive mold covering multiple walls takes 2 to 3 hours including dwell time and repeat applications. DIY supplies run $10 to $30 total: rubber gloves ($3 to $5), respirator mask ($8 to $15), vinegar or bleach ($3 to $5), brushes and cloths you may already have. Complete drying after cleaning matters as much as the cleaning itself. Mold starts growing again within 24 to 48 hours if moisture remains on the surface.
Identifying Mold Types on Bathroom Walls
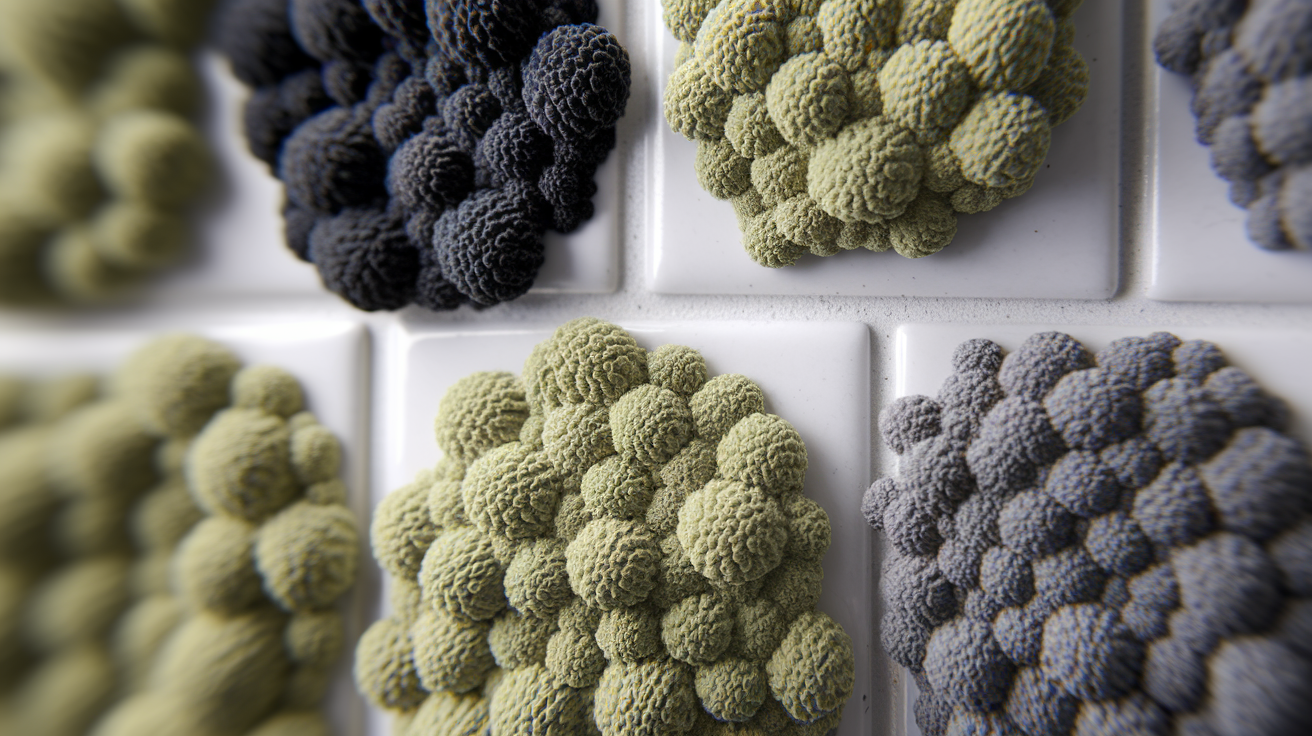
Mold and mildew get lumped together, but they’re different problems needing different levels of concern. Mildew appears as a powdery white or gray coating on surfaces, wipes off relatively easy, mostly just looks bad. Mold appears fuzzy or slimy, comes in black, green, blue, or red colors, and penetrates into surfaces instead of sitting on top. If it’s fuzzy, textured, or you can’t wipe it away with a damp cloth, you’re dealing with mold.
| Mold Type | Appearance | Risk Level |
|---|---|---|
| Alternaria | Black or dark green, velvet texture in damp spots near tubs and showers | Moderate, triggers allergies and asthma |
| Aspergillus | Green, yellow, or white with powdery texture, common on walls and ceilings | Moderate, respiratory irritant, more serious for immune compromised individuals |
| Mucor | White or gray, fast growing, appears quickly after water exposure | Moderate, can cause mucor infections in people with weakened immunity |
| Stachybotrys (Black Mold) | Dark greenish black, slimy or wet looking, often has musty odor | High, releases mycotoxins causing serious respiratory issues and allergic reactions |
| Mildew | Powdery white or gray surface coating, wipes away easily | Low, cosmetic issue, mild irritant |
You can DIY clean surface mold that covers less than 10 square feet, appears only on surfaces like tile or painted walls, and hasn’t caused visible damage to the material underneath. Stop and call a professional if you find mold inside wall cavities, behind baseboards where moisture has damaged drywall, or if you’re dealing with the dark greenish black mold that could be Stachybotrys. Professional assessment also makes sense if mold keeps coming back after you clean it, which signals a moisture problem you haven’t found yet.
Removing Mold From Painted Bathroom Walls

Painted walls need a gentler touch than tile because aggressive scrubbing damages paint and creates a rough surface where mold grows back faster. Your goal is killing the mold without creating more problems for yourself.
Start by spraying your chosen solution onto the moldy area. Don’t scrub yet. Let it sit for 10 to 15 minutes (longer for vinegar, shorter for bleach). This dwell time lets the solution penetrate the mold and kill it at the root instead of just wiping it around. After the dwell time, use a soft bristled brush or a non abrasive sponge and work in gentle circular motions. Work in sections about 2×2 feet at a time so the solution doesn’t dry on the wall before you finish scrubbing. Press firmly enough to remove the mold but not so hard you’re grinding the brush into the paint.
Rinse each section with a clean damp cloth. Not soaking wet, just damp enough to wipe away the cleaning solution and dead mold. Don’t flood the wall with water because excess moisture soaks into the drywall behind the paint. Dry immediately with clean towels. Really dry it. Don’t just wipe it once and move on. Inspect closely under good light for remaining discoloration or spots you missed. If you still see mold staining after the first round, repeat the process. But if the staining remains after two full cleaning attempts, the mold has penetrated behind the paint.
Repainting becomes necessary when mold has stained the paint so deeply that cleaning won’t remove the discoloration, or when the paint itself has started peeling or bubbling from moisture damage. If you’re repainting after mold removal, use a mold killing primer first, let it dry completely (24 hours minimum), then apply mold resistant bathroom paint as your top coat.
Cleaning Mold Off Bathroom Tile and Grout

Tile and grout need different treatment because they’re different materials. Tile is solid and mold sits on the surface. Grout is porous like a sponge, and mold grows into it.
For tile surfaces, spray on a stronger solution like bleach (1 cup per gallon of water) or hydrogen peroxide at 3% concentration. Tile can handle aggressive treatment that would damage paint. For grout lines, use a stiff grout brush with firm bristles and really work it into the grout. Spray the solution, let it sit for 15 to 20 minutes, then scrub grout lines with back and forth motions along the line, not across it. The brush needs to be small enough to fit into the grout channel. For tile surfaces, use a softer brush or sponge with circular motions. The tile cleans up easier than the grout will.
Stubborn grout stains that won’t come out after two cleaning attempts mean the mold has penetrated deep into the grout. You can try a baking soda paste (thick enough to stay in place) applied to the grout line, let it sit for 30 minutes, then scrub again. If the discoloration still won’t budge and the grout has darkened from white or light gray to brown or black, the grout may need replacement. Badly stained grout also indicates the grout has lost its seal and is absorbing water, which means it’ll keep growing mold. After cleaning, consider applying a grout sealer once everything is completely dry. Wait 48 to 72 hours. Sealer creates a protective barrier that stops moisture from soaking into the grout.
Bathroom Ceiling Mold Removal Techniques
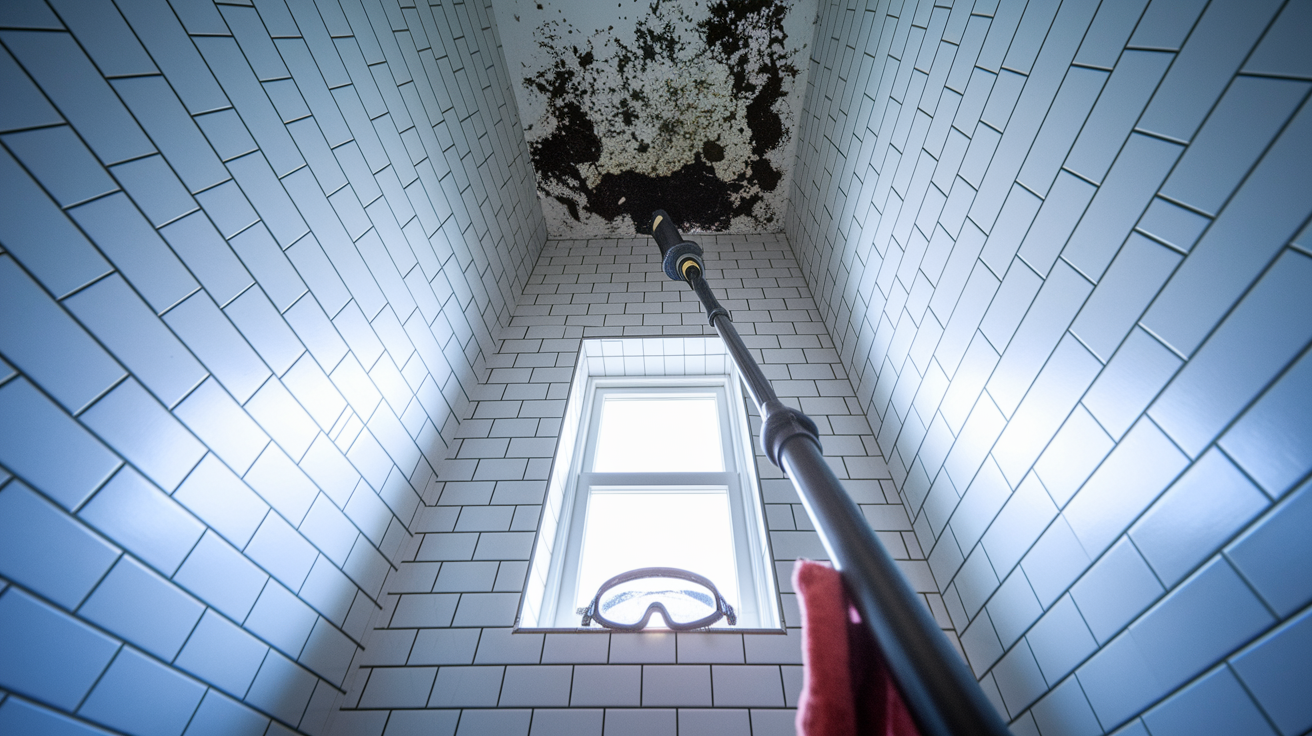
Ceiling mold grows from steam rising during hot showers and inadequate ventilation that leaves moisture trapped against the ceiling. The steam condenses on the cool ceiling surface, creating perfect conditions for mold growth in the corners and around light fixtures.
Cleaning overhead requires technique adjustments to protect yourself and make the process manageable. Use an extension pole attached to your scrub brush or sponge so you’re not balancing on a ladder while handling cleaning solution. Protect your face from drips by wearing the safety goggles and keeping your head to the side of where you’re working, not directly underneath. Apply solution upward carefully to avoid it running down your arms. Work in small 2×2 foot sections because solution dries faster on a ceiling than on walls. Consider using thicker paste solutions (baking soda paste or commercial mold remover gel) instead of liquids when possible, because paste stays in place instead of dripping.
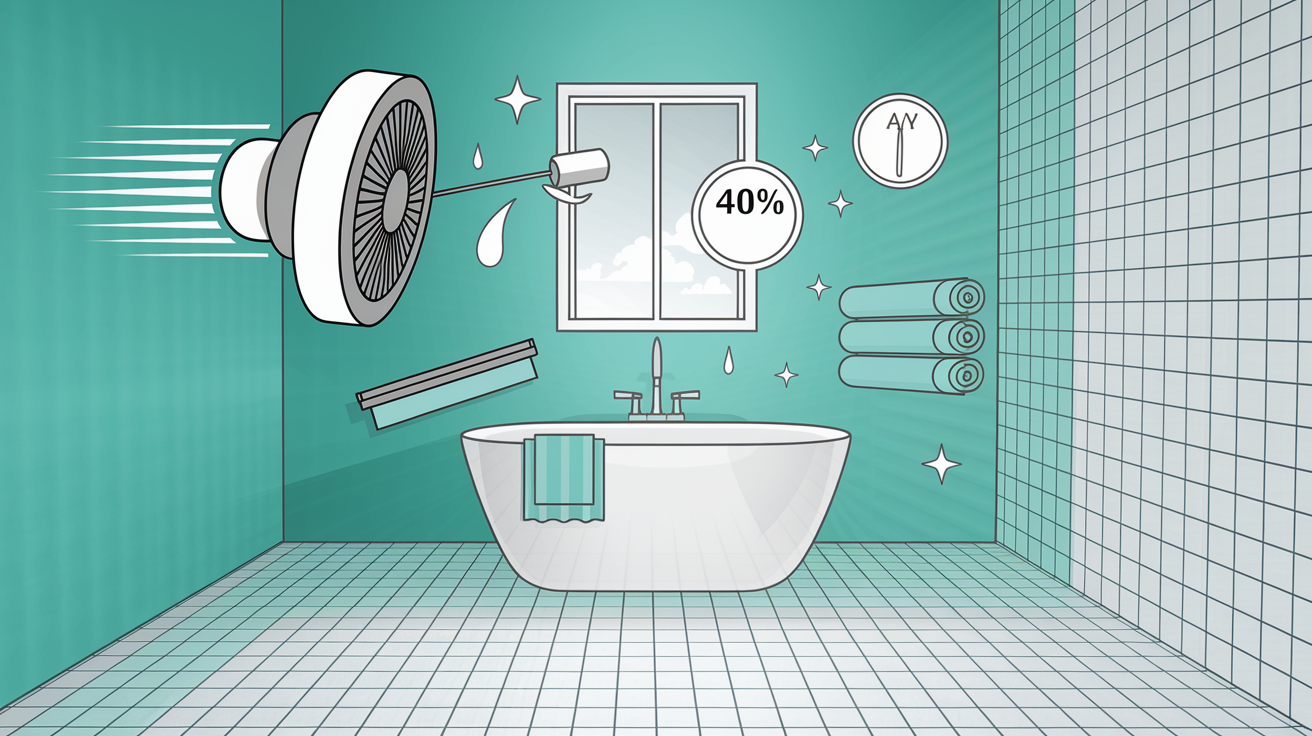
Dry the ceiling thoroughly after cleaning by running a fan pointed at the ceiling for several hours, and keep the bathroom door open so humid air can escape. Improve your exhaust fan function to prevent recurrence. The fan should be strong enough to clear steam within 5 to 10 minutes after a shower ends. If your fan is weak or noisy, it’s probably old and not moving enough air. Installing a bathroom exhaust fan that’s properly sized for your bathroom square footage makes a bigger difference than repeated cleaning.
Dealing With Mold in Bathroom Corners and Caulking
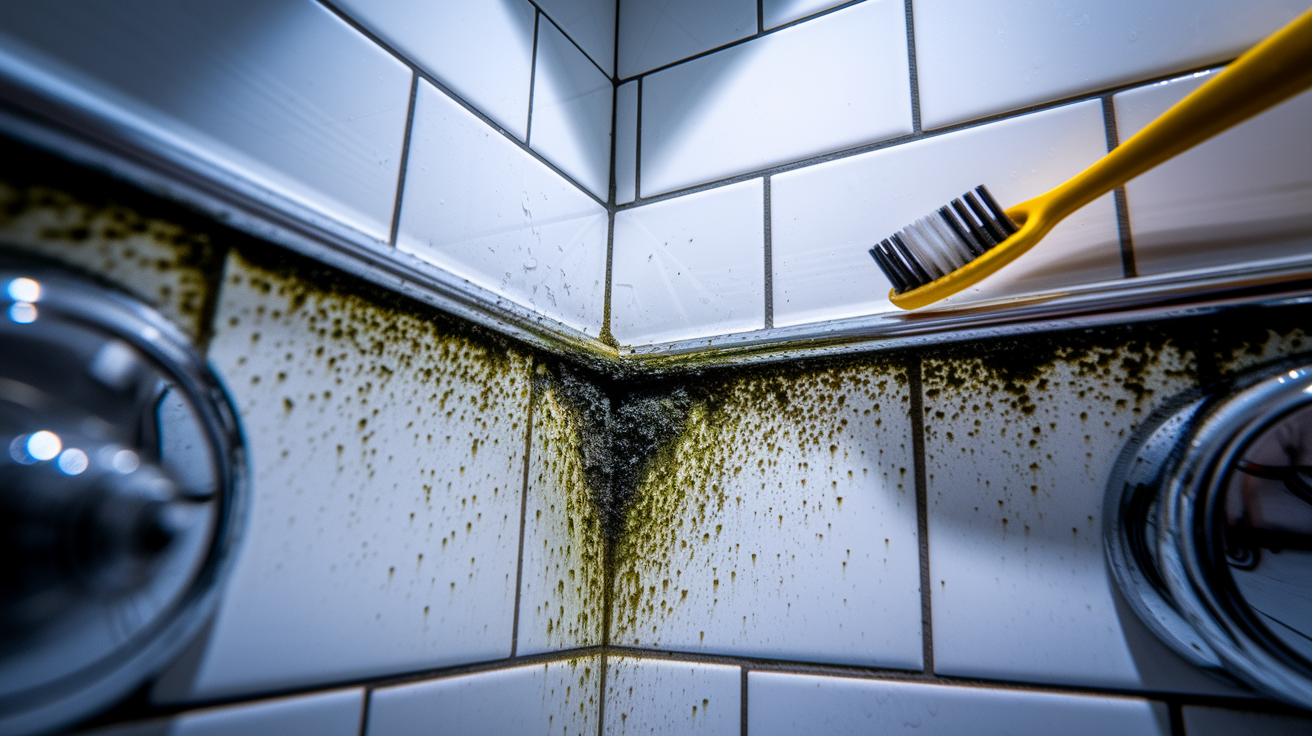
Corners where the tub meets the wall and caulked joints around fixtures create moisture traps where water sits instead of draining away. Caulking is porous silicone or latex, and mold doesn’t just grow on it. Mold grows into it.
You can try cleaning caulk with bleach solution or full strength vinegar. Spray it on, let it sit for 30 minutes, scrub with an old toothbrush to work the solution into the caulk, rinse, and dry. Check the area 24 hours later under good light. If the black or pink discoloration is gone and the caulk looks clean, you got it. If dark staining remains in the caulk or the caulk feels soft or crumbly when you press on it, the mold has grown through the entire bead of caulk.
At that point, remove and replace the caulking. Use a utility knife or caulk removal tool to cut out the old bead. Pull it out completely and scrape away any remaining bits. Clean the joint thoroughly with rubbing alcohol and let it dry for at least 24 hours before applying new caulk. Apply a fresh bead of caulk with mold inhibiting properties. Smooth it with your finger or a caulk tool within 5 to 10 minutes before it skins over. Let it cure for 24 to 48 hours before exposing it to water.
Silicone caulk resists moisture better than latex caulk and lasts longer in wet areas. It costs a few dollars more per tube but stays flexible and mold resistant for years. Latex caulk absorbs water over time and breaks down faster in bathrooms.
Drying and Ventilating Bathroom Walls After Mold Cleaning

Complete drying kills remaining mold spores and prevents new growth from starting within hours of cleaning. Mold needs moisture to grow. Take that away and it dies.
You need air movement and humidity reduction:
- Open windows and doors to create cross ventilation and flush humid air out of the bathroom
- Run the exhaust fan continuously for 2 to 4 hours after cleaning
- Use portable fans aimed directly at the cleaned walls to speed surface drying
- Run a dehumidifier if you have one available, especially in humid climates or during summer
- Wipe all cleaned surfaces with dry towels immediately after rinsing
- Allow 24 to 48 hours before considering the area fully dry and safe to seal or paint
Check humidity levels with a hygrometer (an inexpensive tool that measures moisture in the air). You want bathroom humidity between 30 to 50% for mold prevention. Above 50% humidity, mold spores start growing again even on surfaces you just cleaned. If your bathroom stays above 50% humidity even with the fan running and windows open, you have a ventilation problem that will cause mold to return no matter how well you clean it.
Preventing Mold Growth on Bathroom Walls
Prevention takes less time than repeated cleaning and stops mold before it becomes a problem. Small daily habits make a bigger difference than occasional deep cleaning.
Follow these strategies:
- Run the exhaust fan during showers and for 20 minutes after you finish. Set a timer on your phone if you forget
- Squeegee or towel dry walls, shower doors, and tile after every bath or shower to remove standing water
- Open windows when weather permits to bring in fresh air and push humid air out
- Fix leaks immediately when you notice them. Dripping faucets, loose shower heads, or water spots on the ceiling below an upstairs bathroom
- Maintain 30 to 50% humidity in the bathroom using a dehumidifier during humid months if necessary
- Clean bathroom surfaces weekly with bathroom cleaner to remove soap scum and body oils that feed mold
- Ensure proper caulking around tubs, showers, and sinks with no gaps or cracks where water can seep in
- Consider moisture resistant paint formulated for bathrooms when repainting
Daily habits matter as much as the prevention checklist. Wipe condensation off mirrors and walls with a towel after showers. Leave the shower curtain or door open after use so air can circulate and dry the interior. Spread damp towels on a rack instead of leaving them bunched up. These small actions take 30 seconds and stop moisture from accumulating.
Long term solutions like upgraded ventilation systems or adding a second exhaust fan make sense if you’re constantly fighting moisture and mold despite following prevention habits. A bathroom that fogs up heavily during showers and stays humid for hours afterward has inadequate airflow for its size.
Treating Recurring Bathroom Wall Mold Problems

Mold that comes back within weeks or months after thorough cleaning indicates an unresolved moisture problem. You’re treating the symptom, not the cause.
Common causes include hidden plumbing leaks behind walls that keep drywall damp, inadequate exhaust fan capacity for the bathroom size creating constant high humidity, exterior water intrusion from roof leaks or failed window seals around bathroom windows, condensation from temperature differences when cold exterior walls meet warm humid bathroom air, and damaged waterproofing in shower areas allowing water to penetrate behind tile into wall cavities. Any of these creates conditions where mold grows faster than you can clean it.
Investigate by checking for soft spots in walls around the tub and shower by pressing firmly. Drywall that feels spongy or gives under pressure has water damage. Look for water stains on walls and ceilings, especially brown or yellow discoloration that appears in rings or runs in lines. Monitor when mold appears. If it shows up days after showers, humidity is the issue. If it appears in the same spot repeatedly regardless of shower use, suspect a leak. Inspect plumbing fixtures by running water and watching connections while someone else checks below or behind for drips.
Professional inspection becomes necessary when you can’t find the moisture source, when mold appears on multiple walls suggesting a building envelope problem, or when you suspect water intrusion from outside the bathroom. Thermal imaging cameras and moisture meters can detect hidden water that you can’t see. Fixing bathroom plumbing leaks behind walls requires accessing the pipes, repairing the leak, replacing damaged drywall, and ensuring proper drying before closing everything back up.
Applying Mold Resistant Products to Bathroom Walls

Mold resistant products are your secondary defense after proper ventilation and moisture control. They help, but they don’t replace fixing the underlying moisture problem.
Mold killing primers should be applied to walls before painting after you’ve cleaned mold. These primers contain antimicrobial additives that kill any remaining spores and create a base layer that resists new growth. Apply primer to the entire wall, not just the spot where mold appeared, because spores spread beyond what you can see. Let the primer dry for the time specified on the can (usually 24 hours) before painting over it. Apply it with a roller for even coverage and don’t thin it or dilute it.
Mold resistant paints formulated specifically for bathrooms contain mildewcides and create a finish that moisture can’t penetrate as easily as standard paint. They cost $5 to $10 more per gallon than regular paint but last longer in humid bathrooms. Cover all cleaned areas completely with at least two coats. Pay special attention to corners, around fixtures, and near the ceiling where moisture accumulates. Repaint every 3 to 5 years in high moisture bathrooms even if the paint looks fine, because the mold resistant properties break down over time.
Clear sealants for tile and grout add a protective barrier without changing the appearance. Apply grout sealer after cleaning and letting the grout dry completely for 48 to 72 hours. One bottle covers 50 to 100 square feet depending on how porous your grout is. Reapply sealer annually in showers and every 2 to 3 years on other bathroom tile.
When to Call a Professional for Bathroom Mold Removal
Some mold situations exceed safe DIY limits. Knowing when to stop and call for help protects your health and prevents making the problem worse.
Call a professional for these situations:
- Mold covering more than 10 square feet (roughly a 3×3 foot area) because disturbing large colonies releases massive amounts of spores
- Mold inside walls or cavities that you can see through cracks or damaged areas
- Black mold (Stachybotrys) identified by its dark greenish black color and slimy texture
- Mold caused by contaminated water from sewage backups or toilet overflows
- Household members with respiratory conditions (asthma, COPD) or compromised immune systems
- Mold returning repeatedly after multiple thorough cleanings
- Structural damage from moisture including soft drywall, warped framing, or water stains spreading across multiple walls
Professional mold remediation involves containment using plastic sheeting and negative air pressure to prevent spores from spreading to other rooms, HEPA filtration systems that filter air continuously during the removal process, and specialized antimicrobial treatments stronger than consumer products. They also have moisture meters and thermal cameras to find hidden water sources. The technicians wear full protective suits with respirators during removal.
Typical professional costs run $500 to $3,000 depending on severity, square footage affected, and whether structural repairs are needed. Small bathroom jobs (under 10 square feet) cost $500 to $1,000. Extensive mold requiring wall removal and structural drying runs $2,000 to $3,000 or more. Homeowner’s insurance sometimes covers mold remediation if the mold resulted from a covered event like a burst pipe, but typically won’t cover it if the mold grew from long term maintenance neglect or humidity issues.
Health Considerations When Cleaning Bathroom Mold
Mold spores become airborne when you disturb them during cleaning, and breathing them causes health effects ranging from minor irritation to serious respiratory problems. Even small amounts of mold release enough spores during cleaning to trigger reactions in sensitive people.
Common health effects include allergic reactions with sneezing and itchy eyes, asthma attacks triggered by mold spores, respiratory irritation with coughing and throat scratching, and headaches from breathing mold particles. These symptoms happen because mold spores are small enough to get deep into your lungs and sinuses.
Children, elderly adults, pregnant women, people with asthma or allergies, and anyone with compromised immune systems from illness or medication face higher risks from mold exposure. These individuals should not participate in mold cleaning even with protective gear. The concentration of airborne spores during cleaning is too high for vulnerable people to safely breathe even with good ventilation.
Watch for symptoms during and after cleaning. Persistent coughing that lasts more than a few hours after you finish, eye irritation that doesn’t clear up, skin rashes where your skin contacted moldy surfaces, or breathing difficulty that worsens as you work all indicate you’re being exposed to too much mold. Stop cleaning immediately if these symptoms develop. Leave the area and get fresh air.
Consult your healthcare provider if symptoms persist after cleaning ends or if they worsen instead of improving within a few hours. Describe what you were cleaning and mention mold exposure specifically so they can assess properly.
Maintaining a Mold-Free Bathroom Long-Term
Maintenance prevents major mold problems by catching moisture issues and cleaning regularly before mold colonies establish. A consistent routine beats occasional deep cleaning.
| Frequency | Task | Time Required |
|---|---|---|
| Daily | Squeegee walls and shower door after use | 2 minutes |
| After each shower | Run exhaust fan for 20 minutes | 1 minute to set up |
| Weekly | Clean all bathroom surfaces with bathroom cleaner | 15 minutes |
| Monthly | Inspect caulking and grout for damage or discoloration | 10 minutes |
| Quarterly | Deep clean with mold killing solution in corners and high risk areas | 30 minutes |
| Annually | Check for hidden leaks and moisture damage behind fixtures and in wall cavities | 20 minutes |
Establishing these habits makes maintenance automatic. Set phone reminders for the monthly and quarterly tasks until they become routine. Keep cleaning supplies under the bathroom sink so they’re readily available. A squeegee hanging in the shower reminds you to use it.
Document your maintenance for home value and warranty purposes. Take photos of clean bathrooms and save receipts for professional inspections or repairs. If you sell the house, maintenance records show buyers you’ve taken care of moisture issues. If you need to file an insurance claim for water damage, documentation proves the damage wasn’t caused by neglect.
Final Words
Learning how to clean mold off bathroom walls safely and correctly means you’re protecting both your home and your health. The right cleaning solution, proper safety gear, and complete drying make the difference between a quick fix and a recurring headache.
Once you’ve cleaned the mold, focus on the moisture problem that caused it in the first place.
Fix leaks, improve ventilation, and keep surfaces dry. That’s how you stop mold from coming back.
You’ve got the tools and the plan. Now go take care of it.
FAQ
How do you get rid of black mold on bathroom walls?
You get rid of black mold on bathroom walls by wearing proper safety gear, spraying the mold with undiluted white vinegar or a 1:10 bleach solution, letting it sit for 15-60 minutes, scrubbing with a brush, rinsing thoroughly, and drying completely with towels and ventilation.
What does toxic mold look like in a bathroom?
Toxic mold in a bathroom typically appears as dark greenish-black patches with a slimy or fuzzy texture, often found in corners, grout lines, caulking, or on ceiling surfaces where moisture accumulates. It may produce a strong musty odor and thrives in poorly ventilated areas.
What kills mold permanently?
Mold is killed permanently by using undiluted white vinegar, 3% hydrogen peroxide, or a 1:10 bleach solution combined with complete drying of the affected area, fixing the moisture source, improving ventilation, and maintaining 30-50% humidity levels to prevent regrowth.
Do Clorox wipes kill mold?
Clorox wipes can kill surface mold on non-porous bathroom surfaces like tile or countertops, but they are not effective for porous materials like grout or drywall where mold penetrates deeper. Spray solutions with proper dwell time work better for thorough mold removal.
How long should cleaning solution sit on moldy bathroom walls?
Cleaning solution should sit on moldy bathroom walls for 10-15 minutes for mild surface mold when using bleach, or 60 minutes when using white vinegar for moderate mold. This dwell time allows the solution to penetrate and kill mold spores before scrubbing.
Can you paint over mold on bathroom walls?
You cannot paint over mold on bathroom walls because the mold will continue growing underneath the paint and eventually reappear. You must remove all mold completely, dry the surface thoroughly, and apply mold-killing primer before painting with mold-resistant paint.
How do you know if mold is inside bathroom walls?
You know mold is inside bathroom walls by checking for soft or spongy spots when pressing on drywall, visible water stains, persistent musty odors even after cleaning, peeling paint or wallpaper, and mold repeatedly appearing in the same location despite surface cleaning.
What’s the difference between mold and mildew in bathrooms?
The difference between mold and mildew in bathrooms is that mildew appears powdery and white or gray on surfaces, while mold has a fuzzy or slimy texture and comes in black, green, blue, or red colors. Mildew is easier to remove than mold.
Should you use bleach or vinegar to clean bathroom mold?
You should use vinegar for painted walls and mild mold because it’s safer and won’t damage surfaces, while bleach works faster on non-porous tile and severe mold but produces harmful fumes requiring ventilation. Never mix bleach with other cleaning products.
How do you prevent mold from coming back on bathroom walls?
You prevent mold from coming back on bathroom walls by running the exhaust fan during and 20 minutes after showers, wiping down wet surfaces daily, maintaining 30-50% humidity, fixing leaks immediately, and ensuring proper ventilation through windows or fans.
When should you call a professional for bathroom mold?
You should call a professional for bathroom mold when the affected area exceeds 10 square feet, mold appears inside walls, you identify black mold, household members have respiratory conditions, mold keeps returning after cleaning, or water damage caused the growth.
How long does it take to remove mold from bathroom walls?
It takes 30-60 minutes to remove mold from small bathroom wall areas and 2-3 hours for extensive mold coverage, including preparation, application, scrubbing, rinsing, and drying time. Complete drying may require an additional 24-48 hours before rebuilding or painting.
What safety gear do you need for cleaning bathroom mold?
You need an N95 or N99 respirator mask, waterproof rubber gloves, safety goggles, old clothing or protective coveralls, and proper ventilation from open windows and doors when cleaning bathroom mold to protect against harmful spores and chemical fumes.
Can bathroom mold make you sick?
Bathroom mold can make you sick by releasing spores that cause respiratory irritation, allergic reactions, asthma attacks, persistent coughing, headaches, and skin rashes, especially in children, elderly people, pregnant women, and those with weakened immune systems or respiratory conditions.
How do you remove mold from bathroom grout?
You remove mold from bathroom grout by applying a bleach solution or hydrogen peroxide directly to grout lines, letting it sit for 15-20 minutes, scrubbing vigorously with a stiff grout brush, rinsing thoroughly, and applying grout sealer after drying to prevent future growth.
