

You just pulled drywall off studs and found mold growing on the wood frame of your house. Now what? Most homeowners assume those studs need to be replaced, but that’s usually not true. Structural wood can be cleaned and saved if you do it right, using the correct solutions and safety equipment. This guide walks you through exactly how to kill mold on studs, when cleaning is enough, and when you need to stop and call a professional instead.
Safety Equipment and Protective Gear for Mold Cleanup on Studs

Mold spores go airborne the second you start scrubbing. This isn’t optional safety theater. It’s the difference between finishing the job safely and dealing with respiratory problems for weeks.
The moment you disturb mold growth, microscopic spores launch into the air where you’re breathing. You need real protection, not just a dust mask from the garage.
Required protective equipment for stud cleaning:
- Respirator mask – N95 minimum for light mold, P100 for heavy growth or black mold. Standard dust masks don’t filter mold spores. The respirator needs to seal completely around your nose and mouth.
- Rubber gloves – Nitrile or latex gloves extending past your wrists. Disposable exam gloves work for light cleaning. Heavy duty cleaning gloves are better for scrubbing.
- Safety goggles – Full seal around eyes, not just safety glasses. Spores irritate eyes on contact and can cause infection.
- Protective clothing – Long sleeves and long pants made from washable or disposable material. Coveralls work well. Don’t wear anything you plan to keep wearing around the house.
- Shoe covers – Disposable booties prevent tracking spores through your home. If you don’t have covers, designate work shoes that stay in the work area.
- Glove to sleeve gap coverage – Tape gloves to sleeves or use coveralls with integrated gloves. The wrist gap is where spores sneak onto skin.
Mold releases microscopic spores causing allergic reactions, runny noses, sneezing, and irritating odors that can make you miserable for days. Black mold releases mycotoxins that can cause mild to severe symptoms or death in extreme cases when inhaled, ingested or touched. Each piece of equipment protects against specific hazards. The respirator filters airborne spores before they reach your lungs. Goggles prevent eye irritation and infection. Gloves create a barrier between your skin and both mold and the harsh cleaning chemicals you’ll use. Full coverage clothing keeps spores from settling on skin and clothing you’ll wear later.
After cleanup, PPE disposal prevents cross contamination. Disposable items like gloves, shoe covers, and respirator filters go into sealed plastic bags immediately after use. Washable items like coveralls and reusable goggles get washed separately from regular laundry in hot water with detergent. Don’t shake out dusty coveralls or reuse disposable gloves. The small cost of proper disposal beats the large cost of spreading mold spores through your home.
Assessing Mold Severity: When to DIY vs. Call Professionals

Assessment determines whether DIY cleaning is safe and appropriate or if you need professional help. Walk up to the exposed studs and take an honest look at what you’re dealing with. Measure the affected area. Press on the wood. Check for musty smells. This inspection tells you whether you can handle the job or whether you’re looking at a problem requiring expert intervention.
The 10 square foot threshold is a guideline set by EPA recommendations, and it serves as a practical dividing line between manageable DIY projects and situations requiring professional equipment and expertise. Measure the total area of visible mold on studs by calculating height times width for each affected section, then add them up. If the total exceeds roughly 3 feet by 3 feet, professional remediation is recommended.
But other factors may require professional help regardless of size. Call professionals when black mold (Stachybotrys chartarum) is confirmed or suspected, when anyone in the home experiences health symptoms like persistent coughing or breathing difficulty, when mold has contaminated HVAC systems, when sewage or contaminated water caused the moisture problem, or when mold returns after you’ve already cleaned it once. Recurring growth signals a moisture problem you haven’t fixed, and professionals have moisture detection equipment you don’t.
Warning signs requiring stud replacement or professional assessment:
- Studs feel soft or spongy when you press firmly with your thumb
- Wood crumbles or flakes when you probe it with a screwdriver
- Dark discoloration penetrates deep into the wood grain, not just surface staining
- Strong musty odor persists even in well ventilated spaces, indicating hidden growth behind or within materials
- Mold coverage exceeds 10 square feet across all affected studs combined
- Wall contains electrical wiring, plumbing, or HVAC components you’re not qualified to work around
- Studs are part of a load bearing wall supporting floors or roof above
- Previous cleaning attempts failed and mold returned within weeks
Soft, spongy wood indicates compromised structural integrity and lost load capacity. Do the tactile test by pressing your thumb into the wood surface with moderate force. Healthy, dry lumber feels hard and solid. Wood that’s been saturated and colonized by mold may feel soft, almost like pressing into dense foam.
Use a flathead screwdriver to probe suspect areas. Insert the tip into the wood at a slight angle. Healthy wood resists penetration. Compromised wood allows the screwdriver to sink in easily or causes the surface to crumble. Check multiple spots along each stud’s length because damage often varies. Pay special attention to the bottom plate where studs meet the floor, as this area typically stays wet longest after flooding.
Load bearing studs can’t be removed without temporary support, and attempting removal risks serious structural damage or collapse. Load bearing walls typically run perpendicular to floor joists and often sit directly over foundation walls or beams in the basement. If you’re unsure whether a wall is load bearing, assume it is. If studs in a load bearing wall show severe deterioration requiring replacement, call a structural engineer to evaluate safety before you remove anything. The engineer will specify temporary support requirements during repair.
Professional moisture surveys may be necessary for persistent problems where you can’t identify the water source. Professionals use thermal imaging cameras to detect temperature differences that indicate moisture behind surfaces, moisture meters that measure water content deep within materials, and hygrometers that track humidity patterns over time. Insurance documentation requires detailed damage assessment including photos, measurements, descriptions of affected materials, and timeline of when damage was discovered.
Mold Removal Process: Step-by-Step Cleaning for Exposed Wood Studs

Wood studs are structural framing that must be cleaned when possible rather than replaced. Wood framing behind drywall is permanent structural material that forms the skeleton of your walls. Unlike drywall, which is meant to be replaced when damaged, studs are meant to last the lifetime of the house. When mold grows on studs after water damage, cleaning is your first option unless the wood has become structurally compromised.
Step by step process for cleaning mold from studs:
-
Prepare cleaning solution – Mix 2 parts baking soda, 1 part white vinegar, and 1 part water in a spray bottle, or use straight 3% hydrogen peroxide. Shake well before use.
-
Lightly mist the moldy stud surfaces – Spray a light, even coat over all visible mold. Don’t drench the wood. You want it damp, not soaking.
-
Wait 3 to 5 minutes – Let the solution sit on the surface to penetrate the mold growth. This breaks down the mold structure and makes removal easier.
-
Scrub with a stiff brush or scrub sponge – Use firm pressure and scrub along the wood grain. A nylon scrub brush or scrub sponge works well. Avoid wire brushes on softwood studs as they can damage the surface unnecessarily.
-
Wipe off loosened mold – Use disposable rags or paper towels to wipe away the mold you’ve scrubbed loose. Work from top to bottom so debris falls to areas you haven’t cleaned yet.
-
Inspect the stud – Look closely at the wood grain. If dark discoloration remains, apply solution and scrub again.
-
Repeat application as needed – Heavy mold growth may require 3 or 4 cleaning cycles. Each cycle removes more growth and lightens staining.
-
Allow studs to dry completely – Set up fans and dehumidifiers after final cleaning. Let wood dry for at least 3 days before checking moisture levels with a moisture meter.
-
Verify dryness – Wood moisture content should read below 16% on a moisture meter before you close up walls. Anything higher risks mold regrowth.
-
Final inspection – Check for any missed spots, soft areas, or persistent odors that indicate incomplete cleaning.
Multiple cleaning applications may be necessary for heavy mold growth, especially when black mold has established deep colonies on the wood surface. Each application removes another layer of growth and staining. Don’t rush the process.
Dark black mold stains on wood will lighten gradually with repeated cleaning but may not return to like new appearance. This is normal. The goal is removing living mold, not making the wood look perfect. Some ghosting or shadow staining is acceptable as long as the wood is structurally sound, completely dry, and sealed before closing up the wall.
Complete drying is critical before installing new materials. Sealing damp wood behind new drywall traps moisture and guarantees mold return within weeks. The time investment in proper drying prevents having to tear walls open again in a few months.
Cleaning Solutions and Treatment Options for Moldy Studs

Different solutions have different penetration depths and effectiveness, and choosing the right one affects both your results and your safety during cleanup. Natural solutions are safer but may require more applications to achieve the same results as commercial products. Commercial products often contain stain removers alongside mold killers, which speeds up the process on heavily stained wood.
| Solution Type | Application Method | Wait Time | Effectiveness |
|---|---|---|---|
| Distilled White Vinegar (undiluted) | Spray directly on surface, don’t dilute | 60 minutes | Kills 82% of mold species, safe for indoor use, no rinsing needed |
| Hydrogen Peroxide (3%) | Spray on surface, light scrubbing after wait | 10 to 15 minutes | Effective on most mold types, some bleaching action on wood, penetrates porous surfaces better than bleach |
| Borax Solution (1 cup per gallon water) | Apply with brush or spray, scrub, wipe clean | 5 minutes | Inhibits future growth, low toxicity, leaves protective residue |
| TSP (Trisodium Phosphate) cleaner | Mix per package directions, scrub application | 10 minutes | Strong degreaser and cleaner, effective on heavy buildup, requires rinsing |
| Commercial Mold Stain Remover (Clorox Clean Up, Concrobium) | Spray and wipe, or spray and let dry per label | 2 to 5 minutes | Fast acting, includes stain lightening agents, formulated specifically for mold |
| Antimicrobial Spray (EPA registered) | Apply after cleaning, let air dry | No wait | Prevents regrowth, use as final treatment step after cleaning with other solutions |
Don’t use bleach to clean mold on wood studs or any other porous surface. Bleach creates a false sense of cleanliness while leaving roots intact in the wood grain.
Household bleach (sodium hypochlorite) only kills surface mold. It lightens or removes the visible discoloration, making you think the mold is gone. But bleach molecules are too large to penetrate porous materials like wood. The mold’s root structure (hyphae) remains alive deep in the wood pores. Worse, the water in bleach solution soaks into the wood and actually feeds the remaining mold roots. Within weeks, mold returns stronger than before. The chlorine in bleach also breaks down quickly when exposed to organic material, losing effectiveness within minutes.
Commercial mold stain removers like Clorox Clean Up and Concrobium offer advantages over DIY solutions when you need fast results or are dealing with heavy staining. Concrobium is a nontoxic solution that kills mold and prevents regrowth without using bleach or harsh chemicals. It works by crushing mold spores as it dries, leaving a thin antimicrobial barrier. Commercial products are formulated to work quickly, usually requiring only 2 to 5 minutes of contact time versus 30 to 60 minutes for vinegar. The convenience comes at higher cost per ounce, but the time savings and reduced scrubbing effort may be worth it on large jobs.
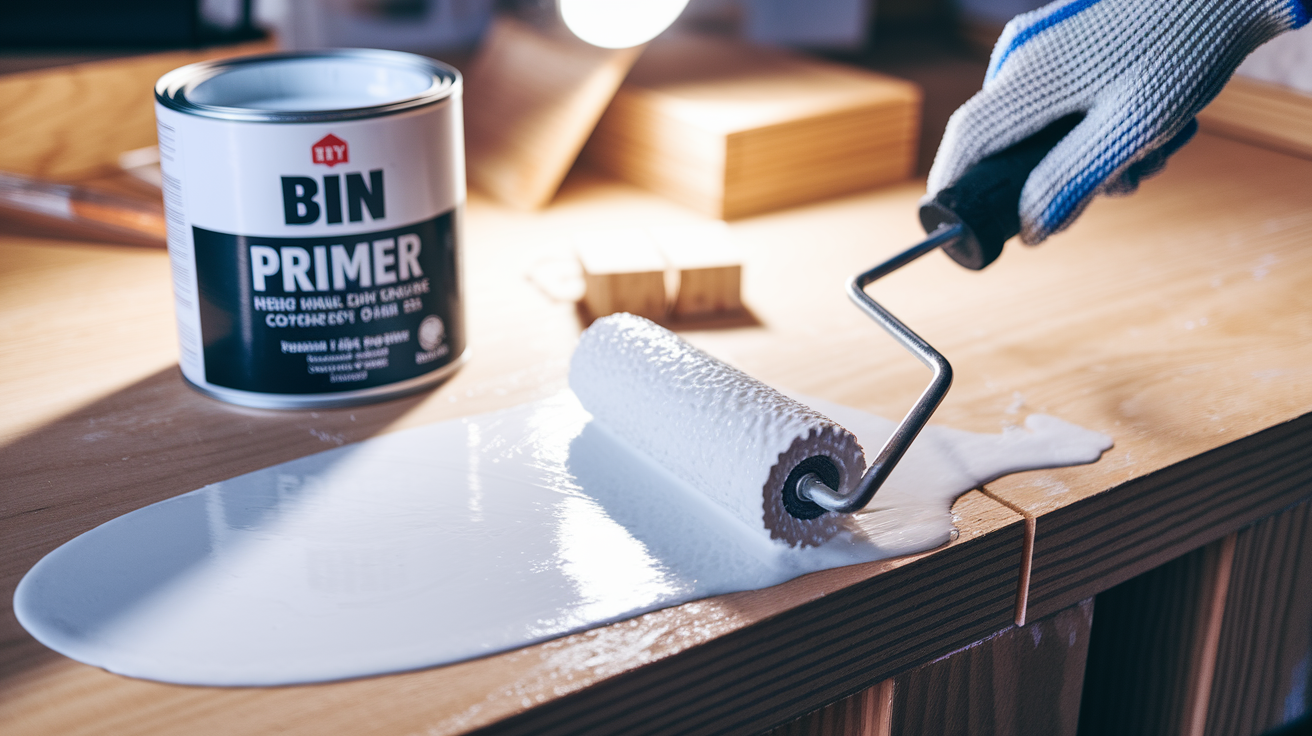
After cleaning and complete drying, apply a sealer or encapsulation product to lock in any remaining stains and create a moisture resistant barrier. Shellac based primers like BIN or oil based primers like KILZ seal wood surfaces and block stains from bleeding through future finishes. These products also reduce the wood’s ability to absorb atmospheric moisture, adding another layer of mold prevention.
Containment and Preparation Before Cleaning Mold Off Studs

Mold spores become airborne during cleaning and can spread to unaffected areas if you don’t create proper containment. The disturbance of scrubbing, wiping, and spraying launches millions of microscopic spores into the air. Without containment, those spores drift through your home and settle on furniture, carpets, and HVAC ducts. Proper containment protects living spaces while allowing safe cleanup in the work area.
Steps for setting up work area containment:
-
Shut down HVAC system – Turn off heating and cooling at the thermostat and at the main unit if possible. Close all supply and return vents in and near the work area. Cover vents with plastic sheeting and tape to prevent spore entry into ductwork.
-
Remove or cover furniture and belongings – Take everything you can out of the room. Cover remaining items with 6 mil plastic sheeting taped at edges to create complete seal.
-
Install floor to ceiling plastic barriers – Hang 6 mil plastic sheeting over doorways, creating an airlock entry. Install plastic from floor to ceiling with 6 inch overlap where sheets meet. Tape all edges to walls, floor, and ceiling with quality duct tape or contractor’s tape.
-
Create negative air pressure – Place a box fan in a window pointing outward, or use a commercial air scrubber with HEPA filtration. The goal is to pull air from the home into the work area and exhaust it outside, preventing spore migration.
-
Shut off electrical power – Turn off breakers for any outlets or switches in the work area. Use a non contact voltage tester to verify power is off before working near any electrical boxes. Work lights and tools must run on extension cords from breakers outside the work area.
-
Establish disposal pathway – Plan a route from work area to exterior that minimizes travel through living spaces. If you must pass through the home, lay down plastic sheeting as a pathway. Stage heavy duty trash bags at the exit point.
-
Stage cleaning materials – Set up a table or workbench just outside the containment area where you can mix solutions, change PPE, and temporarily store tools. Keep clean supplies separated from contaminated tools.
-
Post warning signs – Put signs on containment barriers warning household members and pets to stay out. Include your cell number in case of emergency.
-
Verify containment integrity – Before starting work, check that all plastic barriers are sealed, negative pressure is working (plastic should pull slightly inward), and you have clear access to exit.
Proper ventilation requires open windows and fans directing air outward, creating a balance between fresh air exchange and spore containment. Open at least one window in the work area to provide fresh air makeup for the negative pressure system. The incoming fresh air should flow across the work area toward the exhaust fan. This creates a directional airflow that sweeps spores toward the exit point rather than allowing them to circulate. Don’t create cross breezes that swirl air around the room.
Electrical safety is essential when working in walls that may contain hidden wiring. Even with power shut off at the breaker, verify with a voltage tester before cutting, scrubbing, or working near any outlet boxes or switch boxes. Water damage sometimes compromises wire insulation, creating shock hazards. If you discover damaged wiring, leave it alone and call a licensed electrician.
Drying Requirements and Moisture Control for Cleaned Studs

Enclosing damp studs traps moisture and guarantees mold return, typically within 2 to 6 weeks of closing up the wall. Wood must be completely dry before installing new insulation and drywall. The time and equipment investment in proper drying prevents having to tear walls open a second time.
Dry cleaned areas for at least 3 days using dehumidifiers and fans before checking for remaining mold or making decisions about closing up walls. The three day minimum applies to ideal conditions with good air circulation, low humidity, and moderate temperatures.
Environmental factors affect drying time significantly. Cold temperatures slow evaporation. High outdoor humidity limits how much moisture air can absorb. Poor air circulation leaves pockets of dampness. Heavy water damage that saturated studs deeply requires a week or more of drying even in good conditions. Thick wood dries slower than thin wood. Studs in exterior walls dry slower than interior walls. Dense wood species like oak dry slower than soft pine.
Equipment and techniques for drying wood framing:
-
Dehumidifier placement – Position a 50 to 70 pint dehumidifier in the center of the affected room. Empty the collection bucket every 8 to 12 hours or run a drain hose to a floor drain or sump. Keep dehumidifier running 24/7 until wood reaches target dryness.
-
Air circulation fans – Place box fans or floor fans to create airflow across stud surfaces. Angle fans to blow parallel to walls rather than straight at them. This pulls moisture away from wood surfaces. Use at least one fan per affected wall section. Add fans in corners where air doesn’t circulate naturally.
-
Natural ventilation windows – Open windows when outdoor humidity is lower than indoor humidity. Close windows when it’s humid or raining outside. Monitor indoor and outdoor humidity with a hygrometer to make smart ventilation decisions.
-
Heat to accelerate drying – If ambient temperature is below 65°F, add supplemental heat. Space heaters work well. Keep temperature between 70 to 80°F for optimal drying. Don’t exceed 80°F as excessive heat can damage materials or create fire hazards with some heaters.
-
HEPA air scrubbers – Continue running air filtration units during drying to capture any remaining airborne spores. Position to pull air from work area and exhaust through HEPA filter.
-
Moisture meter verification – Use a pin type or pinless moisture meter to check wood moisture content daily. Insert pins into wood or hold meter against surface. Target reading is below 16% moisture content for studs. New lumber typically measures 10 to 12%. Readings above 16% indicate wood still needs drying time.
-
Humidity monitoring – Maintain indoor humidity between 30% and 50% using dehumidifiers to prevent mold growth during and after the drying process. Use a hygrometer to track humidity levels. Adjust dehumidifier settings to maintain this range.
Moisture meters provide objective dryness verification that you can’t get from visual inspection alone. Wood can look and feel dry on the surface while still holding moisture deep in the grain. Pin type meters have two metal probes that penetrate wood surface and measure electrical resistance between pins. Lower resistance means higher moisture. Pinless meters use radio frequency signals to measure moisture without penetrating the surface.
Take readings at multiple points on each stud. Top, middle, bottom, and near any areas that were heavily saturated. Take readings from both the face and edges of studs. Record readings with dates so you can track drying progress. Wood is ready for enclosure when readings consistently measure below 16% moisture content at all test points for 24 hours.
Document the drying process and timeline with dated photos and moisture readings. This record proves you followed proper procedures if problems develop later. It also helps you estimate drying time for future projects based on your climate and home conditions.
Root Cause Identification and Water Leak Repair for Studs

Mold is the symptom, not the problem. Moisture is the problem, and cleaning mold without fixing the water source guarantees recurrence within weeks or months.
The underlying water or moisture issue causing the mold must be fixed or mold will return. You can scrub studs perfectly clean, dry them completely, seal them with the best primers, and close up the wall with new materials. But if water continues entering that wall cavity, mold will recolonize the wood and you’ll be tearing the wall open again next year.
Common moisture sources in wall cavities fall into several categories. Plumbing leaks from supply lines, drain pipes, or fixture connections slowly saturate framing over weeks or months before anyone notices a problem. A pinhole leak in a copper supply line sprays pressurized water into the wall cavity every time water runs. A slow drain leak drips contaminated water onto wood whenever the sink empties. Condensation on cold water pipes in humid climates can drip enough water to cause mold growth over time.
Roof penetrations including vent pipes, skylights, and chimney flashing fail and allow rain to enter walls during storms. Window flashing failures let water run behind exterior sheathing and into wall cavities. Poor grading and drainage around the foundation allow water to seep through basement walls or crawl space walls, wicking up into bottom plates and studs. Vapor barriers installed incorrectly can trap moisture in walls. Air conditioning condensate drain line clogs and overflows into walls.
Multiple moisture sources may contribute to a single mold outbreak, making diagnosis complicated. The water stain you see on studs near a window might come from failed flashing around that window, or from a roof leak three feet higher that’s running down inside the wall, or from condensation on cold pipes behind the studs.
Diagnostic techniques for identifying hidden moisture sources require both detective work and sometimes specialized tools. Look for water stains that create trails pointing to the source. Water runs downhill, so the highest point of staining often indicates where water entered. Feel insulation for dampness. Wet insulation means current or very recent water intrusion. Shine a flashlight at an angle across stud surfaces to reveal subtle water trails and darkening. Check for rust stains that indicate water contact with metal (nails, wire, pipes). Use your nose. Follow the musty smell to its strongest point. Push on drywall above affected areas to check for soft spots indicating hidden damage.
Moisture sources by home area:
- Basement walls – Foundation cracks, poor exterior drainage, failed waterproofing, condensation on cold concrete, sump pump failures, window well overflow
- Attic framing – Roof leaks, ice dams, inadequate ventilation causing condensation, bathroom exhaust venting into attic, missing or damaged vapor barriers
- Bathroom walls – Leaking shower pans, failed grout or caulk, toilet wax ring leaks, inadequate exhaust ventilation, tub and shower valve leaks behind walls
- Kitchen walls – Dishwasher supply line leaks, sink drain leaks, refrigerator ice maker line leaks, poor ventilation during cooking
Professional moisture surveys may be necessary for persistent problems where DIY investigation doesn’t reveal an obvious source. Pros use thermal imaging cameras to detect temperature differences that indicate moisture behind surfaces. Wet areas appear cooler than dry areas on the infrared display. Moisture meters with deep penetrating probes can detect water content several inches behind surface materials. Flood restoration companies have truck mounted equipment for extracting water from wall cavities and specialized drying equipment for large scale water events that may have affected multiple wall sections.
Repair plumbing, roofing, or window leaks promptly and ensure proper drainage around foundation before you invest time in cleaning and drying studs. Otherwise you’re just setting yourself up to repeat the whole process.
Improved ventilation may be necessary in areas like attics to prevent mold regrowth. Adding soffit vents, ridge vents, or gable vents balances air pressure and reduces condensation. Bathroom exhaust fans must vent to the exterior, not into attics or wall cavities.
Tools and Equipment Required for Stud Mold Removal

Having proper tools improves efficiency and results by letting you work steadily without stopping to hunt for materials or improvise solutions. Gather everything before you start containment setup so you’re not breaking containment to retrieve forgotten items.
| Tool/Equipment | Purpose | Specifications |
|---|---|---|
| HEPA vacuum | Remove loose spores and debris from studs | True HEPA filter rated to capture 99.97% of particles 0.3 microns or larger. Shop vac with HEPA filter works. Bagless models require thorough cleaning after use. |
| Spray bottles and pump sprayer | Apply cleaning solutions to stud surfaces | 1 quart spray bottles for small areas, 1 to 2 gallon pump sprayer for large jobs. Adjustable nozzle from mist to stream. Chemical resistant plastic. |
| Scrub brushes and sponges | Mechanical mold removal from wood grain | Stiff nylon bristle brush for heavy scrubbing. Scrub sponges with abrasive backing for controlled pressure. Avoid wire brushes on softwood studs. |
| Heavy duty trash bags | Contain and dispose contaminated materials | 6 mil contractor bags rated 42 to 55 gallons. Double bag moldy materials. Have 20 to 30 bags staged for typical wall section cleanup. |
| Moisture meter | Verify wood dryness before closing walls | Pin type or pinless meter reading to at least 20% moisture content. Digital display preferred over analog. Calibration check against known dry wood before use. |
| Plastic sheeting and tape | Create containment barriers | 6 mil polyethylene sheeting in 10 foot or 20 foot widths. Contractor grade duct tape or professional containment tape 2 to 3 inches wide. Buy 2 to 3 rolls of sheeting and several tape rolls. |
| Disposable rags and shop towels | Wipe removed mold and cleaning solutions | White or light colored rags show mold removal progress. Paper shop towels work well. Microfiber cloths for final wiping. Budget 2 to 3 dozen towels for typical project. |
| Camera or smartphone | Document extent, process, and completion | High resolution camera capable of close up shots in low light. Date/time stamp enabled. Take photos before, during, and after cleanup. Include scale reference in photos. |
Some tools can’t be adequately cleaned and must be disposed of after mold cleanup projects. Box fans used for ventilation during drying collect spores on blades, motor housing, and grilles. Throw away box fans used for ventilation after cleanup as spores are almost impossible to clean off completely. The cost of a new $20 fan is cheaper than the risk of redistributing spores next time you use it.
Disposable PPE including respirator filters, gloves, shoe covers, and coveralls goes straight into sealed bags for disposal. Don’t try to wash and reuse disposable items.
HEPA filtration is essential for vacuum equipment used during mold cleanup. Standard shop vac filters allow microscopic mold spores to pass through and exhaust into the air. This makes the spore problem worse by aerosolizing material you’re trying to remove. True HEPA filters capture 99.97% of particles down to 0.3 microns. Mold spores range from 3 to 40 microns, well within HEPA capture range. If your shop vac doesn’t have HEPA filtration, either buy HEPA bags and filters for it or rent a true HEPA vacuum for the project.
Clean wet/dry vacuum after use by disposing of the filter and washing the tank, hose, and attachments with a bleach and water solution (1 cup bleach per gallon of water). Rinse thoroughly and let air dry completely before storage. If the vacuum collected heavy mold growth, consider disposing of the vacuum entirely.
Documentation tools help track progress and support insurance claims if you’re filing for water damage reimbursement. Take before photos showing extent and location of mold growth. Take during photos documenting cleaning process and any structural damage discovered. Take after photos showing cleaned and dried studs, moisture meter readings, and completed repairs. Date all photos. Organize them in folders by location and date. Keep notes about cleaning products used, drying time required, and moisture readings over time.
Post Cleanup Treatment and Sealing for Cleaned Studs
Sealing cleaned wood before enclosing walls locks in remaining stains, creates a moisture barrier, and provides additional protection against future mold growth. After you’ve scrubbed mold off studs and dried them completely, don’t skip this critical step. Sealing makes the difference between studs that stay clean and studs that support mold regrowth.
Oil based primers and shellac based sealers both work well for sealing cleaned studs, but they have different characteristics. Shellac based primers like BIN (Bulls Eye 1-2-3) dry very fast, usually within 45 minutes. They seal in stains exceptionally well, blocking even heavy tannin bleeding and smoke damage. Shellac has natural antimicrobial properties and creates a hard, tight seal.
But shellac based products have strong odor during application and require good ventilation. They also cost more per gallon. Oil based primers like KILZ Original dry slower, typically requiring 4 to 6 hours between coats. They seal stains effectively and penetrate wood grain well. Oil based primers are widely available and cost less than shellac products, but they have strong solvent odor and require mineral spirits for cleanup.
Steps for applying sealer to cleaned studs:
-
Vacuum stud surfaces – Use HEPA vacuum to remove any dust, dried cleaning residue, or loose wood fibers left from scrubbing. Sealer won’t adhere well to dusty surfaces.
-
Select appropriate sealer – Use BIN shellac based primer for fastest drying and best stain blocking. Use KILZ Original or similar oil based primer for budget friendly option with good performance. Avoid latex primers on studs with heavy staining or moisture history.
-
Set up ventilation – Open windows and use fans to maintain good airflow. Both shellac and oil based primers release strong fumes. Wear respirator during application if working in confined spaces.
-
Apply first coat – Use a brush or roller to apply even coat to all cleaned stud surfaces. Pay special attention to areas with visible staining. Apply sealer to faces and edges of studs. Smooth out drips and runs.
-
Allow proper drying time – Let shellac based primer dry 45 to 60 minutes. Let oil based primer dry 4 to 6 hours or overnight. Don’t rush this step. Adequate drying ensures adhesion and allows solvents to evaporate.
-
Inspect coverage – Look for any show through stains or thin spots. Check edges and the wood grain where stains can bleed through. Mark any areas needing extra attention.
-
Apply second coat if needed – Heavy staining may require two coats for complete blocking. Apply second coat after first is completely dry. Two thin coats work better than one heavy coat.
Multiple coats may be necessary for severe staining where mold penetrated deeply into wood grain. The goal is complete stain blocking so nothing bleeds through future drywall or paint. Test stain blocking by looking at sealed studs under bright light at an angle. If you see shadow discoloration, apply another coat.
Antimicrobial treatments provide additional protection after sealing. Products like Concrobium Mold Control can be applied over dry sealer to create an additional barrier against spore colonization. These treatments work by leaving a microscopic antimicrobial film that crushes mold spores on contact. Apply per manufacturer directions after primer has fully cured.
Some latex paints now contain mildewcide additives that provide ongoing protection. If you’re painting over sealed studs before installing insulation and drywall, choose paint with mildewcide for bonus protection.
Document treatment products and application dates for future reference by writing the information directly on studs with permanent marker or keeping detailed notes with project photos. If you ever need to open walls again or if you sell the home, this documentation shows the work was done properly. Note the sealer brand, number of coats applied, drying time between coats, and date of application.
Mold Prevention Strategies After Cleaning Wood Framing

Prevention is easier than remediation, costing a fraction of the time and money while avoiding the health risks and stress of dealing with mold growth. After investing hours in cleaning and drying studs, protecting that work makes sense.
Maintain indoor humidity between 30% and 50% using dehumidifiers to prevent mold growth in the long term. Humidity control is the single most important prevention strategy because mold can’t grow without moisture. Buy a hygrometer (humidity gauge) for each level of your home. Check readings weekly. When humidity creeps above 50% for extended periods, mold spores that
Final Words
Now you know how to clean mold off studs safely and completely. Put on your respirator and gloves, contain the work area, and choose the right cleaning solution for your situation. Scrub thoroughly, let it dry for at least three days, and verify dryness with a moisture meter before closing up the wall.
But here’s the thing. If you skip finding and fixing the water source, mold will be back in a few months. Seal that leak, improve the ventilation, and keep humidity between 30 and 50 percent. That’s what keeps your studs clean for good.
FAQ
Can you remove mold from studs?
You can remove mold from studs when the growth is surface-level and the wood remains structurally sound. Clean studs using white vinegar, hydrogen peroxide, or commercial mold removers, then verify complete drying before closing walls. Replace studs that feel soft or spongy.
What kills black mold instantly on wood?
Nothing kills black mold instantly on wood, but 3% hydrogen peroxide applied for 10 to 15 minutes before scrubbing works effectively. Undiluted white vinegar left for one hour also kills mold. Multiple applications are usually needed for heavy growth.
Why do I have black mold in my studs?
You have black mold in your studs because moisture reached the wood framing from plumbing leaks, roof damage, condensation, flooding, or poor ventilation. Mold grows when wood stays damp. Fix the water source or mold returns after cleaning.
How to remove black mold from framing lumber?
To remove black mold from framing lumber, spray with mold remover, wait several minutes, scrub with a brush, wipe clean, and repeat as needed. Wear respirator and protective gear. Verify complete drying for at least three days before installing new drywall.
Do I need professional help for mold on studs?
You need professional help for mold on studs when affected area exceeds 10 square feet, studs feel soft or crumbling, mold returns after cleaning, or you experience health symptoms. Pros handle sewage-related water, hidden mold, and structural concerns.
How long does it take to dry studs after mold cleaning?
It takes at least three days to dry studs after mold cleaning using dehumidifiers and fans in ideal conditions. Actual drying time depends on temperature, humidity, and air circulation. Use a moisture meter to verify dryness before closing walls.
What protective equipment do I need for cleaning mold off studs?
You need an N95 or P-100 respirator, rubber gloves, safety goggles, and long-sleeved protective clothing for cleaning mold off studs. Mold releases spores causing allergic reactions and respiratory problems. Black mold produces mycotoxins creating serious health risks when inhaled.
Should I use bleach to clean mold from wood studs?
You should not use bleach to clean mold from wood studs because bleach only kills surface mold on porous wood while leaving roots intact. Use white vinegar, hydrogen peroxide, or commercial wood mold removers that penetrate deeper and prevent stronger regrowth.
How do I know if studs need replacement instead of cleaning?
You know studs need replacement instead of cleaning when wood feels soft or spongy when pressed, crumbles when probed, shows severe discoloration deep into grain, or lost structural integrity from moisture damage. Replace load-bearing studs showing any weakness.
Can mold stains be completely removed from wood studs?
Mold stains cannot always be completely removed from wood studs, even after thorough cleaning and multiple applications. Dark staining lightens gradually but may not return to original appearance. Clean wood is safe to enclose even with remaining discoloration after proper treatment.
What humidity level prevents mold growth on studs?
A humidity level between 30% and 50% prevents mold growth on studs and other building materials. Use dehumidifiers to maintain this range. Higher humidity encourages mold, while lower levels may crack wood and cause other problems.
How do I seal studs after removing mold?
You seal studs after removing mold by applying pigmented shellac like BIN or oil-based primer like KILZ to completely dry wood surfaces. These products lock in stains, create moisture barriers, and prevent future growth before installing insulation and drywall.
Do I need to test air quality after cleaning mold from studs?
You need to test air quality after cleaning mold from studs to verify successful removal and establish safe spore levels. Use DIY test kits or hire professionals for air sampling. Testing provides baseline for future comparison and documentation for insurance.
