

Wet carpet padding doesn’t dry. It absorbs water like a sponge, and once it’s soaked, the clock starts ticking toward mold growth and bacteria buildup. Most people don’t realize that padding is designed to trap and hold material, which means water counts. You’ve got about 24 to 48 hours before what started as a clean water leak becomes a contamination problem. The good news? Removing wet padding is straightforward work you can handle yourself if you’ve got the right gear, know where the safety lines are, and work in the right sequence.
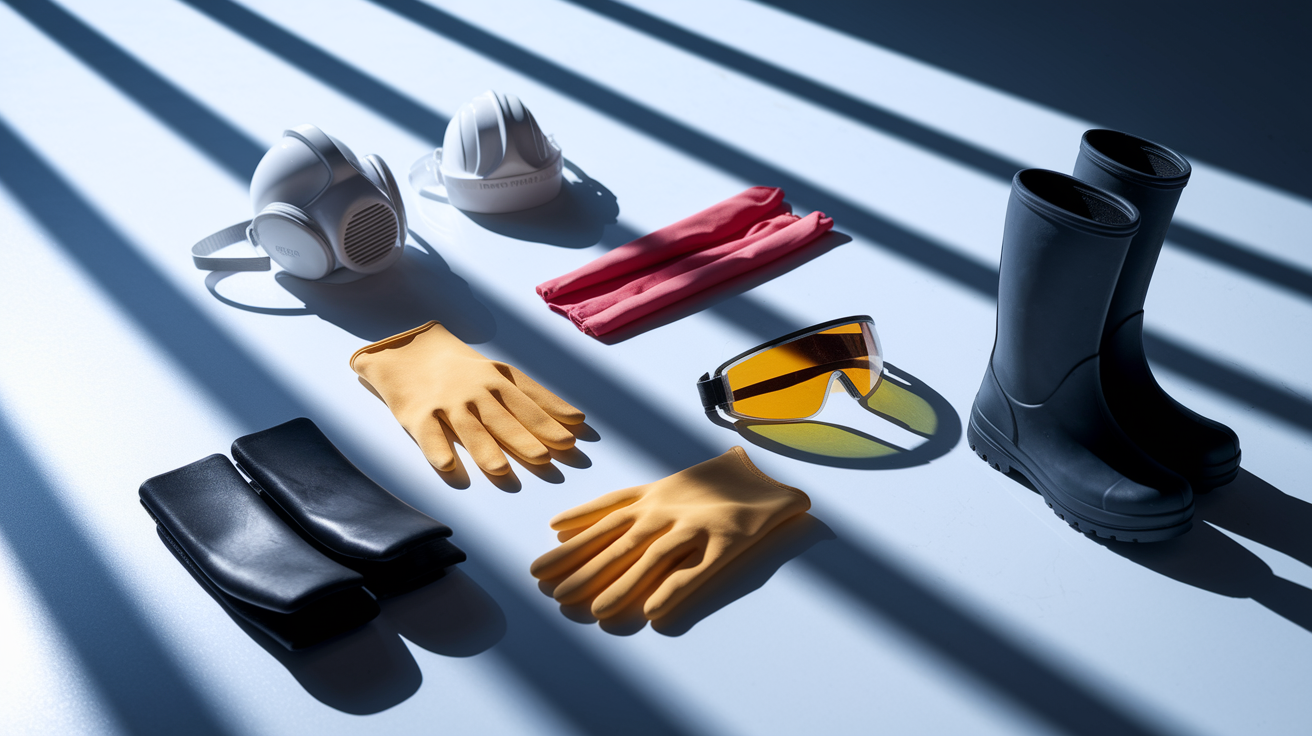
Essential Safety Equipment and Tools for Wet Padding Removal
Power off the electrical circuit to the affected room before you touch anything. If there’s standing water and your electrical panel is in that same room, stop. Call a licensed electrician to handle the shutoff safely.
The protective gear you need depends on what caused the flooding. Clean water from a broken supply line? Basic PPE works fine. Gray water from a washing machine drain or dishwasher backup? You’ll need more protection. Black water from sewage? That requires full contamination gear and honestly, at that point you should stop and hire professionals.
Personal Protective Equipment:
- N95 respirator mask or half face respirator (required if there’s any mold or contaminated water)
- Waterproof work gloves (nitrile or rubber, skip the fabric ones)
- Knee pads (you’re going to be kneeling constantly during removal)
- Rubber boots or waterproof shoe covers
- Safety glasses or goggles (keeps splashing and debris out of your eyes)
- Disposable coveralls (required for gray or black water situations)
Tools and Materials:
- Utility knife with retractable blade and one full pack of replacement blades
- Floor scraper with 4 to 6 inch blade (for glued padding and staple removal)
- Pry bar (12 to 18 inch flat bar handles most padding removal jobs)
- Heavy duty contractor trash bags (3 mil thickness minimum, rated for construction debris)
- Spray bottle filled with cleaning solution
- Shop vacuum (for debris, not bulk water extraction)
- Tape measure and marker
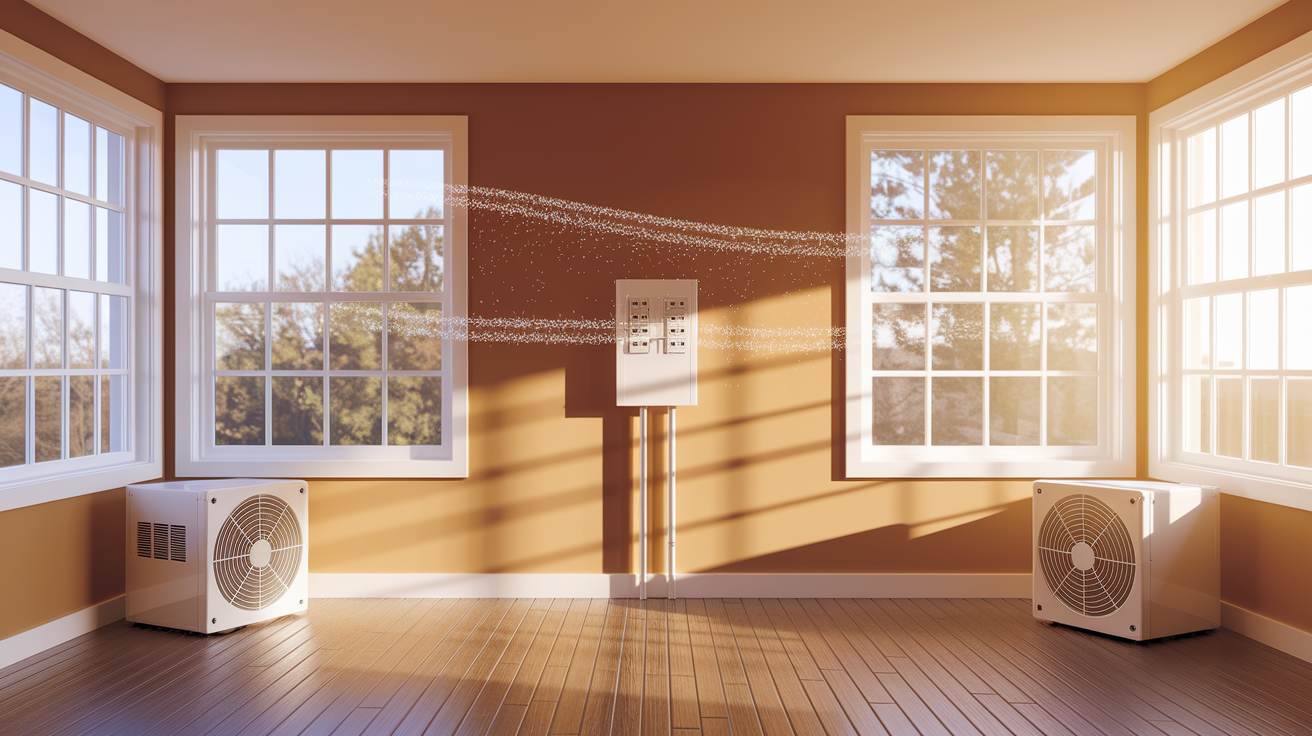
Set up cross ventilation before you start removing anything. Open windows on opposite sides of the room if the outdoor air is dry and warmer than 60 degrees. If it’s raining, humid, or cooler outside, keep windows closed and run your HVAC system or portable fans to move air around. Position at least one box fan or air mover to blow across the floor surface. Make sure all electrical equipment plugs into GFCI protected outlets and cords never touch wet surfaces.
Understanding Water Damage Types and Health Risks Before Cutting Padding

Water damage falls into three categories. The category determines whether you can safely handle removal yourself or need to call professionals right now.
Clean water (Category 1) comes from supply line breaks, burst refrigerator lines, or rainwater that hasn’t contacted contaminated surfaces. Gray water (Category 2) comes from washing machine discharge, dishwasher overflow, or toilet overflow without feces. Black water (Category 3) comes from sewage backups, toilet overflow with feces, or any water that’s sat stagnant for more than 48 hours.
| Water Type | Source Examples | DIY Safe? | PPE Required |
|---|---|---|---|
| Clean (Category 1) | Broken supply pipe, burst washing machine hose, foundation leak from clean rainwater | Yes, if addressed within 48 hours | Gloves, N95 mask, knee pads, boots |
| Gray (Category 2) | Washing machine drain water, dishwasher discharge, toilet overflow (no feces) | Maybe, with full PPE and immediate action | Respirator, waterproof gloves, coveralls, boots, goggles |
| Black (Category 3) | Sewage backup, toilet overflow with feces, drain water, standing water over 48 hours | No, requires professional remediation | Full hazmat PPE (professional use only) |
Mold starts growing in wet padding within 24 to 48 hours after water exposure. Once mold takes hold, it releases spores that cause respiratory problems, trigger asthma attacks, and create allergic reactions. Bacteria from contaminated water multiply rapidly in moist padding materials. Those bacteria produce toxins that become airborne as the material starts drying.
If you smell strong mildew when you walk into the room, mold’s already growing. If the water came from a drain, toilet, or sewer line, bacteria is present regardless of smell. For sewage backups or any situation where water’s been sitting more than 48 hours, the health risk is too high for DIY removal. You need professional restoration. Look for companies with IICRC certification when you start making calls, and be ready to discuss the water source and timeline in detail. For more guidance on recognizing when professional help is necessary, see When to Call Water Damage Restoration Professionals.
Preparing the Workspace and Stopping the Water Source
Find and fix the leak before you remove anything. A broken supply line needs shutoff at the fixture valve or main water shutoff. A foundation leak requires exterior drainage work or crack sealing. A washing machine hose failure means replacing the burst hose and checking the connection points. If water’s still entering the space while you’re working, you’re just creating more work for yourself.
Turn off power to the room at the circuit breaker panel. Flip the breaker to the off position for every circuit serving the affected area. If the panel is located in the wet space, don’t touch it. Standing water near an electrical panel creates electrocution risk. Hire a licensed electrician to handle the shutoff, then wait for their all clear before entering the room. Test outlets with a voltage tester after power is off to confirm circuits are dead.
Remove all furniture, boxes, and movable items from the room. Lift furniture onto blocks or move it to a dry space. Wet padding can transfer moisture and odor to furniture legs within hours. For built in cabinets or heavy appliances you can’t move, pull the carpet and padding away from those areas and work around them. Stack removed items in a dry location where air can circulate around them. Cardboard boxes that got wet need to be emptied and thrown out, as cardboard wicks water and grows mold quickly.
Open windows only if outside conditions help with drying. Check the weather. If it’s sunny, low humidity, and warmer than 60 degrees outside, open windows on opposite walls to create cross flow ventilation. If it’s raining, above 70% humidity, or nighttime, keep windows closed and run your central HVAC fan setting continuously. The goal is moving air across wet surfaces, not introducing more moisture from outdoors.
Before cutting any padding, extract as much standing water as possible:
- Rent a carpet extractor or commercial grade carpet cleaner, not a basic wet/dry shop vac
- Move the extractor slowly across the entire wet area in one direction, overlapping each pass slightly
- Extraction removes 1,200 times more water than dehumidification alone, so don’t skip this step
- Rent a large commercial dehumidifier rated to remove at least 25 to 30 gallons per day (home units only remove about 4 gallons and won’t keep up)
- Position air mover fans to blow across the surface and under the edges where you’ll be lifting carpet
- Run extraction passes until you’re pulling up almost no water with each pass
Even with thorough extraction, wet padding won’t dry before mold starts growing. The padding’s job is absorbing impact, which means it’s designed to trap and hold material. Water counts. Once padding is saturated, it must be removed and thrown away, not dried and reused.
Complete Step by Step Wet Carpet Padding Removal Process

Wet carpet padding can’t be saved. Foam, rubber, rebond, and fiber padding all absorb water like a sponge and create the perfect environment for mold growth. The material won’t dry out completely before mold spores colonize it, typically within 24 to 48 hours. Padding is inexpensive compared to the health risks and odor problems caused by trying to salvage it.
The entire removal process typically takes 2 to 4 hours for an average sized bedroom or living room. Larger spaces or padding stuck down with glue will take longer. Work during daylight hours when you can see clearly, and plan to finish the job in one session.
- Pull the carpet away from the tack strips along one wall while wearing protective gloves (tack strips have sharp pins pointing upward that will puncture skin)
- Fold the carpet back toward the center of the room to expose the padding underneath
- Identify the padding type by looking at the exposed surface: foam (solid colored, uniform texture), rebond (multicolored bits pressed together), rubber (waffle pattern on bottom), or fiber (looks like dense felt)
- Start cutting foam or rebond padding into 3 foot wide strips using a sharp utility knife, making straight cuts parallel to the longest wall
- Cut through the padding using firm downward pressure, keeping the blade perpendicular to the surface and making one clean pass rather than sawing back and forth
- For glued padding, score the top surface in a grid pattern before cutting, then use the floor scraper to separate the backing from the subfloor as you cut
- Replace utility knife blades every 15 to 20 feet of cutting when working with rubber backed padding, as the rubber dulls blades faster than other materials
- Roll each 3 foot section toward you as you cut it free, creating a tight cylinder that’s easier to carry and prevents dripping along the path to disposal
- Use the pry bar to lift padding edges that are caught on tack strip pins, working the bar underneath without gouging the subfloor
- Scrape away padding remnants or adhesive residue with the floor scraper, holding the blade at a low angle (about 15 degrees) to avoid digging into wood subfloors
- If adhesive won’t release, spray a small section with hot water from the spray bottle, wait 60 seconds, then scrape (for water based adhesive) or use an adhesive remover product (for solvent based adhesive)
- Carry rolled sections immediately to your disposal staging area (garage or driveway) and return for the next section
Wet padding weighs 3 to 5 times more than dry padding, meaning a small bedroom’s worth of saturated padding can weigh 60 to 100 pounds total. A 3 foot rolled section typically weighs 15 to 25 pounds depending on thickness and saturation level. Bend at your knees, not your waist, when lifting each roll. Get help for larger rooms rather than straining your back by working alone.
Different padding materials cut differently. Rebond and foam cut cleanly with a fresh blade. Rubber backed padding requires more frequent blade changes and tends to grab the knife. Fiber padding can fray at edges but cuts easily. If you hit a seam where two padding pieces meet, cut along the seam line rather than through both layers at once.
Removing Tack Strips and Handling Carpet Padding Seams
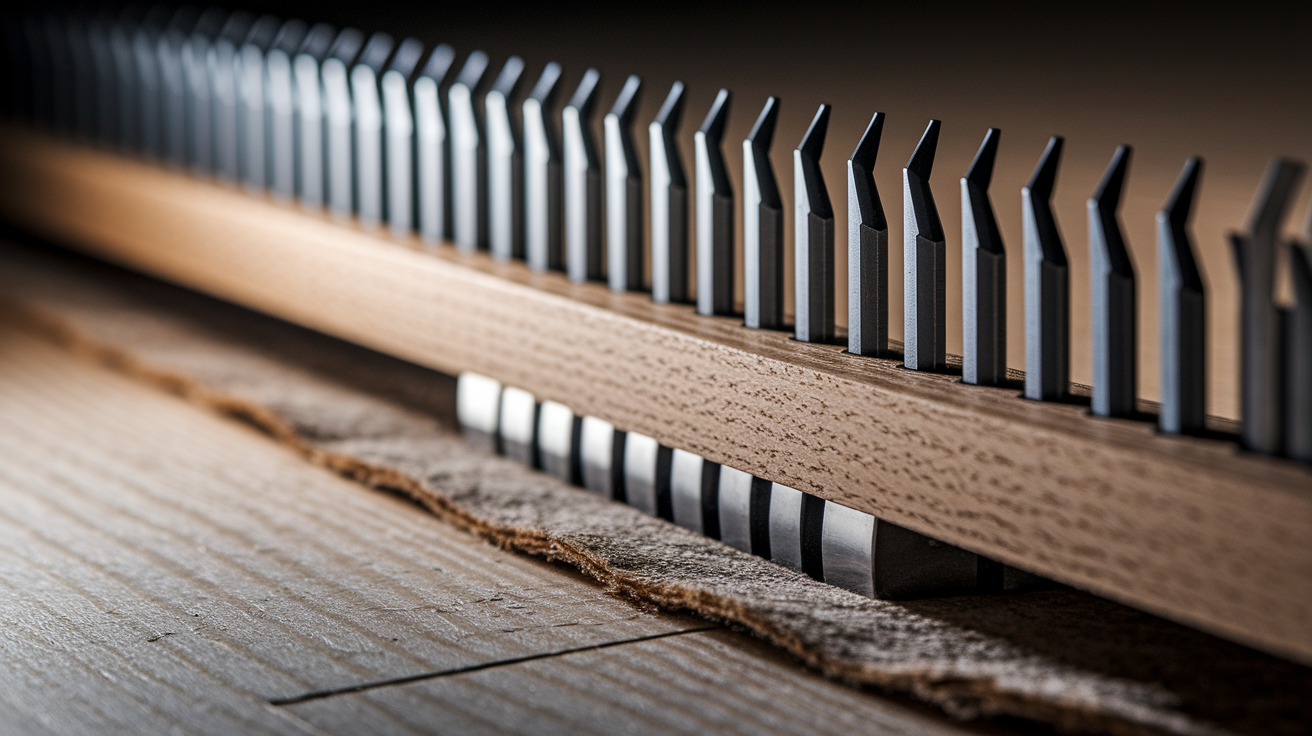
Tack strips are the thin wood strips nailed to the subfloor around the room perimeter, with angled pins that grip the carpet backing. Padding typically isn’t attached to tack strips directly but is stapled to the subfloor in a line about half an inch inside the tack strip location.
Slide the flat end of your pry bar under the padding edge near a corner while wearing protective gloves. Lift gently to see if staples are holding the padding down. You’ll feel resistance if staples are present or easy lifting if the padding was just laid in place. Work along the perimeter, lifting and pulling the padding away from staples rather than trying to pull staples out first. The padding will tear away from most staples, leaving them behind in the subfloor.
After removing the padding, go back and pull any remaining staples using the pry bar or needle nose pliers. Position the pry bar directly over each staple, wedge the flat end under the staple crown, and lever upward slowly. Jerking the bar sideways will bend staples instead of removing them. Pull staples from wood subfloors to prevent rust stains and to create a smooth surface for new padding installation. Staples in concrete are rare but may be present if someone used a pneumatic stapler with concrete fasteners. Those require a cold chisel and hammer to remove.
Padding seams occur where two sections of padding meet, typically running parallel to walls in larger rooms. At seams, padding sections often overlap by 1 to 2 inches rather than butting together precisely. Cut through both layers at the same time if they’re wet and stuck together, or separate the layers and cut each individually if you can pull them apart. Seam tape (fabric tape with adhesive on both sides) may be holding the seam together on the underside. That tape has no salvage value and will come up with the padding.
Check the perimeter one final time for any padding scraps stuck to tack strips or caught under the strips themselves. Small pieces trapped under tack strips will create odor problems if left behind, so remove them even if it means temporarily pulling a section of tack strip.
Inspecting and Preparing the Subfloor After Wet Padding Removal

Once padding is removed, examine the entire subfloor surface carefully before moving forward with drying or reinstallation. You’re looking for structural damage, moisture penetration, and contamination that may have reached the subfloor itself.
Wood subfloors and concrete slabs require different inspection approaches. Plywood and OSB subfloors can absorb water, swell, delaminate, or develop soft spots. Concrete can absorb water but won’t warp or lose structural integrity from moisture alone.
Walk the entire floor area and check for these problems:
- Soft spots where plywood gives slightly underfoot (indicates delamination or rot starting)
- Warped or cupped boards where edges are higher than centers
- Dark staining or discoloration that wasn’t there before the water event
- Moisture meter readings above 12 to 14% in wood (insert meter pins into the wood surface in multiple spots)
- Concrete surface that feels cool and damp to touch several hours after padding removal
- Musty or sour odor rising from the subfloor itself, not just lingering from the removed padding
- Visible mold growth in seams, edges, or nail holes
Press firmly on any suspicious areas with your foot. A solid subfloor shouldn’t flex beyond a slight give. If you feel noticeable movement or hear cracking sounds, that section has structural damage and needs repair or replacement before you install new padding. Take photos of damaged areas before you move anything, especially if you’re filing an insurance claim.
Moisture meters cost $30 to $100 and they’re worth buying if you’re dealing with water damage yourself. Push the pins into the wood in at least six spots across the room. Wood moisture content should read below 12 to 14% before you install new padding. Concrete doesn’t work with pin meters but you can tape a 2 foot square of plastic sheeting to the concrete surface and check under it after 24 hours. If condensation or darkening appears under the plastic, moisture is still present.
Subfloor replacement becomes necessary when plywood or OSB has swollen more than 1/8 inch at seams, shows extensive dark staining across multiple boards, feels spongy when walked on, or has moisture readings that won’t drop below 16% after several days of drying. Minor edge swelling under 1/8 inch can often be sanded down once dry. If damage is confined to a small area (less than 4 square feet), you can cut out and replace that section. Widespread damage means pulling and replacing entire sheets, which is a bigger project. Structural concerns like floor joists showing rot or sagging require a contractor evaluation immediately. For detailed assessment guidance and repair approaches for wood subfloors specifically, see Understanding Wood Subfloor Water Damage and Repair.
Sanitizing, Drying, and Environmental Controls for Exposed Subfloors
Even when water comes from a clean source like a broken supply line, bacteria will grow once moisture and organic material (dust, skin cells, pet dander) are present together. Sanitizing the subfloor kills bacteria and mold spores before they establish colonies.
The Environmental Protection Agency requires that all surfaces exposed to water damage must be completely dry within 48 hours of the initial water event. That 48 hour window starts from when the flooding happened, not from when you start working. If you’re already 24 hours in, you have 24 hours left to get everything dried to safe levels.
- Sweep and vacuum the entire subfloor surface to remove dirt, padding fragments, and debris
- Mix a sanitizing solution of 1 cup household bleach per 1 gallon of water in a bucket for clean water incidents (for gray or black water, use a commercial disinfectant rated for sewage contamination instead)
- Mop or spray the solution across the entire subfloor surface using a mop or pump sprayer
- Let the solution sit for 10 minutes of contact time (don’t rinse immediately)
- Wipe or mop up excess liquid with old towels or a mop
- Allow the floor to air dry completely with fans running before proceeding
| Subfloor Type | Minimum Drying Time | Target Moisture Level | Verification Method |
|---|---|---|---|
| Concrete | 3 to 5 days with ventilation | Dry to touch, no dark areas | Plastic sheet test (no condensation after 24 hours) |
| Wood/Plywood | 2 to 4 days with active drying | 12 to 14% moisture content or lower | Moisture meter with pins inserted into wood |
Apply an antimicrobial spray after sanitizing and initial drying to prevent mold from establishing. Products containing quaternary ammonium compounds work for most clean water situations. Spray lightly across the entire floor, covering seams and edges where water accumulated. Let the spray dry naturally without wiping.
For situations involving contaminated water sources like washing machine drain water or sewage backups, use commercial disinfectants like Sporicidin instead of bleach. Sporicidin specifically kills pathogens from sewage and gray water contamination. Follow label instructions for dilution and contact time. These products require longer contact times (often 20 minutes) but provide better kill rates for dangerous bacteria.
If you notice a strong mildew smell even after cleaning and sanitizing, moisture is still trapped somewhere or mold has already colonized material you can’t see. Check inside walls behind baseboards, in floor seams, and under any remaining materials. Persistent odor means hidden contamination that won’t resolve without finding and removing the source.
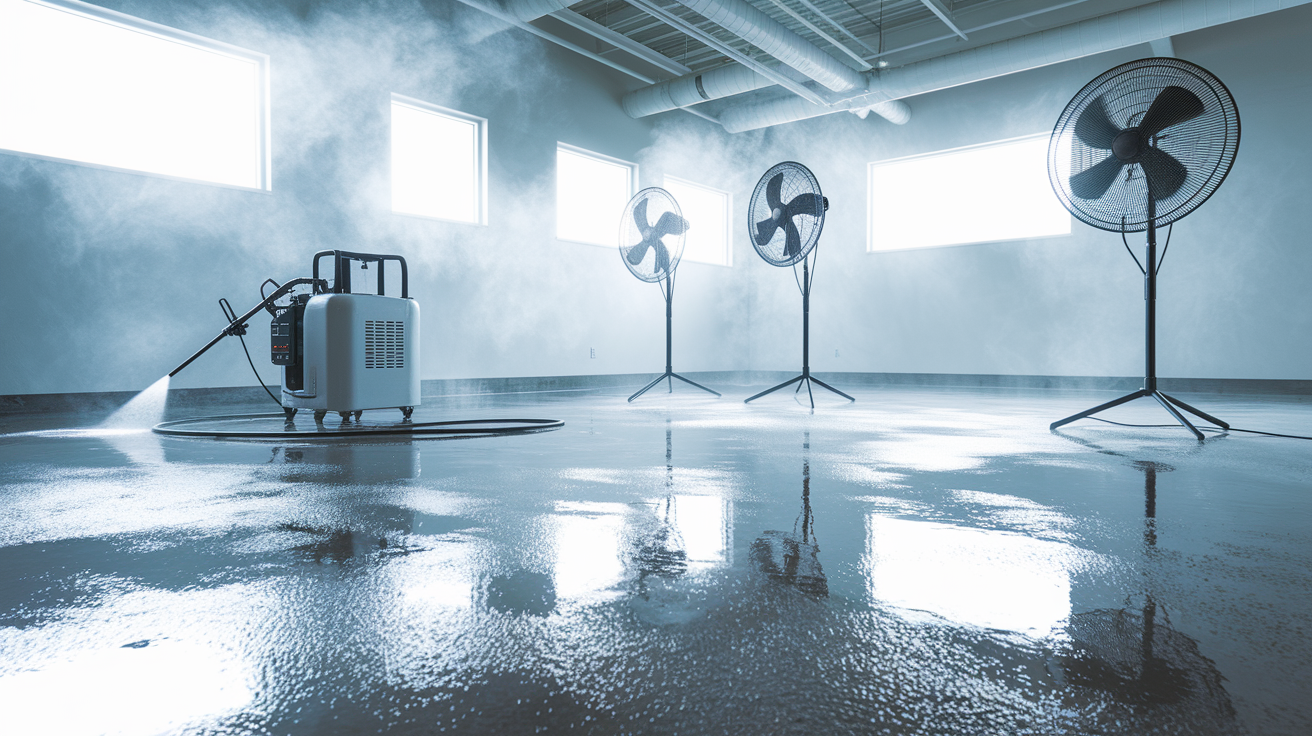
Position fans to blow across the floor surface, not down at it. Put box fans or air movers in doorways to push air through the room. Set up at least one commercial dehumidifier in the space and empty it twice daily. Home dehumidifiers rated at 30 to 50 pints per day will remove about 4 gallons of moisture daily. Commercial units rated at 100+ pints will pull 25 to 30 gallons per day, which is what you need for proper drying.
Close windows if outside humidity is above 60% or if it’s raining. Opening windows during humid weather just brings more moisture into the space. Monitor weather conditions and only ventilate with outside air during dry, sunny periods. Keep windows closed at night even during summer, as overnight humidity rises and slows drying.
Maintain room temperature at or below 75 degrees during the drying period. Warmer temperatures speed drying but also accelerate bacterial growth. The balance point is 72 to 75 degrees, where drying happens efficiently without creating health risks. Use your air conditioning or open windows strategically to control temperature.
Check moisture levels daily using your moisture meter or the plastic sheet test. Don’t rush to reinstall padding before the subfloor is fully dry. Installing new materials over damp subfloor traps moisture and guarantees mold growth.
Safe Disposal Methods for Wet Carpet Padding
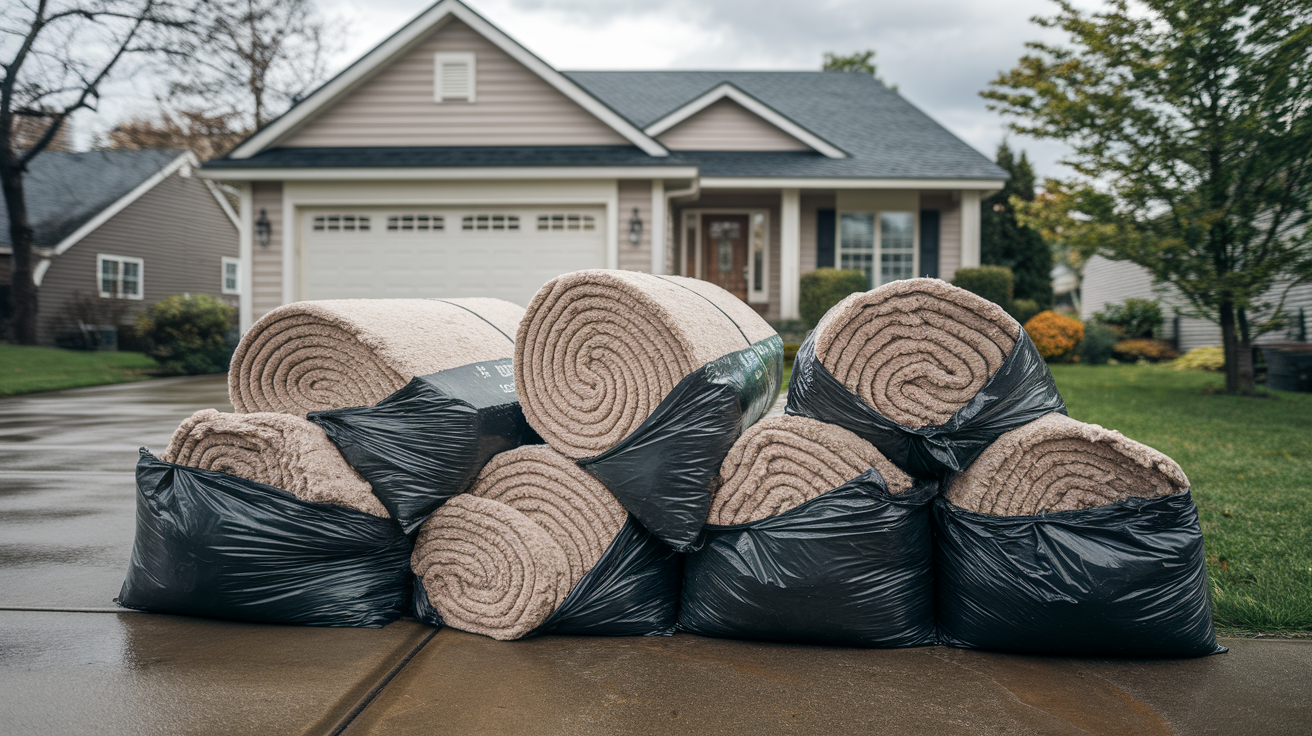
Wet padding weighs 3 to 5 times more than the same padding when dry. A standard 8 pound pad square foot becomes 25 to 40 pounds per square foot when saturated. That means a 10×12 room’s padding goes from 96 pounds dry to 300 to 400 pounds wet. Plan your disposal method around that weight reality.
Roll each 3 foot section tightly as you cut it free, then carry it immediately to your staging area. Rolling compresses the material, squeezes out some excess water, and reduces the volume by about half compared to wadded up padding. A tight 3 foot roll is manageable for most adults to carry. A loose, unrolled section of the same size is awkward, drips constantly, and weighs more because water hasn’t been squeezed out.
Use heavy duty contractor trash bags rated at 3 mil thickness or higher. Standard kitchen garbage bags will tear immediately under the weight and sharp edges of wet padding. Contractor bags cost $15 to $25 for a box of 20 at hardware stores. Slide each rolled section into a bag, fold the open end over twice, and tape it shut with duct tape. Double bagging is worth doing for contaminated padding or for bags you’ll be storing overnight before disposal.
Contact your local waste management department before you haul anything to the curb. Many municipalities classify water damaged carpet and padding as construction debris, not household trash. Some will pick it up on regular trash day if you call ahead and pay a bulk item fee ($25 to $50 typically). Others require you to rent a dumpster or haul it to a construction and demolition debris facility yourself. A few areas have special restrictions on mold contaminated materials and require notification before disposal.
For padding contaminated with sewage or gray water, disposal rules are stricter. Most jurisdictions require sealed bags clearly marked as contaminated. Some areas prohibit homeowner disposal entirely and require professional waste removal. Call your local health department if you’re unsure. Getting this wrong can result in fines and having your contaminated bags rejected at disposal facilities, forcing you to bring them back home.
DIY vs. Professional Restoration: Cost Analysis and Decision Criteria

Whether you remove padding yourself or hire professionals depends on the size of the damaged area, the type of water contamination, and your physical capability to do the work safely.
Professional water restoration services average $2,500 for basement cleanup in a typical 800 to 1,000 square foot space. That includes water extraction, padding removal, disposal, subfloor sanitizing, drying equipment rental, and moisture monitoring. Costs increase if structural damage repair is needed or if drying takes longer than expected.
| Cost Factor | DIY Approach | Professional Service |
|---|---|---|
| Equipment Rental | $150 to $200 for 3 days (extractor, dehumidifier, fans) | Included in service fee |
| Padding Replacement | $80 to $150 for average room | $100 to $200 including installation |
| Labor Time | 6 to 10 hours over 3 to 4 days | Done in 1 to 2 days, no homeowner time required |
| Disposal Fees | $25 to $75 depending on method | Included in service fee |
| Total Average (Small Room) | $300 to $500 plus labor | $800 to $1,200 |
You should call professionals immediately and not attempt DIY removal in these situations:
- Sewage backup or any Category 3 (black water) contamination
- Visible mold growth covering more than 10 square feet of surface area
- Sagging ceilings, buckling walls, or other signs of structural damage
- Water damage affecting multiple rooms or multiple floors of your home
- Strong mildew smell that developed rapidly (within 24 hours of the water event)
- Standing water near the electrical panel, and you can’t safely shut power off
- More than 72 hours have passed since the initial flooding and materials are still wet
- Physical limitations that prevent you from kneeling, lifting 20 to 30 pounds repeatedly, or working in confined spaces
If you’re filing an insurance claim, document everything before you remove materials. Take photos of the water source, wet padding, subfloor condition, and any damaged walls or belongings. Most insurance policies require immediate mitigation to prevent additional damage, but you need photos first. Some policies cover professional restoration costs but not DIY expenses, so read your policy or call your agent before you rent equipment.
Look for IICRC certification when hiring restoration companies. IICRC (Institute of Inspection, Cleaning and Restoration Certification) is the industry standard for water damage restoration training. Certified companies follow EPA and industry protocols for drying, sanitizing, and mold prevention. Verify certification by asking for the technician’s certification card or checking the company’s credentials on the IICRC website.
Ask restoration companies these questions before hiring: How many years have you been in business? Do you carry liability insurance and workers compensation? Will you document moisture levels before, during, and after drying? What equipment will you use? How long do you estimate the drying process will take? What’s your policy if mold develops after your work is complete?
Professional restoration is worth the cost when water damage exceeds what you can manage safely in the available time window, when contamination risk is high, or when your insurance covers most of the expense. DIY makes sense for clean water damage in small to medium areas when you have time, capability, and proper equipment.
Selecting and Installing Replacement Carpet Padding
Replacing water damaged padding gives you the opportunity to upgrade quality or add moisture resistance if your location is prone to repeated water issues.
Carpet becomes stiff and difficult to work with after getting wet and drying. The backing material contracts, edges curl, and the carpet no longer stretches easily over tack strips. Professional carpet installers have power stretchers and knee kickers designed to re-stretch dried carpet, plus the experience to avoid tearing or damaging the backing. Most homeowners don’t own these tools and will struggle with DIY carpet reinstallation even if padding replacement itself went smoothly.
Common padding options available at flooring stores include:
- Standard rebond padding (economical, made from recycled foam scraps, typically $0.35 to $0.50 per square foot, works well for normal conditions)
- Memory foam padding (premium comfort, $0.80 to $1.20 per square foot, good sound absorption and cushioning)
- Moisture resistant or waterproof padding (rubberized coating, $0.65 to $1.00 per square foot, recommended for basements or areas with previous flooding)
- Rubber padding (dense and firm, $0.55 to $0.80 per square foot, naturally moisture resistant and long lasting)
- Fiber padding (made from synthetic or natural fibers, $0.40 to $0.70 per square foot, moderate moisture resistance)
Padding thickness typically ranges from 7/16 inch to 1/2 inch for residential applications. Thicker isn’t always better. Padding over 1/2 inch can cause carpet to feel unstable underfoot and makes vacuuming harder. Most carpet warranties specify maximum padding thickness, often 7/16 inch for Berber styles and 1/2 inch for other styles. Check your carpet warranty before buying replacement padding.
Density ratings matter more than thickness for padding performance and durability. Look for padding rated at 6 pounds per cubic foot or higher. Higher density means better support, longer life, and better resistance to compression. The label will show density as “6 lb.” or “8 lb.” Higher ratings cost more but prevent the padding from breaking down quickly under furniture and traffic.
If your home has experienced flooding before or if you’re working in a basement, upgrade to moisture resistant padding with a waterproof barrier on one side. These products cost 30 to 50% more than standard padding but provide crucial protection against minor water incidents and moisture migration from concrete slabs. The waterproof side faces down toward the subfloor.
Basic padding installation involves rolling the padding out across the dried subfloor, cutting sections to fit the room using a utility knife, and stapling edges to the subfloor about 1/2 inch inside the tack strip line. Seams should butt together without gaps or overlaps. Padding wraps should face up (text and labels visible when looking down). The process is straightforward if you’re working with a simple rectangular room.
Professional installers complete padding and carpet reinstallation in 2 to 3 hours for an average room, using power stretchers to pull carpet tight and properly hook it to tack strips. They also trim carpet precisely at doorways and transitions. Plan to hire a professional for the carpet reinstallation phase even if you handled the padding removal yourself. Expect to pay $100 to $200 for labor on a typical bedroom sized room.
For areas with recurring water problems, consider installing a vapor barrier between the subfloor and padding before laying new padding. Vapor barriers are 6 mil plastic sheeting that prevents moisture from migrating up from concrete or soil. This is particularly important for basement installations. Tape seams with contractor tape and run the barrier 2 to 3 inches up the wall before reinstalling baseboards.
Prevention Strategies to Avoid Future Wet Carpet Padding Issues
Preventing water damage costs less than cleaning up after it happens. Most carpet flooding comes from predictable sources that can be addressed before they fail.
- Schedule a plumbing inspection every 2 to 3 years to identify supply line corrosion, fixture leaks, and connection problems before they burst
- Replace washing machine supply hoses every 5 years regardless of visible condition (rubber hoses degrade internally and braided stainless hoses can fail at crimped ends)
- Install a sump pump in basement floor drains if you’re in a flood prone area, and add a battery backup system so the pump works during power outages
- Grade soil away from your foundation at a slope of 6 inches per 10 feet to direct rainwater away from the house
- Clean gutters twice yearly and extend downspouts at least 6 feet from the foundation to prevent water pooling near basement walls
- Place a drain pan under your water heater and run the drain line to a floor drain or sump, so leaks don’t spread across the floor
- Install water leak detection devices near washing machines, water heaters, and under sinks (battery powered alarms cost $15 to $30 and alert you immediately when water touches the sensor)
- Avoid installing carpet in basement rooms that have flooded before, or upgrade to water resistant padding and plan for removal if water returns
- Seal foundation cracks and gaps around basement window wells promptly, before the next heavy rain tests them
- Maintain your HVAC system and replace drain pan overflow switches so condensate leaks trigger automatic shutoff instead of flooding the floor
Final Words
Wet carpet padding won’t dry out properly and needs to come out fast. Cut it into 3- to 4-foot sections, roll them up, and get them out of the house before mold gets a foothold.
The job takes a few hours, some basic tools, and honest attention to safety, especially around contaminated water or electrical hazards.
Once the subfloor is dry and sanitized, you’re ready for fresh padding and a clean start. And if you tackle the prevention steps now, you’re way less likely to do this again.
FAQ
Can wet carpet padding be saved?
Wet carpet padding cannot be saved and must be removed completely. Carpet padding acts like a sponge that absorbs large amounts of water and will not dry out properly, creating ideal conditions for mold growth within 24 to 48 hours even with extraction equipment.
What is the best thing to cut carpet padding with?
The best tool to cut carpet padding with is a sharp utility knife with extra replacement blades. Cut foam and rebond padding into 3 to 4 foot sections using straight angles, and replace blades frequently when cutting rubber-backed padding because it dulls blades faster.
How quickly can mold grow under wet carpet?
Mold can grow under wet carpet within 24 to 48 hours when the carpet and padding remain wet. The Environmental Protection Agency requires that carpet and padding be completely dry within 48 hours to prevent mold growth, which produces toxins causing respiratory problems and allergic reactions.
How do you cut out wet carpet?
To cut out wet carpet, pull the carpeting from the tack strips along the room edges while wearing protective gloves, then fold the carpet back to expose the padding underneath. Use a utility knife to cut the wet padding into 3 to 4 foot sections for easier handling and disposal.
Do I need different safety equipment for contaminated water versus clean water?
You need different safety equipment depending on water contamination type. Clean water from supply lines requires basic PPE including waterproof gloves and N95 mask, while gray or black water from sewage backups requires disposable coveralls, respirator mask, rubber boots, and eye protection for health safety.
Should I hire a professional for wet padding removal or do it myself?
You should hire a professional for wet padding removal if the water came from sewage backup, black water sources, or if mold growth is extensive. DIY removal is safe for clean water damage from broken pipes or supply line leaks when addressed within 72 hours and proper safety precautions are followed.
How long does it take to remove wet carpet padding from a room?
Removing wet carpet padding from an average room typically takes 2 to 4 hours depending on padding type and whether adhesive was used. Wet padding weighs 3 to 5 times more than dry padding, so working in manageable sections prevents physical strain and speeds up the removal process.
What moisture level should my subfloor reach before installing new padding?
Your wood subfloor should reach moisture levels below 12 to 14 percent before installing new padding, verified using a moisture meter. Concrete subfloors must feel completely dry to the touch with no visible dampness, typically requiring 3 to 7 days with proper dehumidification and air circulation.
When should I stop DIY removal and call a professional restoration company?
You should stop DIY removal and call a professional restoration company if you encounter sewage contamination, extensive mold growth, structural damage concerns, strong persistent mildew odors, or water affecting multiple rooms. Look for IICRC certification when hiring professionals to ensure proper training and restoration standards.
What type of replacement padding should I choose for flood-prone areas?
For flood-prone areas, choose moisture-resistant or waterproof padding options instead of standard rebond padding. Recurring flooding situations warrant upgrading to water-resistant padding as a practical long-term solution, though avoiding carpet installation in flood-prone basements remains the most effective prevention strategy.
