

You can’t just wipe down a flooded house and call it clean. Floodwater carries sewage, bacteria, viruses, chemicals, and pathogens that stay on every surface the water touched, even after things dry out. Standard household cleaners won’t kill those contaminants. You need the right disinfectants, the right protective equipment, and a methodical approach that tackles hard surfaces, removes ruined materials, and protects you from infection while you work. This guide walks you through the disinfection process step by step, from safety gear to EPA-approved solutions to the contact times that actually kill pathogens.
Safety First: Pre-Entry Assessment and Required Protective Equipment
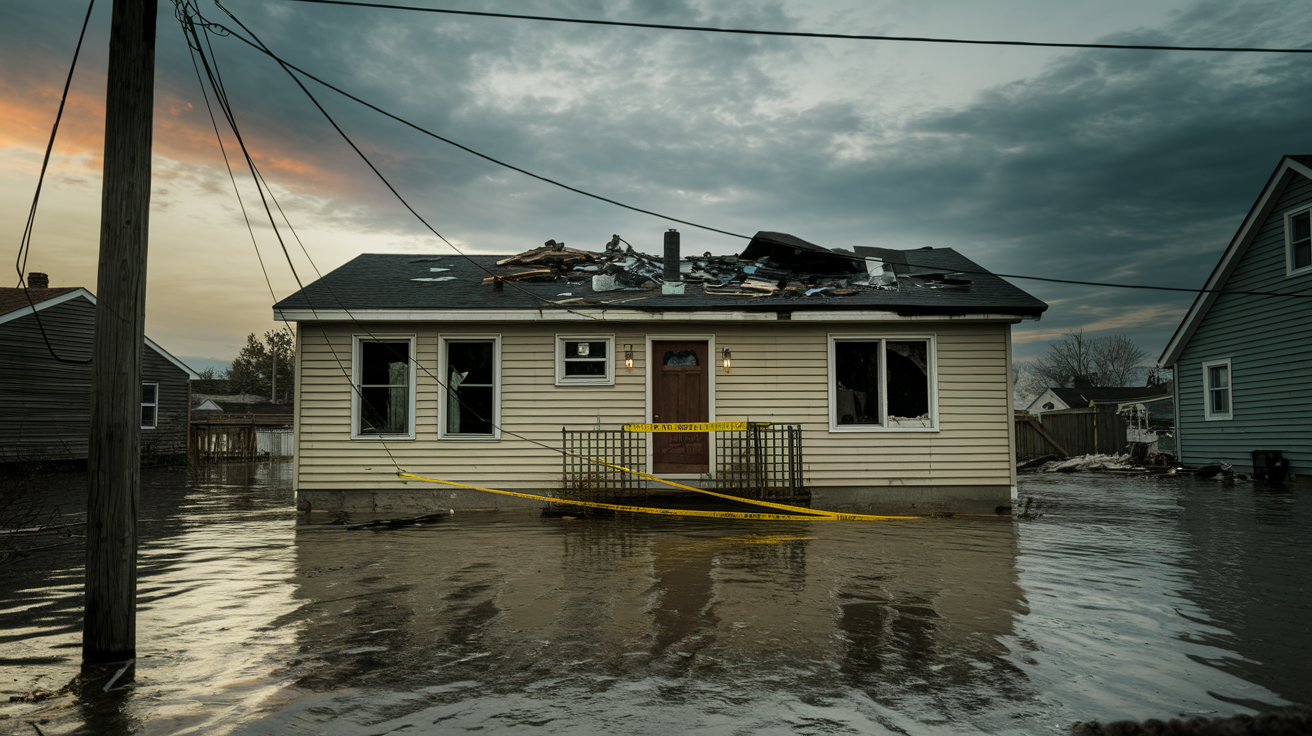
Before you walk into a flood-damaged house, stop at the property line and look things over from the outside. Check roofs and trees for debris that might fall. Scan the building for walls that look bent, door or window frames sitting crooked, visible foundation cracks, a sagging roofline, anything suggesting the structure shifted. If you see damage like that or think the foundation moved, don’t go in. Call a structural engineer first. Make sure the main electrical panel got shut off by the utility company or a licensed electrician. Treat every downed power line like it’s live, even if it looks dead. If you see wires touching the house or lying in standing water, back off and call the utility.
Once you’ve confirmed it’s structurally safe to enter and all utilities are off, get your protective equipment together before you step inside:
- Heavy duty boots with high ankles, steel or composite toe protection, and puncture-resistant soles
- Work gloves that handle wet conditions and sharp debris
- Hard hat for falling debris and low overhead hazards
- Safety goggles that seal around your eyes. Regular glasses don’t protect you from splashes.
- N95 or N100 respirator masks rated for particulates and mold
- Work pants that cover your legs completely
- Long-sleeved shirts protecting your arms from contaminated surfaces
- Waterproof rubber boots if there’s still standing water
- Face shields for extra splash protection when you’re working with disinfectant
- Disposable Tyvek suits for sewage backup or black water contamination
- Knee pads if you’ll be working on floors for a while
- First aid kit at the work site with wound care supplies
Replace your respirator mask using the five Ds rule. Swap it when it gets Dirty with visible contamination, Damaged with tears or broken straps, Damp from your breath or moisture in the air, Deformed so it doesn’t seal properly against your face, or Difficult to breathe through because the filters are clogged. If you’re working in a sewage contaminated area, upgrade to an N100 mask or a full-face respirator with cartridge filters rated for organic vapors and particulates. Half-face respirators don’t protect your eyes from airborne pathogens.
Never walk into a flood-damaged structure without complete protective equipment. Floodwater carries sewage, chemicals, pesticides, animal waste, and industrial contaminants that cause infections through skin contact, breathing them in, or accidental ingestion. One small cut on unprotected skin exposed to contaminated water can lead to tetanus, cellulitis, or systemic bacterial infection.
Disinfectant Solutions: Formulations and Mixing Protocols

The EPA and CDC recommend specific antimicrobial formulations for post-flood disinfection based on surface type and contamination level. Always use EPA-registered disinfectants that list flood cleanup or antimicrobial efficacy on the product label.
| Disinfectant Type | Dilution Ratio | Contact Time | Surface Restrictions |
|---|---|---|---|
| General Surface Bleach Solution | ½ cup chlorine bleach per 1 gallon water | 5-10 minutes before rinsing | Not for HVAC systems, metals, fine woods, non-colorfast surfaces |
| Mold-Specific Bleach Solution | 2 cups chlorine bleach per 2 gallons water | 4 hours minimum, do not rinse | Non-porous surfaces only, requires N100 mask during application |
| Quaternary Ammonium Compounds | Follow manufacturer label instructions | 10 minutes typical | Safe for metals and some woods, verify compatibility first |
| Hydrogen Peroxide Solutions | 3% concentration ready-to-use or per label | 10-15 minutes | Safe for most surfaces, less corrosive than bleach |
| Commercial Antimicrobial Products | Per manufacturer directions, typically ready-to-use | Varies by product, follow label | Check label for surface compatibility and pathogen claims |
| Natural Alternatives (vinegar, tea tree oil) | Not recommended for flood disinfection | Insufficient for pathogen elimination | Inadequate antimicrobial efficacy for sewage and floodwater contamination |
Mix bleach solutions right before you use them in well-ventilated areas. Always add bleach to water, never pour water into concentrated bleach. The reverse order creates dangerous fumes and splashing. Use clean containers like dedicated plastic buckets or garden sprayers that have never held other chemicals. Wear gloves and eye protection while mixing. If you splash concentrated bleach on your skin, rinse immediately with lots of clean water for at least 15 minutes.
Don’t use chlorine bleach on HVAC system components, ductwork, or furnace surfaces. It corrodes metals and creates toxic fumes when it contacts certain materials. Skip bleach on fine hardwoods, antique furniture, metal door hinges, plumbing fixtures, aluminum siding, and any surface where you’re not sure about color-fastness. For these materials, use quaternary ammonium disinfectants or hydrogen peroxide formulations that give you antimicrobial action without corrosion.
Contact time isn’t negotiable. The disinfectant has to stay wet on the contaminated surface for the full specified period to kill pathogens. “Contact time” means the disinfectant stays visibly wet, not just damp. If it dries before the time runs out, bacteria and viruses survive. For general bleach solutions, that’s 5 to 10 minutes of wet surface contact before you rinse with clean water. For mold treatment, the stronger solution needs to soak the surface and stay wet for at least 4 hours. After proper contact time, rinse hard surfaces thoroughly with clean water to remove bleach residue that could cause irritation or damage over time.
Understanding Flood Contamination Categories and Material Assessment

Treat all standing floodwater as contaminated until proven otherwise. Even if the water looks clear, it’s traveled across soil, through sewage systems, over streets, and through building materials that harbor bacteria, viruses, chemicals, and biological waste.
| Water Type | Source | Contamination Level | Health Risks | Material Disposal Guidelines |
|---|---|---|---|---|
| Clean Water (Category 1) | Broken supply lines, rainwater infiltration, melted snow | Minimal initial contamination | Low risk if addressed within 24-48 hours, becomes Category 2 after that period | Most non-porous materials salvageable if dried quickly; porous items require assessment |
| Gray Water (Category 2) | Washing machine overflow, dishwasher leaks, toilet tank backflow (no feces) | Moderate bacterial contamination and chemical content | Causes illness if ingested, skin irritation from prolonged contact, respiratory issues from aerosols | Discard porous materials, disinfect and assess semi-porous items, clean and disinfect non-porous surfaces |
| Black Water (Category 3) | Sewage backup, toilet overflow with feces, river or stream flooding, standing water over 48 hours | Severe pathogen load including E. coli, hepatitis, parasites, fungi | Serious illness from any contact, wound infections, gastrointestinal disease, respiratory infections, tetanus risk | Discard all porous and semi-porous materials; disinfect non-porous items with extended contact time; consider professional decontamination |
| Mixed Floodwater (Unknown) | Natural flooding combining multiple water sources, compromised municipal systems | Unknown but assume Category 3 contamination | Treat as highest risk category until testing proves otherwise | Use Category 3 disposal guidelines; document contamination for insurance; test if occupant health conditions require clearance verification |
Material porosity determines whether disinfection can make an item safe again or whether disposal is the only option. Porous materials absorb contaminated water into their internal structure where disinfectants can’t penetrate. Even after the surface dries and looks clean, bacteria, mold spores, and pathogens stay embedded deep inside. Non-porous materials have sealed surfaces that contamination can’t penetrate, so thorough cleaning and disinfection can restore them to safe condition.
Discard These Porous Materials:
- Pressboard furniture and shelving
- Plywood that’s delaminated or shows swelling
- Particleboard cabinet boxes and countertops
- Wall-to-wall carpeting and padding
- Upholstered furniture including couches and cushions
Save and Disinfect These Non-Porous Materials:
- Solid wood furniture and cabinetry
- Stone countertops and surfaces
- Metal furniture frames and cabinets
- Hard plastic items and trim
- Solid wood window frames, door frames, and floor trimming
Floodwater carries risks beyond visible dirt. Waterborne diseases include leptospirosis from animal urine, giardia and cryptosporidium parasites, hepatitis A virus, E. coli bacteria causing severe gastrointestinal illness, and tetanus bacteria entering through cuts in contaminated environments. Anyone with open wounds, even small scratches, faces infection risk from contact with contaminated surfaces. Respiratory hazards develop when contaminated dust becomes airborne during demolition or when sewage aerosols spread through improper fan use. Sewage-contaminated floods exceed DIY safety limits. If you see or smell sewage, if water entered through backed-up drains, or if flooding mixed with sewer overflow in streets, call professional restoration services with biohazard training before you attempt cleanup yourself.
Water Extraction, Drying, and Moisture Control
Remove all standing water before you start removing debris or cleaning contaminated surfaces. Any water left standing keeps wicking upward into walls, migrates through subflooring, and creates new contaminated areas while you work. The first 24 to 48 hours after flooding ends is your critical window for preventing mold growth. Mold spores start germinating on damp surfaces within that timeframe.
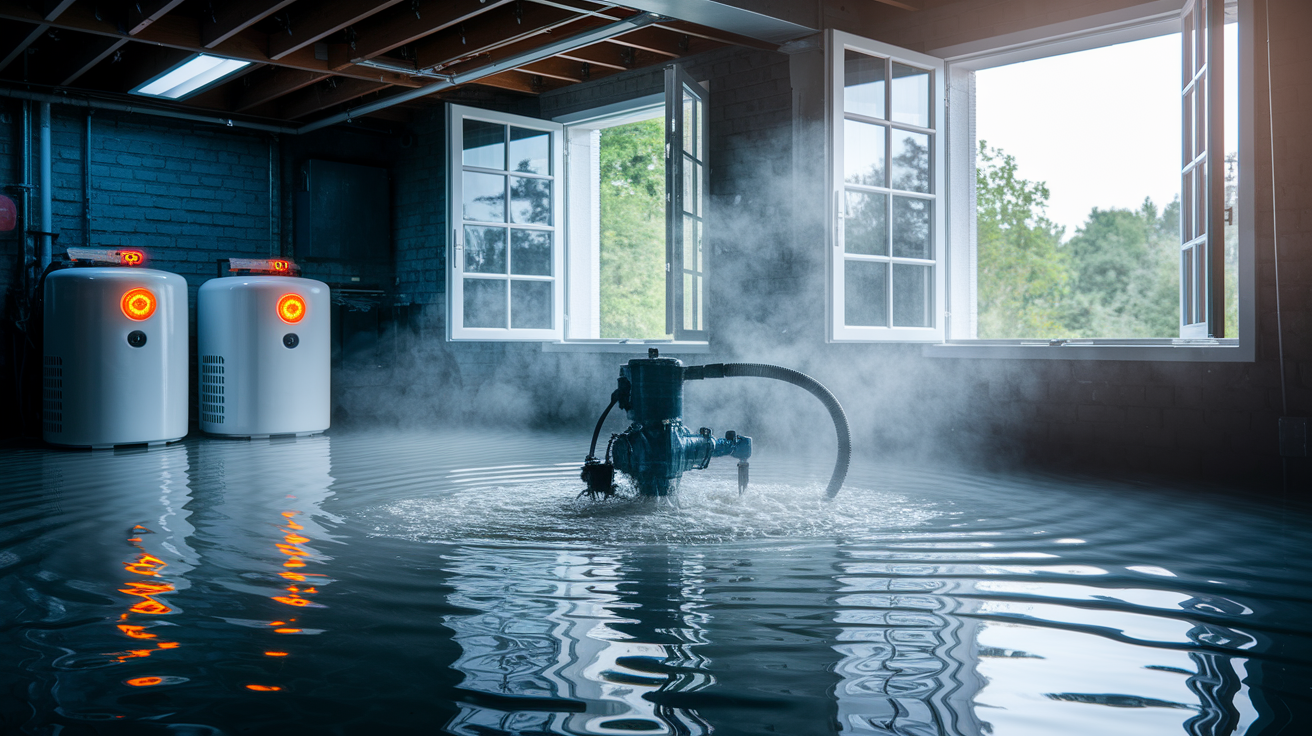
Use sump pumps for large water volumes in basements or ground-level rooms. If your existing sump pump failed during the flood, rent a submersible pump rated for the water depth and floor area. Pump water to the exterior away from the foundation. Discharging near the house sends it back through foundation cracks or saturates soil that keeps basement walls wet. For residual water after the sump pump drops levels below its intake depth, switch to a wet-dry vacuum. Go over floors multiple times, working the vacuum across the surface until no more water extracts. If flooding was severe with more than 6 inches of standing water, or if water remains after your pumping attempts, professional extraction equipment with truck-mounted pumps and high-volume capacity gets the job done faster and more completely than residential equipment. The sequence always runs: remove standing water first, then remove wet debris and unsalvageable materials, then begin cleaning and disinfection on dried surfaces.
Open all windows immediately upon safe entry to start ventilation. Create cross-ventilation by opening windows on opposite sides of the house so air flows through rather than just entering and exiting the same side. Remove screens if that increases airflow. Prop open interior doors to let air circulate into closets, bathrooms, and hallways. But this restriction isn’t optional. Don’t use fans if sewage contamination is present or suspected. Wastewater contains airborne pathogens including fecal bacteria, viruses, and parasites that fans propel through the entire work area, contaminating surfaces that weren’t originally affected. Similarly, never use fans in spaces with visible mold growth. Drying mold-contaminated surfaces with forced air spreads millions of spores throughout the house, colonizing areas far from the original growth and creating respiratory hazards in rooms you haven’t even entered yet. Ventilation from open windows and doors is fine. Powered air circulation isn’t until contamination gets addressed.
Place dehumidifiers in the center of rooms, away from walls, with adequate clearance around all sides for air intake and discharge. Match capacity to your space. A 50-pint-per-day unit handles about 1,500 square feet, a 70-pint unit covers up to 2,500 square feet, larger areas need multiple units. Set up continuous drainage by connecting the drain hose to a floor drain, sump pit, or running the hose to an exterior discharge point. Dehumidifiers with manual bucket collection require emptying every 8 to 12 hours, which interrupts drying overnight when you’re not monitoring. Expect to run dehumidifiers continuously for 3 to 7 days for typical flooding, longer if saturation reached wall cavities or subflooring. Severe basement flooding with foundation wall saturation may need 7 to 14 days of dehumidification.
Verify drying before you close up any surfaces or begin reconstruction:
- Moisture meters pressed against walls should read below 16 percent
- Moisture meters on floors and subflooring should read below 12 percent
- Visual inspection should show no water stains, discoloration, or efflorescence (white mineral deposits)
- Touch test should find no dampness or cool spots indicating moisture presence
- Musty odors should be completely gone. Persistent smell means moisture remains.
- Relative humidity readings taken with a hygrometer should stabilize between 30 and 50 percent
- Subflooring checks under removed carpet or flooring should confirm dryness before reinstallation
Don’t seal wet surfaces behind new drywall, don’t install flooring over damp subflooring, and don’t close wall cavities until moisture readings confirm complete drying. Closing in moisture creates ideal conditions for hidden mold growth that spreads unseen until it damages structural elements and causes serious indoor air quality problems. Mold behind sealed walls is far more expensive to remediate than mold on open surfaces you can access and treat.
Debris Removal and Material Disposal Organization
Document damaged items before you remove anything. Take photos and video showing the extent of loss for insurance claims. Create a written inventory listing each item, its approximate age, original cost if you have receipts, and replacement value. Track all expenses related to cleanup including rental equipment, supplies, disposal fees, and professional services. These costs may be reimbursable depending on your insurance coverage and disaster assistance eligibility.
Remove unsalvageable materials systematically room by room rather than randomly pulling items throughout the house. Pull up wall-to-wall carpeting and padding first, rolling sections and carrying them directly outside. If carpet is heavily saturated, cut it into manageable sections with a utility knife so you can remove it without tearing or dragging contaminated water across floors you’re trying to clean. Upholstered furniture including couches, recliners, mattresses, and cushioned chairs has to go. The internal foam and fabric absorb contaminated water completely and can’t be disinfected. Pressboard furniture, particle board shelving, and laminate items that contacted floodwater lose structural integrity when saturated and support mold growth even after drying.
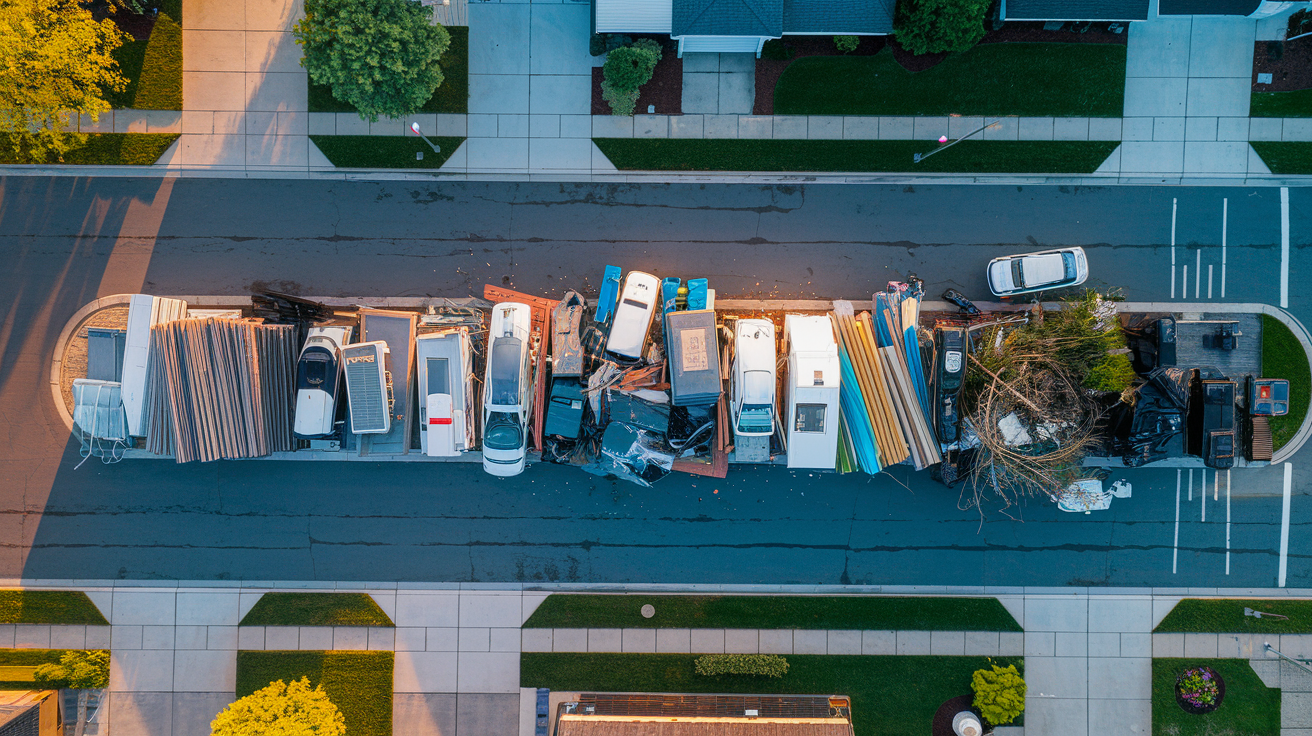
Organize debris at the curb using six separate categories for efficient municipal collection:
- Vegetation and yard debris including tree branches, leaves, shrubs, and organic material washed into the structure
- Household garbage and non-salvageable items including damaged furniture, carpets, curtains, bedding, clothing, and general contents
- Construction debris including drywall sections, removed insulation, damaged lumber, baseboards, and building materials
- Large appliances that contacted floodwater including washers, dryers, dishwashers, refrigerators, and water heaters
- Electronics and small appliances including computers, televisions, microwaves, and devices with internal components damaged by moisture
- Household hazardous materials including paint cans, solvents, pesticides, cleaning chemicals, batteries, and fluorescent bulbs requiring special disposal
Keep debris piles back from the street edge so vehicles can pass safely. Don’t block sidewalks where pedestrians need clear passage. Stay at least 5 feet away from mailboxes, electric meters, gas meters, water meters, fire hydrants, and storm drains. Covering storm drains blocks drainage during the next rain event and creates new flooding problems for you and neighbors.
Household hazardous waste requires separate handling. Don’t mix paint, solvents, pesticides, herbicides, automotive fluids, or pool chemicals into general debris piles. Most municipalities designate specific drop-off locations or collection days for hazardous materials. Damaged aerosol cans, propane cylinders, and lithium batteries present fire and explosion risks if compacted in collection trucks. Check with your local public works department or emergency management office for hazardous waste disposal instructions specific to your flood recovery situation.
Structural Material Removal: Drywall, Insulation, and Flooring
Wet drywall can’t be saved. The gypsum core absorbs floodwater like a sponge, and even after drying, the paper facing stays contaminated and supports mold growth. Wet insulation similarly holds moisture and contamination throughout its mass. Both have to be removed to access wall cavities for disinfection and create conditions for proper structural drying.
Remove damaged drywall and insulation using these steps:
- Mark your cut line horizontally at least one foot above the highest visible watermark on the drywall face, or at the nearest drywall seam above the watermark, whichever is higher. Cutting at seams reduces drywall waste and creates cleaner edges for patching later.
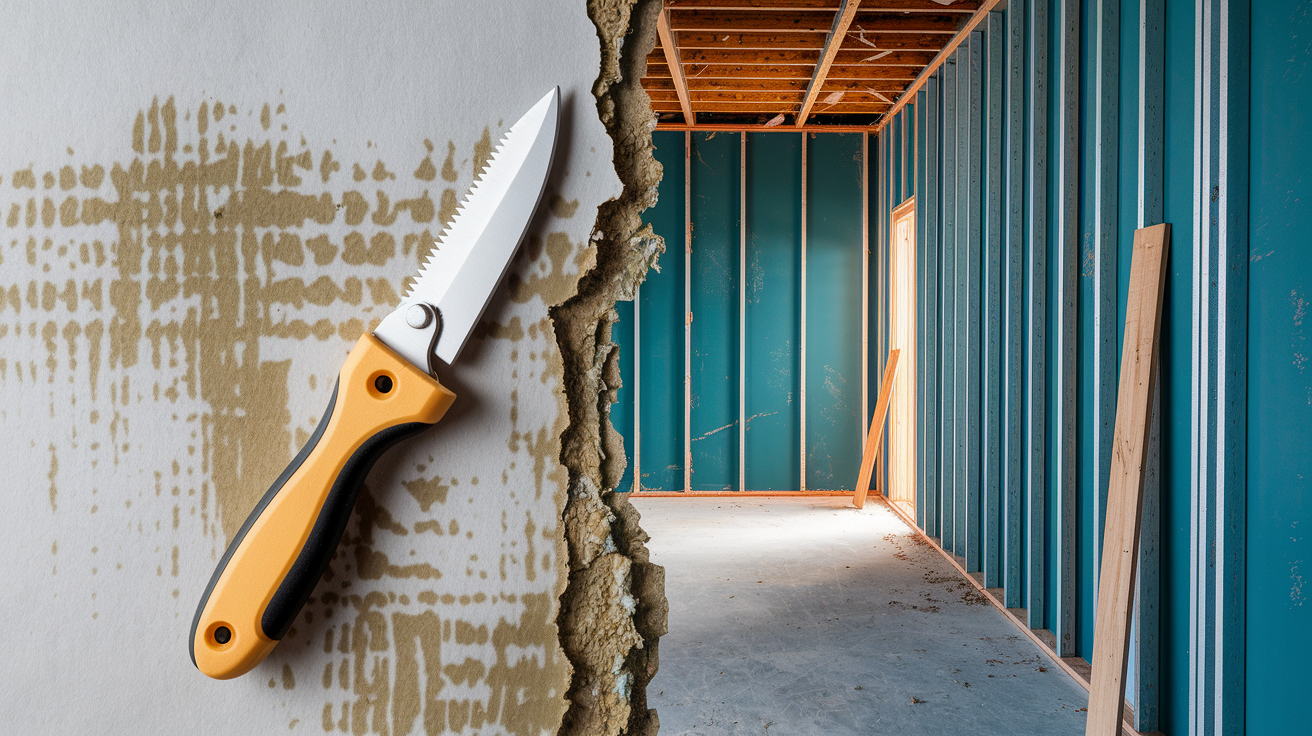
- Use a utility knife to score horizontal cuts through the face paper, then score vertical cuts at wall corners and doorways to define sections, and snap the drywall by pulling it away from the studs.
- Use a pry bar to remove cut drywall sections from the studs, pulling nails or unscrewing fasteners, and carry sections directly outside to debris piles.
- Inspect exposed wall cavities with a flashlight, looking behind the removed drywall for hidden moisture, mold growth on studs, or contamination that wicked higher than the visible exterior watermark.
- Remove all wet insulation from wall cavities by pulling it out in sections, stuffing it into contractor trash bags, and disposing it with construction debris. Insulation is lightweight but compresses poorly, so use large bags and don’t overfill.
Assess flooring materials individually based on saturation level and material type. Carpet and padding always have to be removed after flooding regardless of water source. The porous fibers trap contamination completely. Laminate flooring damaged by moisture swells at seams and edges, and the particle board or MDF core loses structural integrity permanently. Pull laminate that shows edge swelling, lifting seams, or surface bubbling. Hardwood flooring assessment depends on how long water sat on the surface and whether boards have cupped (edges higher than centers) or crowned (centers higher than edges). Minor cupping in solid hardwood may flatten during drying and sanding. Severe cupping, crowning, or any lifting from the subfloor requires removal. Engineered hardwood with thin veneer layers delaminates when saturated and has to be removed. Tile inspection focuses on whether individual tiles have loosened or grout has compromised. Loose tiles indicate water reached the adhesive layer and subfloor, requiring removal to address hidden moisture.
Disinfect exposed wall studs, floor joists, and subflooring before reconstruction. Mix the standard ½ cup bleach per gallon water solution and pour it into a garden sprayer. Spray all wooden structural elements thoroughly, including the back sides of studs you couldn’t reach before removing drywall. Let the solution sit for 5 to 10 minutes, maintaining visible wetness. Rinse structural lumber with clean water if you plan to drywall within a few days. Bleach residue can corrode steel studs and drywall screws. If reconstruction won’t happen for weeks, you can leave bleach solution in place and let it dry on the wood.
Comprehensive Surface Disinfection by Room Type
Surface disinfection only works after you complete the mandatory three-step sequence. First, remove all wet items and debris from the space. Second, clean all mud, dirt, and organic matter from walls, floors, and surfaces using phosphate-free detergent mixed with water and scrubbed with a stiff brush. Third, apply disinfectant solution. Skipping the cleaning step leaves a physical barrier of dried mud and organic material that shields bacteria and pathogens underneath from the disinfectant. Clean first, then disinfect.
Living Areas: Walls, Floors, and Structural Elements
Fill a garden sprayer with the ½ cup bleach per gallon water solution for walls. Start at the top of the wall and spray downward in overlapping passes, working from ceiling to floor. Pay extra attention to the bottom two feet where contamination concentrated. Spray along baseboards, around door frames, and into corners where water and dirt collected. For wall cavities exposed by drywall removal, spray the entire interior surface including studs, any remaining insulation facing, and the back side of drywall on adjacent walls.
Switch to floor disinfection using a mop and bucket method or continuing with the sprayer for large areas. Spray or mop the bleach solution across the entire floor surface. Scrub grout lines with a stiff brush. Grout is porous and holds contamination even after mopping. Go over baseboards again from the floor side, making sure solution reaches the joint between baseboard and floor where debris accumulates. Disinfect door frames at the base, window frames on the sill, and any salvageable built-in cabinetry from the interior. Access wall cavities and apply solution to the interior surfaces where flood odors linger. These hidden spaces hold contamination that affects air quality even after visible surfaces are clean.
Let the solution sit for 5 to 10 minutes while staying visibly wet. If sections start drying before the contact time runs out, spray them again. After full contact time, rinse walls and floors with clean water using a mop and bucket system, or spray with clean water and squeegee or mop up the rinse water.
Kitchens: Counters, Cabinets, and Appliances
Disinfect countertops made of non-porous materials like granite, quartz, laminate, or solid surface using the bleach solution. Spray or wipe the solution across the entire surface, letting it pool slightly in low spots rather than running off. Get into the joint between countertop and backsplash where water seeps behind. Spray cabinet exteriors including doors and the base where they meet the floor. If cabinet interiors were exposed to floodwater, remove all contents, clean shelves thoroughly, then spray disinfectant on all interior surfaces including shelf bottoms, cabinet walls, and the underside of the top.
Disinfect the sink basin, faucet, and handles by spraying solution over all surfaces and letting it sit. Scrub faucet aerators and the area around the base where the faucet meets the sink deck. For tile backsplash areas, spray solution and scrub grout lines with a stiff brush since grout absorbs contamination.
Most appliances that had water enter the internal cabinet or components need to be replaced. Dishwashers, refrigerators, and ranges with water damage to insulation, electrical components, or control boards will develop rust, electrical shorts, and mold growth internally that can’t be adequately cleaned. If floodwater only contacted the exterior or base of an appliance without entering the internal cabinet, you can disinfect the outside. Unplug the appliance, spray all exterior surfaces with bleach solution, let it sit for 10 minutes, and rinse. Don’t reconnect power until a qualified appliance technician inspects internal components and wiring.
Food preparation surfaces including cutting board storage areas, utensil drawers, and spaces where dishes are kept need extra attention. Apply bleach solution, allow the full 10-minute contact time, rinse thoroughly, then apply a second round of disinfectant as a safety measure for surfaces where you’ll prepare food.
Bathrooms: Fixtures, Tile, and Plumbing Areas
Disinfect toilets, bathtubs, and showers starting with a generous application of bleach solution over all surfaces. For sewage backup situations where contaminated water came up through drains, extend the contact time to 15 minutes and apply two consecutive treatments. Spray solution on the entire toilet exterior, lift the seat and spray the bowl rim, spray under the rim where water enters during flushing, and spray the tank exterior. If sewage entered the tank, flush once with the water supply on to clear contaminated water, then spray the interior tank surfaces.
For tubs and showers, spray walls from ceiling level down to the base, spray the tub or shower pan, spray the showerhead and faucet fixtures, and scrub tile grout with a brush while the solution sits. Get into corners and the joint between the tub and wall. Spray and scrub the area around drains where contamination concentrates.
Disinfect sinks, vanities, and surrounding walls using the same solution and contact time. Check under sinks for leaks or moisture before reinstalling stored items. Verify that all plumbing supply and drain connections are secure and not leaking. Floods shift plumbing, corrode connections, and loosen fittings. Look for mold growth on the vanity cabinet interior or wall behind the sink. If you find mold, see the mold-specific remediation section before proceeding.
Verify all drain plumbing before using any bathroom fixture. Sewage backups often damage sewer laterals and drain lines, causing water you pour into sinks or tubs to back up into other fixtures or create leaks under the floor.
Detailed Elements: Trim, Doors, and Salvageable Woodwork
Non-porous trim made of MDF with painted finish, solid wood baseboards, and plastic or composite molding can be disinfected if the material hasn’t swelled or delaminated. Spray bleach solution along the face and edges, letting it run down to the floor joint. Wipe the solution along the top edge of baseboards where they meet the wall. For door trim and window trim, spray the face and wipe into the corners where trim meets the wall surface.
Solid wood doors and door frames that survived flooding can be saved if the wood hasn’t warped or swollen excessively. Spray the entire door face, edges, and the frame. Get into the bottom corner where the door frame meets the floor. Water collects there and the joint often stays damp longer than visible surfaces.
Salvageable wood window frames and built-in wooden shelving require caution with bleach. Fine woods, stained surfaces without a sealed finish, and antique woodwork shouldn’t get chlorine bleach application. For these items, use a quaternary ammonium disinfectant following the product label instructions. Apply the disinfectant, allow the specified contact time, and wipe or rinse according to product directions.
After disinfecting detailed elements, check for lingering musty odors when you return to the space hours later. Odor indicates incomplete disinfection, moisture trapped in joints, or areas you missed. Trace the odor source and apply additional disinfectant to resolve it. If you maintain proper contact time and rinse correctly, surfaces should smell only of residual bleach, not mildew or sewage.
Mold-Specific Remediation and Prevention Protocols

Mold comes in every color. Dangerous mold growth appears white, green, orange, brown, gray, and yes, black. The color doesn’t indicate toxicity. All mold growth poses health risks through spores, allergens, and mycotoxins released into indoor air. Treat all mold growth as a contamination requiring removal and specific protocols.
The 10-square-foot threshold separates DIY from professional remediation. If mold covers less than 10 square feet total in a space, you can handle it yourself following mold-specific procedures. If mold covers more than 10 square feet, if it’s spread beneath flooring where you can’t see the full extent, or if it’s grown behind drywall beyond the visible surface area, stop and call professional mold remediation contractors. Large-scale mold indicates prolonged moisture problems, hidden water sources, or contamination depth that DIY methods can’t safely address.
Mold-specific requirements exceed standard surface disinfection:
- Upgrade respiratory protection to N95 or N100 masks, and add a full Tyvek disposable suit that covers your body and closes at wrists and ankles
- Create containment by sealing the work area with 6-mil plastic sheeting taped over doorways and vents to prevent spore migration to other rooms
- Use HEPA-rated air scrubbers running continuously in the work area to filter airborne spores. Standard air purifiers don’t capture mold spores.
- Absolutely don’t use fans, which spread spores throughout the entire house including rooms you haven’t entered
- Mix a stronger bleach solution at 2 cups chlorine bleach per 2 gallons water, nearly double the standard concentration
- Apply solution using a garden sprayer to soak mold-contaminated surfaces thoroughly until solution drips or pools
- Leave the solution in place for a minimum of 4 hours, far longer than the 5 to 10 minutes for surface disinfection. Mold requires extended contact time for kill.
- Dispose of all contaminated porous materials including drywall, insulation, fabric, and cardboard in sealed 6-mil plastic bags before carrying them outside
Anyone with immune system disorders including HIV, anyone undergoing chemotherapy, anyone with chronic lung conditions like COPD or severe asthma, and anyone with immune suppression from medications shouldn’t enter mold-contaminated spaces until professional cleaning is complete and air quality testing confirms clearance. Mold exposure for immunocompromised individuals creates serious respiratory infections and systemic fungal infections that become life-threatening.
After removing mold and disinfecting the surfaces where it grew, apply an antimicrobial spray rated for mold prevention on all cleaned surfaces. These products leave a residual barrier that inhibits future mold growth if minor moisture issues recur. Follow product label instructions for application rates and drying time. Antimicrobial spray isn’t a substitute for fixing moisture sources. If the leak, seepage, or humidity problem that caused the original mold growth isn’t corrected, mold will return regardless of antimicrobial treatment.
Basement and Crawl Space Disinfection Challenges

Basements and crawl spaces present unique difficulties. Limited ventilation below grade means moisture takes longer to escape. Concrete foundation walls absorb water during flooding and release it slowly back into the space for weeks afterward. Hydrostatic pressure pushes groundwater through foundation cracks and the joint between walls and floor slabs. These below-grade spaces often experienced longer water exposure during the flood, deeper standing water, and contamination that soaked into concrete and masonry materials.
Water removal from basements relies on sump pumps, but verify your sump system is working correctly after a flood. Check that the discharge line wasn’t damaged, that the float switch moves freely and activates the pump, and that the check valve prevents backflow. If groundwater seepage continues after the initial flood, your sump pump may run intermittently for days managing ongoing infiltration. This is normal, but monitor the pit to make sure the pump keeps up with inflow. If water rises faster than the pump removes it, you’ve got either a pump capacity problem or an overwhelming infiltration issue requiring a larger pump or additional discharge capacity.
Ventilation challenges below grade require patience. Open basement windows if you have them, but many basements have small or no windows. Run dehumidifiers continuously and set up a temporary exhaust fan in a window or door opening to pull moist air out while drawing drier air in from upstairs. Don’t rely on passive air exchange alone. Use mechanical ventilation. Expect dehumidification to run 7 to 14 days in flooded basements compared to 3 to 7 days for ground-level spaces. Monitor moisture meters on foundation walls to track drying progress. Concrete reads wet for a long time. Below 4 percent is your target before refinishing.
Inspect your foundation carefully before proceeding with disinfection and reconstruction. Look for new cracks or widening of existing cracks that indicate the flood created structural stress. Check for horizontal cracks in block walls or vertical cracks wider than ¼ inch in poured concrete. Walk the perimeter looking for bowing or leaning walls, especially if soil against the exterior was saturated. Examine the joint between the floor slab and wall for separation or heaving. If you find significant structural damage, consult a structural engineer or foundation specialist before rebuilding. Disinfecting and finishing a compromised foundation creates serious safety hazards and costly future failure.
HVAC Systems, Ductwork, and Indoor Air Quality

HVAC system flood damage usually means replacement, not cleaning. If water entered the furnace cabinet, air handler, or evaporator coil housing, internal components including the blower motor, control boards, limit switches, and gas valves face corrosion and electrical failure. Insulation inside the cabinet absorbed contaminated water and can’t be adequately cleaned. Ductwork with fiberglass interior lining that got wet holds contamination permanently. Systems with minor exterior exposure only (water splashed the outside of the cabinet but didn’t enter) may be professionally cleaned and inspected, but most flood-affected HVAC equipment is a total loss.
Ductwork inspection requires professional expertise. You can see contamination in floor registers and the first few feet of visible ductwork using a flashlight, but you can’t reach the entire duct system for cleaning. Professional duct cleaning uses truck-mounted negative air machines, rotary brushes on flexible cables, and inspection cameras to
Final Words
Knowing how to disinfect house after flood comes down to sequence: stabilize your safety, extract all standing water, remove unsalvageable materials, then clean first and disinfect second with proper contact time.
The right bleach solution and enough patience during drying prevent mold from turning a manageable cleanup into a gut job.
If you’re hitting sewage backup, structural concerns, or mold over 10 square feet, call a pro. For everything else, you’ve got the roadmap to do this right the first time.
FAQ
What is the best disinfectant after a flood?
The best disinfectant after a flood is a bleach solution made with one-half cup of ultra chlorine bleach mixed with one gallon of water for general surfaces. This EPA-recommended mixture kills bacteria and pathogens when left on surfaces for 5 to 10 minutes before rinsing with clean water.
How do you disinfect your house after the floods?
You disinfect your house after floods by following a three-step process: first remove all wet items and debris, then clean all mud and dirt with phosphate-free detergent and water, and finally apply bleach disinfectant solution with proper contact time before rinsing.
How quickly does mold grow after a flood?
Mold grows after a flood within 24 to 48 hours when moisture and organic materials remain present. This critical window means you must remove standing water, dry all materials thoroughly, and disinfect surfaces within two days to prevent mold establishment and spore spread.
How do you clean your house after a flood?
You clean your house after a flood by first extracting all standing water with pumps or wet-dry vacuums, removing unsalvageable porous materials like carpet and drywall, thoroughly drying remaining structures with dehumidifiers and ventilation, cleaning surfaces with detergent, then disinfecting with bleach solution.
Can you use bleach on all flood-damaged surfaces?
You cannot use bleach on all flood-damaged surfaces because chlorine bleach damages HVAC systems, metals, fine woods, and non-colorfast materials. For these restricted surfaces, use quaternary ammonium compounds or hydrogen peroxide-based disinfectants following manufacturer instructions for safe antimicrobial treatment.
What materials must be thrown away after flooding?
Materials that must be thrown away after flooding include all porous and absorbent items like pressboard furniture, particleboard, plywood, carpets, curtains, couches, fabrics, drywall, insulation, and any food touched by floodwater. These materials cannot be adequately disinfected and will support mold growth.
How long should disinfectant sit on flood-damaged surfaces?
Disinfectant should sit on flood-damaged surfaces for 5 to 10 minutes for general surface treatment, or a minimum of 4 hours when treating visible mold growth. Adequate contact time ensures complete pathogen elimination before rinsing surfaces with clean water for safe reconstruction.
When should you call a professional after a flood?
You should call a professional after a flood when sewage or black water contamination occurred, mold covers areas over 10 square feet, structural damage is visible, HVAC systems were flooded, or household members have compromised immune systems requiring certified contamination-free clearance.
How do you remove drywall after flooding?
You remove drywall after flooding by cutting horizontally one foot above visible watermarks or at the nearest drywall seam, whichever is higher, using a utility knife to score and a pry bar to remove sections. This exposes wall cavities for inspection and disinfection.
Is all floodwater considered contaminated?
All floodwater is considered contaminated regardless of the source because it picks up bacteria, sewage, chemicals, and pathogens while flowing over ground surfaces. Treat every gallon of standing water as a health hazard requiring full protective equipment and thorough disinfection protocols.
How do you dry a house after flooding?
You dry a house after flooding by removing standing water with pumps, running dehumidifiers continuously for 3 to 7 days, opening windows for cross-ventilation, and using moisture meters to verify walls read below 16 percent and floors below 12 percent before sealing or rebuilding.
Why can’t you use fans during sewage cleanup?
You cannot use fans during sewage cleanup because wastewater contains airborne pathogens that fans circulate throughout your work area and entire house. Wait until sewage-contaminated materials are removed and surfaces disinfected before introducing any air circulation equipment.
What protective equipment do you need for flood cleanup?
Protective equipment needed for flood cleanup includes N95 or N100 respirator masks, heavy duty high-ankle boots with toe protection, high dexterity waterproof gloves, hard hat, safety goggles, tear-resistant pants, long-sleeved shirts, and disposable Tyvek suits when handling sewage contamination.
How do you know when a flooded house is dry enough?
A flooded house is dry enough when moisture meters read below 16 percent for walls and below 12 percent for floors, relative humidity stays between 30 and 50 percent, no musty odors remain, and touch tests confirm surfaces feel completely dry.
What concentration of bleach kills mold after flooding?
A bleach concentration of 2 cups ordinary household bleach mixed with 2 gallons of water kills mold after flooding when applied with a garden sprayer to soak surfaces well and left for a minimum of 4 hours. This stronger mixture is required for mold versus the weaker solution for general surface disinfection.
