

Most people think the hard part of a flood is the water coming in. It’s not. The hard part is getting it back out before your house becomes a biology experiment. You have about 24 to 48 hours before mold starts growing in wet materials, and that clock is already running. This guide walks you through the safety checks you can’t skip, the fastest ways to pull water out of floors and walls, where to aim your fans and dehumidifiers, and exactly what “dry enough” means before you close anything back up.
The 24-48 Hour Critical Window for Flood Drying
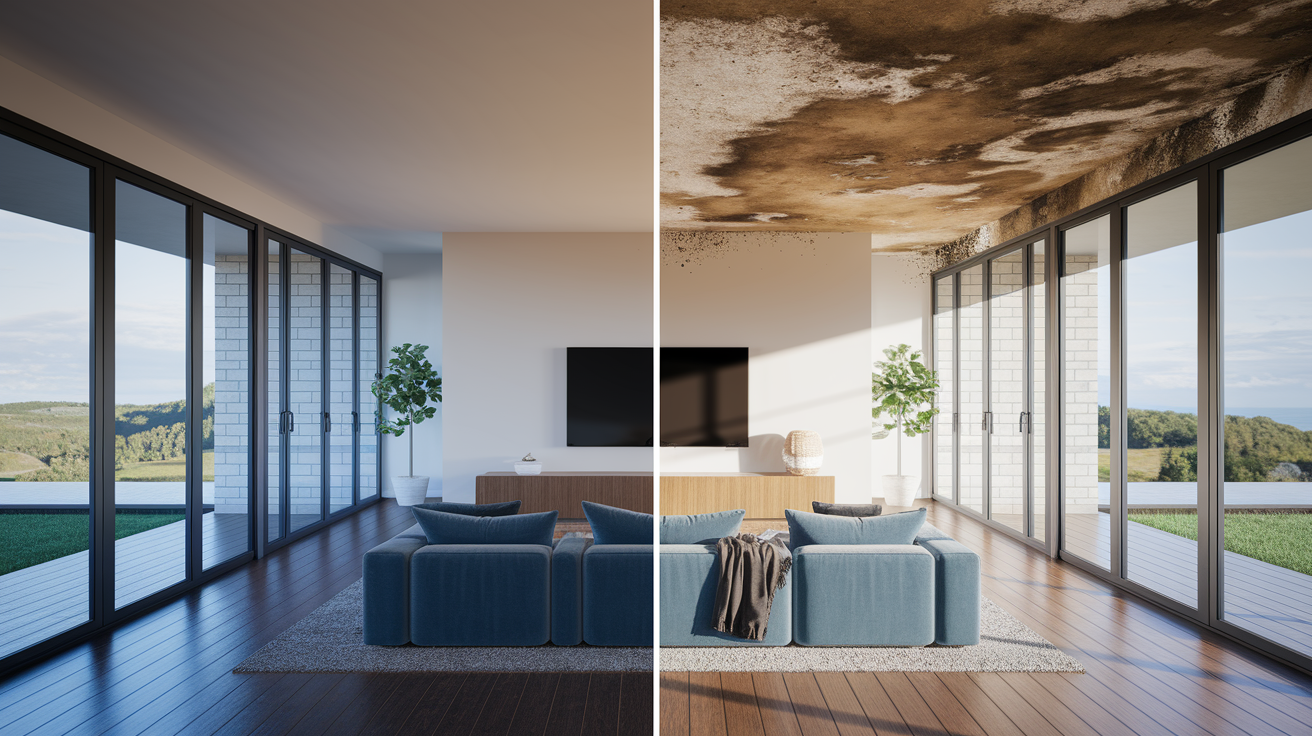
When your house floods, you’re in a race against mold. It starts growing within 24 to 48 hours of water exposure. That narrow window determines whether you can save your belongings or lose them to the trash pile. The goal of flood cleanup is pulling as much moisture as possible from every affected space before biological contamination sets in. What follows covers safety protocols that have to happen first, then walks through systematic water extraction, strategic drying methods, hidden moisture detection, and clear criteria for when professional help stops being optional.
Immediate Safety Steps Before Starting House Drying
Flood cleanup starts with safety assessment, not water removal. People get electrocuted, exposed to contaminated water, and injured by structural collapses when they skip this step and rush straight to salvaging belongings or mopping floors.
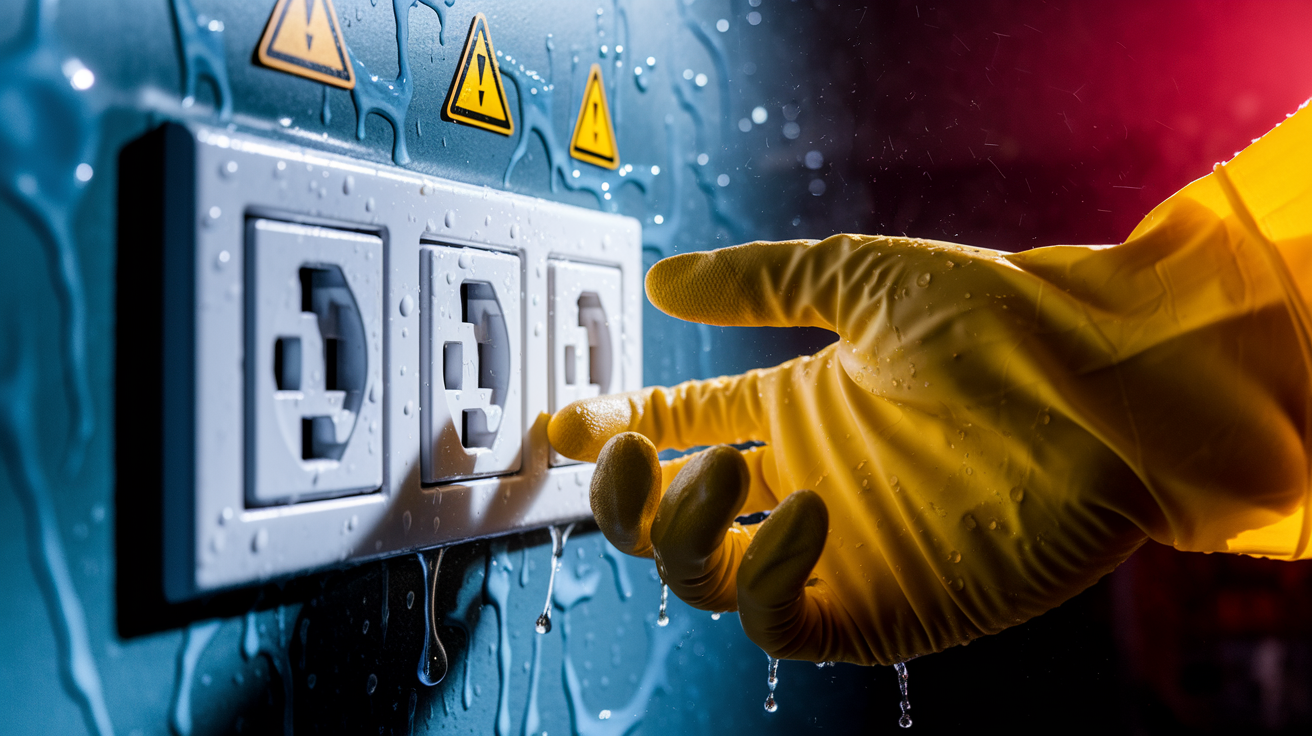
Electrical hazards are the most immediate threat. If standing water has reached any outlets, appliances, or the circuit breaker panel, don’t enter the space until power is shut off at the main breaker. If water has reached the electric meter outside, stop. You can’t restore power yourself. Electric service has to stay off until the utility company inspects the system and gives approval. Homes that get re-energized too early with wet electrical systems cause house fires and serious personal injury. If you’re uncertain about electrical safety or can’t safely access the breaker panel, call a licensed electrician before doing any cleanup.
Water contamination level determines what protective equipment you need and what risks you’re accepting by handling cleanup yourself. The industry uses three categories:
-
Category 1 (Clean Water): Comes from broken supply lines, leaking faucets, toilet tanks (not bowls), or rainwater that hasn’t contacted contaminated surfaces. Generally safe to handle with basic gloves and boots. Still needs prompt removal to prevent mold.
-
Category 2 (Gray Water): Comes from dishwashers, washing machines, clean toilet overflow (tank water), or sump pump failures. Contains moderate contamination including detergents, food particles, or mild chemicals. You need gloves, boots, and eye protection. Can cause illness if ingested or if it contacts open wounds.
-
Category 3 (Black Water): Sewage backups, toilet bowl overflows, floodwater from rivers or storms, or any standing water that’s sat for more than 48 hours (which allows bacterial growth). Contains harmful bacteria, chemicals, and potential viruses. You need full protective equipment including waterproof boots, heavy-duty gloves, eye protection, and N95 or better respirator. Porous materials contacted by Category 3 water generally can’t be saved and have to be thrown away.
Before you touch any water, identify its source and category. For Category 2 and especially Category 3 situations, strongly consider calling professionals who have proper protective equipment and disposal protocols. Also check for gas odors before entering flooded spaces. If you smell natural gas, leave immediately and call the gas company from outside the home. Gas lines can break during flooding or when appliances shift, creating explosion risks when combined with electrical sparks or pilot lights.
Standing Water Extraction and Removal Methods

After safety measures are in place, standing water removal becomes the first active cleanup step. Air circulation and dehumidification can’t work effectively while water pools on floors or saturates materials.
For flooded basements with several inches of standing water, submersible pumps are the primary tool. These pumps sit in the water and discharge through a hose to the outside. Most can move 1,500 to 3,000 gallons per hour, clearing a moderately flooded basement in a few hours. You can rent these from home improvement stores for roughly $40 to $60 per day. Position the pump in the lowest point where water accumulates, make sure the discharge hose runs downhill away from the foundation, and monitor it continuously. For extensive basement flooding (more than 4 inches deep throughout) or situations where you can’t safely access the space, calling a professional water restoration company is the safer choice. They have truck-mounted extraction systems that remove thousands of gallons far faster than portable pumps.
Wet/dry shop vacuums handle remaining water after pumps remove the bulk. A 6-gallon or larger shop vacuum can extract water from corners, from under cabinets, around utility connections, and from carpets. Empty the tank frequently. Wet/dry vacuums aren’t designed for continuous high-volume pumping, so use them for cleanup after the standing water is gone, not as the primary extraction tool.
Carpets and pads present a difficult decision. If the water is Category 1 and you can extract and begin drying within a few hours, carpets might be saved by repeated shop vacuum passes and aggressive air circulation. Pull up corners to check the pad underneath. Carpet pads act like sponges and rarely survive. Even if the surface carpet looks okay, a saturated pad beneath will create mold growth and odor issues. When in doubt, remove both carpet and pad. If the water is Category 2 or 3, dispose of all carpeting and padding without trying to save it. For remaining surface water on hard floors, towels and mops work for final cleanup after equipment has removed bulk water, but they’re inefficient for anything more than minor residual dampness. Move water-damaged furniture and belongings out of the space. Saturated items release moisture into the air, slowing down the drying process and creating an ongoing moisture source that works against your drying efforts.
Air Circulation and Ventilation Techniques for Flood Drying

Moving air accelerates evaporation by replacing humid air near wet surfaces with drier air. Without air circulation, moisture evaporates slowly from materials but has nowhere to go, creating a humid environment that feels damp and slows further drying.
Open windows and exterior doors to create cross-ventilation that pushes moisture-laden air outside. Position windows on opposite sides of the space when possible so air flows through rather than stagnating. This natural ventilation works best when outdoor humidity is lower than indoor humidity. Check weather forecasts. If outdoor humidity exceeds 60 to 70%, opening windows may actually bring in more moisture than it removes, especially in humid climates or during rainy periods. In those conditions, keep the space closed and rely on dehumidifiers instead of ventilation.
Proper fan placement makes the difference between effective drying and just moving air around. Here are strategic positioning approaches:
- Angle fans toward open windows or doors so they push humid air out of the space rather than just circulating it
- Place fans at floor level when drying carpets, baseboards, or lower walls to target moisture where it’s concentrated
- Rotate fan positions every 4 to 6 hours to dry different sections and prevent moisture from settling in areas the airflow misses
- Avoid aiming high-velocity fans directly at wet drywall for extended periods as this can cause surface damage or separation from studs
- Space multiple fans throughout large rooms rather than clustering them in one area for more even air coverage
Fans should run continuously for a minimum of 24 to 48 hours, but most flood situations require 48 to 72 hours or longer depending on how much water was present and what materials got wet. Don’t turn equipment off overnight to save electricity. Continuous operation maintains drying momentum. Stopping airflow allows relative humidity to rise again as materials release stored moisture, which slows your overall timeline and increases mold risk.
Dehumidifier Usage for Removing Moisture from Flooded Spaces

Dehumidifiers extract water vapor directly from the air and collect it as liquid condensate, making them essential for enclosed spaces where ventilation is limited or outdoor humidity is too high to open windows. They work by pulling air across cold coils that cause moisture to condense, then reheating the air slightly before returning it to the room.
Refrigerant dehumidifiers (the compressor-based type) are most common and work well in typical basement and living space temperatures. They’re rated by how many pints of moisture they can remove in 24 hours. For flood recovery, use units rated for at least 50 to 70 pints per day for medium rooms, or 70+ pints for large spaces or basements. Residential units from hardware stores may be adequate for minor water damage, but commercial-grade dehumidifiers available through rental companies pull 150+ pints per day and work far more effectively for significant flooding. Desiccant dehumidifiers use moisture-absorbing materials and work better in colder environments (below 60 degrees) where refrigerant models lose efficiency, making them the better choice for unheated crawlspaces or winter flooding scenarios.
Place dehumidifiers in a central location away from walls and furniture so air can circulate freely around all sides. Most units have built-in humidistats that shut off when target humidity is reached, but during active flood drying, you want continuous operation. Empty collection tanks every 4 to 8 hours, or set up a continuous drain hose to a floor drain or sump if your model supports it. Running the unit with a full tank accomplishes nothing since it shuts off automatically when the reservoir is full.
Monitor indoor humidity levels with a hygrometer (many dehumidifiers have them built in, or you can buy a standalone unit for $10 to $20). Target a relative humidity between 30% and 50% during drying. When you can maintain that range for 24 to 48 hours and moisture meter readings on structural materials show dry results, the space is ready for repairs. Until then, keep the dehumidifier running.
Removing Water-Damaged Materials from Your House
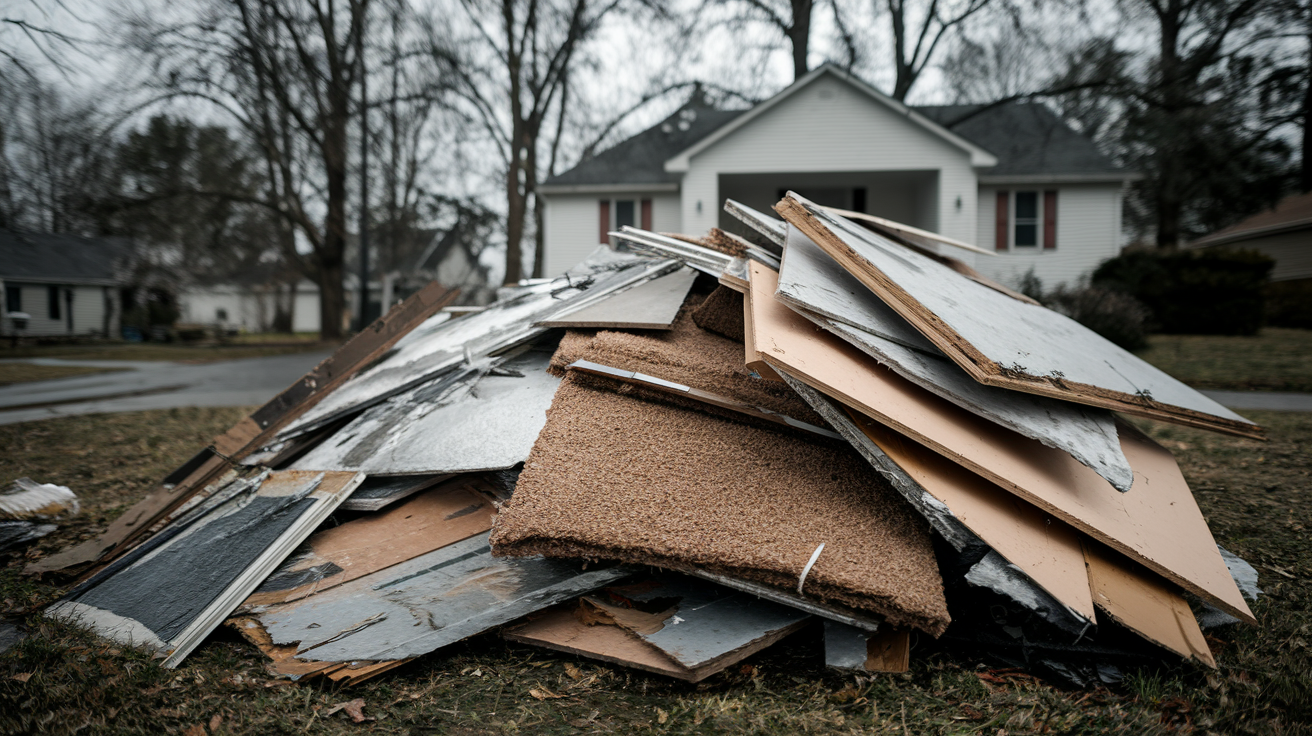
Porous materials that remain saturated become moisture reservoirs that continuously release water vapor, prevent the space from drying, and create ideal conditions for mold growth. Even while running fans and dehumidifiers at full capacity, you can’t dry a room when wet drywall, insulation, and flooring keep adding moisture back into the air.
The 48-hour window determines salvage decisions for belongings. Furniture, clothing, books, and personal items that can be cleaned, extracted, and fully dried within that timeframe have a reasonable chance of being saved. Items that remain damp past 48 hours face high mold risk. Contamination category also drives decisions. Category 3 water requires disposal of any porous belongings that contacted it, regardless of timeline. Hard, non-porous items (metal, plastic, sealed wood furniture) can be cleaned and disinfected, but upholstered furniture, mattresses, stuffed items, and paper goods should go if they’ve been touched by sewage or heavily contaminated floodwater. When deciding what to remove versus dry in place, use this framework:
| Material Type | Remove or Dry in Place | Reasoning |
|---|---|---|
| Drywall (lower 12 to 24 inches) | Remove if saturated | Drywall wicks water upward and rarely dries completely. Holds moisture against studs, promoting mold and wood rot. Cut away wet sections. |
| Carpet and Pad | Remove pad, remove carpet if Category 2/3 | Pads can’t be effectively dried and create odor issues. Carpets may be saved from Category 1 water if dried within hours, otherwise remove. |
| Hardwood Flooring | Dry in place if caught early | Hardwood can sometimes be saved with aggressive drying, but requires weeks and careful monitoring. Cupping and buckling indicate removal is needed. |
| Baseboards and Trim | Remove | Removal provides access to wall cavities and floor edges for drying. Trim is inexpensive to replace and impossible to dry thoroughly while installed. |
| Insulation (fiberglass or cellulose) | Remove if wet | Wet insulation loses R-value, dries extremely slowly, and supports mold growth. Can’t be effectively dried in place. |
| Upholstered Furniture | Dry in place if Category 1 and quick, otherwise remove | Fabric and padding hold moisture. Can sometimes be saved with extraction and air drying if caught within hours. Category 2/3 water requires disposal. |
| Ceiling Tiles (drop ceiling) | Remove and replace | Ceiling tiles are porous, inexpensive, and impossible to dry without warping. Always replace rather than attempting to dry. |
| Cabinets (particle board or MDF) | Remove if saturated at base | Particle board and MDF swell when wet and don’t return to original dimensions. Solid wood cabinets can sometimes be dried and saved. |
Removing baseboards early in the process opens wall cavities to airflow. Water travels up inside walls through capillary action and sits against the bottom plate and lower studs even after surface water is gone. Taking off baseboards and cutting away the lower 12 to 24 inches of drywall exposes these areas so fans and dehumidifiers can reach them. This isn’t optional for significant flooding. Trying to dry walls without removing baseboards and lower drywall traps moisture inside where it will create mold behind what looks like a dry surface.
Structural Drying and Hidden Moisture Detection

Water visible on floors and walls is just part of the problem. Flooding sends water into wall cavities, beneath flooring layers, into ceiling spaces, and along structural members where it remains trapped even after surface areas appear dry. This hidden moisture creates long-term mold environments and structural damage that develops out of sight.
When water floods a room, it doesn’t just sit on the surface. It soaks into drywall, wicks upward through capillary action into wall studs and plates, seeps between flooring layers to reach the subfloor, and can even travel through ceiling cavities if the flooding reached upper levels or came from roof leaks. In multi-story homes, water that enters upper floors travels downward through wall cavities and can appear in lower-level walls far from the original leak location. Concrete and masonry materials absorb significant moisture that releases slowly over weeks. This invisible saturation is why surface drying is insufficient and why moisture detection tools become critical.
Moisture meters measure water content in materials and come in two types. Pin-type meters have two probes you press into the material, measuring electrical resistance to estimate moisture content. Pinless meters use electromagnetic signals to scan without penetrating the surface. Both types display moisture content as a percentage or on a relative scale. For most building materials, readings should be below 15 to 20% moisture content before reconstruction begins. Wood framing should read below 15%. Drywall should be under 1% on many meters (some use different scales, so check your specific meter’s guidelines). Take readings in multiple spots throughout affected areas. Check the bottom plate of walls, studs at various heights, subfloors near wet areas, and ceiling drywall or joists. Thermal imaging cameras detect temperature differences that indicate moisture, since wet materials are cooler than dry ones. They show moisture patterns without touching surfaces, making them useful for scanning large areas quickly and finding hidden dampness.
Pay special attention to these common hidden moisture locations:
- Wall cavities behind drywall that appears dry on the surface but has wet insulation, studs, or bottom plates inside
- Beneath flooring where water has seeped under vinyl, tile, or hardwood to saturate the subfloor and underlayment
- Ceiling insulation above flooded rooms where water may have wicked upward before evaporating from the surface
- Crawlspaces beneath the affected floor where water drips through and saturates insulation, rim joists, and floor framing
- Rim joists and sill plates where foundation walls meet floor framing, a common moisture accumulation point
- Window and door frames where water infiltrated around openings and soaked into framing members and rough openings
Creating airflow in structural cavities requires removing the barriers that block air movement. Baseboards have to come off. Lower drywall sections should be cut away. Some situations benefit from drilling small weep holes through drywall near the floor to allow trapped moisture to escape, though this only works when you plan to replace the drywall anyway. For subfloors, removing finished flooring exposes the subfloor to air. If the subfloor itself is saturated, you may need to remove sections to dry the space below and the framing beneath. None of this is visible work, and that’s exactly why it gets skipped. But hidden moisture is what causes callbacks, insurance claims months later, and the “we thought it was dry” mold discoveries that turn initial flood damage into major reconstruction projects.
Mold Prevention During the House Drying Process

Mold growth begins within 24 to 48 hours after materials get wet, which means your drying timeline is also your mold prevention window. Once those first spores germinate and colonies establish, you’ve moved from flood recovery into mold remediation, a more expensive and more complex problem.
Speed is the primary prevention strategy. Every hour materials remain wet is an hour closer to mold growth, so aggressive drying with multiple dehumidifiers, continuous fan operation, and prompt removal of saturated materials cuts the risk significantly. There’s no “wait and see” approach that works. Either you dry it fast or you deal with mold.
Antimicrobial treatments can be applied to surfaces after water removal to inhibit microbial growth while drying continues. These are particularly appropriate for Category 2 and Category 3 water situations where bacterial and fungal contamination is already present in the water itself. Spray or wipe EPA-registered antimicrobial solutions onto hard surfaces (concrete, framing, subfloors) following product instructions. These treatments don’t replace drying or allow you to extend the timeline, but they can provide additional protection during the drying process. Don’t apply them to materials you plan to remove anyway. Don’t use them as a substitute for discarding Category 3-contacted porous materials. And understand that antimicrobial treatment of a wet surface doesn’t prevent mold if the surface stays wet. The moisture still has to be removed.
Air filtration during drying captures mold spores that become airborne when you remove wet materials or disturb contaminated areas. HEPA-filtered air scrubbers pull air through fine filters that trap spores, preventing them from settling elsewhere in the home. Run air scrubbers continuously during demolition and material removal, positioning them in the work area. These units also create negative air pressure that prevents contaminated air from spreading to unaffected rooms. Standard box fans don’t filter anything. They move spores around. If you’re handling Category 2 or 3 water, or if you’ve discovered any visible mold during the cleanup, an air scrubber isn’t optional equipment.
Check high-risk areas every 12 to 24 hours during the drying process for any signs of visible mold growth. Crawlspaces beneath flooded rooms, the inside surfaces of exterior walls, areas behind wallpaper, and HVAC systems all support rapid mold development if they stay damp. Look for discoloration, black or green spots, fuzzy growth, or musty odors. If you find growth while drying is still in progress, it means your drying methods aren’t working fast enough or you have hidden moisture you haven’t addressed. At that point, the situation has moved beyond DIY flood cleanup into mold remediation that requires containment, removal, and disposal protocols.
Flooded Basement Drying Strategies

Basements and crawlspaces create unique drying challenges because they’re below grade, typically cooler than the rest of the house, have limited ventilation, and are surrounded by moisture-retaining concrete and soil. These conditions slow evaporation and make complete drying a longer process.
Below-grade spaces naturally have higher humidity because they’re cooler, and cool air holds less moisture before reaching saturation. The temperature difference between a 60-degree basement and 75-degree main floor means the basement air feels damp even when moisture levels are similar. Concrete foundation walls and floors absorb significant water during flooding and release it slowly over weeks. A poured concrete slab can take 4 to 6 weeks to fully dry after saturation. Concrete block walls wick water upward through the hollow cores and hold moisture inside the blocks. Evaporation from these surfaces is slow, and without active dehumidification, basements can remain damp indefinitely.
Standing water in basements requires pumping with a submersible pump as the first step. Position the pump at the lowest point and discharge the water at least 10 feet away from the foundation so it doesn’t seep back in. If your basement has a sump pit, use it as the pumping location if water has accumulated there. For homes without existing sump systems, consider installing one after the flooding is resolved, as it provides ongoing protection against future water intrusion.
Basement-specific drying techniques focus on dehumidification and air movement at the floor level where moisture concentrates. Place at least one 70-pint or larger dehumidifier in the basement and run it continuously. For larger basements or severe flooding, two dehumidifiers may be necessary. Empty tanks or set up continuous drainage. Position floor fans to create air circulation across concrete surfaces, but understand that fans alone can’t dry a basement effectively due to the low evaporation rate and limited ventilation. The dehumidifier does most of the work. Check foundation walls and floor joists with a moisture meter. The band joist (rim joist) area where the foundation meets the floor framing is a common moisture trap. Water that contacts the foundation can wick upward into this wood, creating rot risk. If those joists read wet on a moisture meter, direct fans toward them and continue running dehumidifiers until readings drop below 15% moisture content. Wet floor joists that aren’t properly dried lead to structural problems and hidden mold growth inside the floor cavity above.
Crawlspaces that flooded require vapor barrier installation and ongoing dehumidification after drying is complete. Standing water in a crawlspace should be pumped out. Wet insulation between floor joists has to be removed and discarded. After the space dries, install a heavy-duty vapor barrier (6-mil polyethylene or thicker) over the dirt floor, running it up the foundation walls and sealing seams with tape. Then install a crawlspace dehumidifier designed for that environment and set it to maintain relative humidity below 60%. Crawlspaces without vapor barriers and dehumidification allow moisture from the soil to continuously infiltrate the home, creating mold problems and rotting floor joists even without additional flooding events.
Timeline Expectations for Drying Out a Flooded House

Drying timelines vary significantly based on how much water was present, what materials got wet, what category of water you’re dealing with, outdoor temperature and humidity, and how quickly you started active drying. There’s no single answer, but understanding the factors helps set realistic expectations and prevents the mistake of closing up repairs before materials have actually dried.
Water category affects timeline because Category 3 situations require additional antimicrobial treatment, longer drying to ensure contamination is addressed, and more extensive material removal which opens up larger areas that need to dry. Volume of water matters. A burst supply line that ran for 20 minutes creates a different situation than a sewer backup that sat for 12 hours or a river flood that filled the basement to the ceiling. Materials drive timeline as much as anything. Drywall dries relatively quickly. Hardwood flooring, brick, plaster, and concrete take far longer due to density and porosity. A hardwood floor might require 2 to 4 weeks of controlled drying to stabilize. Concrete basement floors can take 4 to 6 weeks. Plaster walls take longer than drywall. Temperature and humidity create the environment for evaporation. Warm, dry conditions speed drying. Cool, humid conditions (or winter heating that doesn’t remove humidity) slow it considerably. And airflow from fans and dehumidifiers provides the mechanism for moisture removal, so homes with adequate equipment dry faster than those relying on passive ventilation.
Monitoring drying progress requires moisture meter readings, not guesswork or timelines pulled from the internet. Check materials every 24 to 48 hours. When readings stabilize at acceptable levels for that material type and remain stable for 48 hours, the material is dry enough for repair work. Drywall should read below 1% on most pin-type meters (or within the “dry” range if your meter uses color scales). Wood framing should be below 15%. Concrete should be below 4% on the appropriate concrete scale. Rushing this step to meet a desired timeline instead of actual dryness traps moisture inside the repairs, leading to mold growth behind new drywall or beneath new flooring weeks or months later.
| Damage Severity | Drying Duration | Repair Duration | Total Timeline |
|---|---|---|---|
| Minor (Category 1, small area, caught within hours) | 3 to 5 days | 1 to 2 weeks for light repairs | 2 to 3 weeks total |
| Moderate (Category 1 or 2, multiple rooms, significant saturation) | 1 to 2 weeks | 2 to 4 weeks of rebuilding | 4 to 6 weeks total |
| Extensive (Category 2 or 3, whole floor affected, deep saturation) | 2 to 4 weeks or longer | 4 to 8 weeks of repairs | 8 to 12 weeks total |
| Category 3 with structural damage or mold remediation | 4+ weeks including remediation | 6 to 12 weeks or more | 12+ weeks total |
Seasonal factors also influence drying. Summer heat and lower humidity accelerate evaporation. Winter cold slows it, and heating systems that don’t actively remove humidity (like forced air without dehumidification) can create stagnant damp conditions. In winter scenarios, dehumidifiers and air movement become even more critical since you can’t rely on outdoor ventilation.
Essential Equipment for DIY House Drying After Floods
DIY flood drying is feasible for minor to moderate Category 1 water situations where contamination is minimal and the affected area is manageable. Beyond that scope, commercial-grade equipment and professional expertise produce significantly better outcomes in less time with lower mold risk.
Residential equipment from home improvement stores works for small-scale situations. A standard 70-pint dehumidifier can handle a medium-sized basement or a couple of flooded rooms if the saturation isn’t extreme. Box fans or household air movers provide airflow for ventilation and evaporation. Wet/dry shop vacuums extract surface water. This equipment is affordable to purchase or rent and can handle situations where you removed the water source quickly, extracted standing water within a few hours, and have a manageable area to dry. But it has limits. Residential dehumidifiers pull moisture slowly compared to commercial units. Box fans move less air and create weaker airflow patterns than professional air movers. If you’re facing anything beyond a minor localized flood, the residential equipment will run for weeks doing what commercial equipment could accomplish in days.
Commercial restoration equipment rentals provide a middle-ground option. Rental companies and some home improvement stores offer commercial-grade dehumidifiers (150+ pints per day), axial air movers (high-velocity fans designed for drying), and specialty equipment like injectidry systems that force air into wall cavities and subfloor spaces. Rental rates typically run $30 to $50 per day for large dehumidifiers, $15 to $25 per day for air movers, and $40 to $60 per day for submersible pumps. Renting for one or two weeks becomes cost-competitive with hiring professionals, but you’re doing the labor, monitoring, and decision-making yourself. If the rental cost approaches what a professional service would charge for the same job, factor in the value of expertise, warranty on the work, and the risk of making mistakes that lead to mold or incomplete drying.
Essential equipment for a DIY flood drying project:
- Wet/dry shop vacuum with 6-gallon or larger capacity for extracting remaining water from floors, carpets, and corners after bulk water removal
- Box fans or air movers with minimum of 3 units for adequate air circulation in a typical room; more for larger spaces or multiple affected rooms
- Commercial dehumidifier rated for at least 70 pints per day capacity; 100+ pints for basements or severe flooding situations
- Moisture meter (pin-type or pinless) for monitoring drying progress and confirming materials have reached acceptable moisture content before repairs begin
- Submersible pump if standing water is deeper than 2 inches or covers significant floor area; rental is usually sufficient for one-time use
- Extension cords and power strips rated for the electrical load of running multiple dehumidifiers and fans simultaneously
- Protective gear including waterproof boots, heavy-duty rubber gloves, safety glasses, and N95 or better respirator mask especially for Category 2 or 3 water
- Cleaning supplies and EPA-registered disinfectants or antimicrobial treatments appropriate for the water category you’re dealing with
Purchasing equipment makes sense if you live in a flood-prone area where repeat events are likely, or if you’re managing rental properties where water damage is an occasional issue. For most homeowners facing a one-time flood, renting commercial-grade equipment for a week or two provides better drying results than buying consumer-grade tools that will underperform.
Documentation and Insurance Claims for Flood Damage
Photograph and video everything before you touch anything. Insurance claims depend on documented proof of damage, and once cleanup begins, that evidence disappears.
Walk through every affected area with your phone camera before removing water, pulling materials, or throwing anything away. Capture water level marks on walls, wide shots showing the extent of flooding in each room, close-ups of damaged materials, ruined belongings, and any visible mold or structural damage. Include video narration where you describe what you’re seeing and explain the sequence of events that led to the flooding. Timestamp photos if your camera supports it, or note the date and time in a separate log. This documentation establishes the baseline condition and severity, which drives coverage decisions and claim amounts.
As cleanup progresses, continue documenting the process. Photograph moisture meter readings showing high moisture content in walls and floors during the drying phase. Take pictures of removed materials (drywall sections, carpeting, insulation) before disposal. Document equipment in use (dehumidifiers, fans, pumps) with dates they were rented or purchased. This creates a timeline showing that you took prompt mitigation steps, which can protect you against insurance arguments that damage worsened due to delayed response. Photograph the progression of drying with dated images showing conditions at 24 hours, 48 hours, one week, and when materials finally read dry on meters.
Maintain a detailed expense log in a spreadsheet with date, item or service, vendor, cost, and purpose columns. Save every receipt for equipment rentals, cleaning supplies, trash bags, replacement materials, and any professional services. If you’re doing the labor yourself, track hours spent even though you typically can’t bill for your own time. This log becomes your claim documentation and helps you track total costs which often exceed initial estimates as hidden damage appears during the drying and repair process.
Communicate with your insurance adjuster early and understand your policy’s requirements before proceeding with major work. Standard homeowner’s insurance typically covers sudden and accidental water damage from burst pipes or appliance failures, but often excludes flooding from external sources (which requires separate flood insurance). Gray areas include sewer backups (sometimes covered with additional endorsement) and sump pump failures (sometimes covered, sometimes excluded). Read your policy or have your agent explain coverage before assuming what’s included. Some policies require approval before you hire contractors for repairs exceeding certain dollar amounts, or before you dispose of items the adjuster hasn’t seen. Violating these terms can reduce or deny your claim. When in doubt, call your insurer and ask before proceeding. Document that call with date, time, representative name, and what they told you.
When to Hire Professional Water Damage Restoration Services
Certain flood situations exceed DIY capabilities, and attempting them yourself increases health risks, extends timelines, and often creates worse outcomes than calling professionals from the start.
Professional restoration companies bring industrial extraction equipment including truck-mounted pumps that remove thousands of gallons per hour, commercial dehumidifiers that pull 150 to 300+ pints per day, thermal imaging cameras and commercial moisture meters for comprehensive moisture mapping, and expertise in industry drying standards that ensure structural materials reach appropriate moisture content before reconstruction. They also carry insurance, provide documentation that satisfies insurance requirements, and often work directly with insurers to streamline claims. The investment in professional service typically pays for itself through faster drying, lower mold risk, and proper documentation.
You need professional restoration services rather than DIY when you’re facing any of these seven scenarios:
-
Category 2 or Category 3 water contamination requiring specialized cleaning, antimicrobial treatment, proper protective equipment, and disposal protocols for contaminated materials
-
Flooding deeper than 2 inches throughout the home or affecting more than two rooms with significant saturation of walls and structural materials
-
Water has reached electrical panels, meter bases, HVAC equipment, or other critical systems requiring utility shutoff and specialized restoration procedures
-
Structural damage including sagging ceilings, bowing walls, shifted foundations, or compromised floor framing that creates safety hazards during cleanup
-
Visible mold growth already present or strong musty odors indicating hidden mold that requires containment and remediation protocols beyond flood cleanup
-
Inability to dry the space within 48 to 72 hours using available equipment, which increases mold risk beyond acceptable levels for DIY work
-
Insurance company policy requirement for licensed and certified restoration contractors to perform the work or document the drying process for claim approval
When hiring professionals, verify credentials and insurance before signing contracts. Look for IICRC certification (Institute of Inspection Cleaning and Restoration Certification), which provides training in water damage restoration standards and procedures. For moisture-related work, HERS Rater or Building Performance Institute BPI certification indicates expertise beyond general restoration or HVAC work, particularly for hidden moisture detection and building science principles. Confirm the company carries general liability insurance and workers’ compensation coverage. Ask for references from recent water damage jobs and check online reviews. Get written estimates that detail the scope of work, equipment to be used, estimated timeline, and cost breakdown.
Professional restoration companies
Final Words
You now have a complete roadmap for how to dry out a flooded house, from the first safety shutoff through hidden moisture detection and timeline planning.
The key is starting fast. Water removal, air movement, and dehumidification all work together to hit that 48-hour window before mold takes hold.
Take it one step at a time. Shut off power, pump out standing water, get fans and dehumidifiers running, and pull wet materials that can’t be saved.
Check hidden spots with a moisture meter. Don’t close anything up until readings confirm it’s actually dry.
You’ve got this.
FAQ
How long does it take for a flooded house to dry?
A flooded house typically takes 48 hours minimum for minor damage, 1-2 weeks for moderate flooding, and 4+ weeks for extensive damage or Category 3 water. Drying time depends on water volume, affected materials, humidity, temperature, and airflow. Dense materials like hardwood, brick, plaster, and concrete require longer drying periods than standard drywall and flooring.
How do you dry out a flooded house?
Drying out a flooded house starts by shutting off power and water, removing standing water with pumps or wet/dry vacuums, then running fans and dehumidifiers continuously for 48+ hours. Remove wet porous materials like carpet pads and damaged drywall. Position fans toward open windows to push moisture outside. Use moisture meters to verify materials reach safe moisture levels before closing walls or reinstalling flooring.
How much does it cost to dry a flooded house?
Drying a flooded house costs between $1,300 and $6,200 for most homeowners. Cost varies based on water category, square footage affected, material damage, mold presence, and response timing. DIY equipment rental (dehumidifiers, air movers, pumps) costs $50-100 daily, while professional restoration services include industrial equipment, labor, monitoring, and documentation for insurance claims.
What draws moisture out of your house?
Dehumidifiers draw moisture out of your house by condensing water vapor from humid air into collection tanks. Air circulation from fans accelerates evaporation by replacing moisture-laden air with drier air. Cross-ventilation through open windows and doors pushes humid indoor air outside when outdoor humidity is lower. Removing wet materials eliminates ongoing moisture sources that prevent spaces from drying.
When should I call a professional for flood drying?
You should call a professional for flood drying when water is Category 2 or 3 (contaminated), flooding exceeds 2 inches throughout your home, water reaches electrical panels or HVAC systems, ceilings sag or show structural damage, visible mold appears, you cannot achieve drying within 48-72 hours, or your insurance requires licensed contractors for coverage.
Can I use regular fans to dry a flooded house?
You can use regular box fans to dry a flooded house for minor flooding, but they are less effective than commercial air movers. Position fans angled toward open windows at floor level. Run multiple fans continuously for 48+ hours minimum. For moderate to extensive flooding, commercial air movers provide higher velocity airflow that accelerates evaporation significantly compared to household fans.
What humidity level is safe after flood drying?
A safe humidity level after flood drying is 30-50% relative humidity measured with a hygrometer. Higher humidity slows evaporation and creates mold growth conditions. Run dehumidifiers until humidity stabilizes in this range for 24+ hours. Check moisture meter readings on affected materials to confirm wood reads below 16%, drywall below 1%, and concrete below 4% moisture content.
Do I need to remove baseboards after flooding?
You need to remove baseboards after flooding to allow wall cavities to dry and prevent trapped moisture from causing mold growth behind walls. Baseboards block airflow to the bottom plate and lower wall studs. Removing them creates openings for fans to direct air into wall cavities and allows moisture meters to check hidden dampness behind drywall.
How do I know when flood-damaged materials are dry enough?
You know flood-damaged materials are dry enough when moisture meter readings reach acceptable levels: wood below 16%, drywall below 1%, concrete below 4% moisture content. Materials should maintain these readings for 24 hours without rising. Touch-dry surfaces can still contain deep moisture, so rely on moisture meter readings rather than visual inspection or touch before rebuilding.
Can flooded drywall be saved or must it be replaced?
Flooded drywall can be saved if it dried completely within 48 hours and water was Category 1 (clean supply water), but drywall that stayed wet longer than 48 hours, was exposed to Category 2 or 3 water, or shows bulging, crumbling, or discoloration must be replaced. Cut and remove at least 12 inches above visible water lines to access wet insulation and framing.
