

You can absolutely dry out wet drywall without cutting it open, but only if the water’s clean, you catch it fast, and you’re willing to run fans and a dehumidifier nonstop for several days. Skip any of those three and you’re gambling with hidden mold growth behind walls you thought were safe. This guide walks you through the exact airflow setup, moisture tracking, and day-by-day checkpoints that separate successful in-place drying from a costly demo job you should’ve done from the start.
Step-by-Step Methods for Drying Wet Drywall In Place

Drying drywall without cutting it out is totally possible if you catch clean water damage early and go at it the right way. The whole thing boils down to three moves: get air moving fast across wet surfaces, knock down indoor humidity, and check your progress every day with actual numbers. DIY methods using fans you’ve got at home plus some rental gear usually take 3 to 7 days. Pros with industrial equipment? They’re done in 24 to 72 hours.
Small clean water leaks you catch within a few hours often dry in 24 to 48 hours if you set things up right. Moderate leaks that soak the bottom of your walls usually need 2 to 4 days. Here’s what’s happening: drying pulls moisture through evaporation, yanking water from the gypsum core and wall cavity into the air, then your dehumidifier strips that moisture out.
-
Get rid of standing water right now. Blot wet drywall with towels, then run a wet-dry vac over any puddles on the floor. The faster you pull out bulk water, the less time moisture has to soak into porous stuff.
-
Aim high-velocity fans at wet walls from multiple angles. Point fans so air smacks the wall surface directly, not parallel. Move them every 6 to 8 hours to hit different sections as wet spots dry. Use at least one fan per affected wall.
-
Run a dehumidifier with continuous drainage. Drop the unit somewhere central in the affected space. Keep it going 24/7, either emptying the bucket or hooking up a drain hose so it never shuts off. A 50 pint per day unit handles a single room. Bigger spaces need more capacity.
-
Control ventilation based on what’s happening outside. Open interior doors throughout your place to get air moving. Only crack windows if outdoor humidity is below 60 percent. When outdoor humidity climbs past 60 to 70 percent, seal up those windows or you’re just bringing in more moisture.
-
Keep indoor temp between 70 and 80 degrees. Warmer air holds more moisture and speeds up evaporation from wet surfaces. If it’s cool outside, use heat to keep the space warm while drying.
-
Test moisture levels daily with a moisture meter. Check multiple spots across the wet area and at least 2 feet above the visible water line. Compare to an unaffected wall in the same room. Write down numbers each day to track where you’re at. Only stop drying when readings match the dry reference area.
Here’s the reality on DIY timeframes. Drywall and baseboards dry in 3 to 4 days without cutting anything out when you use proper techniques, but only if you maintain airflow and dehumidification around the clock. Shutting equipment off overnight or skipping days stretches the timeline and bumps up mold risk. Surface dryness doesn’t mean the inner gypsum layer or wall cavity is dry. Keep equipment running until moisture meter readings confirm you’re done, then wait another 24 to 48 hours before sealing with paint or patching.
Essential Drying Equipment and Setup Requirements
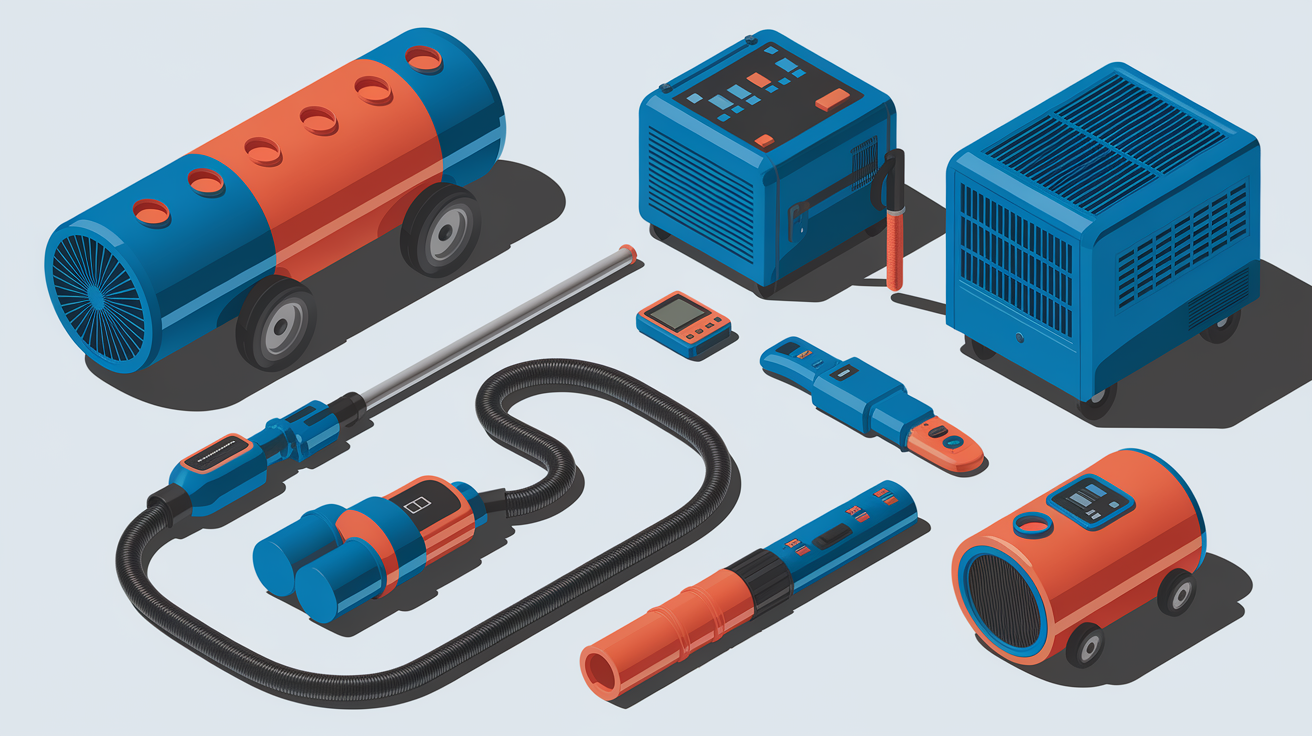
Equipment quality directly decides how fast drywall dries and whether this actually works without removal. Household box fans push some air across the surface but lack the volume needed for deep drying. Rental tools bridge the gap between basic home gear and full professional rigs. The right setup makes a 3 day job possible instead of a 7 day slog.
High velocity fans or air movers produce 1000 to 3000 CFM (cubic feet per minute) compared to 1000 to 1500 CFM from standard box fans. Rent these from equipment suppliers or home improvement stores. Position them 3 to 6 feet from wet walls, angled straight at the surface. Use one fan per wall section, more if you’ve got a large affected area.
Dehumidifier with adequate capacity rated for at least 50 pints per day for a single room, 70+ pints for larger spaces. Professional LGR (low grain refrigerant) dehumidifiers extract 100 to 140+ pints daily versus 30 to 50 pints from typical home units. Rent a commercial unit if the affected area goes beyond one room or saturation is heavy.
Moisture meter is essential for tracking actual dryness, not guessing by feel. Pin type meters use metal probes inserted into drywall to measure moisture at depth. Pinless meters scan the surface without creating holes. Both work. Expect to spend $30 to $80 for a basic pin meter, $100 to $150 for a quality pinless unit.
Wet-dry vacuum removes standing water from floors and baseboards faster than towels alone. Use it immediately after discovering the water damage, then again after the first few hours as more moisture wicks down from wet drywall.
Absorbent towels and materials for blotting water from wall surfaces and soaking up puddles. Old bath towels work. Wring them out and repeat until you stop pulling water from the surface.
Thermometer and hygrometer track indoor temperature and relative humidity. Aim for 70 to 80 degrees and humidity below 50 percent during active drying. A basic combo unit costs $10 to $20.
Heavy duty extension cords rated for continuous use. Fans and dehumidifiers run 24/7 for several days. Use 12 gauge or 14 gauge cords, not lightweight 16 gauge versions that overheat.
Safety equipment including rubber gloves, boots if standing water is present, and basic eye protection when moving furniture or working near wet areas.
Equipment placement matters as much as the tools. Fans angled toward the wall from 3 to 6 feet away create airflow across the surface without blowing so hard they scatter dust or damage loose texture. Dehumidifiers work best in a central location with doors open to adjacent rooms, pulling moisture from a larger air volume. Renting professional grade air movers and a commercial dehumidifier for 4 to 5 days costs $200 to $400 total but cuts drying time nearly in half compared to household fans. The faster you dry, the lower the mold risk and the sooner you get the space back to normal.
Monitoring Moisture Levels and Tracking Drying Progress
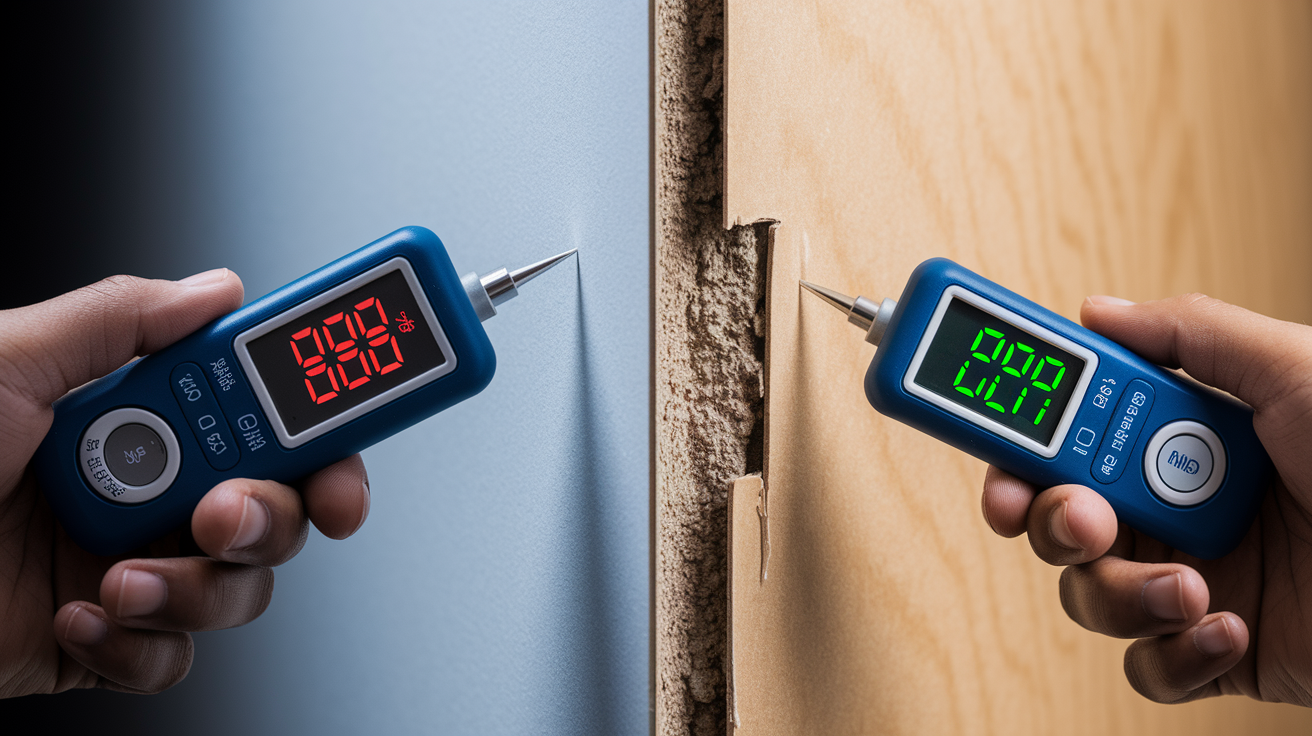
Drywall that feels dry to the touch might have an inner gypsum layer and wall cavity staying damp way longer. Surface dryness is misleading. Without a moisture meter, you’re guessing. Guessing wrong means sealing moisture inside walls where mold thrives. Moisture meters confirm proper dryness with wood framing at 10 to 12 percent moisture content and drywall matching unaffected areas. Daily readings show whether the drying process is working or equipment needs adjustment.
Pin type moisture meters use two metal probes inserted into the drywall. Push the pins in at a slight angle, about 1/4 to 1/2 inch deep, not just surface contact. Take readings at multiple points: near the floor where water soaked in, at mid wall height, and 2 to 3 feet above the visible water line. Water wicks upward through capillary action in drywall, often rising several feet above the visible wet surface. Test the same spots daily at roughly the same time. Write down the numbers. A reading that drops from 28 percent to 22 percent to 16 percent over three days shows progress. If numbers stay flat or rise, reposition fans or check that the dehumidifier is running continuously. Pinless meters scan the surface without creating holes. Hold the sensor flat against the wall and move it slowly. These detect moisture up to 3/4 inch deep. They work well for mapping the wet area and finding hidden damp spots, but pin meters give more precise measurements at depth.
Establish a baseline by testing an unaffected wall in the same room. That reading becomes your target. When the wet wall matches the dry reference area (usually 6 to 10 percent for interior drywall, 10 to 12 percent for wood framing), drying is complete. Don’t trust one reading. Test at least 5 to 10 points across the affected area. One high reading in a corner means moisture is still there even if the center of the wall is dry. Document everything: record moisture readings on a sketch or photo showing test locations, note the date and time, write down humidity levels and room temperature. Proper documentation includes psychrometric readings, moisture content readings, moisture logs, detailed sketches, moisture maps, and labeled photos with final readings and locations. This record protects you if problems show up later and supports insurance claims if you filed one.
Final verification requires patience. Once moisture readings stabilize and match the dry reference area, wait another 24 to 48 hours before sealing with paint, mud, or texture. Residual moisture deep in the gypsum core or wall cavity needs extra time to equalize. Paint and primer create a vapor barrier that traps any remaining moisture. Sealing too early leads to bubbling paint, staining, and mold growth weeks after you thought the problem was solved.
Assessing Damage Severity and Salvageability

Proper damage assessment before you start any drying determines whether you’re about to save the drywall or waste days trying to rescue material that needs replacing anyway. Salvage decisions hinge on water source, saturation duration, structural condition, and contamination level.
Conditions Favorable for In-Place Drying
Category 1 clean water from supply lines or condensate. This includes burst supply pipes, leaking water heaters, overflowing sinks with clean tap water, and AC condensation. Category 1 water is often dryable within a few days when you address it quickly.
Immediate detection and response within 24 to 48 hours. Small clean water leaks detected within hours typically dry in 24 to 48 hours with proper equipment. Speed prevents mold establishment and limits how deep water penetrates.
Limited saturation area affecting one wall or a section of a room. Small spills, localized leaks, and isolated incidents respond well to focused drying efforts.
No insulation involvement or minor wicking into open wall cavities. When water doesn’t heavily saturate insulation, drying the drywall alone often works. Water wicks up into drywall through capillary action but doesn’t significantly wet insulation in wall cavities when caught early.
No visible mold growth on paper facing or drywall surface. If mold hasn’t started, aggressive drying within the 24 to 48 hour window prevents it from forming.
Structurally sound material with no sagging, warping, or soft spots. Drywall that maintains its shape and firmness during and after water exposure can be dried and reused.
Water damage gets categorized by contamination level. Category 1 is clean water from sanitary sources. Category 2 is grey water from appliances like dishwashers, washing machines, or toilet overflow with urine. It may require partial demolition depending on exposure time. Category 3 is sewage, river flooding, and stormwater backup, which always requires removal and replacement due to hazardous contamination. The ANSI/IICRC S500-2021 Standard states that carpet and drywall are generally restorable when affected with Category 1 or Category 2 water, but Category 2 incidents need faster response and more thorough drying.
Critical Warning Signs Requiring Replacement
Visible mold on paper backing or drywall surface, especially dark spots or fuzzy growth. Mold on paper facing or behind walls requires removal and remediation, not just drying. Once established, surface cleaning doesn’t eliminate spores embedded in porous gypsum.
Structural softness or crumbling when pressed. Drywall sagging, crumbling, or structurally soft after drying attempts requires replacement for safety. Gypsum that disintegrates under light pressure has lost integrity.
Sagging or bulging, especially on ceilings. Ceiling sag indicates collapse risk. Don’t attempt removing sagging ceiling materials yourself due to significant water weight overhead.
Category 2 grey water or Category 3 sewage contact. Contact with sewage, river flooding, or stormwater backup always requires drywall removal. Contaminated water introduces bacteria and pathogens that drying alone doesn’t eliminate.
Prolonged saturation lasting weeks or months from slow leaks. Slow leaks wetting drywall for weeks or months create ideal conditions for mold growth deep within wall cavities, often invisible until you remove the drywall.
Persistent musty odor after drying efforts. Odor signals mold or bacterial growth inside the wall cavity or gypsum core that drying hasn’t resolved.
Extensive warping or delamination where paper facing separates from the gypsum core. Warped drywall doesn’t return to flat after drying. Delaminated paper facing creates an unstable surface for paint or texture.
Discoloration and staining that don’t fade as the material dries. Some water stains, especially from contaminated sources, remain visible even after moisture is gone, requiring replacement for appearance.
Wet insulation in exterior wall cavities. Insulated exterior walls require flood cuts removing both drywall and wet insulation since fiberglass and cellulose hold significant water. Drying drywall in place while wet insulation remains behind it fails.
Nail or screw pops creating bumps or cracks across the surface. Water weakens gypsum, causing fasteners to lose hold and push through the paper facing.
Mold begins forming within 24 to 48 hours if wet drywall and framing aren’t properly dried and dehumidified. The 24 to 48 hour timeline is the critical window. Catching water damage in the first 24 hours and starting aggressive drying gives the best chance of salvaging drywall. Waiting 3 days turns a drying job into a demolition and replacement project. Attempting to save severely damaged drywall creates health risks from mold exposure and long term structural problems including ongoing odor, hidden rot in framing, and cosmetic failure after repairs. When in doubt, test with a moisture meter after 3 to 4 days of drying. If readings remain high or mold appears, stop and remove the material.
Preventing Mold Growth During the Drying Process

Mold spores are always in the air, but they only colonize and grow when moisture, organic material, and time line up. Wet drywall provides the moisture and food source (paper facing and gypsum). The 24 to 48 hour window before mold spores establish is your chance to act. After 48 hours of continuous dampness, spores germinate and begin forming visible colonies. Aggressive drying within that window prevents mold from taking hold.
Environmental controls are the front line. Maintain indoor humidity below 50 to 60 percent using a dehumidifier running continuously. Mold thrives above 60 percent relative humidity. Keep air moving constantly with fans angled at wet surfaces. Stagnant air allows moisture to linger. Control temperature by maintaining the space at 70 to 80 degrees, which accelerates evaporation. Don’t let the room cool below 65 degrees overnight, as cool stagnant air slows drying and creates condensation. Opening windows when outdoor humidity exceeds 60 to 70 percent introduces moisture instead of removing it, especially in humid climates or after storms. Check outdoor conditions before ventilating. If outdoor humidity is high, keep the space sealed and rely on dehumidification alone.
Proper ventilation means continuous airflow without introducing additional moisture. Open interior doors to adjacent rooms so the dehumidifier pulls moisture from a larger air volume. This prevents the drying area from becoming a humidity trap where moisture laden air has nowhere to go. Keep wet areas isolated from unaffected rooms when possible, especially if mold odor develops. Minimize foot traffic through damp zones to avoid spreading spores. Containment basics include closing doors to hallways and sealing HVAC vents in the affected room so the central system doesn’t distribute airborne particles throughout the home.
Real world evidence shows that proper techniques prevent mold even under repeated exposure. A flood house used for IICRC training on a college campus has been flooded over 140 times with no mold growth in wall cavities or behind baseboards when proper drying techniques were used. Those results came from aggressive drying within 24 to 36 hours, continuous airflow, and humidity control below 50 percent. The key isn’t hoping mold doesn’t form but creating an environment where it can’t. Antimicrobial treatments are available for lightly affected surfaces, but they’re secondary to drying. No spray prevents mold if moisture remains. Use antimicrobial solutions only with Category 1 clean water situations after removing bulk moisture, and only as an additional precaution, not a substitute for thorough drying.
Special Considerations for Ceiling Drywall and Insulated Walls

Certain drywall scenarios present complications that slow drying or require alternative approaches beyond standard methods. Ceilings, insulated exterior walls, and hidden access areas each create unique challenges.
Ceiling Drywall Challenges
Ceiling drywall saturated with water holds significant weight overhead, creating collapse risk. Ceilings often require faster intervention with potential bracing to prevent collapse when saturation is heavy. A 4×8 sheet of half inch drywall weighs roughly 50 pounds dry. Saturated with water, it can weigh 100 pounds or more. Gravity pulls that weight downward, bowing the drywall away from ceiling joists. Don’t attempt removing sagging ceiling materials yourself due to significant water weight overhead. If a ceiling sags more than an inch, or if you see cracking along seams and fasteners, evacuate the area and call a professional immediately.
Drying ceiling drywall requires positioning fans to blow air upward at an angle. Gravity works against evaporation since moisture naturally wants to move downward through the material. Use multiple fans to create cross ventilation across the ceiling plane. Dehumidify aggressively. If the ceiling is wet from a roof leak or upstairs plumbing failure, check the attic or crawl space above for standing water or wet insulation. Drying the ceiling drywall from below does nothing if insulation above remains soaked. In most cases, ceiling water damage benefits from professional assessment. The safety risk from collapse and the difficulty of drying overhead material make DIY less practical.
Insulated Wall Cavities
Insulation acts as a sponge, holding moisture far longer than drywall. Fiberglass batts absorb water and compress, losing R value and taking days or weeks to dry even with air circulation. Cellulose insulation soaks up water like a paper towel and rarely dries without removal. Insulated exterior walls require flood cuts removing both drywall and wet insulation since fiberglass and cellulose hold significant water. When water enters an insulated wall cavity, the insulation traps moisture against the back side of the drywall and exterior sheathing, creating conditions for mold growth you can’t see or reach.
Early intervention makes a difference. Water wicks up into drywall through capillary action but doesn’t significantly wet insulation in wall cavities when caught within the first few hours. If you start drying immediately after a small leak, you may save the drywall and avoid insulation removal. If water sat for 12 to 24 hours or soaked the lower portion of a wall heavily, the insulation likely absorbed moisture and must come out. Drilling inspection holes near the floor and shining a flashlight into the cavity shows whether insulation is wet. If it is, drying the drywall in place fails. You need a flood cut 12 to 24 inches above the water line to remove both materials.
Hidden Access Areas
Walls behind cabinets, tile surrounds, and built-ins dry more slowly because airflow can’t reach them. A wall behind a kitchen base cabinet has limited access. Air from fans stops at the cabinet face. Moisture trapped behind the toe kick or between the wall and cabinet back lingers. These areas almost always dry more slowly, requiring toe kick removal or drilling access holes for airflow and inspection. Remove toe kicks by unscrewing or prying them loose, then angle a small fan toward the wall base. For tiled bathroom walls, water that reaches drywall behind tile usually means grout or caulk failure. Tile itself isn’t porous, but water travels through grout lines and soaks the drywall backing. You can’t dry behind tile without removing it in most cases.
Drilling access holes in less visible locations (inside closets, behind appliances, low on walls that will be covered by baseboards) allows insertion of moisture meter probes and provides ventilation into hidden cavities. Use a 1 inch hole saw. After drying, patch the holes with a small circle of drywall and quick setting mud. If moisture readings behind built-ins remain high after 5 to 7 days of aggressive drying, the hidden sections likely have wet insulation or saturated framing that requires demolition to access.
These situations may require alternative approaches beyond standard DIY methods. Ceiling sag risks injury. Wet insulation rarely dries in place successfully. Hidden areas often need partial demolition for access. Recognize when complications exceed DIY tools and safety limits, and seek professional assessment before wasting days on a drying attempt that can’t succeed.
Environmental Factors That Affect Drying Time
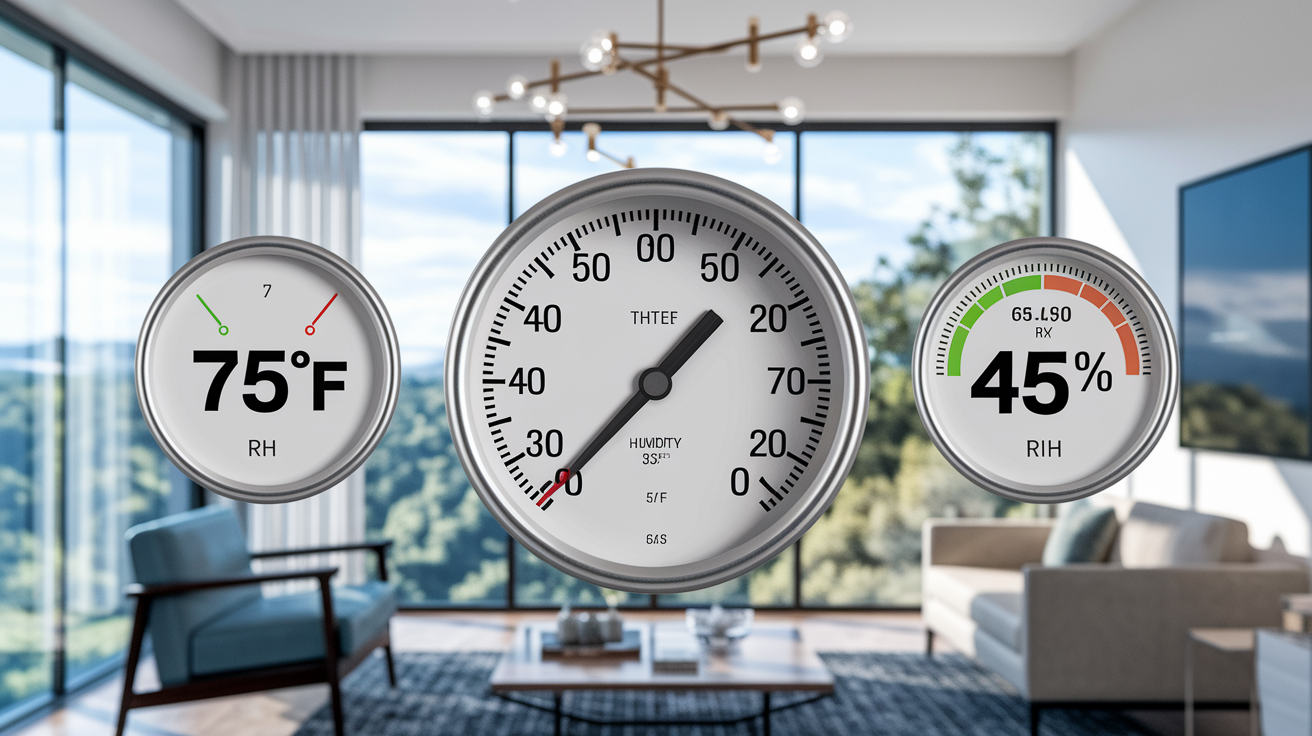
Temperature directly impacts how fast water evaporates from wet drywall. Warmer air holds more moisture, which accelerates evaporation from wet surfaces. Maintain indoor temperature between 70 and 80 degrees during the drying process. Every 10 degree increase roughly doubles the evaporation rate. If outdoor temperature is cool or the affected room is in a basement, use space heaters or central heating to keep the space warm. Don’t overheat past 85 degrees, as extreme heat stresses drywall tape and joint compound, but staying in the 70 to 80 degree range optimizes drying without causing secondary damage.
Humidity has a dramatic impact on drying time. Raising humidity from 50 percent to 90 percent at 55 degrees increases drying time by up to four times. High humidity means the air is already saturated with moisture and can’t absorb much more from the wet drywall. When relative humidity climbs above 70 percent, evaporation slows to a crawl. Dehumidifiers become essential instead of optional. In regions where humidity stays high naturally, such as Austin, Texas, where relative humidity climbs above 70 percent after storms and remains at 60 to 70 percent during spring and summer, natural evaporation stalls. Drying wet drywall in Austin without a dehumidifier running 24/7 extends timelines from 3 days to 7 or more.
Outdoor versus indoor humidity determines whether opening windows helps or harms the drying process. Opening windows when outdoor humidity exceeds 60 to 70 percent introduces moisture instead of removing it. After a rainstorm, outdoor humidity often spikes to 80 or 90 percent. Cracking a window in that condition brings humid air inside, which condenses on cool surfaces and rewets areas you’re trying to dry. Check outdoor humidity with a hygrometer or weather app before ventilating. If outdoor humidity is below 50 percent and temperature is warm, opening windows creates a cross breeze that assists drying. If outdoor humidity is above 60 percent, keep windows closed and rely on mechanical dehumidification. In dry climates, natural ventilation works. In humid climates, it sabotages the process.
Residential HVAC systems are designed for comfort, not structural drying. Central air conditioning removes some moisture as a byproduct of cooling, but it can’t remove moisture fast enough for water damage recovery. AC systems cycle on and off based on thermostat settings, meaning they stop dehumidifying when the temperature setpoint is reached. A commercial dehumidifier runs continuously, extracting 100+ pints of water per day. A residential AC might remove 10 to 20 pints per day under ideal conditions, and most of that goes into normal household humidity, not structural moisture. Running the AC helps slightly by maintaining lower humidity than no climate control, but it’s not a substitute for a dedicated dehumidifier. Relying on HVAC alone extends drying time significantly and often fails to dry materials completely.
Safety Precautions When Drying Water-Damaged Drywall
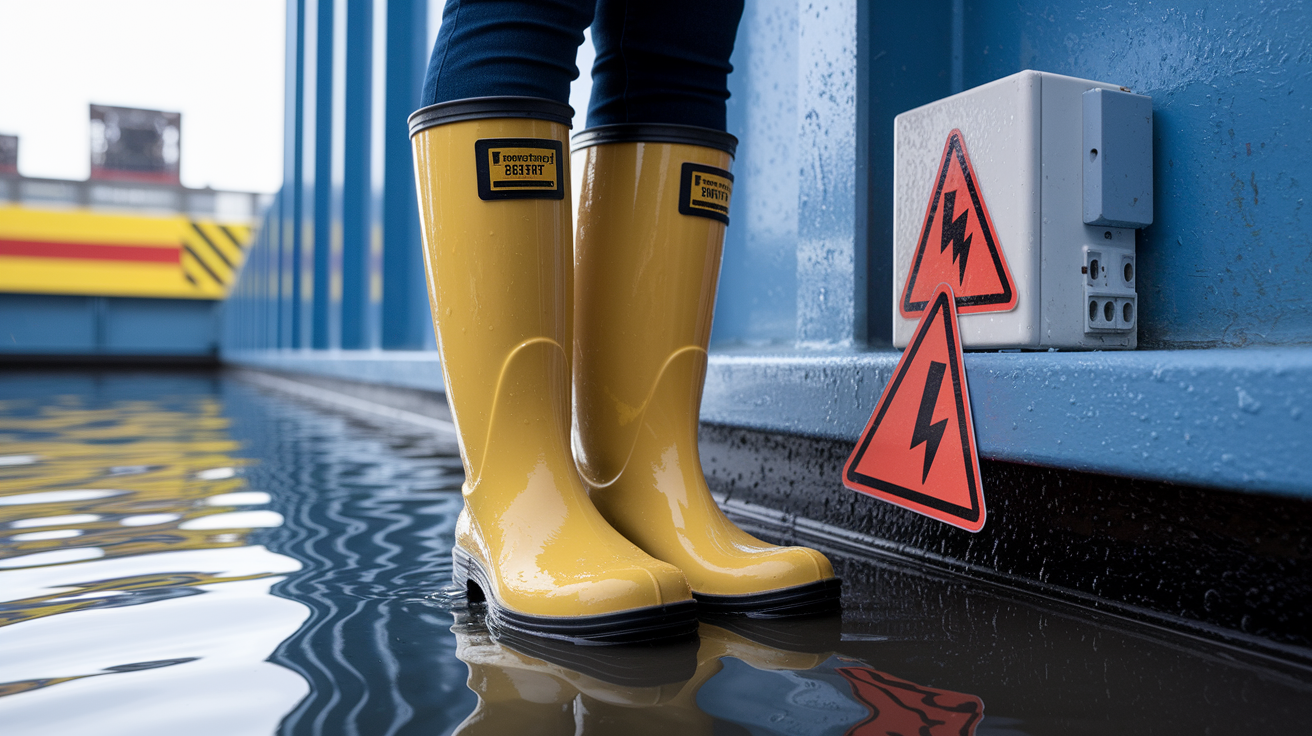
Safety must come before any drying effort. Water and electricity create lethal hazards. Structural instability from saturation, contamination from dirty water sources, and air quality concerns all pose risks that require attention before starting fans and dehumidifiers.
-
Assess electrical hazards and shut off power to affected circuits. Avoid walking through standing water near electrical outlets or appliances. If water reached outlets, switches, or appliance bases, turn off the breaker to that circuit. If the main electrical panel is in the flooded area, don’t enter. Call an electrician to safely disconnect power. Only restore power after the area is dry and a qualified person inspects the wiring.
-
Stop the active water source immediately. Stop water source safely by shutting off the supply valve or main water shut-off while waiting for professionals if the leak involves plumbing. For roof leaks, place tarps or buckets to catch dripping water and prevent further saturation. For appliance failures, disconnect water supply lines. Don’t start drying until the source is stopped.
-
Avoid standing in or touching standing water near outlets. Even small puddles conduct electricity. Wear rubber soled boots if you must enter the area, but stay away from anything electrical until power is off.
-
Wear appropriate protective equipment. Rubber gloves protect hands from contaminated water and cleaning chemicals. Boots keep feet dry and provide electrical insulation. Eye protection prevents splashes when moving furniture or using wet-dry vacuums. For Category 2 or 3 water, add an N95 respirator to filter airborne contaminants and spores.
-
Ensure adequate ventilation to prevent air quality issues. Running multiple fans and dehumidifiers creates airflow that stirs dust and particles. Open windows when outdoor conditions allow, or run exhaust fans to exchange air. If mold odor develops, increase ventilation and consider upgrading to an N95 mask while working in the space.
-
Inspect for structural instability before working. Look for sagging ceilings, bulging walls, or cracks in framing. Water saturated materials lose strength. If ceilings sag visibly or walls bow outward, evacuate and call a professional. Don’t attempt to prop or brace structural elements without proper knowledge and tools.
-
Know when to evacuate immediately. Heavy ceiling sag, strong sewage odor, visible electrical arcing or sparking, or gas odor require immediate evacuation. Call emergency services and let trained responders handle dangerous conditions.
Contaminated water scenarios require different safety protocols. Category 2 grey water from washing machines or dishwashers may contain detergents, grease, and bacteria. Wear gloves, avoid skin contact, and clean affected areas with disinfectant after drying. Category 3 sewage or floodwater contains hazardous pathogens. Don’t attempt DIY drying. Professional remediation with full PPE, antimicrobial treatment, and material removal is necessary to protect your health.
Timeline Expectations for DIY Drywall Drying
Drying time varies significantly based on saturation level, equipment quality, and environmental conditions. Understanding realistic timelines prevents frustration and helps you recognize when progress has stalled and adjustments are needed.
| Damage Scenario | DIY Timeline | Professional Timeline |
|---|---|---|
| Minor surface moisture from small spill or condensation | 24 to 48 hours | 12 to 24 hours |
| Small clean-water leak (supply line, minor overflow) detected within hours | 2 to 4 days | 24 to 48 hours |
| Moderate saturation affecting wall bases, several feet of drywall | 3 to 5 days | 2 to 3 days |
| Heavy saturation from burst pipe or major leak, full wall height | 5 to 7 days | 3 to 5 days |
| Hidden or long-term leak, multiple wall cavities, possible insulation involvement | 7+ days or requires removal | 3 to 7 days with selective demolition |
Drywall and baseboards dry in 3 to 4 days with no material removal when using proper techniques: continuous airflow, dehumidification below 50 percent humidity, and warm temperatures. That timeline assumes clean water, immediate response, and no insulation saturation. Moderate leaks soaking wall bases usually require 2 to 4 days of active drying. Major flooding or hidden long term leaks need 3 to 7 days or more, often with some sections requiring replacement rather than drying.
Factors that extend drying time include high outdoor humidity slowing evaporation, inadequate dehumidifier capacity for the affected area size, insufficient airflow from using only one or two household fans, cool temperatures below 65 degrees, and hidden moisture in insulation or wall cavities. Equipment failures like a dehumidifier reservoir filling and shutting off overnight can add an extra day or two. Stopping equipment for any reason pauses progress. The material doesn’t continue drying on its own in humid conditions.
Verification before repair is critical. Don’t trust surface dryness. After moisture meter readings match dry reference areas, wait an additional 24 to 48 hours before sealing with paint or texture. Residual moisture deep in the gypsum core or behind walls needs time to equalize and evaporate. Painting too early traps moisture inside, leading to bubbling, staining, and mold weeks later. Patience during verification prevents having to redo cosmetic work.
Preparing Surfaces for Repair After Successful Drying
Once moisture readings confirm complete drying, inspect the drywall surface for residual damage before moving to cosmetic repairs. Check for warping by sighting down the wall from an angle. Even slight bowing or waviness means the gypsum core shifted during saturation. Minor warping sometimes flattens under the weight of joint compound and paint, but noticeable bows require skim coating or replacement. Look for separation along seams where drywall tape has lifted or pulled loose. Water weakens the paper facing and mud bond. Tap along seams and corners. A hollow sound means the tape has separated and must be recut and remudded. Check for nail pops and screw pops by running your hand lightly over the surface. Bumps indicate fasteners that have pushed through the paper due to gypsum softening. Drive new screws 2 inches away from popped fasteners, then cover the old and new locations with joint compound.
Examine texture for damage. Knockdown, orange peel, and popcorn textures often slough off or become patchy when wet. Lightly sand any raised paper edges where the facing lifted but didn’t tear off completely. Use 120 grit sandpaper and a light touch. Over sanding removes too much facing and creates a fuzzy surface that shows through paint. Water stains and discoloration often remain even after moisture is gone. Tannins from wood framing, rust from fasteners, or mineral deposits from hard water create brown, yellow, or orange marks. These stains bleed through standard paint. Apply stain blocking primer over affected areas before painting. Use an oil based or shellac based primer rated for stain sealing. Two coats may be necessary for heavy staining. Texture matching requires practice and the right tools. For small areas, aerosol texture sprays work. For larger sections, rent a texture hopper and spray gun to match existing patterns.
Allow adequate time after moisture readings stabilize before sealing with paint. Wait 24 to 48 hours minimum, longer if environmental humidity is high. Paint and primer create a vapor barrier. If any residual moisture remains, it becomes trapped behind the coating and has nowhere to go except back into the gypsum core, where it creates blistering, bubbling, or mold growth. Final verification includes a last round of moisture meter tests across the affected area the day before painting. If readings still match dry reference areas after 24 to 48 additional hours, the material is safe to seal and finish.
Cost Comparison: DIY Drying vs Professional Restoration
The decision between DIY and professional help often comes down to cost savings versus speed, thoroughness, and peace of mind. DIY methods save money but require time, effort, and acceptance of longer drying periods.
Dehumidifier rental costs $40 to $80 per day depending on capacity. A 70 pint residential unit rents for $40 to $50 per day. A commercial LGR dehumidifier extracting 100 to 140+ pints daily rents for $60 to $80 per day. Expect 4 to 7 days of rental, totaling $160 to $560.
High velocity fan or air mover rental costs $20 to $40 per day per unit. You need at least two fans, sometimes four for larger areas. Budget $40 to $160 per day for fans. Over a 4 to 7 day drying period, that’s $160 to $1120 total.
Moisture meter purchase ranges from $30 to $150. Basic pin meters start at $30 to $50. Quality pinless meters cost $100 to $150. This is a one time purchase you keep for future use.
Electricity costs for extended operation add $20 to $50 depending on equipment and local rates. Running a dehumidifier and multiple fans 24/7 for a week uses 200 to 400 kWh. At $0.12 per kWh, that’s $24 to $48.
DIY time investment spans 3 to 7 days of active monitoring. You check moisture levels daily, reposition equipment, empty dehumidifier reservoirs, and manage the space. If your time has value, factor that into the cost equation.
Professional restoration services range from $500 to $3000+ depending on affected area size, water category, and equipment required. A single room clean water incident might cost $800 to $1500. Whole home flooding requiring multiple days of commercial equipment and selective demolition runs $2500 to $5000 or more.
Insurance coverage often makes professional help low out of pocket cost. Homeowner insurance typically covers sudden and accidental water damage from
Final Words
You can dry out drywall without removing it when you catch clean water damage early and commit to the process. Set up your fans and dehumidifier, monitor moisture levels daily with a meter, and give it the full 3-7 days it takes with household equipment.
But don’t skip the assessment step. If you’re dealing with contaminated water, visible mold, or sagging ceilings, stop and call a pro.
The difference between saving your drywall and creating a bigger problem comes down to honest evaluation and patient drying.
FAQ
Is it possible to dry out drywall?
It is possible to dry out drywall without removal when clean water damage is caught within 24-48 hours and proper equipment is used. Success requires aggressive airflow, humidity control below 50-60%, daily moisture monitoring, and typically 3-7 days for DIY methods or 24-72 hours with professional equipment.
Will mold always grow on wet drywall?
Mold will not always grow on wet drywall if aggressive drying begins immediately and dries the material completely within 24-48 hours. Proper techniques using dehumidifiers, high-velocity fans, and continuous airflow prevent mold establishment even in repeated flooding scenarios when applied correctly.
How do you get moisture out of walls fast?
Getting moisture out of walls fast requires stopping the water source, using high-velocity fans angled toward wet areas, running a dehumidifier with continuous drainage, maintaining temperature at 70-80°F, and opening interior doors for cross-ventilation. Avoid opening windows when outdoor humidity exceeds 60-70%.
How long does it take for drywall to dry out?
Drywall takes 3-7 days to dry out using household fans and dehumidifiers, or 24-72 hours with professional equipment. Small clean-water leaks caught immediately dry in 24-48 hours, moderate saturation takes 2-4 days, and heavy flooding requires 3-7 days or longer depending on conditions.
What moisture level indicates drywall is dry enough?
Drywall is dry enough when moisture meter readings match unaffected reference areas in the same room. Wood framing should read 10-12% moisture content. Wait 24-48 hours after readings stabilize before sealing surfaces with paint or other coatings to prevent trapping residual moisture.
Can you dry drywall with just fans?
You can dry drywall with just fans for minor surface moisture, but effective drying requires both fans and a dehumidifier working together. Fans alone provide surface evaporation but cannot reduce room humidity levels, which slows overall drying time significantly, especially in moderate to heavy saturation.
When should wet drywall be replaced instead of dried?
Wet drywall should be replaced instead of dried when contaminated water contact occurs, visible mold appears on paper backing, material becomes structurally soft or crumbling, or saturation lasted weeks to months. Category 3 water (sewage, flooding) always requires complete removal.
Does opening windows help dry wet drywall?
Opening windows helps dry wet drywall only when outdoor humidity stays below 60%. When outdoor humidity exceeds 60-70%, especially common after storms, opening windows introduces additional moisture into the space and dramatically slows evaporation instead of accelerating drying.
What equipment do you need to dry wet drywall?
To dry wet drywall you need high-velocity fans (300+ CFM), a dehumidifier rated for room size (50+ pint capacity preferred), moisture meter for tracking progress, wet-dry vacuum for standing water, absorbent towels, and basic safety equipment including rubber gloves and eye protection.
How do you know when wet drywall is completely dry?
You know wet drywall is completely dry when moisture meter readings taken at multiple points match dry reference areas, no cool spots exist when touching surfaces, and readings remain stable for 24-48 hours. Surface dryness to touch is misleading since inner gypsum layers dry slower.
Can wet insulation inside walls be dried in place?
Wet insulation inside walls cannot usually be dried in place because fiberglass and cellulose hold significant water and dry extremely slowly. When water wicks into wall cavity insulation, removal is typically necessary to prevent mold growth and achieve complete structural drying.
How much does professional drywall drying cost?
Professional drywall drying costs typically range from $500 to $3,000+ depending on affected area size, saturation severity, and equipment requirements. Many homeowner insurance policies cover sudden and accidental water damage, making professional services more affordable than out-of-pocket rental and time investment.
What causes drying to fail after water damage?
Drying fails after water damage when outdoor humidity introduction occurs through open windows, equipment runs insufficiently (stopping too early), moisture remains trapped behind sealed surfaces, airflow placement is inadequate, or reliance on HVAC alone without supplemental dehumidification. Insufficient daily monitoring also contributes to failure.
Should you remove baseboards to dry wet walls?
You should remove wet baseboards to dry walls because they block critical airflow into wall cavities where moisture accumulates. Leaving baseboards in place traps moisture behind trim, significantly extends drying time, and creates ideal conditions for hidden mold growth along wall bases.
What is the difference between Category 1, 2, and 3 water damage?
Category 1 water damage comes from clean sources like supply lines and is often salvageable with proper drying. Category 2 grey water from appliances may require partial removal. Category 3 water from sewage or flooding contains contamination and always requires complete drywall removal and replacement.
