

You can’t just slap drywall back on wet framing and hope it dries out later. It won’t. What you’ll get instead is mold growth behind closed walls, wood rot that weakens your structure, and repair bills that triple because you skipped the drying step. Wet exterior wall framing needs specific moisture levels before you close it up, not guesswork or a two-week wait. This guide walks you through how to test framing with a moisture meter, when to use fans versus dehumidifiers, and exactly what “dry enough” means in numbers you can verify before hanging a single sheet of drywall.
Drying Wet Exterior Wall Framing: Critical Moisture Thresholds
Moisture meter readings above 18% mean your framing’s too wet. Don’t close those walls yet. At this level, mold spores wake up and wood rot starts doing its thing. You’re shooting for 12% to 14% moisture content, ideally 12% or less, before you even think about hanging drywall or closing up the wall cavity. These aren’t random numbers someone pulled out of thin air. They represent the line between safe construction and problems that show up months or years down the road as mold, nail pops, cracks, and walls that won’t stop moving.
Different lumber needs different targets. Kiln-dried framing should hit 15% or lower before you close walls. Green or pressure-treated lumber can go up to 17%. Never eyeball it or assume “it’s been two weeks, must be dry.” Get a moisture meter and verify. The sections below walk through how to diagnose what’s happening and what actually works to dry things out.
Diagnosing Moisture Issues and Testing Wall Framing

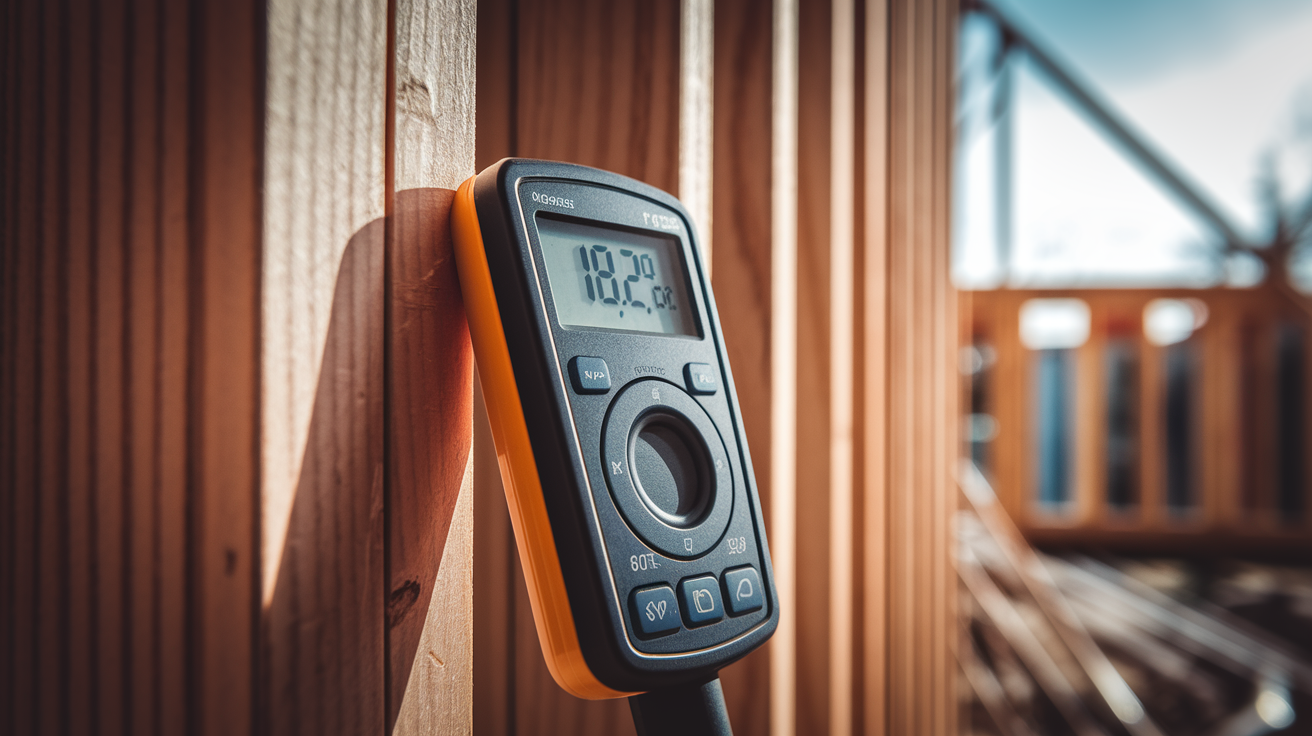
Pin-type moisture meters give you the most accurate readings for framing lumber. Basic models like the Extech MO220 run around $150 and let you calibrate for softwood or hardwood. High-end meters with data storage go for $500 or more. Pinless meters read moisture down to about 3/4″ depth and work great for scanning large areas fast, but pin-type meters tell you exactly what’s happening at specific depths and spots.
Bottom plates usually hold the most moisture because water runs down vertical studs and pools at the bottom. Moisture also wicks up from wet subfloors and gets trapped between the slab and sill plate. King studs (the full-height studs framing windows and doors) take forever to dry and shrink the most because they’re solid all the way through and stuck in that wall assembly position.
Test systematically. Check every 10th stud at chest height and at the bottom plate, then hit the bottom plate at every 4th stud. Use a permanent marker to write the moisture percentage and date right on each stud you test. You’ll rarely need more than three readings marked on any single piece as you track progress. This documentation matters when you’re figuring out where to move equipment and when framing’s actually ready to close up.
Before you start drying anything, find where water’s still getting in. Check for roof leaks where walls meet, failed window flashing, damaged housewrap, plumbing leaks behind walls, and condensation from HVAC equipment. Water intrusion can hide for two weeks or more before you see moisture problems. Drying framing while water keeps coming in just wastes your time and money.
Creating Access and Ventilation in Exterior Wall Cavities
Look at what you’re dealing with before you start cutting. If drywall’s not up yet, you’ve got direct access to framing. If drywall’s already installed, figure out whether you’re looking at limited moisture in a small spot (a few strategic holes might work) or widespread saturation requiring full drywall removal in affected sections. Check behind baseboards and around windows first. These spots usually show moisture problems earliest.
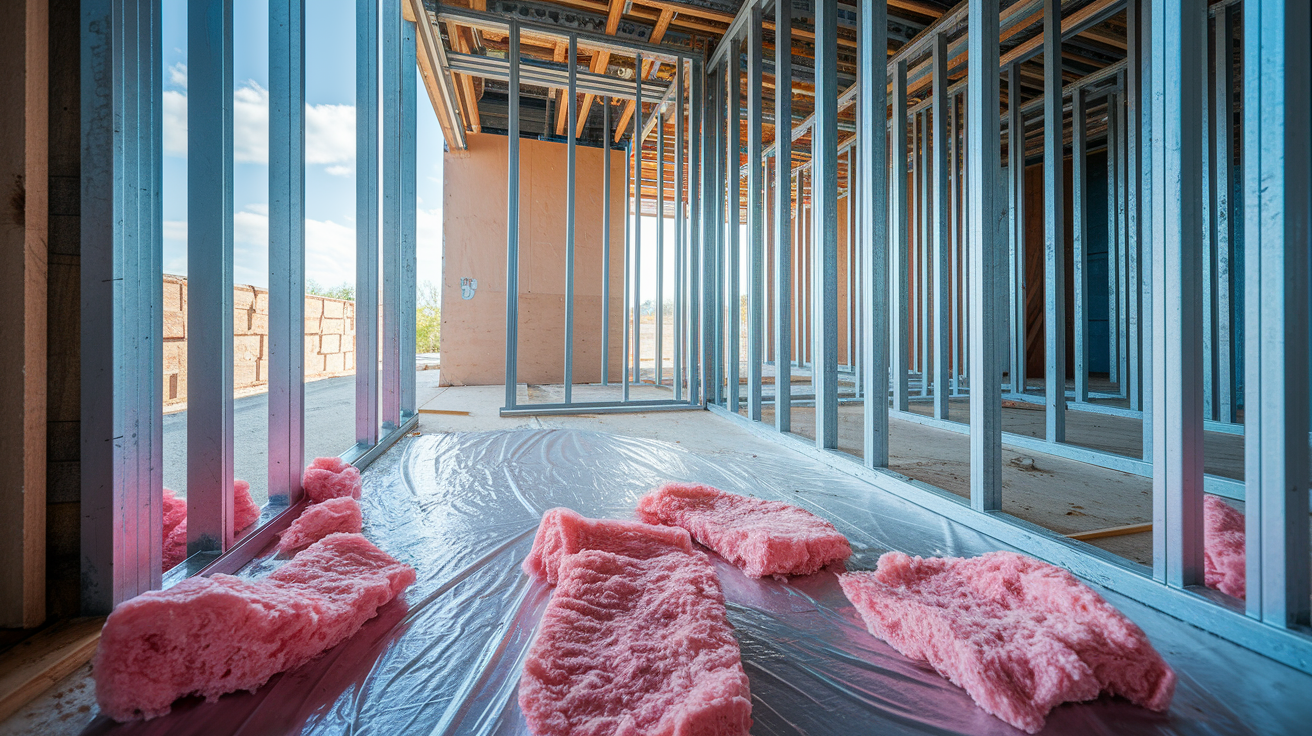
Pull wet insulation and vapor barriers immediately. Fiberglass batts turn into soggy sponges when wet and hold moisture right against the framing. Plastic vapor barriers on the interior side trap moisture in the wall cavity and stop it from drying. Wall systems with internal plastic vapor barriers combined with low-perm housewraps on the exterior create a moisture trap with nowhere for water to escape. Pull these materials out of any cavity that needs drying.
If walls are closed and moisture’s localized, drill 1-inch access holes near the bottom plate to get cavity drying equipment hoses in there. Space holes every 16 inches in affected bays. You’ll patch them later, but they let air move into closed cavities without ripping out entire drywall sections.
For exterior access, check your housewrap permeability. Low-perm housewraps (those with permeability ratings below 10 perms) stop moisture from drying outward through the wall assembly. In coastal and cooler climates where inward drying barely happens, vapor-open exterior membranes matter. Field testing’s proven that timber wrapped in high-perm materials dries way faster than lumber sealed behind low-perm barriers. If your wall won’t dry despite interior air movement and dehumidification, you might need to pull siding in affected areas to swap low-perm housewrap for vapor-open alternatives. That’s a big decision but sometimes necessary for walls that have been trapping moisture for months.
Air Movement Strategies for Wet Framing
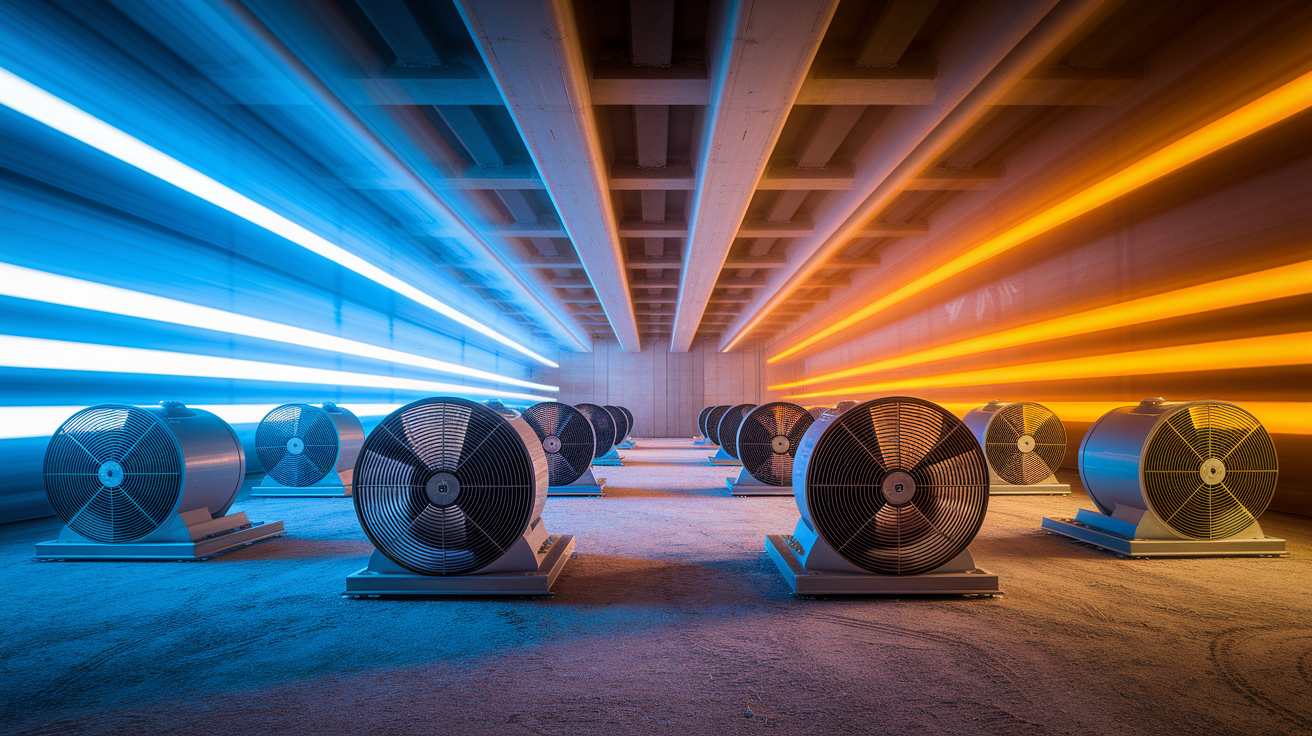
Air movement is your first tool when outdoor temps go above 45°F. Fans running 24/7 knock moisture content down by 0.5% to 1% per day under good conditions. Carpet blower fans and air movers create the high-velocity airflow you need to pull moisture from wood fibers and carry it out of the space. Standard box fans don’t cut it for structural drying.
Look for fans rated for at least 2,000 cubic feet per minute (CFM). The Quest C1000 two-speed fan moves 2,700 CFM and draws 2.4 to 2.8 amps on low and high settings, meaning you can run multiple units on a single 15-amp circuit. Commercial-grade carpet fans start around $300 to buy or $10 per day to rent, with monthly rental rates around $150.
Fan Placement and Operation:
Position fans to blow directly into wall cavities, not just across the room. Space multiple fans to create overlapping airflow patterns covering all wet framing. Chain or padlock fans to the framing to prevent theft on job sites where equipment runs overnight. Run fans continuously 24/7. Turning equipment off at night wastes drying time and stretches your timeline. Calculate fan needs based on square footage: a 2,500 square foot house typically needs 10 fans for effective preinsulation drying.
Running 3 to 4 fans drops moisture content by about 5 percentage points in one week when outdoor temps stay above 45°F. If you start with framing at 18% to 20% moisture content, one week of continuous fan operation should bring readings down to 14% or below in most conditions.
Check moisture content every 3 to 4 days and move fans based on your readings. Areas that dry fastest don’t need direct airflow anymore. Move those fans to sections still reading 17% to 18%. Focus on the slowest-drying components, typically king studs and bottom plates touching concrete.
Equipment rental costs run about $10 per day or $150 per month. For a typical one-week intensive drying operation with 3 to 4 fans, expect $200 to $300 in rental costs. Purchase makes sense if you’re a builder or contractor who hits wet framing regularly.
Dehumidification Methods for Exterior Wall Drying
When outdoor humidity goes above 60%, air movement alone stops working. At 100% humidity, air’s maxed out on water capacity and drying stops no matter how fast fans blow. Close all windows and doors and bring in dehumidification equipment to pull moisture from the air while fans keep moving air through wall cavities.
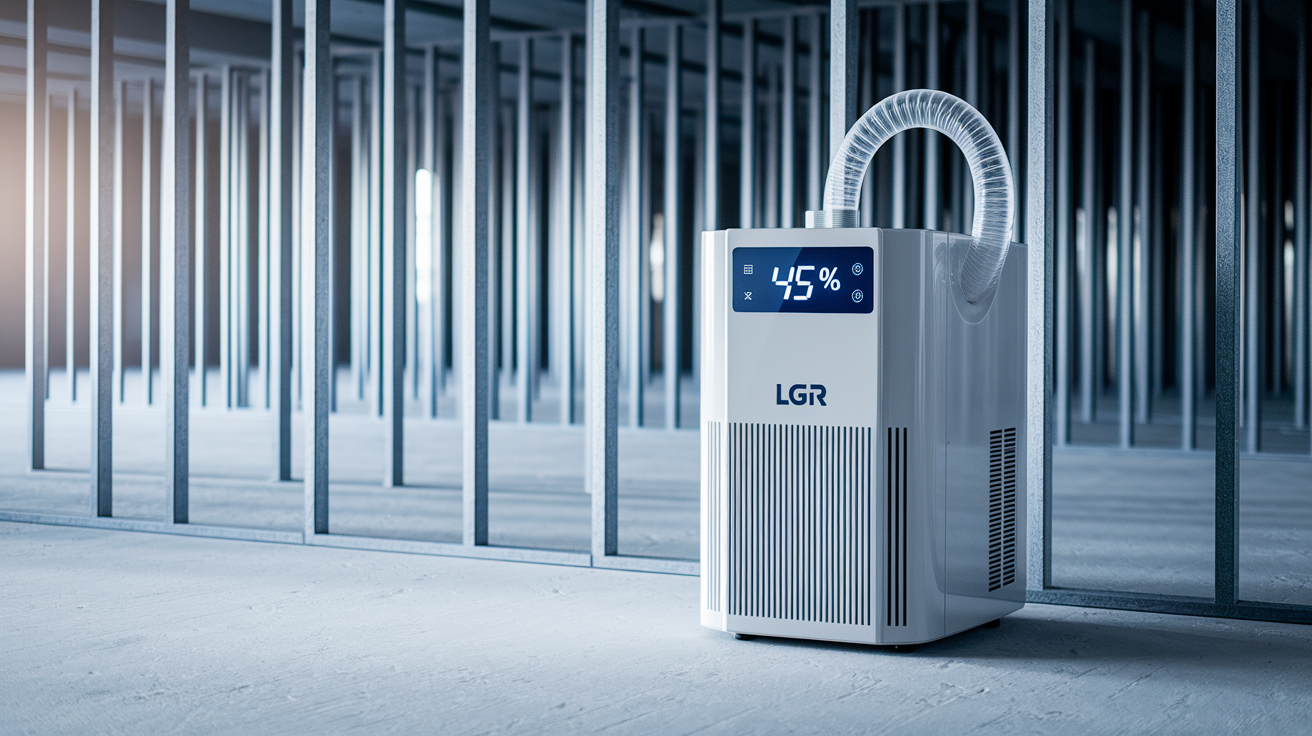
Professional LGR (Low Grain Refrigerant) dehumidifiers like the Dri-Eaz LGR Evolution and Quest PowerDry 4000 provide the capacity needed for structural drying. These units include built-in hygrometers with adjustable humidity settings from 30% to 70% relative humidity. For drying framing lumber, set your dehumidifier to 45% RH for maximum moisture extraction. If you’re also drying joint compound or paint, raise the setting to 55% RH to keep finish from cracking.
Running fans with a dehumidifier in moderate temps brings moisture content down roughly one week for a 5-percentage-point reduction, similar to fans alone in dry weather, but effective even when outside conditions won’t cooperate. The dehumidifier pulls moisture from the air, fans move that drier air through wall cavities, and the cycle continues until framing hits target moisture levels.
Set up continuous drainage for the dehumidifier’s water output. Most units include a pump and hose for routing water to a floor drain, sump, or exterior location. Empty bucket-style collection requires manual monitoring and wastes drying time when the unit shuts off because the bucket filled overnight. Plan your drainage path before starting equipment, and check the drain line daily to make sure it hasn’t kinked or clogged.
Monitor power draw when running multiple fans with a dehumidifier. A typical LGR unit draws 8 to 12 amps, and three fans add another 7 to 8 amps on high speed. That’s 15 to 20 amps total, too much for a single 15-amp circuit. Run equipment on separate circuits or reduce fan count to avoid tripping breakers. On job sites without adequate power, rent a generator with sufficient capacity and proper outdoor placement.
Heat Application for Frozen or Severely Wet Framing

Heat becomes necessary when outdoor temps drop below freezing, framing’s severely saturated, or you’re facing emergency flood damage that needs rapid drying. Frozen lumber won’t dry at all. Moisture stays locked in ice crystals until temperatures rise.
Never use propane heaters for structural drying. Propane combustion adds one gallon of moisture to the air for every hour of operation. You’re adding water while trying to remove it. Counterproductive and expensive. This same rule applies to kerosene heaters and any combustion equipment that exhausts into the drying space.
Indirect-fired diesel heaters rated for 90,000 BTU combust outside the building and blow hot, dry air through a heat exchanger into the drying area. External fuel tanks hold enough diesel to run units for up to 3 days without refueling. Trailer-mounted units like the Dri-Eaz Dragon X2 produce 100,000 BTU of dry heat and can be positioned outside while ducting carries heated air into the building. Earlier models produced 85,000 BTU, still sufficient for most residential drying operations.
Never use client furnaces for temporary construction heat. This voids equipment warranties and damages ductwork when construction dust and moisture get pulled through the HVAC system. External heaters blowing hot dry air into the building are required for proper drying in cold climates without wrecking mechanical systems.
Combine heat with fans and dehumidification for maximum effectiveness. Heat raises air temperature, which increases the air’s capacity to hold moisture. Fans move that warmer air through wall cavities. Dehumidification removes moisture from the heated air. Monitor framing temperature with an infrared thermometer to prevent overheating lumber above 100°F, which can cause resin bleeding, warping, and damage to engineered lumber products. Position heat sources to warm the space gradually rather than blasting framing with direct high-temperature air.
Monitoring Progress and Establishing Drying Timelines

Check moisture content every 3 to 4 days during active drying operations. Use the same test points you marked during initial assessment, every 10th stud at chest height and bottom plate, with additional bottom plate readings every 4th stud. Mark new readings on the studs with permanent marker and include the date. You’ll rarely need more than three readings on any stud as you track progress toward target moisture levels.
| Conditions | Equipment Used | Expected Timeline |
|---|---|---|
| Passive drying above 60°F | No equipment (natural drying) | 3 to 5 weeks |
| Passive drying in cold/rainy weather | No equipment (natural drying) | 6 to 12 weeks |
| Active drying above 45°F | 3 to 4 fans running 24/7 | 1 week for 5-point reduction |
| Active drying moderate temps with high humidity | Fans + dehumidifier | 1 week for 5-point reduction |
| Severe saturation or freezing conditions | Heat + fans + dehumidifier | Varies by saturation level |
Watch for drying that stalls. Moisture readings that plateau and stop declining even with equipment running. This often means moisture redistribution from deeper in the wall assembly (subfloor, sill plate, sheathing) back into the framing. Pull moisture readings from wall sheathing and bottom plates. If these materials stay saturated, they’ll keep rewetting studs as fast as you dry them.
Reposition equipment when readings show uneven drying. Areas reading 14% don’t need fans pointed directly at them anymore. Move those fans to sections still reading 17% to 18%. Focus dehumidification and airflow on the slowest-drying components, typically king studs, built-up headers, and bottom plates touching concrete.
Before closing walls, verify moisture content at multiple depths in framing members. Surface readings can lie. Drive moisture meter pins to full depth in studs and plates to confirm that moisture content is uniform through the wood thickness. Test random studs beyond your mapped points as a final check. One missed wet stud discovered after drywall installation means cutting walls open again.
Mold Prevention and Antimicrobial Treatment During Drying

Mold spores activate and rot begins when moisture content rises above 19%. This threshold is why immediate action matters when you discover wet framing. Every day above 19% increases the odds of established mold colonization. Rapid drying prevents mold from taking hold, but you need to inspect for existing growth before closing walls.
Look for visible mold on framing surfaces, behind insulation, on sheathing, and at sill plates. Surface mold appears as discoloration: black, green, white, or gray spots and fuzzy growth. Check areas with the highest moisture readings first. Use a flashlight at an angle to highlight texture changes on wood surfaces. Pull off any remaining insulation to expose the back side of studs and the sheathing surface behind the wall cavity.
If you find widespread mold covering more than 10 square feet, or if moisture readings have been above 19% for more than a week, consider professional mold testing before moving forward. Small isolated patches of surface mold can be treated during the drying process. Extensive colonization may require professional remediation to ensure complete removal and proper containment.
Antimicrobial treatments should be applied after moisture levels drop below 19% but before final enclosure. Treating wet wood traps moisture behind the chemical barrier and stops effective drying. Wait until moisture content reaches 16% to 17%, apply EPA-registered antimicrobial products following manufacturer instructions, allow surfaces to dry completely, then verify final moisture levels before installing drywall. Focus treatment on areas that showed the highest moisture readings and any surfaces with visible staining.
Remove materials that can’t be adequately dried or treated. Compressed fiberglass insulation that stayed wet for more than 48 hours, moldy paper-faced insulation, and delaminated OSB sheathing should be pulled and replaced. Dimensional lumber framing can usually be dried and treated unless wood shows advanced rot (soft, spongy texture when pressed with a screwdriver). The long-term consequences of failing to address moisture and mold properly are severe. Hidden damage appearing years later when repairs become invasive, disruptive, and exponentially more costly than addressing the problem correctly during construction or initial recovery.
Safety Precautions and Personal Protective Equipment

Electrical safety matters when running fans, dehumidifiers, and heating equipment near wet framing. Use only GFCI-protected circuits. Test GFCI outlets before connecting equipment. Route extension cords away from standing water and puddles. Even if water’s been extracted, damp concrete and wet subfloors conduct electricity. Hang cords on the framing rather than running them across the floor. Inspect cords daily for damage and replace any with frayed insulation or exposed wire.
Wear appropriate personal protective equipment when working with wet framing and mold-contaminated materials. An N95 respirator provides minimum protection against mold spores during inspection and light work. For extensive mold exposure or when applying antimicrobial treatments, upgrade to a half-face respirator with P100 filters. Wear nitrile gloves when handling moldy materials or chemical treatments. Safety glasses prevent splashes when spraying treatments. Long sleeves and pants protect skin from contact with contaminated materials and chemical irritants.
Assess structural integrity before loading wet framing. Saturated lumber loses stiffness and load-bearing capacity. Don’t store building materials on wet floor joists or subfloors until moisture content drops below 15%. Avoid unnecessary loading of walls with heavy equipment leaned against studs. Watch for obvious signs of structural distress: sagging, deflection, cracking at connections. Stop work immediately if framing shows movement or deformation. When moisture affects load-bearing walls or floor systems, bring in a structural engineer for evaluation before going forward.
Ventilation and air quality during drying operations require attention when using heating equipment or working in enclosed spaces with elevated mold activity. Indirect-fired heaters exhaust combustion products outside the building, but carbon monoxide detectors should be installed and monitored throughout drying operations. Never run generators inside enclosed spaces. When working in basements or confined areas with active mold growth, provide mechanical ventilation to prevent mold spore concentration from reaching hazardous levels.
Equipment and Tool Checklist for Drying Wet Framing
Equipment needs scale with the severity of water intrusion and your timeline. For isolated moisture in a few wall bays, you might need only a moisture meter and a couple of fans. Extensive saturation across multiple rooms requires industrial drying equipment and possibly heating systems.
Essential and Optional Equipment:
Pin-type moisture meter ($150 for basic models like the Extech MO220, $500 for high-end units with data storage and Bluetooth). Pinless moisture meter ($200 to $400) for rapid scanning of large areas. Industrial carpet blower fans or air movers (2,500+ CFM, $300 to purchase or $10/day to rent). Extension cords rated for job site use with GFCI protection. LGR dehumidifier (Quest PowerDry 4000, Dri-Eaz LGR Evolution, rental $50 to $75/day). Indirect-fired diesel heater (90,000 to 100,000 BTU, Dri-Eaz Dragon X2, rental $150 to $200/day). Thermal imaging camera ($300 to $1000 for handheld models, or rent for $75/day) to detect hidden moisture behind finished surfaces. Wet/dry vacuum or water extraction equipment for standing water removal before structural drying. PPE: N95 or P100 respirators, nitrile gloves, safety glasses, protective clothing. Documentation tools: permanent markers, camera, moisture mapping forms, notebook.
For typical residential projects with wet framing in exterior walls, 3 to 4 carpet blower fans handle air movement effectively. A company in Portland uses 10 fans for preinsulation drying of a 2,500 square foot house. Scale up for larger projects or when drying multiple floors simultaneously.
Rental economics favor short-term projects. At $10 per day per fan, one week of drying with 4 fans costs $280. Add a dehumidifier at $50/day and the weekly total reaches $630. For professional builders who hit wet framing regularly or restoration contractors handling multiple projects, purchasing equipment makes financial sense. One moisture meter and three fans total around $1,050, recovered in two projects compared to rental costs.
Source equipment from local tool rental centers (Home Depot, Sunbelt Rentals), specialized restoration equipment suppliers (Jon-Don, Dri-Eaz dealers), and online retailers. Understanding Moisture Meters provides detailed information on meter selection and operation for different wood species and applications. Choosing the Right Dehumidifier covers capacity sizing and features specific to structural drying versus general humidity control.
Identifying When Professional Restoration Is Required
Some moisture situations exceed DIY capabilities and require professional water damage restoration services. Extensive flooding affecting large wall sections across multiple rooms creates logistical challenges (equipment quantity, power requirements, and monitoring demands) that overwhelm homeowner resources. Category 3 contaminated water (sewage backup, rising floodwater) requires professional remediation with proper containment, PPE, and antimicrobial protocols beyond typical DIY scope.
If moisture readings won’t decline despite active drying efforts for more than one week, professional diagnostics can identify hidden water sources or building system problems blocking effective drying. Widespread mold contamination covering more than 10 square feet of wall surface requires certified mold remediation to ensure complete removal and prevent health risks during removal work.
Structural damage signs demand professional assessment: visible deflection in load-bearing walls, sagging floor systems, cracked foundation connections, or deformation at framing joints. When wet framing occurs in load-bearing walls (exterior walls, walls running perpendicular to floor joists above), engineering evaluation determines whether temporary shoring is necessary during drying and whether framing members require replacement. Don’t guess about structural integrity when moisture has compromised load-bearing components.
Insurance claim documentation requirements often necessitate professional restoration involvement. Certified water damage restoration companies provide detailed moisture mapping, photo documentation, equipment logs, and moisture tracking that insurance adjusters expect. Professional documentation also establishes a clear record for future buyers if you’re planning to sell the property: proof that water damage was addressed correctly rather than just covered up.
Cost-benefit analysis favors professional services when DIY equipment rental and time investment exceed restoration company charges, when liability concerns exist for rental properties (tenant displacement, habitability requirements, landlord responsibilities), and when certified restoration documentation adds value for resale purposes. Calculate your total DIY costs (equipment rental, electricity for 24/7 operation, time away from work, potential for mistakes requiring rework) against professional estimates. The gap is often smaller than expected for projects requiring more than one week of active drying.
Material Replacement Versus Salvage Decisions for Wet Framing
Visual and moisture-based assessment determines which framing members can be dried and salvaged versus which require replacement. Surface mold on otherwise sound lumber can be treated with antimicrobial products after drying. Deep mold penetration into wood grain (dark staining throughout lumber thickness, musty odor that persists after surface cleaning) indicates extensive colonization requiring replacement.
Warping and deformation beyond typical lumber tolerances means the member has moved during wetting or drying and won’t return to original dimensions. A stud bowed more than 1/4 inch from plane should be replaced. Drywall won’t hang flat and finish work becomes problematic. Delamination of engineered lumber products (OSB sheathing separating into layers, I-joist webs detached from flanges, LVL headers with visible glue line failure) requires replacement. These products rely on adhesive bonds that fail under prolonged moisture exposure and don’t recover even after drying.
Dimensional lumber framing versus engineered products respond differently to moisture. Solid 2×4 and 2×6 studs can typically be dried and salvaged unless rot has advanced (soft punky texture when probed with a screwdriver, wood that crumbles under pressure). Engineered products (I-joists, laminated veneer lumber (LVL), oriented strand board (OSB)) have lower tolerance for moisture exposure. Check manufacturer guidelines for your specific products. Most I-joist manufacturers void structural warranties if members stay wet for more than 48 hours.
Pressure-treated lumber has higher moisture tolerance than kiln-dried framing. Accept target moisture content of 17% or lower for pressure-treated sill plates and bottom plates rather than the 12% to 14% standard for kiln-dried studs. Pressure-treated material starts at higher moisture content from the treatment process and takes longer to reach equilibrium.
Long-term performance concerns should drive replacement decisions for borderline cases. If studs lose more than 5 percentage points of moisture content after drywall installation, resulting shrinkage causes nail pops, drywall cracks around window heads, floor and stair squeaks, interior trim joint separation, and caulk pulling. Once homes are occupied and HVAC runs for a year, studs typically reach equilibrium at 10% to 12% moisture content. Framing that gets enclosed at 18% will shrink significantly during the first year. Plan for finish problems or replace studs now. King studs take the longest to dry and shrink the most because of their solid cross-section. Consider replacing rather than drying if moisture content exceeds 20% and timeline is tight.
Compare replacement costs against extended drying time. At $8 to $12 per 8-foot stud, replacing 10 heavily saturated studs costs $80 to $120 in material. Extended drying to salvage those studs might require two weeks of additional equipment rental at $100 to $150 per week. Material cost exceeds drying cost in this scenario. Replace and move forward.
Common Water Intrusion Sources in Exterior Walls
Drying wet framing is pointless without stopping active water entry. Before investing in drying equipment and time, systematically identify the source of moisture and implement repairs. Water intrusion through weep holes can wet sill plates and baseboards undetected for 2 weeks or more before moisture readings reveal the problem. By then, mold has often established and damage has spread beyond the initial entry point.
Common Exterior Wall Water Intrusion Sources:
Roof leaks at wall intersections (chimney flashing, valley transitions, roof-to-wall connections). Failed window and door flashing (improperly installed head flashing, missing pan flashing, deteriorated sealant). Compromised siding and housewrap (torn building wrap, gaps at penetrations, improperly lapped seams). Plumbing penetrations and leaks (exterior hose bibs, service line entries, condensate drains). HVAC condensate line issues (clogged drains, disconnected lines, improper drainage). Grade and drainage problems (soil sloped toward foundation, splash-back from hard surfaces, clogged gutters). Weep hole backups in brick veneer walls (debris blocking drainage, flashing dams).
Visual inspection during rain events reveals active leaks that aren’t obvious in dry weather. Walk the exterior perimeter during or immediately after rainfall and watch for water entry points, overflowing gutters, splash patterns, and areas where water pools against foundation walls. Inside, look for water stains, active dripping, and moisture patterns on framing that trace back to specific entry locations.
Thermal imaging cameras detect hidden moisture paths not visible to the eye. Cool spots on interior walls during warm weather often indicate moisture accumulation. Darker areas on thermal images suggest retained water. Follow moisture trails from wet framing back toward the source using a combination of thermal imaging and moisture meter readings at strategic points.
Make temporary emergency repairs to stop water entry while you plan permanent solutions. Tarp roof leaks, seal window perimeters with temporary caulk, install temporary gutters to redirect water away from walls, and pump standing water from window wells. These stopgap measures won’t pass inspection or hold up long-term, but they prevent ongoing water entry while drying equipment runs.
Condensation issues are different from intrusion problems and require different solutions. Wall systems with internal plastic vapor barriers combined with low-permeability exterior housewraps trap moisture generated inside the home. In heating climates, warm moist interior air condenses when it contacts cold surfaces in the wall cavity. Vapor barrier problems and inadequate ventilation create ongoing moisture accumulation that returns even after drying. Past projects built with low-permeability housewraps trapped moisture, with timber reading wet months to a year after construction: evidence that system design, not just water intrusion, can cause chronic moisture problems. Address design deficiencies as part of your drying and repair strategy to prevent recurrence.
Cost Estimates and DIY Versus Professional Decision Framework
Typical DIY equipment costs for drying wet exterior wall framing include moisture meter purchase ($150 to $500 depending on features), fan rental for 3 to 4 units ($10/day per fan, $150/month long-term for each fan), dehumidifier rental ($50 to $75/day), and electricity consumption for 24/7 operation (approximately $3 to $5/day in electricity for 4 fans plus one dehumidifier). For a one-week intensive drying project, total DIY costs run $600 to $900 including equipment rental and electricity.
| Project Scale | DIY Cost Estimate | Professional Cost Estimate |
|---|---|---|
| Single room or small area (1 to 2 walls) | $300 to $600 | $800 to $1,500 |
| Multiple rooms (3 to 5 walls) | $600 to $1,200 | $1,500 to $3,000 |
| Whole floor | $1,000 to $2,000 | $3,000 to $5,000 |
| Extensive or structural damage | Not recommended DIY | $5,000 to $15,000+ |
Hidden costs impact the DIY versus professional decision beyond direct equipment expenses. Time investment for a one-week drying project includes initial moisture mapping (2 to 3 hours), equipment setup (2 to 4 hours), daily monitoring (30 minutes per day), repositioning equipment (1 to 2 hours every 3 to 4 days), and final verification before wall closure (2 to 3 hours). Total time commitment reaches 15 to 20 hours for straightforward projects: time away from work, family, or other responsibilities.
Mistakes requiring rework carry significant cost. Closing walls before framing reaches target moisture content leads to mold growth, drywall damage, and finish defects discovered months later when repair costs multiply by 5 to 10x compared to initial correction. Insurance deductible considerations also matter. If your deductible is $1,000 to $2,500 and professional restoration costs fall near that threshold, paying out of pocket for proper professional service versus going DIY with marginal results deserves careful evaluation.
Decision factors include project scale (DIY works for 1 to 2 walls, becomes impractical for whole floors), timeline urgency (professionals mobilize full equipment packages and staffing, DIY takes longer), skill level and comfort with equipment operation (running fans is straightforward, but heat and dehumidification require more technical understanding), and rental property liability concerns (tenant displacement, habitability requirements, and potential code enforcement scrutiny favor documented professional restoration).
Hybrid approaches combine DIY and professional elements. Professional assessment and moisture mapping ($200 to $400) provides expert diagnosis and baseline documentation. You then execute drying under guidance using rented equipment. Or you handle immediate water extraction and fan setup yourself, then bring in a professional for final verification and certification before closing walls. When to Call a Water Damage Pro provides detailed decision criteria. Budgeting for Flood Repairs covers cost estimation and financial planning for water damage recovery including contingencies for unexpected complications.
Final Words
Stop the water first, test the framing, then start drying. That’s the sequence that matters.
How to dry wet framing in exterior walls comes down to knowing your target moisture range (12-14% or less), picking the right combination of fans and dehumidifiers for your conditions, and checking progress every few days with a meter. Most projects take one to three weeks with active equipment. Cold weather or high humidity stretches that timeline.
Mark your studs as you go. Reposition fans when readings stall. Don’t close up walls until every test point hits your target, especially those bottom plates and king studs.
You can handle this.
FAQ
How do you dry out wet framing?
You dry out wet framing by using air movers and industrial fans to create continuous airflow across the wood surfaces, running the equipment 24/7 until moisture content drops to 12-14% or less as verified by a moisture meter. For humidity above 60%, close windows and add a dehumidifier alongside the fans to actively remove moisture from the air. Check moisture levels every 3-4 days and reposition equipment as needed.
How long does wet framing take to dry?
Wet framing takes approximately one week to dry when using 3-4 industrial fans in temperatures above 45°F, reducing moisture content by about 5 percentage points. Natural drying without equipment takes 3-5 weeks in warm weather above 60°F, or 6-12 weeks in cold and rainy conditions. Below-freezing temperatures dramatically extend drying time and require supplemental heat application.
What happens if framing lumber gets wet?
Framing lumber that gets wet and stays above 19% moisture content develops mold growth and wood rot, compromising structural integrity. If studs dry too quickly after wall closure and lose more than 5 percentage points of moisture, the resulting shrinkage causes drywall nail pops, cracks around windows, trim gaps, and floor squeaks. King studs take longest to dry and experience the most shrinkage.
How do you dry out a wet 2×4?
You dry out a wet 2×4 by positioning air movers to blow directly across the wood surface and running fans continuously until moisture meter readings drop to 12-14% or lower. Remove any insulation or vapor barriers blocking airflow, and if outdoor humidity exceeds 60%, operate a dehumidifier in the enclosed space. Test moisture content every 3-4 days and expect roughly 0.5-1% reduction per day with proper airflow.
What moisture content is too wet for framing?
Framing with moisture content above 18% is too wet and must be dried before enclosing walls. The target moisture range for safe wall closure is 12-14%, ideally 12% or less for dimensional lumber. Kiln-dried lumber should reach 15% or lower, while pressure-treated lumber can be enclosed at 17% or lower, always verified with a moisture meter rather than visual assessment.
Can you save wet framing or does it need replacement?
You can save wet framing if you dry it properly before moisture content stays above 19% long enough to cause rot or deep mold penetration. Framing with surface mold, minor warping, or temporary saturation is typically salvageable through systematic drying. Replace framing showing delamination, severe warping, visible rot, deep mold growth, or prolonged saturation that compromises structural integrity.
Where does moisture concentrate in wet walls?
Moisture concentrates at bottom plates in wet walls because water gravitates down vertical studs and bottom plates absorb moisture from wet subfloors. King studs around door and window openings retain moisture longest and shrink the most during drying. Check these areas plus the sheathing-to-stud interface when testing moisture levels, as these zones typically show the highest readings.
What equipment do you need to dry wet framing?
You need a pin-type moisture meter ($150-500) to verify dryness, 3-4 industrial air movers or carpet blower fans ($10/day rental or $300 purchase each), and a commercial dehumidifier when outdoor humidity exceeds 60%. For severe saturation or freezing conditions, add an indirect-fired diesel heater producing 90,000-100,000 BTU. Secure fans with chains to prevent theft during extended 24/7 operation.
When should you call a professional for wet framing?
You should call a professional for wet framing when moisture readings won’t decline despite active drying, when water involves sewage or Category 3 contamination, when extensive flooding affects load-bearing walls, or when structural damage like deflection or deformation appears. Professional restoration provides insurance documentation, certified moisture mapping, and engineering assessment for liability protection on rental properties.
How do you prevent mold while drying wet framing?
You prevent mold while drying wet framing by starting air movement and moisture removal immediately, before moisture content stays above 19% long enough for mold activation. Run fans and dehumidifiers 24/7 to rapidly reduce moisture levels, remove wet insulation that traps moisture against wood, and apply antimicrobial treatment to affected surfaces after moisture drops below 19% but before closing walls.
What causes exterior wall framing to get wet?
Exterior wall framing gets wet from roof leaks at wall intersections, failed window and door flashing, compromised siding or housewrap, plumbing leaks at wall penetrations, and water trapped between slab and sill plate. Low-permeability housewraps combined with interior vapor barriers trap construction moisture or condensation inside wall cavities. Water intrusion through weep holes can wet baseboards undetected for two weeks or more.
Do you need to remove drywall to dry wet framing?
You need to remove drywall to dry wet framing when insulation or vapor barriers block airflow, when moisture readings indicate saturation behind closed walls, or when visual inspection reveals mold growth. For minor moisture intrusion in accessible wall cavities, strategic access holes for cavity drying equipment may work. Full drywall removal provides fastest drying and allows proper mold inspection and antimicrobial treatment.
How much does it cost to dry wet framing yourself?
Drying wet framing yourself costs $150-500 for a moisture meter, $300-450 per month to rent 3-4 industrial fans at $10/day each, plus electricity for 24/7 operation and potential dehumidifier rental. A typical one-week drying project for a single room runs $200-400 in equipment rental. Extended projects requiring heating equipment, multiple dehumidifiers, or month-long timelines can reach $800-1,200 in DIY costs.
Can you use regular fans to dry wet framing?
You cannot effectively use regular household fans to dry wet framing because they lack the cubic feet per minute (CFM) airflow needed for structural drying. Commercial carpet blower fans moving 2,700 CFM and air movers designed for water damage restoration create the sustained, directed airflow necessary to reduce moisture content 0.5-1% per day. Regular fans won’t provide adequate air velocity or coverage for framing lumber.
What happens if you close walls with wet framing?
If you close walls with wet framing above 14% moisture content, trapped moisture causes mold growth and rot when levels stay above 19%. As studs dry in the enclosed wall cavity and lose more than 5 percentage points of moisture, shrinkage creates drywall nail pops, cracks around window and door openings, separated trim joints, pulling caulk, and floor squeaks throughout the structure.
