

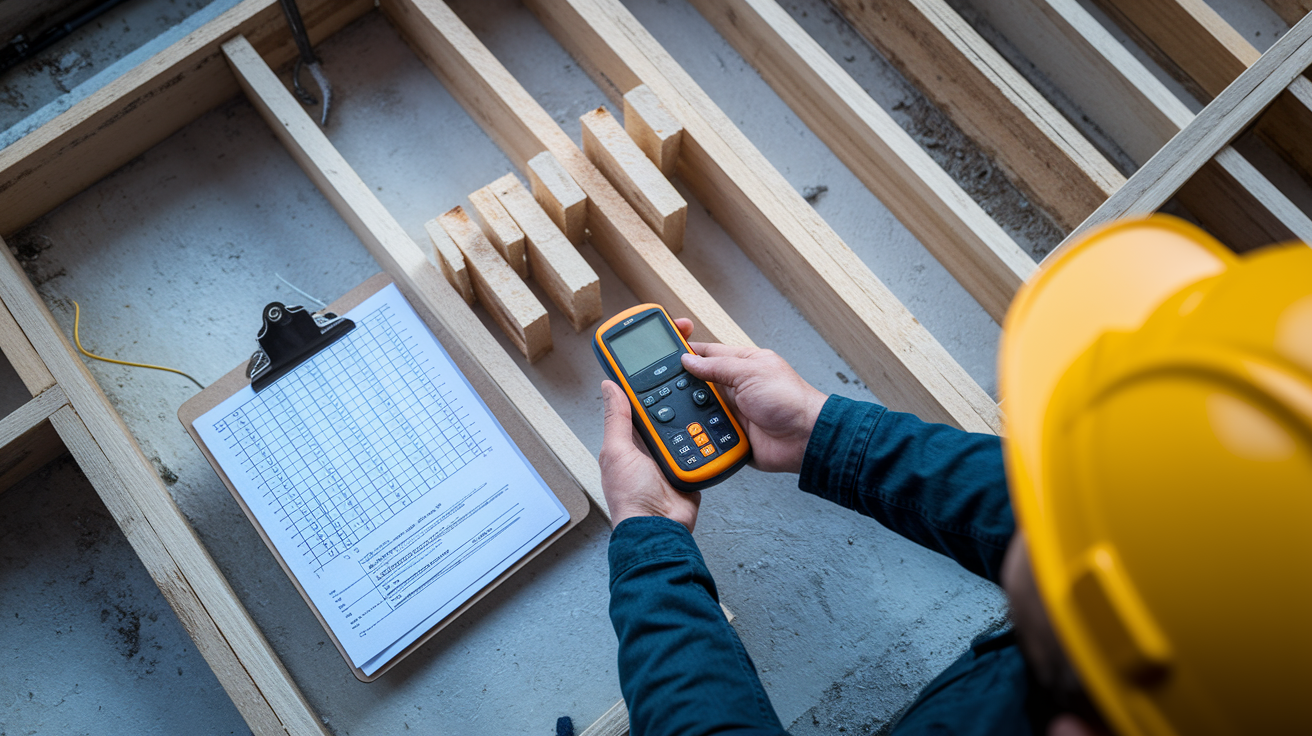
You can’t just slap drywall up and hope your framing’s dry enough. Closing in wet lumber causes problems that show up months later: nail pops, cracks at every seam, trim gaps you could slide a nickel through. A moisture meter gives you the actual numbers you need before you cover anything up, but only if you know what readings mean and where to test. This guide breaks down the safe moisture thresholds for framing, explains how pin and pinless meters read differently, and shows you exactly where to put that meter so you’re measuring what actually matters.
Acceptable Moisture Content Percentages for Wood Framing

You’re looking for readings between 9% and 14% if you want your framing dry enough to keep building. These numbers show moisture content percentage (MC%), which basically measures how much water’s in the wood compared to what it would weigh completely dried out. When your meter shows 12% MC, that means the water in that board weighs about 12% of what the bone-dry wood weighs.
Where you’re building changes the target. Phoenix or Albuquerque? Framing settles between 7% and 12% MC, usually around 9%. Humid coastal spots and most of the rest of the country? You’re looking at 9% to 14% MC, typically hitting 12%. Climate drives these differences. The wood eventually reaches equilibrium with whatever conditions it’s living in once you close up the building and get HVAC running.
Before drywall goes up, aim for 12% to 14% MC across your framing. Readings at or below 12% are better, giving you cushion against movement and shrinkage down the road. The closer your framing sits to its final moisture content before you seal it in, the less it’ll shift after finishes are installed. Studs, plates, joists—everything needs to hit this range before insulation, vapor barriers, or wallboard cover it up.
If your meter shows anything above 18% MC, stop. Don’t keep building, fix the moisture problem first. Framing that wet will shrink hard as it dries to equilibrium, causing nail pops, drywall cracks, joints pulling apart. Readings this high need active drying, not just waiting around.
Moisture content zones for framing lumber:
- Ideal range (6 to 12% MC): Fully dry, ready for anything, minimal shrinkage risk
- Safe range (12 to 15% MC): Good for most framing, move forward once you verify it’s stable
- Caution zone (15 to 19% MC): Keep an eye on it, maybe give it more drying time, check for moisture sources
- Problem threshold (19 to 20% MC): Over the IRC maximum of 19%, needs intervention, don’t close in walls
- Risk zone (above 20% MC): Decay and mold territory, major shrinkage potential, find and eliminate the moisture source now
Anything above 18% needs fixing before you close walls, hang drywall, or add insulation. That 19% threshold in building code is the absolute limit, not something to aim for.
Pin-Type vs Pinless Moisture Meters: Reading Differences

Pin and pinless meters measure moisture in completely different ways, which changes what they’re actually telling you about your framing. Both spit out moisture percentages, but they’re reading different parts of the same board.
Pin meters drive two metal probes into the wood and measure electrical resistance between them. More moisture means easier current flow between the pins. Most pin meters read shallow, typically the first 1/4 to 3/8 inch below the surface. This surface reading catches recent moisture and drying patterns but might miss what’s happening deeper in the board. Pin meters leave tiny holes where you test. Doesn’t matter on rough framing, might matter on exposed lumber. The pins work well for checking specific members and getting into tight spaces where you can’t fit a flat sensor.
Pinless meters use electromagnetic sensors that scan through the wood without breaking the surface. These read up to 3/4 inch deep, giving you a better picture of moisture distribution through the board’s thickness. That deeper reading matters when you’re checking thicker stuff like 2×10 joists or 4×6 posts. Pinless meters let you test lots of framing quickly since you don’t need to reposition pins every time. They work great when you’re checking multiple studs in a wall or scanning sheathing for wet areas.
| Meter Type | Reading Depth | Advantages | Limitations |
|---|---|---|---|
| Pin-Type | 1/4 to 3/8 inch surface penetration | Precise spot measurement, works in tight spaces, confirms surface drying, verifies specific moisture depth | Leaves pinholes, slower for volume testing, pins can bend or corrode, may miss deep moisture pockets |
| Pinless | Up to 3/4 inch electromagnetic scan | No surface damage, fast scanning, reads deeper moisture, good for large quantities | Requires flat contact surface, affected by metal fasteners, less precise for small areas |
The same board can give you different numbers depending on which meter you use. A 2×6 stud might read 11% MC on a pinless meter but 9% with pins. This happens when the surface dried faster than the core, which is normal after a few days of ventilation. The opposite pattern (pin readings higher than pinless) means moisture’s trapped at or near the surface, maybe from recent rain or condensation. Moisture stuck between a sill plate and concrete foundation often creates the biggest reading gap. Pin readings from the top of the sill plate might show 14% MC while a pinless meter pressed against the side reads 19% because it’s detecting the wetter zone where wood contacts the slab.
Where to Take Moisture Readings on Framing Lumber

Reading location changes your result. The same 2×4 can show three different moisture contents depending on where you put the meter, and only one of those readings matters.
Test the center section of each board, both lengthwise and across its thickness. Wood ends dry faster than the middle because end grain exposes more cell structure to air. Edges dry faster than centers for the same reason. A board might read 10% MC at the cut end and 16% MC at mid-span. The center reading represents the bulk of the wood and predicts how that member will act once it’s behind drywall. For studs, measure at chest height or mid-wall. For joists, test at mid-span away from bearing points. For plates (top, bottom, sill), take readings along the flat face away from splice joints or corners where air circulation creates edge drying.
Different framing members need different attention. Wall studs usually dry evenly if the wall’s getting good airflow, so testing every third or fourth stud captures the pattern. Bottom plates and sill plates need more readings because they touch the subfloor or foundation, creating moisture traps. Check sill plates every 6 to 8 feet, testing both the top face and one end grain. Floor joists need testing at mid-span and near any plumbing penetrations where leaks may have happened. Laminated beams (glulam, built-up beams, engineered headers) need multiple readings along the entire length since each piece may have come from different stock with different moisture histories. Ridge beams, valley rafters, and any structural member carrying serious load should get checked at three points minimum: both ends and center.
Specific framing member testing locations:
- Center section of board length: Test 2 to 4 feet from either end, mid-span on joists, mid-height on studs
- Thickest cross-section: Put the meter on the widest face, not the narrow edge where drying happens fastest
- Multiple spots per member: At least three readings on any board longer than 8 feet or thicker than 2×6 nominal
- Sill plates near foundation contact: Test top face and end grain separately, check every 6 to 8 feet along the run
- Both faces of suspect boards: If one reading seems high, flip the board and test the opposite face to verify
- End-grain for comparison: Take one end-grain reading for reference, expect it to read 1 to 3 percentage points higher than face grain on the same board
Don’t test within 12 inches of board ends. Skip edges and corners. If you’re seeing unexpectedly low readings, check whether you’re testing the part of the lumber that’s been getting the most air movement. That’s not the moisture content that matters once the wall’s closed up.
Species Correction Factors for Framing Wood

Most moisture meters don’t actually read wood directly. They measure electrical resistance and convert that resistance to a moisture percentage using a built-in calibration curve. The meter’s factory calibration assumes you’re testing Douglas fir. If you’re testing something else, the meter may show a number that’s off by a few percentage points.
Dense hardwoods conduct electricity differently than softwoods, creating consistent reading errors. A moisture meter reading 10% on red oak might actually be measuring 12.5% to 13% true moisture content. The meter’s Douglas fir calibration underreports the actual moisture because oak’s density and cell structure create higher electrical resistance. Most framing lumber (SPF, hem-fir, southern yellow pine, Douglas fir) falls within a narrow enough density range that calibration error stays within 1 to 2 percentage points. That error’s small enough to ignore for framing. But if you’re using denser species for structural posts, beams, or specialty framing, the error widens to 3 to 5 points.
Good news for most framing work is that SPF (spruce-pine-fir), hem-fir, and southern yellow pine all read close enough to the Douglas fir baseline that no correction is needed. A meter showing 13% MC on an SPF stud is within 1 percentage point of true moisture content, which is accurate enough for making drywall decisions. Douglas fir obviously needs no correction, that’s what the meter’s calibrated for. Southern yellow pine reads slightly low (maybe 1 point) because it’s denser than Douglas fir, but the difference is negligible. If you’re testing pressure-treated southern yellow pine or hem-fir, the treatment chemicals affect readings more than species correction factors, so don’t try to correct for species on treated lumber.
Engineered lumber and laminated products throw a bigger wrench into meter accuracy. Laminated veneer lumber (LVL), engineered I-joists, parallam beams, and oriented strand board (OSB) can’t be accurately read with standard pin meters because the glue layers and strand orientation mess up electrical resistance patterns. Some manufacturers provide moisture content specs at installation time, those are more reliable than trying to test the material yourself with a standard meter. If you must verify moisture content on engineered products, use pinless meters when possible and understand the readings are approximations.
Understanding Equilibrium Moisture Content in Framing

Equilibrium moisture content (EMC) is the moisture percentage wood settles into based on the relative humidity and temperature of its environment. Framing lumber doesn’t stay at whatever moisture content it had when you bought it. The wood constantly swaps moisture with the air until it reaches equilibrium with the space around it.
Where you’re building changes the target EMC. In Phoenix, where indoor relative humidity averages 10% to 30% year-round, wood framing eventually dries down to 6% to 9% MC once the building’s enclosed and conditioned. In Savannah, where summer relative humidity tops 75%, that same framing would stabilize at 12% to 14% MC. If you install framing at 18% MC in Phoenix, that lumber will shrink hard as it dries to its 7% equilibrium point. You’ve just built in 11 percentage points of moisture loss, which translates to noticeable dimensional change. Studs shrink across their width. Plates pull apart at splices. Drywall cracks and fasteners pop. On the flip side, if you install framing at 9% MC in a humid coastal climate, the wood will swell as it absorbs moisture and reaches 13% equilibrium. That swelling can create different problems: tight doors, buckled flooring, compressed insulation.
The EMC target shifts with the seasons, but enclosed conditioned buildings smooth out the extremes. Outdoor lumber exposed to weather stabilizes between 12% and 18% MC depending on season and rain exposure. Once you close in the building and run HVAC, the interior EMC narrows to a tighter range. Most finished homes maintain indoor EMC between 8% and 12% MC across seasonal swings. That’s why your pre-drywall target of 12% to 14% MC works well in most climates. It’s close enough to final interior EMC that dimensional change stays minimal after enclosure. The closer your framing moisture content is to its final EMC before you close things in, the less movement you’ll deal with later.
Wood shrinks most when moisture content drops more than 5 percentage points. Framing lumber installed at 19% MC (the IRC maximum) will shrink down to 9% to 14% equilibrium in most conditioned spaces. That 5 to 10 point drop creates measurable dimensional change, especially in horizontal members like wall plates and floor joists. The bottom plate of an 8-foot wall section can shrink 1/8 to 3/16 inch across its width as moisture content drops from 19% to 10%. Multiply that across multiple horizontal members in a building and you’re looking at accumulated shrinkage that shows up as nail pops, drywall cracking, and trim gaps. Check out the DIY moisture mapping guide for strategies on identifying problem areas and tracking where moisture sources are concentrated before beginning drying efforts.
How to Interpret Moisture Meter Readings Correctly
One reading doesn’t tell you much. You need multiple data points to understand whether your framing’s dry enough or whether you’ve got a moisture problem that needs attention.
Start with a testing plan that covers representative quantities. Test at least three boards in each wall section or floor zone. If you’re checking a 12-foot wall with 16-inch-on-center studs, that’s eight or nine studs total—test three of them, spread across the wall length. One reading per stud gives you a single number. Three readings per stud (bottom, middle, top) tell you whether moisture’s consistent through the member or whether you’ve got moisture concentrated at one end. Testing three studs per wall tells you whether the whole wall’s at the same moisture content or whether one area’s wetter than the others. Scale this up based on project size. A 1,200-square-foot framing job might need 40 to 50 readings to properly characterize the lumber. Sounds like a lot, but each reading takes 15 seconds. Ten minutes of testing catches problems that cost thousands to fix later.
A pattern tells you what’s happening. If all readings across multiple studs, plates, and joists come back between 11% and 13% MC, your framing’s dry and consistent. Move forward. If all readings are high (everything coming back at 17% to 19% MC) you’ve got a job-wide drying issue. The lumber was delivered wet, or weather got to it, or the building’s holding humidity. You need general drying intervention (fans, dehumidifiers, time, heat). If most readings are in the 12% to 14% range but a few scattered boards show 18% to 21% MC, you’ve got mixed mill runs or different species mixed into the same delivery. Those high boards need to be identified, marked, and either replaced or isolated and monitored separately.
Gradient patterns point to moisture sources. If sill plates read 18% MC but wall studs at 4 feet high read 13% MC, moisture’s wicking up from the foundation. If floor joists near a bathroom read 19% MC but joists 8 feet away read 12% MC, you’ve got a plumbing leak or ground moisture coming through the subfloor at that location. When you see rising moisture content as you move toward one area of the building, you’ve found your source. Fix the source, then dry the framing. Readings that jump all over the place on the same board (14%, 19%, 13% in three spots on one joist) suggest either meter problems, contaminated wood surface, or uneven drying where one side of the member got more airflow than the other.
Common Causes of High Moisture Readings in Framing

Before you start drying lumber, find out why it’s wet. Throwing fans and dehumidifiers at wet framing wastes time and money if the moisture source is still active.
Moisture gets into framing during construction more often than you’d think. Lumber delivered “kiln-dried” may have been rehydrated during transport or outdoor storage at the supplier yard. A stack of 2×6 studs sitting in the rain for two days before delivery can jump from 12% MC to 20% MC. Framing left exposed during construction picks up moisture from rain, snow, or morning dew. Even covered framing can collect condensation if tarps trap humid air against the wood overnight. Poor site drainage concentrates water near the foundation, creating splash-back onto bottom plates and rim joists. If your foundation trenches or crawl space aren’t graded to drain away from the building, you’re pumping ground moisture into your sill plates every time it rains.
Foundation moisture causes some of the most stubborn high readings in framing. Concrete slabs and poured foundation walls release moisture for weeks to months after the pour. Sill plates installed on fresh concrete wick moisture directly through the wood-to-concrete contact surface, especially if you skipped the sill sealer or foam gasket. A sill plate reading 19% MC with studs above it reading 13% MC isn’t drying slowly, it’s actively absorbing moisture from below. Crawl space humidity drives moisture up through rim band joists and subfloors in homes without proper vapor barriers or ventilation. Basements with wet soil against foundation walls create vapor drive that pushes moisture through the concrete and into the framing on the interior side. Temperature differences between warm, humid outdoor air and cool foundation walls create condensation directly on the framing, especially in summer months before HVAC is running.
Common moisture sources in framing:
- Green lumber not kiln-dried: Check delivery tags, verify moisture content before accepting loads, reject lumber above 19% MC on delivery
- Rain exposure during framing: Tarps that don’t ventilate, standing water on subfloors, soaked top plates and headers left uncovered overnight
- Ground contact or splash-back: Bottom plates too close to grade, inadequate foundation clearance, mud splatter onto rim band during rain
- Concrete foundation moisture wicking through sill plates: Fresh concrete, missing sill sealer, capillary action pulling water up through wood-to-masonry contact
- Poor site grading: Water pools near foundation, French drains not installed or clogged, gutters dumping directly at building perimeter
- Condensation from temperature differentials: Warm humid air contacting cold framing, summer conditions in unconditioned buildings, basement rim joists in humid climates
- Plumbing leaks: Supply line leaks in walls, drain leaks in floor systems, testing leaks during rough plumbing pressure tests, valve leaks at fixtures
Identify which of these applies to your situation before you start the drying process. If the source is still active, drying is temporary. The framing reabsorbs moisture as fast as you remove it.
Drying Strategies When Framing Reads Too High

Stop construction when moisture meter readings exceed 18% MC. Do not install insulation, vapor barriers, drywall, or sheathing over framing that wet. Your first priority is eliminating the moisture source. Your second priority is creating conditions that let the wood release moisture to the air.
Passive air drying works when outdoor conditions cooperate. Open windows, open doors, remove tarps that block airflow. Ventilation lets humid air escape and brings in drier air to absorb moisture from the wood. When outdoor temps stay above 60°F and outdoor relative humidity stays below 60%, passive drying drops moisture content at roughly 1 percentage point every 4 to 6 days. Framing at 18% MC takes 3 to 5 weeks to reach 14% MC under good passive conditions. Cold and rainy weather extends that timeframe a lot. When outdoor temps drop below 50°F or rain keeps outdoor humidity above 70%, passive drying slows to 6 to 12 weeks for the same 4-point moisture reduction. Below 32°F, lumber takes forever to dry without active intervention because cold air holds very little moisture and wood releases moisture slowly at low temperatures.
Active air movement with fans speeds up drying by constantly replacing the humid air layer around the wood surface with drier air. Carpet blower fans, box fans, or industrial air movers positioned to blow across framing members increase evaporation rates. When outdoor temps stay above 45°F, continuous fan drying drops framing moisture content at 0.5% to 1% per day. One week of continuous fan operation typically reduces moisture content from the 18% to 20% range down to 14% or below. Position fans to create cross-ventilation through wall cavities and floor systems. Blow air horizontally along walls rather than straight at them. Move air through the building from one end to the other, pulling outdoor air in one side and pushing humid air out the other. If you’re moving a lot of water out of framing quickly (like after emergency water removal from a plumbing failure or weather event) expect to run fans for 5 to 10 days before moisture readings drop into the acceptable range.
Dehumidification becomes necessary when outdoor humidity exceeds 60% or when outdoor air is colder than indoor air. Close the building and run commercial dehumidifiers to pull moisture directly from the air. A closed building with dehumidifiers running creates a controlled drying environment where you can reduce interior relative humidity to 30% to 40%, forcing moisture out of the wood much faster than passive ventilation. Combine dehumidification with fans for fastest drying. Fans move moisture from wood to air, dehumidifiers remove moisture from air. This combo works in cold weather, rainy conditions, and high-humidity climates where passive drying’s too slow. Monitor moisture meter readings daily during active drying. When framing consistently reads 15% MC or below across multiple test locations over two consecutive days, you’ve reached the target. Chain and padlock fans to the framing and run them 24/7 during the drying process. Fans left on job sites disappear otherwise.
Moisture Meter Calibration and Accuracy Checks
Your moisture meter’s only useful if it’s giving you accurate readings. Meters drift out of calibration, probes corrode, batteries weaken, and sensors get damaged. Verify accuracy before you start testing framing and again if readings start looking wrong.
Most meters include a calibration check procedure in the manual. Some meters come with a reference block or calibration verification plate, a small piece of material with a known electrical resistance that should produce a specific reading. If your meter reads the reference block correctly, the electronics and calibration are working. If it doesn’t, you need to recalibrate or replace the unit. Some pin meters have a zero-adjust screw or button that lets you recalibrate to the reference standard. Pinless meters usually require factory recalibration if they drift. You can create your own field calibration check by testing a piece of kiln-dried lumber with a verified low moisture content, then retesting the same board in the same spot every few weeks. Consistent readings over time mean the meter’s stable. Readings that creep upward or downward on the same dry board indicate drift.
Battery condition affects accuracy more than most people realize. Weak batteries reduce the current flowing through pin probes, which makes the meter read artificially low. If your meter’s showing 9% to 10% MC on lumber that feels damp to the touch or shows visible moisture staining, check the battery. Replace batteries before you start a testing session, not after you’ve taken 30 readings that might all be 2 to 3 percentage points too low. Probe damage also skews results. Bent pins, corroded pin tips, or oxidized probe surfaces increase electrical resistance and create erratic readings. If you’re getting 3 to 4 point fluctuations on repeated readings from the same spot, clean the probe tips with fine sandpaper or a wire brush. Steel wool works but can leave conductive residue. Wipe probes clean after polishing.
| Problem Sign | Likely Cause | Solution |
|---|---|---|
| Stuck readings, identical numbers across different boards and species | Locked calibration mode, damaged electronics, internal sensor failure | Check meter settings for calibration lock, attempt factory reset per manual, replace meter if reset fails |
| Erratic jumping numbers, 3 to 4 point fluctuations on same test spot | Oxidized or bent probe tips, corroded pins, poor pin contact with wood | Clean probe tips with fine sandpaper, straighten bent pins, replace probe assembly if cleaning doesn’t fix it |
| Consistently low readings in cold conditions, all readings 2 to 3 points lower than expected | Cold wood increases electrical resistance, weak battery reducing current flow | Warm wood to 50°F or above before testing, replace meter battery, add 2 to 3 percentage points to readings taken below 40°F |
| “HI,” “OL,” or overflow error displays on dense wood or engineered lumber | False overflow from low electrical conductivity in very dense species or glue-laminated products | Switch to pinless meter for dense materials, consult manufacturer moisture specs for engineered products, verify wood is not actually saturated |
Temperature affects pin meter readings. Pin meters read 2% to 3% lower in wood below 50°F because cold increases electrical resistance. If you’re testing framing in winter before heat’s on, expect readings to underreport actual moisture content. Add 2 to 3 percentage points to cold-wood readings or warm the wood to room temp before testing. Pinless meters are less affected by temperature but still work best at moderate temps.
Building Code Requirements and Inspector Expectations

The International Residential Code (IRC) Section R319 sets 19% moisture content as the legal maximum for lumber used in wood framing. This isn’t a recommendation, it’s the code requirement. Framing lumber above 19% MC doesn’t meet code and can be rejected by building inspectors. The Canadian Wood Council uses the same 19% threshold as the definition of “dry” lumber for structural applications.
Professional builders target 15% MC or below despite the 19% code allowance because they understand what happens after the framing’s enclosed. Lumber at 19% MC is legally compliant but still wet enough to cause problems. That lumber will shrink 4 to 9 percentage points as it dries down to equilibrium with conditioned interior air. The shrinkage causes nail pops, drywall cracks, gaps in trim, and warranty callbacks. Builders who want to avoid callbacks and maintain quality reputations aim for 12% to 15% MC before closing in walls. The extra margin between 15% and 19% protects against localized wet spots that didn’t get tested and against seasonal humidity increases between framing and finish work.
Documentation protects everyone. Keep a timestamped log of moisture meter readings with board locations and dates. Record readings when lumber’s delivered, again when framing’s complete, and a final time before drywall installation. Note the meter model and calibration status. Photograph the meter display showing readings on representative members. This documentation serves multiple purposes: it proves to your building inspector that framing meets code, it establishes a baseline for warranty claims if moisture problems appear later, and it protects you against liability if the homeowner claims you installed wet lumber. Builders have successfully defended against warranty claims by producing moisture meter logs showing framing was at 13% MC when drywall was approved, which proves the moisture problem developed after their work was complete.
Building inspectors increasingly request moisture meter verification before approving drywall rough-in inspections, especially in humid climates and during wet construction seasons. Some jurisdictions now require written documentation of framing moisture content as part of the inspection record. Even where it’s not required, having the data available speeds up inspections and demonstrates professional practices. Test representative quantities. You don’t need to document every board, but you should have enough readings to characterize each zone of the building. Three to five readings per room or wall section is usually sufficient for inspection purposes.
Consequences of Installing Finishes Over Wet Framing
Wet framing doesn’t improve with time once you close it in. It gets worse. Enclosing moisture behind drywall, insulation, and vapor barriers traps that moisture in a space with limited air exchange, creating the conditions for mold growth, rot, and structural movement.
Structural and finish failures start showing up within weeks to months. Drywall cracks appear at corners, along ceiling lines, and above door openings as framing members shrink and pull away from fasteners. Nail pops appear as studs shrink in width and release their grip on drywall screws. Door and window openings warp as vertical studs shrink differently than horizontal headers and sills, throwing frames out of square. Floor joists shrink in height, creating dips and uneven surfaces in the floor above. Roof truss uplift separates interior partition walls from ceiling drywall as bottom chords of trusses shrink and lift. Open joints appear in trim and baseboards as wall plates shrink and wall height decreases. Loose joints and fastenings develop as wood members pull away from connectors, joist hangers, and structural fasteners. In extreme cases, plumbing stacks running through floor framing can shift as joists shrink, breaking soldered joints or loosening push-fit connections and causing water leaks inside finished walls.
Mold and rot risks become serious when framing above 15% MC gets enclosed in a low-airflow cavity. Wood at 15% to 20% MC in a closed wall cavity with poor ventilation provides enough moisture to support mold growth on the wood surface and on adjacent paper-faced drywall. Add warm temps (70°F to 85°F, common in walls during summer) and mold establishes within 48 to 72 hours. Mold on framing doesn’t usually threaten structural integrity right away, but mold on drywall paper destroys the paper facing and requires drywall replacement. Prolonged exposure to moisture above 20% MC starts wood decay, especially in rim band joists, bottom plates, and any framing in contact with concrete or near plumbing penetrations. Once decay starts, structural capacity drops and repair costs escalate.
Real-world cost examples show why moisture verification matters. A builder in Atlanta installed 1,200 square feet of white oak flooring at 12.8% MC in a newly constructed home with HVAC not yet balanced and indoor humidity still at 65%. Within 8 weeks, 60% of the planks showed visible cupping as the flooring absorbed ambient moisture and swelled. Replacement costs ran $9,200 for materials, labor, and subfloor remediation. A framing contractor in Houston closed in walls on a custom home with framing lumber averaging 22% MC (3 percentage points above the IRC maximum) due to schedule pressure during a wet spring. Mold growth appeared on interior wall framing within 5 months. Mold remediation, drywall replacement, and reframing costs totaled $11,500. These aren’t edge cases, they’re predictable outcomes of installing finishes over wet substrates.
Special Considerations for Pressure-Treated and Engineered Lumber
Pressure-treated lumber and engineered wood products create specific challenges for moisture meter accuracy. Standard calibration doesn’t work the same way on these materials, and the readings you get need different interpretation.
Pressure-treated lumber is chemically saturated. The treatment process forces copper, alkaline quaternary compounds, or other preservatives deep into the wood structure along with the water carrier. Those chemical salts change the wood’s electrical resistance, causing pin-type moisture meters to read artificially high. Freshly treated lumber often shows 25% to 35% MC on a moisture meter even though the wood isn’t structurally wet. The meter’s reacting to the conductive chemicals, not just the water. Pressure-treated sill plates and bottom plates routinely read 18% to 25% MC immediately after installation but will dry over time. In good ventilation conditions, treated lumber exposed to air on all sides dries to 12% to 15% MC within 4 to 8 weeks. Treated lumber in contact with concrete dries slower, expect 8 to 16 weeks to reach equilibrium. You can’t reliably use a moisture meter to verify when treated lumber’s dry enough for construction to proceed. Instead, rely on time and conditions: 6 to 8 weeks after installation in warm weather with good airflow, or 10 to 12 weeks in cold or damp conditions.
Engineered lumber products (laminated veneer lumber LVL beams, engineered I-joists, parallel strand lumber PSL, glue-laminated beams glulam, and oriented strand board OSB) can’t be accurately tested with standard resistance-based pin meters. The adhesive layers between wood strands or veneers disrupt electrical conductivity in unpredictable ways. A pin meter might show 14% MC on an LVL beam that’s actually at 9% MC, or it might show 22% MC on a properly dry I-joist simply because the pins are bridging a glue line. Pinless meters work slightly better on engineered products because they average moisture across a larger scan area, but accuracy’s still questionable. Most engineered lumber manufacturers provide moisture content specifications at the time of shipment. Those specs are more reliable than field testing. If you must verify moisture content on engineered framing, check the manufacturer’s published guidance and use that as your baseline rather than field meter readings.
Laminated structural beams (built-up beams made from multiple 2x members spiked together, glulam beams, LVL headers) require testing each layer separately when possible. Drive pins deep enough to reach past glue lines into solid wood, or test each board from the side before assembly. A built-up beam made from three 2×10 boards might have one dry member at 11% MC sandwiched between two wet members at 18% MC. Testing the assembled beam gives you an average that hides the problem boards. Test before you assemble, reject wet stock, and build structural beams only from lumber that meets your moisture target.
Pre-Drywall Moisture Verification Checklist
This final verification step prevents costly failures and
Final Words
Moisture meter readings for dry framing aren’t guesswork. They’re how you protect yourself from tearing out warped drywall, dealing with mold growth, or spending thousands on emergency remediation.
Stick to the 12–15% range before you close up walls. Test multiple spots. Track your readings. If numbers don’t look right, stop and dry it out.
That extra week with fans running saves you months of repair headaches later. You’ll know the framing is ready when the meter confirms it, and your project can move forward without hidden moisture waiting to cause problems.
FAQ
What is the acceptable moisture level in wood framing?
The acceptable moisture level in wood framing ranges between 9 and 14 percent MC, depending on your geographic location. Dry regions like the Southwest average 9 percent MC (7-12 percent range), while humid coastal areas and most other US regions average 12 percent MC (9-14 percent range). Before hanging drywall, target 12-14 percent MC, with 12 percent or less being ideal.
What is a normal reading on a moisture meter?
A normal reading on a moisture meter for framing lumber falls between 9 and 15 percent MC, with regional variations. Readings in the 6-12 percent range are ideal, 12-15 percent is safe for most applications, and anything above 15 percent requires attention. For pre-drywall checks, aim for readings at or below 12 percent MC to prevent future shrinkage and movement issues.
Is 25 a high damp reading?
A moisture meter reading of 25 percent MC is extremely high and indicates serious excess moisture that requires immediate attention. Wood at 20-28 percent MC faces significant risk of decay and mold growth. At 25 percent, framing is too wet for any finish work and needs active drying with fans and dehumidifiers before construction can safely proceed.
How do you read a moisture meter for drywall?
Reading a moisture meter for drywall involves taking multiple measurements across the surface and interpreting the numbers based on the material being tested. For drywall installed over wood framing, verify the framing reads 15 percent MC or below before installation. Take at least three readings per area, avoid edges and corners that dry faster, and look for consistent patterns rather than relying on single measurements to confirm the substrate is ready.
Where should I take moisture readings on framing lumber?
Take moisture readings at the center of boards rather than ends or edges, which tend to be drier and give false low readings. Test the thickest cross-section, multiple spots along each member’s length, and both faces of suspect boards. For sill plates, measure near foundation contact points where moisture wicking occurs, and always test representative quantities based on project size.
How long does wet framing take to dry?
Wet framing typically takes 3-5 weeks to dry naturally when outdoor temperatures stay above 60 degrees F. In cold or rainy weather, expect 6-12 weeks without intervention. Active air circulation with fans speeds drying to 0.5-1 percent MC reduction per day, meaning one week of continuous fan operation can drop moisture from 18 percent down to 14 percent or below.
Why do pin-type and pinless moisture meters give different readings?
Pin-type and pinless moisture meters give different readings because they measure at different depths and use different technologies. Pin meters read surface moisture at shallow penetration (leaving small pinholes), while pinless meters use electromagnetic sensors to read up to 3/4 inch deep. Trapped moisture between surfaces like slab and sill plate can create significant discrepancies between the two meter types on the same board.
Do I need to adjust moisture meter readings for different wood species?
Most softwood framing species (SPF, southern yellow pine, Douglas fir) require minimal species correction, typically within 1-2 percent of the meter’s Douglas fir baseline calibration. Hardwoods and dense exotic species need more significant adjustments, with errors of 2-4 percent on hardwoods and 3-5 points on exotics. Most pin meters ship calibrated to Douglas fir, so dense species may underreport actual moisture content.
What causes high moisture readings in framing after construction?
High moisture readings in framing stem from green lumber not properly kiln-dried, rain exposure during framing, ground contact or splash-back, concrete foundation moisture wicking through sill plates, poor site grading, condensation from temperature differentials, and plumbing leaks. Moisture can become trapped between slab and sill plate or in enclosed cavities, causing readings to stay elevated even when surfaces appear dry.
What happens if I install drywall over wet framing?
Installing drywall over wet framing leads to nail pops, drywall cracks, warped door openings, uneven floors, loose joints, and potential mold growth in enclosed cavities. Framing above 15 percent MC in low-airflow spaces supports mold development. Shrinkage from wet framing drying after enclosure causes finish failures, with real-world remediation costs ranging $6,500-$11,000 for flooring replacement and $8,000-$14,000 for mold treatment.
How do I know if my moisture meter is working correctly?
Verify your moisture meter is working correctly by testing it on reference blocks or known-MC samples, checking battery condition, and looking for consistent readings across multiple tests on the same spot. Stuck readings showing identical numbers across different boards suggest calibration problems or damaged probes. Erratic 3-4 point fluctuations on the same spot indicate oxidized or bent probe tips requiring cleaning.
Can I use a regular moisture meter on pressure-treated lumber?
Regular moisture meters read artificially high on pressure-treated lumber because chemical salts affect electrical resistance. Pressure-treated sill plates and bottom plates commonly read 18-25 percent MC immediately after installation but will dry to 12-15 percent over weeks to months depending on ventilation and contact with concrete. Expect longer drying times and verify readings stabilize before closing in treated framing members.
What moisture level is required by building code for framing?
Building code (IRC Section R319) sets 19 percent MC as the legal maximum for framing lumber. Professional builders target 15 percent or below despite the 19 percent code allowance to prevent shrinkage, protect warranties, and ensure quality. Building inspectors may request moisture meter verification before approving drywall rough-in, and documented readings protect against future warranty disputes related to wood movement.
