

The moment you see floodwater receding, every instinct screams “get in there and start cleaning,” but that first move in without a plan is exactly what sends people to the hospital or worse. Standing water doesn’t just sit there being wet. It hides live electrical current, gas leaks, contaminated sewage, and structural damage that can kill you faster than the flood itself. Most post-flood injuries happen during cleanup, not during the actual event, because people rush past safety steps to save their stuff. This guide walks you through the exact sequence that keeps you alive while you start recovery.
First Actions to Take When Floodwaters Recede
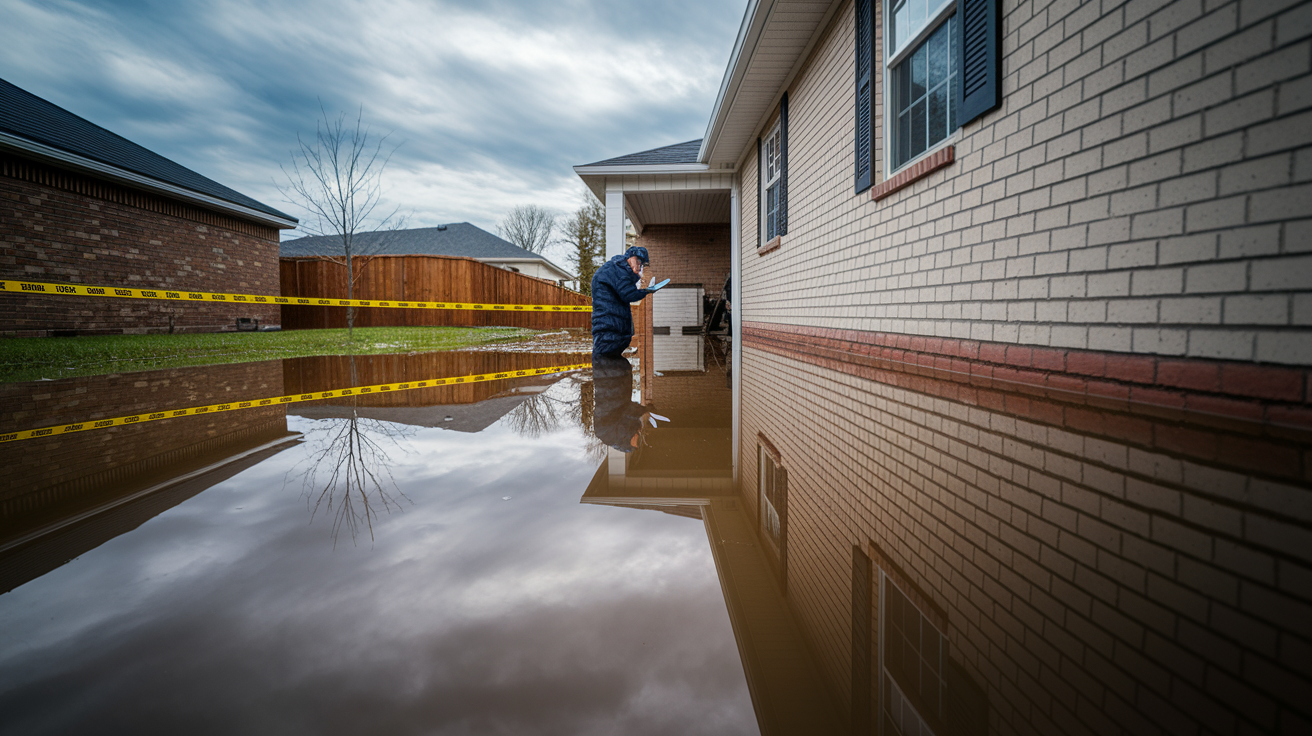
The first 24 hours after floodwaters recede pretty much determine whether your recovery goes smoothly or turns into a months-long nightmare involving more damage, safety incidents, and insurance headaches. Every minute counts, but rushing in without following proper safety protocols puts you at serious risk of electrocution, gas explosion, structural collapse, or contamination exposure.
The immediate hours require a calm, methodical approach that prioritizes life safety over salvaging belongings. Even if your instinct is to run inside and start saving what you can, that impulse can get you killed. Floodwater creates hidden hazards that stick around long after the water stops rising. Live electrical current in standing water, compromised gas lines, weakened structural supports, and contaminated conditions that threaten your health.
Follow these essential steps in order:
- Wait for official all-clear from local authorities before returning home if evacuation orders were issued
- Assess exterior structural damage from a safe distance before entering. Look for foundation cracks, shifted walls, sagging rooflines, or visible leaning
- Shut off electricity at the main breaker if you can access it safely from outside the house without stepping in water
- Never touch electrical panels, outlets, or appliances while standing in water or on wet surfaces. Electrocution kills instantly
- Check for gas leaks by smell and sound (rotten egg odor or hissing). If detected, evacuate immediately and call the utility company from a safe distance at least 100 feet away
- Call your utility company to shut off gas service if you cannot safely access the valve yourself or if any gas odor is present
- Avoid all downed power lines and maintain at least 35 feet of distance. Assume every downed line is energized
- Photograph visible damage from doorways without entering if structural concerns exist
- Contact emergency services immediately if you detect gas leaks, downed power lines on the property, or major structural damage
- Wear rubber boots, waterproof gloves, and N95 mask for initial entry even into seemingly minor flooding
- Use portable generators only outdoors in well-ventilated areas at least 20 feet from all doors and windows. Never in garages, basements, or enclosed spaces where carbon monoxide accumulates
- Document all utility shutoffs with photos and timestamps showing valve positions and breaker settings for insurance records
These steps prevent the most common post-flood injuries and deaths. More people are hurt in the cleanup phase than during the actual flooding because they underestimate electrical hazards, gas risks, and carbon monoxide dangers from generators. A submerged electrical panel remains energized even after floodwaters recede. Standing water conducts electricity throughout your entire basement or first floor, turning it into a death trap.
Gas line damage may not be immediately obvious. Even a small leak in an enclosed space creates explosion risk within hours as gas accumulates. The “rotten egg” additive in natural gas exists specifically to warn you. Trust your nose and evacuate if you smell it.
Proper sequencing prevents compounding problems. Shutting off utilities before entering protects you from immediate hazards. Documenting conditions before touching anything protects your insurance claim. Wearing protective equipment shields you from the contaminated soup of sewage, chemicals, and bacteria that every flood carries, regardless of the water source. Slow down, follow the steps in order, and you create a foundation for successful recovery instead of creating new emergencies on top of flood damage.
Immediate Damage Documentation for Insurance

Insurance companies deny or reduce thousands of flood claims every year because homeowners started cleanup before documenting the full extent of damage. The moment you remove debris, extract water, or throw away damaged belongings, you erase evidence that proves your claim value. Moving items from their original flooded locations, cutting out wet drywall, or pulling up carpet before an adjuster photographs the scene gives insurers ammunition to dispute your reported losses.
Claims get denied or reduced for three main reasons. Insufficient photographic evidence showing water levels and affected areas, missing itemized inventories with values, and cleanup started before documentation. You have one chance to capture the initial damage state. Once cleanup begins, you cannot recreate it. Your photos and videos become the only proof of what the flood actually destroyed.
Take comprehensive photos immediately of:
- Water line marks on walls with measuring tape showing exact flood height. These marks fade within days as walls dry
- Damaged flooring and subflooring with close-ups showing saturation, warping, and separation
- Wet drywall and insulation including photos behind removed outlet covers showing hidden water damage
- Affected appliances with model and serial number plates visible in the photos
- Soaked furniture and belongings in their original flooded locations. Do not move items before photographing
- Foundation cracks, shifts, or new gaps with measurements showing width
- Ceiling damage, stains, and sagging from below and from attic or upper floor
- HVAC system, water heater, and furnace condition showing flood water contact points
- Overall room views from multiple angles capturing the full scope. Take wide shots from each doorway and corner
Take multiple photos of everything. Shoot wide-angle room views, then medium-distance shots of damaged areas, then extreme close-ups of specific damage. Photograph the same items from different angles. Take 10 times more photos than you think you need. Storage is cheap, and missing documentation costs thousands.
Create a written inventory while photographing. Walk through each room with a notebook or phone recording and verbally document every damaged item: “Living room, sectional sofa, approximately $2,200, bought from Ashley Furniture in 2019. Coffee table, solid wood, approximately $400.” Note purchase dates and estimated replacement values. Keep damaged items in place exactly where flood left them until an insurance adjuster completes inspection. Hauling water-damaged furniture to the curb before documentation means the insurance company only has your word that it existed. Photos showing items in the flooded room prove the loss.
Contact your insurance company within 24 hours if possible, 48 hours maximum. Many flood insurance policies require notification within 60 days, but immediate contact starts the claims process and gets an adjuster scheduled before you lose documentation opportunities. When you call, request a claim number immediately and write it down along with the representative’s name, direct phone number, and the date and time of your call. Keep a log of every insurance conversation including dates, times, names, and what was discussed. Email summaries to yourself after phone calls to create timestamps. This communication record protects you if disputes arise about what was said or agreed upon. Save every email, text, and letter from your insurance company in both digital and printed formats.
Essential Safety Equipment and Contamination Protection

Floodwater is not just dirty water. It’s a contaminated mixture of raw sewage, industrial chemicals, agricultural runoff, fuel residue, heavy metals, and decomposing material that creates serious health risks with every contact. Even floods from “clean” sources like burst pipes or heavy rain pick up sewage from overwhelmed drain systems, bacteria from rotting organic matter, and chemicals from garages, lawns, and streets. The water soaking your home contains pathogens that cause severe infections, gastrointestinal illness, skin conditions, respiratory problems, and long-term health complications.
Floodwater falls into three contamination categories. Clean water comes directly from supply line breaks or rainwater that had no contact with contaminants. Rare in actual flooding. Gray water flows from appliances like washing machines or dishwashers and clean toilet overflow. Contains some bacteria and detergents but not sewage. Black water includes sewage, toilet waste, or any flooding that contacted ground surfaces. Contains dangerous pathogens including E. coli, Salmonella, Hepatitis A, and tetanus-causing bacteria. Every natural flood event produces black water regardless of the original source because rising water mixes with sewage systems, septic overflows, and ground contamination. Treat all floodwater in your home as black water contamination.
| Equipment Type | Protection Provided | Minimum Rating |
|---|---|---|
| Rubber Boots | Puncture and contamination protection for feet and lower legs | Steel toe recommended, waterproof to mid-calf minimum |
| Waterproof Gloves | Chemical and bacteria barrier for hands | Heavy-duty rubber or nitrile extending past wrists |
| Face Masks | Mold spore and particle filtration | N95 or N100 respirator, properly fitted |
| Eye Protection | Splash protection from contaminated water | Sealed safety goggles, not open-side glasses |
| Long Sleeves and Pants | Full skin coverage preventing direct contact | Synthetic quick-dry material, not absorbent cotton |
| Hard Hat | Protection from falling debris during demolition | ANSI-rated construction helmet |
This equipment represents the minimum protection for entering flooded spaces and beginning cleanup work. You upgrade to professional hazmat-level protection including full Tyvek suits, face shields, and heavy-duty respirators when dealing with confirmed sewage backup, visible mold growth, chemical contamination from heating oil or industrial sources, or extended work in enclosed contaminated spaces. If your flood involved sewage backup or you find yourself gagging from smell, stop and call professional restoration services with proper hazmat equipment and training.
Additional health precautions protect you from contamination effects. Check your tetanus vaccination status. If you haven’t had a tetanus booster in the past 10 years, get one before starting flood cleanup or immediately after any cuts or puncture wounds. Avoid all direct skin contact with floodwater even for brief moments. The pathogens absorb through cuts, scratches, and even intact skin with prolonged exposure. Wash your hands thoroughly with soap and clean water immediately after removing gloves and before eating, drinking, or touching your face. Shower and change clothes after every work session in flooded areas. Seek immediate medical attention for any cuts, scrapes, or puncture wounds exposed to floodwater, even minor ones. Watch yourself and family members for symptoms of waterborne illness for two weeks after exposure: severe diarrhea, vomiting, fever, unusual fatigue, or skin rashes. These symptoms indicate serious infection requiring immediate medical treatment.
When removing protective equipment, follow proper protocols to avoid contaminating yourself. Remove gloves by pinching the outside at the wrist and peeling them off inside-out, then drop them without touching the contaminated exterior. Remove boots outside before entering clean areas. Wash hands immediately after gear removal, scrubbing for at least 20 seconds with soap. Watch for infection warning signs that require immediate medical care: red streaks spreading from a wound, increasing pain and swelling, pus or drainage, fever above 100.4°F, or feeling suddenly worse rather than gradually better. These symptoms indicate serious infection that can become life-threatening without prompt treatment.
Water Extraction, Drying, and Mold Prevention
Mold spores begin germinating within 24 to 48 hours after water exposure when humidity stays above 60 percent. This narrow window determines whether you face minor drying challenges or major mold remediation costing thousands in professional services. Aggressive water removal followed by complete structural drying is the single most important recovery priority that prevents the majority of long-term flood damage. Everything else depends on getting materials completely dry first. Repairs, painting, replacing flooring, moving back in.
The 48-hour clock starts the moment flooding begins, not when you start working. If floodwaters took two days to recede, you have essentially no buffer time before mold becomes a serious problem. If you can’t extract standing water and begin aggressive drying within this window, mold prevention becomes mold remediation, and simple cleanup becomes a toxic contamination problem requiring professional intervention.
Safe Water Extraction Methods
Safe water removal requires different approaches depending on depth, location, and the structural risks involved:
- Assess water depth and contamination source before beginning extraction to choose appropriate equipment and safety gear
- Pump basement water gradually over 2-3 days if flooding exceeded 2 feet depth. Removing water too quickly while surrounding soil remains saturated creates extreme inward pressure on foundation walls that can cause them to collapse or crack severely
- Use wet-dry vacuums for shallow standing water under 2 inches depth. Industrial-sized shop vacs with continuous-drain capability work faster than residential models requiring frequent emptying
- Remove soaked absorbent materials immediately including carpets, padding, area rugs, and upholstered items that act as giant sponges holding water against floors and walls
- Squeegee remaining water toward floor drains or doorways after extraction equipment removes the bulk. Even thin water films slow drying significantly
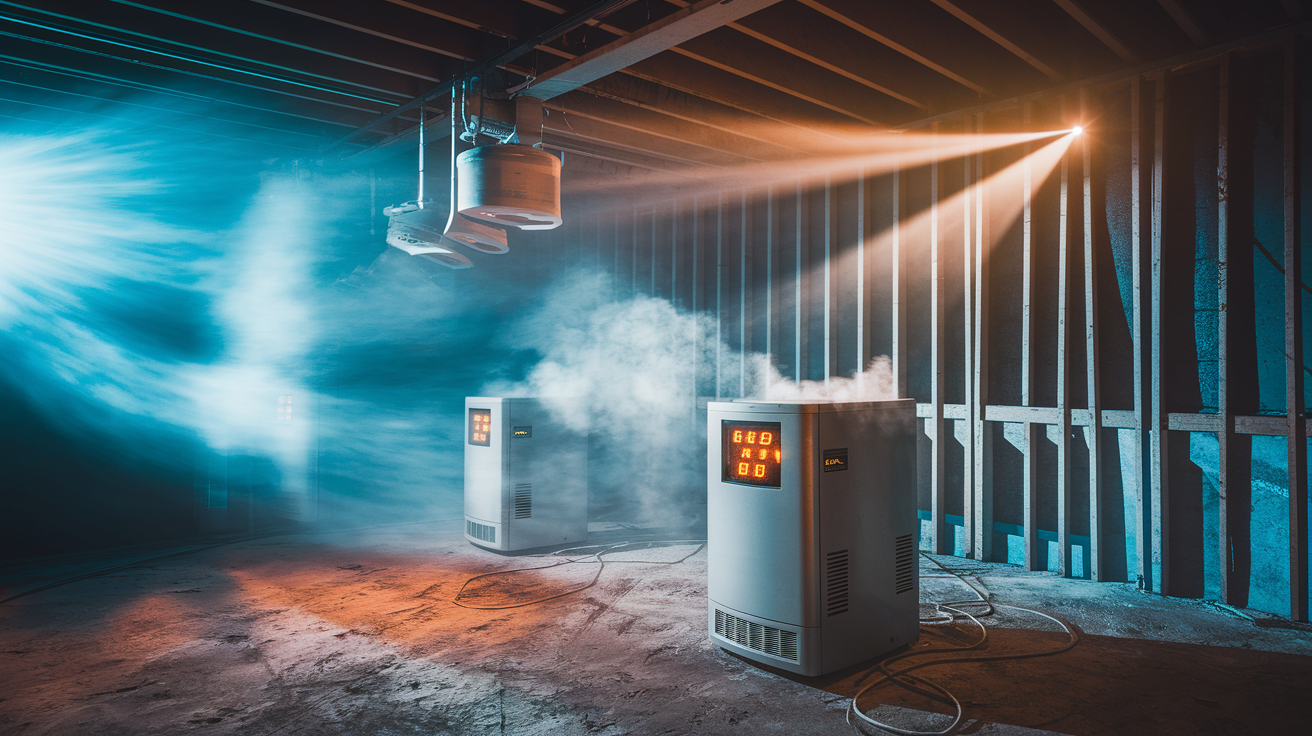
Professional water extraction becomes necessary rather than optional in several situations. More than 2 inches of standing water throughout the home, contaminated water from sewage backup requiring hazmat protocols, flooding affecting multiple rooms or entire floors, or homeowner lacking physical ability to operate heavy equipment continuously for hours. Professional extraction companies use truck-mounted pumps that remove thousands of gallons per hour, heated air movers that accelerate evaporation, and commercial dehumidifiers that pull 10 times more moisture than residential units. The cost often proves worthwhile when it compresses days of DIY work into hours and dramatically reduces mold risk.
Accelerated Drying and Humidity Control
After extracting standing water, aggressive drying and humidity control become the focus:
- Open all windows and doors for cross-ventilation if outdoor humidity is below 60 percent. Check weather forecasts because drying in high-humidity conditions is counterproductive and actually adds moisture
- Position fans to blow across wet floors and walls at an angle rather than directly at them. This creates airflow patterns that pull moisture from surfaces into the air where dehumidifiers can capture it
- Place dehumidifiers in central locations where air circulates freely, and empty collection buckets every 4-6 hours. Full buckets stop dehumidification completely
- Remove wet drywall and insulation to expose wall cavities to direct airflow. Moisture trapped inside walls can’t dry through paint and drywall facings
- Lift area rugs and pull furniture away from walls creating air gaps of at least 6 inches for circulation behind and under everything
- Run HVAC system if inspected and confirmed safe to create whole-house air movement. Forced air circulation accelerates drying in every room simultaneously
- Check progress with moisture meter every 24 hours in multiple locations including floors, walls, and inside exposed wall cavities. Guessing about dryness leads to enclosed moisture and guaranteed mold
- Maintain indoor humidity below 50 percent continuously until moisture meter readings show all materials at or below 15 percent moisture content. This usually takes 3-7 days with proper equipment
| Location | Monitoring Method | Action Threshold | Prevention Step |
|---|---|---|---|
| Indoor Humidity | Hygrometer reading | Above 60% | Add dehumidifier capacity or increase ventilation |
| Wall Cavity Moisture | Moisture meter probe inserted in cavity | Above 20% | Remove additional drywall for airflow access |
| Flooring Moisture | Moisture meter scan mode on surface | Above 15% | Remove flooring materials that cannot dry |
| Visible Water Stains | Daily visual inspection | Spreading stains | Increase ventilation immediately and locate source |
| Musty Odors | Smell test daily | Any musty smell | Indicates hidden moisture source requiring investigation |
Target moisture levels determine when drying is complete and rebuilding can safely begin. Wood framing and subflooring must reach below 15 percent moisture content. Concrete must reach below 12 percent. Drywall that will be saved must reach below 13 percent. These numbers aren’t suggestions. They represent the maximum moisture content at which mold cannot establish colonies. A moisture meter provides objective measurements that remove guesswork and prevent the single most common flood recovery mistake: closing up spaces before materials finish drying completely.
Sealing damp materials behind new drywall, under new flooring, or inside closed wall cavities traps moisture and creates perfect conditions for mold growth. In 2-4 weeks you’ll smell musty odors. In 2-3 months you’ll see visible mold growth. Within 6 months you’ll be tearing out your repairs and starting over with mold remediation adding thousands to your costs. This scenario happens in the majority of rushed flood recoveries where homeowners focused on getting back to normal quickly instead of getting completely dry first.
Check hidden areas including behind baseboards, inside closets, under stairs, and in rim joist spaces where floor systems meet foundation walls. These locations trap moisture and dry last. Pull baseboards to inspect and verify dryness rather than assuming sealed spaces dried. If you find moisture in hidden areas, you haven’t finished drying yet regardless of what visible surfaces look and feel like. Visible mold growth at this stage indicates insufficient drying that has already allowed mold to establish. This requires professional mold remediation assessment and usually specialized treatments before rebuilding.
Assessing Structural Damage After Flooding

Structural damage from flooding may not be immediately visible on casual inspection but can seriously compromise your home’s safety and stability. Foundation shifts, weakened floor joists, compromised load-bearing walls, water-logged structural posts, and ceiling damage all require professional evaluation before extensive cleanup work begins or anyone occupies the home. What looks like minor cosmetic damage on the surface sometimes hides critical structural problems that worsen under continued loads.
Structural assessment must happen before you start hauling debris, removing drywall, or making repair decisions. Finding out that your foundation shifted or your floor joists lost half their strength after you’ve already invested hundreds of hours in cleanup wastes all that effort if the inspector says the damage requires major structural work first.
Watch for these warning signs requiring immediate professional inspection:
- Cracks wider than 1/8 inch in foundation walls or concrete floors
- Doors and windows that no longer close properly or require forcing
- Sloping or sagging floors you can feel when walking across rooms
- Bowing, bulging, or leaning walls, especially basement walls
- Ceiling water stains, sagging drywall, or visible deflection in ceiling joists
- Gaps between walls and ceiling or floor that weren’t present before flooding
- Visible shifting, cracking, or displacement of foundation relative to the house above
Any of these conditions indicates potential structural compromise that requires expert assessment. Don’t dismiss small changes as cosmetic settling. Floods impose enormous loads on building structures through water pressure, saturation weight, and soil movement around foundations. A foundation wall that looks fine might have cracked internally or shifted slightly in ways that lead to progressive failure over months as the house settles.
The types of professionals needed depend on what you find. Structural engineers assess foundation integrity, load-bearing capacity, and overall structural safety. They provide stamped engineering reports that insurance companies and building departments require before authorizing major repairs. Licensed general contractors with flood restoration experience assess framing, floor systems, and overall building condition, providing repair estimates and construction plans. For foundation issues, you may also need specialized foundation repair contractors who handle underpinning, wall stabilization, and structural waterproofing.
Typical inspection timelines run 3-7 days from initial contact to completed inspection, longer in disaster areas where every house needs assessment. Call immediately after initial safety checks are complete so inspections happen while drying is in progress rather than delaying recovery. Most inspectors need access to exposed framing and foundation, making early inspection ideal before you close anything up.
Insurance companies typically require professional structural assessments for claims involving foundation damage, major structural repairs, or rebuilding costs exceeding certain thresholds. Getting these inspections done proactively protects you from claim disputes and future liability. If undetected structural damage worsens over the next year and causes additional problems, documentation proving you had professional assessment and followed recommendations shields you from insurance denials or resale disclosure complications.
Salvageable Items vs. Permanent Flood Damage

Material porosity, whether something absorbs water, determines almost everything about what you can save and what must be discarded after flood exposure. Non-porous items including glass, metal, hard plastics, and sealed solid surfaces can usually be cleaned, disinfected, and safely returned to use. Porous materials like upholstered furniture, mattresses, carpet padding, drywall, and insulation become permanent homes for bacteria and mold spores that cleaning can’t eliminate. Contaminated floodwater makes this distinction even more critical because pathogens penetrate deep into absorbent materials where disinfectants can’t reach.
Sentimental value and replacement cost don’t change contamination facts. A $3,000 leather sofa that absorbed sewage-contaminated floodwater can’t be made safe again regardless of how much you paid for it or how much you want to keep it. Making salvage decisions based on science rather than emotion prevents future health problems and allows you to move forward with recovery.
| Item Category | Usually Salvageable | Usually Discard | Notes |
|---|---|---|---|
| Flooring | Ceramic tile, sealed vinyl plank | Carpet, padding, laminate | Carpet holds contaminants and never fully dries |
| Furniture | Solid wood, metal, hard plastic | Upholstered pieces, fabric cushions | Cushions and fabric trap bacteria deep in padding |
| Appliances | May be salvageable if dried immediately | If motors submerged or powered on wet | Requires professional assessment and testing |
| Documents | If quickly dried flat or frozen | If heavily soaked or stuck together | Lamination or professional freezing may preserve |
| Drywall | None, all wet drywall must go | All drywall contacted by floodwater | Becomes structurally weak and harbors mold inside |
| Insulation | None, all wet insulation must go | All types when saturated | Impossible to fully dry, holds contamination |
| Electronics | Sometimes if dried before powering on | If powered on wet or fully submerged | Professional data recovery only option for important devices |
| Mattresses | None, all flood-exposed must go | All mattresses contacted by floodwater | Harbor mold, bacteria, and contamination internally |
The 48-hour rule for mold growth creates urgency around salvage decisions. Items that might theoretically be saved if dried immediately become unsalvageable if they sit wet for days while you deal with other priorities. A leather couch might survive clean water exposure if dried within 24 hours. That same couch sitting wet in your basement for 3 days while you pump water and remove carpet is now growing mold colonies and must be discarded. Make rapid decisions about borderline items, and when in doubt, throw it out. The replacement cost of a questionable piece of furniture is far less than the cost of mold remediation if you save something that should’ve been discarded.
Photograph all discarded items before removal for insurance documentation. Take clear photos showing the item in its flooded location, close-ups of damage and water saturation, and photos of brand labels, model numbers, and identifying features. Video walk-throughs work well for documenting large quantities of discarded belongings. Just narrate what you’re showing. Keep trash bags and debris at the curb or in your driveway until after the insurance adjuster visits if possible, or take photos of discarded items staged together before disposal if adjuster delays make keeping debris impractical.
Debris Removal and Initial Flood Cleanup

Debris removal order determines how efficiently your cleanup progresses and whether you end up repeating work. Random removal without strategy means walking through mud to remove carpet, then walking through the space again to shovel mud, then walking through again to remove drywall. Each trip tracking contaminants through areas you already worked. Systematic sequencing completes each phase before starting the next, minimizing contamination spread and physical effort.
Follow debris removal in this sequence for fastest, safest cleanup:
- Remove all standing water using pumps and wet-dry vacuums as described in the water extraction section
- Pull up wet carpet and padding immediately as entire sections. Cutting it into smaller pieces spreads contaminated water and creates unnecessary mess
- Cut and remove drywall 12-24 inches above the visible water line to ensure all saturated portions are removed including wicking damage. Use a utility knife to score horizontal lines then snap sections off at studs
- Remove wet insulation from walls and ceilings by pulling it out in sections and bagging immediately to control mold spore spread
- Shovel out mud and sediment starting from the farthest point from your exit and working backward so you don’t walk through cleaned areas
- Clean remaining mud with pressure washer or hose working toward floor drains or doorways. Shop vac the muddy water as you go
- Remove damaged flooring materials including laminate, hardwood, or vinyl that has lifted, warped, or shows saturation damage
- Dispose of debris following local flood waste guidelines which may include separated piles for different material types or special contaminated waste handling
Protective equipment during demolition and debris handling is not optional. Wear rubber boots, waterproof gloves, N95 respirator, and eye protection for every work session. Demolition kicks up mold spores, dried sewage particles, and contaminated dust that you’ll breathe without proper respiratory protection. Heavy-duty gloves prevent puncture wounds from nails, staples, and sharp edges hidden in debris. Long sleeves and pants protect skin from contamination and minor cuts.
Saving wet drywall or insulation is false economy that leads directly to mold growth and structural problems within weeks. Wet drywall loses structural integrity even if it dries. The gypsum core softens and weakens, and the paper facing becomes perfect mold food. The $30 you save not replacing a damaged drywall sheet turns into $500 in mold remediation costs when that section grows visible colonies. Wet insulation compresses, loses R-value permanently, holds moisture against framing that causes wood rot, and provides ideal mold habitat. The few dollars you save keeping wet insulation costs thousands in structural repairs down the road. Drywall and insulation are among the cheapest building materials. Replace them without hesitation when flood damage occurs.
For more detailed guidance on determining cut heights and replacement procedures, check out our complete guide on drywall water damage repair.
Debris documentation for insurance requires photographing materials before disposal when possible. Take photos showing carpet pulled up but still in rooms, drywall sections cut out and stacked, insulation removed from wall cavities, and damaged flooring materials. These images prove what you removed and prevent disputes about the extent of repairs needed. Proper disposal methods for contaminated materials vary by location. Many jurisdictions require special handling for flood debris due to sewage contamination and prohibit mixing it with regular household trash. Check with your local waste management or emergency management office about designated flood debris collection sites, required separation of materials, and pickup schedules in disaster areas.
Disinfecting Surfaces After Water Damage
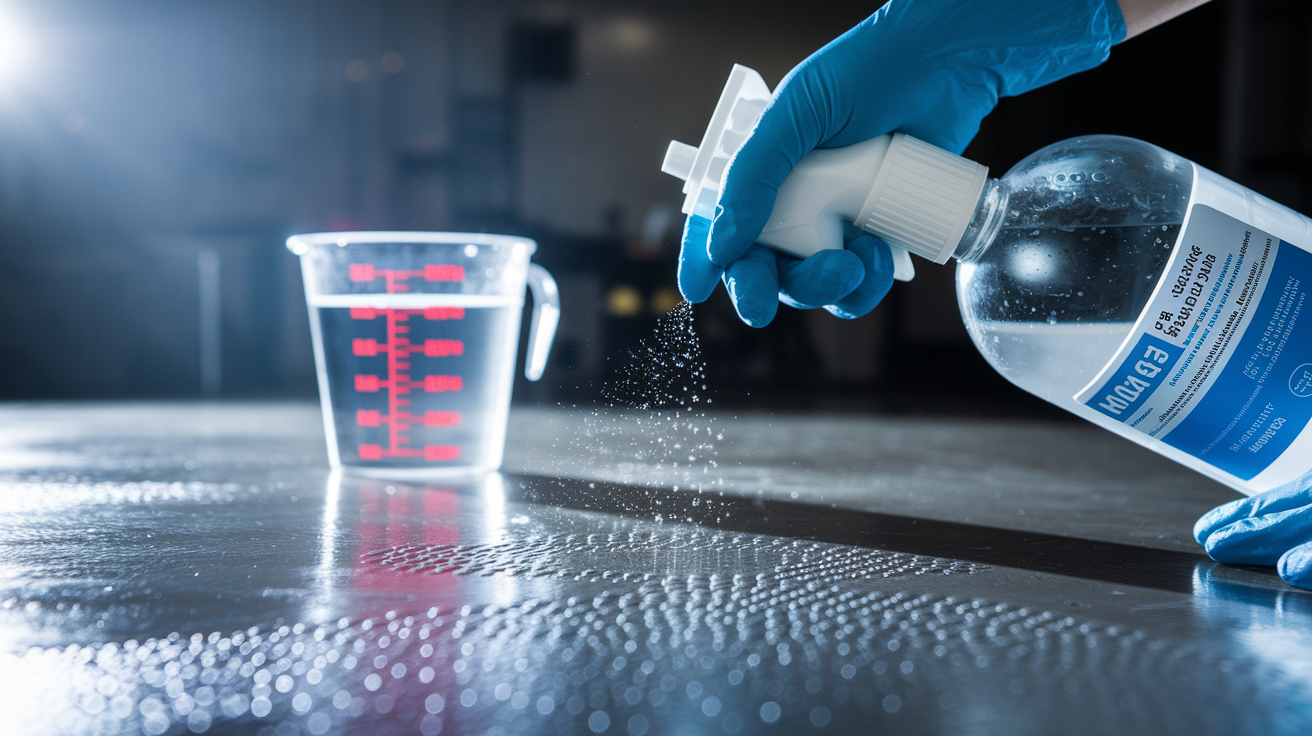
Disinfection only works on clean, dry surfaces after you’ve completed water extraction, debris removal, and drying. Trying to disinfect while materials are still damp or before removing contaminated mud wastes time and chemicals without actually killing bacteria or mold spores. Timing matters. Disinfect too early and moisture prevents effectiveness, disinfect too late and mold colonies establish so firmly that surface treatments can’t eliminate them.
The cleanup sequence must follow this order: extract water, remove damaged materials, dry remaining surfaces completely, clean away all dirt and sediment, then disinfect. Skipping steps or reversing order produces poor results.
Proper disinfection requires specific procedures:
- Mix fresh bleach solution daily using 1 cup household bleach per gallon of clean water. Bleach loses effectiveness in solution within 24 hours so mixing large batches wastes money
- Wear rubber gloves and eye protection during all disinfectant application. Bleach solution splashing in eyes causes serious injury and requires immediate flushing
- Wash surfaces with detergent and rinse thoroughly before disinfecting. Bleach can’t penetrate organic debris or sediment layers so cleaning must happen first
- Apply bleach solution with mop or spray bottle and let sit 10 minutes for proper contact time. Wiping it off immediately doesn’t kill bacteria or mold
- Scrub non-porous surfaces including concrete, ceramic tile, metal fixtures, and sealed wood with brushes during contact time
- Rinse thoroughly with clean water after contact time ends. Bleach residue causes odor and eventual material degradation
- Allow complete air drying before painting, sealing, or closing up any treated surfaces
- Never mix bleach with ammonia, vinegar, or other cleaners. Produces toxic chlorine gas that can kill
Alternative disinfectants work better for specific materials where bleach causes damage or discoloration. Quaternary ammonium compounds work well on painted surfaces and metal without causing fading. Hydrogen peroxide-based cleaners disinfect without the harsh fumes of bleach in enclosed spaces. Commercial antimicrobial products designed for flood restoration provide longer-lasting protection and sometimes prove worth the additional cost when treating large areas or severe contamination. The EPA maintains a list of registered antimicrobial products proven effective against specific pathogens if you want to verify product claims before purchasing.
Ventilation requirements during disinfection prevent respiratory irritation and chemical exposure. Open all windows and doors to create cross-ventilation. Use fans to exhaust air outdoors rather than circulating it within the house. Respiratory protection becomes necessary in enclosed spaces like basements or bathrooms where ventilation is limited. N95 masks don’t protect against chemical fumes so upgrade to respirators with organic vapor cartridges when working with bleach or other strong disinfectants in poorly ventilated areas for extended periods. Take breaks in fresh air every 30 minutes, watch for dizziness or nausea indicating overexposure, and never work alone with strong chemicals in enclosed spaces where you could become overcome without anyone noticing.
When to Call Professional Flood Restoration Services

Professional restoration companies have commercial-grade equipment, technical expertise, and insurance documentation experience that DIY efforts can’t match. The decision between DIY and professional services depends on flooding extent, contamination level, your physical ability, available time, and insurance coverage. Minor flooding from a single burst supply line in one room falls well within DIY capability for most homeowners. Whole-house flooding from natural disasters or major sewage backup requires professional intervention to prevent long-term problems.
Call professionals when flooding involves any of these scenarios:
- Flooding affecting multiple rooms or entire floors requiring simultaneous drying
- Water depth exceeding 2 inches anywhere in the home
- Sewage backup or black water contamination requiring hazmat protocols
- Structural damage concerns including foundation issues or compromised framing
- Mold growth visible before cleanup begins indicating existing colonies
- HVAC system flooding requiring ductwork assessment and cleaning
- Electrical system submersion requiring professional inspection before restoration
- Inability to achieve dryness within 72 hours using available equipment
- Insurance claim amounts exceeding your deductible significantly enough to justify professional documentation
- Homeowner lacking time, physical ability, or equipment access for intensive multi-day recovery work
Restoration professionals provide services DIY methods can’t duplicate. Industrial truck-mounted dehumidifiers pull 10-20 times more moisture per day than consumer units you can rent. Commercial air movers create airflow patterns that accelerate drying in ways box fans can’t achieve. Thermal imaging cameras detect hidden moisture inside walls and ceilings that moisture meters miss. Antimicrobial fogging treatments reach areas spray bottles and mops can’t access. Professional reconstruction services coordinate all repair phases under one contract. Insurance liaison services handle adjuster communication, documentation requirements, and claim negotiations that homeowners find overwhelming.
Vetting restoration contractors prevents hiring scams and incompetent operators that proliferate after major flooding events. Verify licensing and insurance by checking state contractor databases and requesting certificates of insurance directly from the insurance carrier. Check references from recent flood jobs specifically, not just general construction work. Flood restoration requires specialized knowledge that general contractors may lack. Get written estimates with detailed scope descriptions breaking down water extraction, drying, demolition, disinfection, and reconstruction phases with separate pricing for each. Confirm emergency availability and response times because delays of even 24 hours matter in flood recovery. Ask about equipment capacity. How many dehumidifiers, air movers, and generators they have available if you need large-scale drying.
Working with insurance-preferred vendors offers advantages including streamlined claims processing, pre-approved rates, and guaranteed work quality, but
Final Words
The difference between a manageable recovery and a drawn-out disaster comes down to what you do immediately after a flood. Shutting off power safely, documenting every corner before you touch anything, and getting water out fast set everything else in motion.
Yes, it’s overwhelming when you’re standing in a wet basement. But you’ve got the sequence now. Safety checks first, then documentation, then extraction and drying within that 24-48 hour window.
Take it one step at a time. You’re not just cleaning up. You’re rebuilding right, and that starts with doing the first things in the right order.
FAQ
Q: What is the first thing you should do after a flood?
A: The first thing you should do after a flood is wait for the official all-clear from local authorities, then assess your home’s exterior for structural damage before entering. Never enter a flooded building until you confirm it is safe to do so.
Q: How quickly does mold grow after a flood?
A: Mold grows within 24 to 48 hours after a flood in humid conditions. This narrow window makes aggressive water removal and complete drying your most critical recovery priorities to prevent mold establishment in your home.
Q: Can you flush a toilet during a flood?
A: You should not flush a toilet during a flood if sewage systems are compromised or if standing water surrounds the toilet. Check with local authorities about wastewater system status and look for signs of sewer backup before using plumbing.
Q: Should you turn off electricity before entering a flooded home?
A: You should turn off electricity at the main breaker from outside before entering a flooded home if you can do so safely. Never touch wet electrical panels or enter standing water near electrical sources due to electrocution risk.
Q: What safety equipment do you need for flood cleanup?
A: Flood cleanup requires rubber boots with steel toes, waterproof gloves, N95 face masks, sealed safety goggles, long sleeves, and pants. Floodwater contains sewage and bacteria that create serious health risks without proper protective equipment.
Q: How do you remove standing water from a flooded basement?
A: You remove standing water from a flooded basement gradually over 2 to 3 days using a pump to prevent wall collapse from exterior ground pressure. For shallow water under 2 inches, use wet-dry vacuums and squeegees.
Q: When should you call professional flood restoration services?
A: You should call professional flood restoration services when flooding affects multiple rooms, water depth exceeds 2 inches, sewage backup occurs, structural damage is suspected, or you cannot dry the space within 72 hours.
Q: What items can be saved after flood damage?
A: Non-porous items like glass, metal, hard plastics, tile, and solid wood furniture can usually be saved after flood damage. Porous materials like upholstered furniture, mattresses, carpet padding, drywall, and insulation must be discarded.
Q: How do you disinfect surfaces after flooding?
A: You disinfect surfaces after flooding by mixing 1 cup bleach per gallon of water, washing surfaces with detergent first, applying the bleach solution for 10 minutes, scrubbing non-porous surfaces, and rinsing thoroughly with clean water.
Q: Does flood insurance cover all water damage?
A: Flood insurance covers water damage from rising water, storm surge, and heavy rain overflow, but standard homeowners insurance excludes flood damage. You need a separate flood insurance policy purchased through the National Flood Insurance Program.
Q: How long can you stay in a flooded home?
A: You cannot stay in a flooded home if structural damage exists, mold is visible, utilities are shut off, or standing water remains. Most flood-damaged homes require weeks or months of restoration before safe occupancy.
Q: What should you photograph for flood insurance claims?
A: You should photograph water line marks with measuring tape, damaged flooring and walls, wet drywall and insulation, affected appliances with model numbers, soaked furniture in original locations, and overall room views from multiple angles.
Q: How do you check if food is safe after a flood?
A: You check if food is safe after a flood by discarding anything contacted by floodwater, anything in a refrigerator without power for 4+ hours, and all canned goods with damaged seals. When in doubt, throw it out.
Q: What are signs of structural damage after flooding?
A: Signs of structural damage after flooding include foundation cracks wider than 1/8 inch, doors and windows that will not close properly, sloping or sagging floors, bowing walls, ceiling sagging, and gaps between walls and floors.
Q: How do you prevent mold after water damage?
A: You prevent mold after water damage by removing standing water within 24 hours, maintaining indoor humidity below 50%, using dehumidifiers and fans continuously, removing wet porous materials immediately, and ensuring all materials reach below 15% moisture content.
